Maduino Zero SIM808 GPS Tracker
1. Introduction
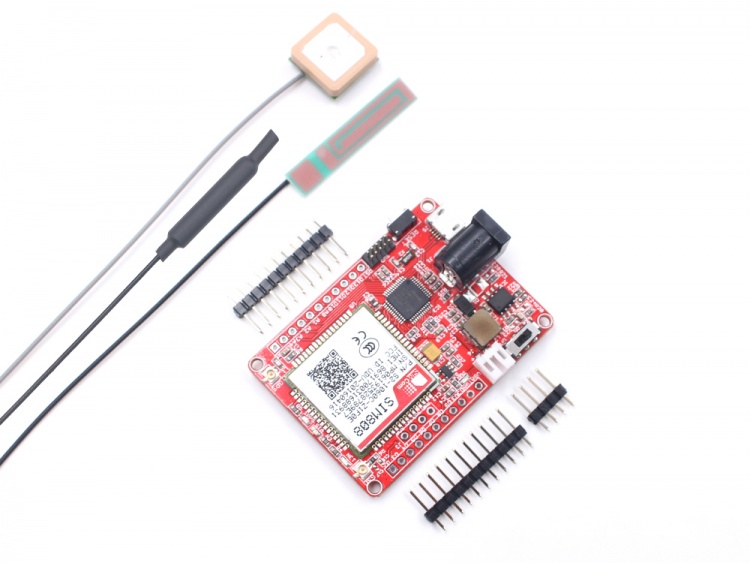
Maduino Zero SIM808 GPS Tracker is an IoT (Internet of things) Solution based on the 32-bit Atmel’s SAMD21 MCU and GPRS/GSM GPS module SIM808, which is the upgrade version of SIM900. It can be a real project for IoT projects such as smart-home, outdoor monitoring, shared bicycle, etc. The Maduino Zero SIM808 GPS Tracker based on the Arduino, users can program it with Arduino IDE, which is very easy especially suit for the none-programmers. There are also guide for users to learn how to create the first IoT project with this board, with which the starters can learn the hardware and programming skill quickly. This guide helps you with the basic usage of the Maduino Zero SIM808 GPS Tracker.
2. Features
- ATMEL SAMD21G18A: 32-bit ARM® Cortex®-M0 up to 48MHz, 256KB flash, 32KB SRAM, LQFP48v • Powered by lithium battery(3.4-4.2V) or AC-DC Adapter
- GSM Quad-band: 850/900/1800/1900Mz
- GPS Location
- Bluetooth 3.0 + EDR(Enhanced Data Rate), up to 2.1Mbps
- Interface: I2C/SPI/UART/ADC/DAC/I2S/38*GPIO
- Arduino Compatible: You can play it with Arduino IDE
- More cost-effective and high quality than Arduino Zero
- Working Temperature: -20 ~ +85℃
- Default baud rate: 115200bps
- Size: 40*55mm
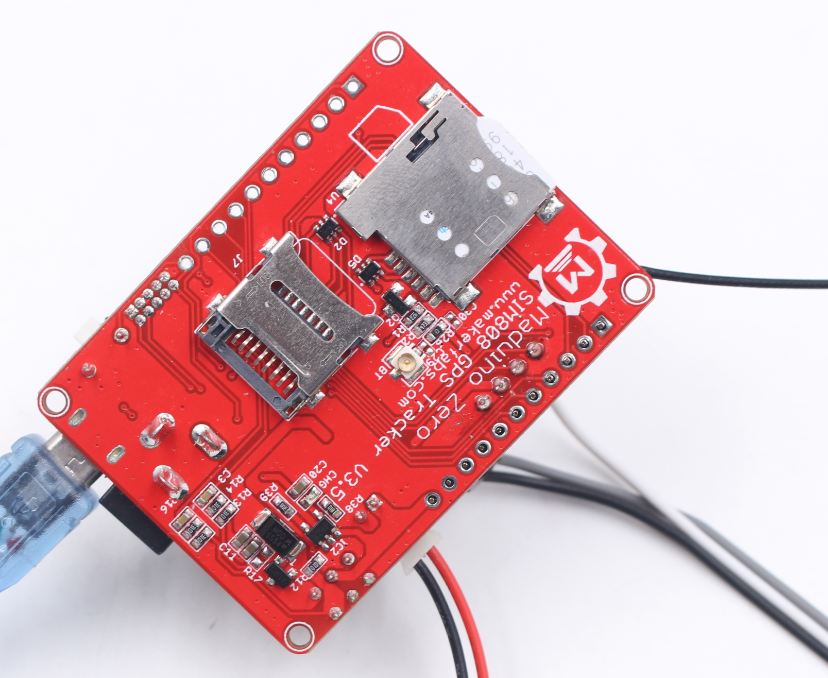
3. Interface Function
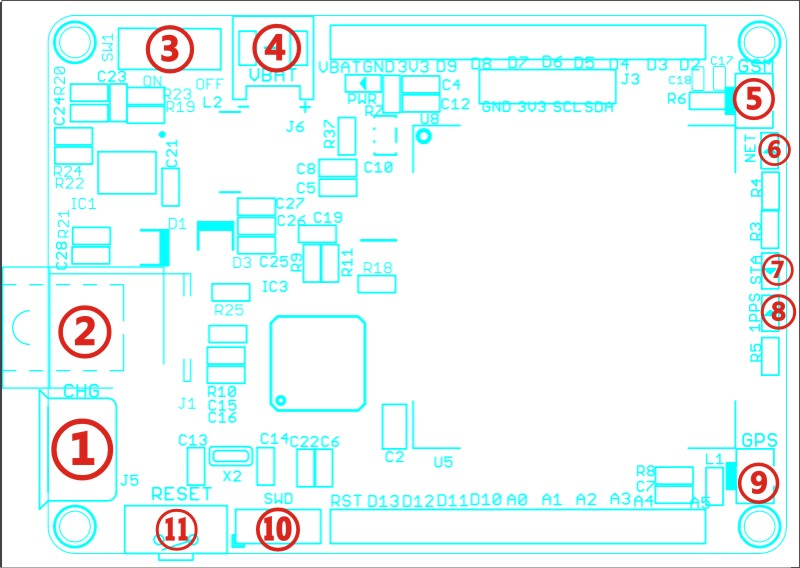
① Micro USB: USB to serial communication (Note that the USB is not for power supply)
② DC-05: Supply power for the board
③ Switch: Power switch
④ VBAT: 3.7V Lipo battery connector
⑤ GSM: GSM Antenna IPX Interface
⑥ NET: SIM808 Network indicate
⑦ STA: SIM808 status indicate
⑧ 1PPSTime Mark outputs
⑨ GPS: GPS Antenna IPX Interface
⑩ SWD: Bootloader downloading
⑪ RESET: Reset button for ATSAMD21G18
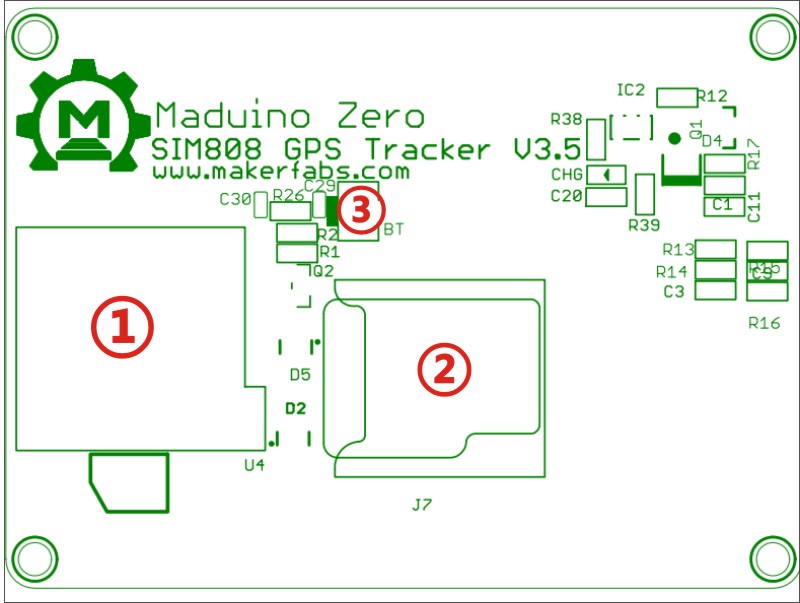
① Micro SIM Card Holder
② Micro SD Card Holder
③ BT: Bluetooth IPX Interface
| Indicator LED | Status |
|---|---|
| PWR | Light on when switch on, light off when switch off |
| CHG | Charge indicate |
| NET | Off: SIM808 is not working. 64ms On/800ms/ Off: SIM808 not registered the network. 64ms On/3000ms Off: SIM808 registered to the network. 64ms On/300ms Off: PPP GPRS communication is established |
| STA | Light on when GSM module powered on.Light off when GSM module powered off. |
| 1PPS | Time Mark outputs timing pulse related to receiver time |
4. Usage
Warning: Don’t operate anything when the board supplied on (That is, plug or unplug the Antenna or Sensor, in case of short-circuiting that may burn the IC down.)
Note After an Arduino IDE installed, there is no package to support Maduino Zero(Arduino Zero ), we need to install the Arduino Zero package in Arduino IDE to continue.
4.1 Install Software for the Arduino/Genuino Zero
The following screens show how to install software for the Maduino(Arduino/Genuino) Zero boards in the Arduino IDE.
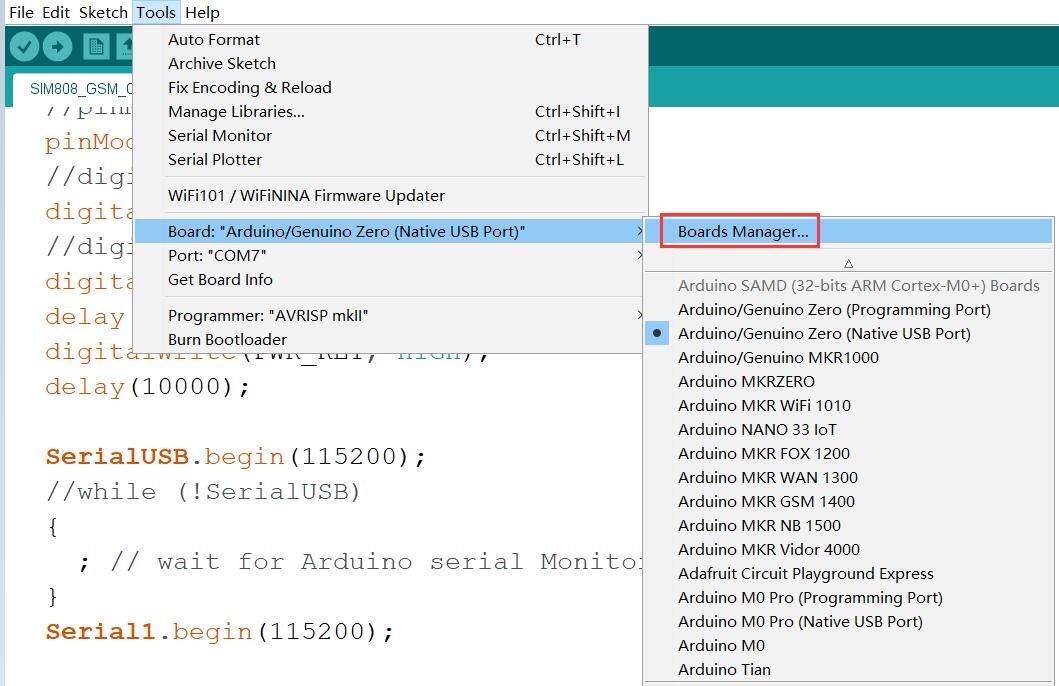
1.1 Open the Boards Manager From the top Arduino IDE menu, select Tools-> Board-> Boards Manager… to open the Boards Manager dialog box.
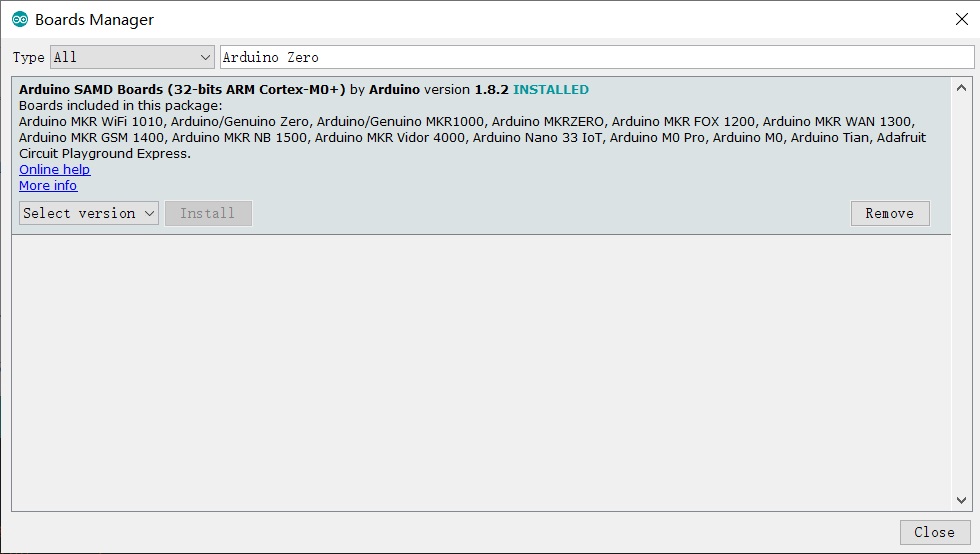
1.2 Select Arduino SAMD Boards and Install In the Boards Manager dialog box, type Arduino Zero into the search field to easily find the Arduino SAMD package for 32-bit ARM Cortex-M0+ boards as shown in the image below. Install it.
1.3 Find the Arduino Zero Boards on the Arduino IDE Menu After the software package has been installed, the new Arduino boards can be seen on the Arduino IDE Board menu found under Tools →Board as shown in the image below.
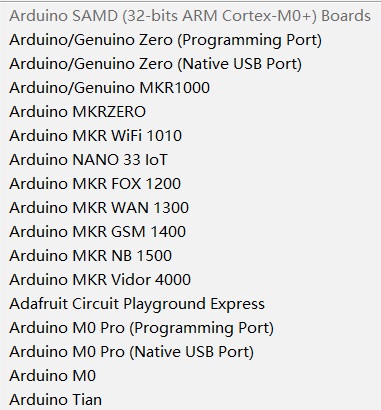
A new section called Arduino SAMD (32-bits ARM Cortex-M0+) Boards can be seen on the Board menu which contains Arduino M0, M0 Pro, Zero, MKR boards and others. This means the right package has been installed and Maduino is ready to go.
4.2 Hardware Connection
- Plug a MicroSIM card.
- Plug a GPS Antenna to designator which shows GPS.
- Plug a GSM Antenna to designator which shows GSM.
- Plug a Bluetooth Antenna to designator which shows BT.
- Plug a Micro USB Cable to Maduino Zero SIM808.
- Plug a 3.7V lithium battery to J6 or AC-DC Adapter to Maduino Zero SIM808
** > - Note1: A 3.7V lithium battery normal voltage is 3.7V, but the range voltage often from 3.4V to 4.2V
- Note2: Micro USB just used for communicate with the board, it doesn’t supply power to the board because the SIM808 Module need a 2A pulse current when power on.
- Note3: The current of AC-DC Adapter should be 2A or more. Otherwise the SIM808 may not work or work unstable.
- Note4: Both the battery or the DC jack can be used for power supply. While DC connected, the board will be powered by DC, while DC removed, it will switch to battery automatically.**
4.3 Program the Maduino Zero
Select the desired Arduino/Genuino Zero(Native USB port) board from the Arduino IDE Board menu and then select the correct Port number from the menu item below Board on the Tools Menu. The Maduino board can now be programmed in the usual manner.
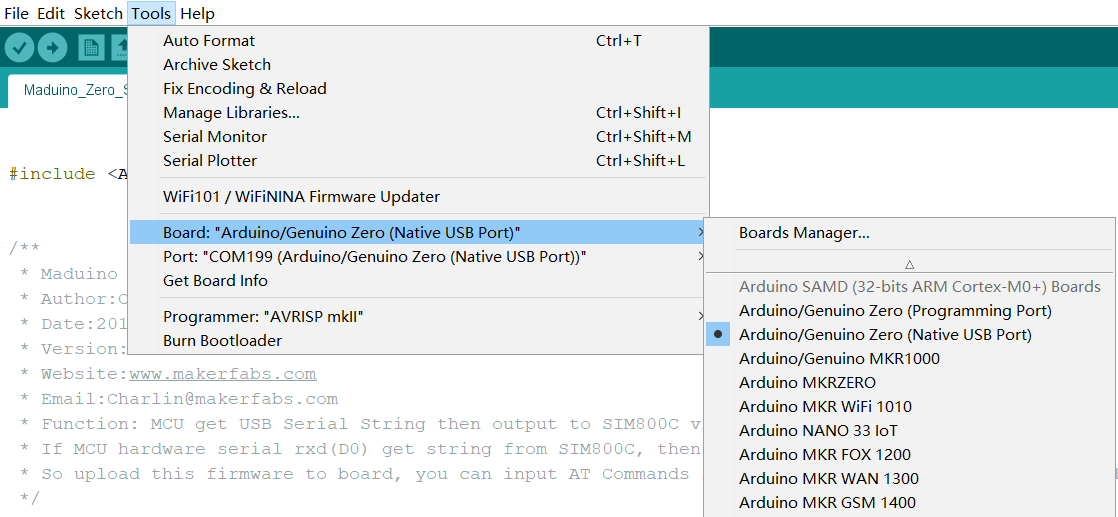
Select Arduino/Genuino Zero(Native USB port) Open our first programming code SIM808_AT_Commands_Test.ino
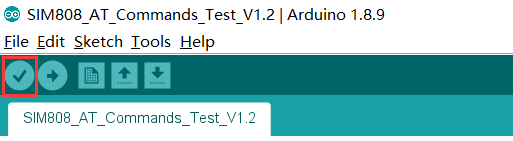
Click Verify button to compile it.
If there are no any errors, it will show Done compiling.

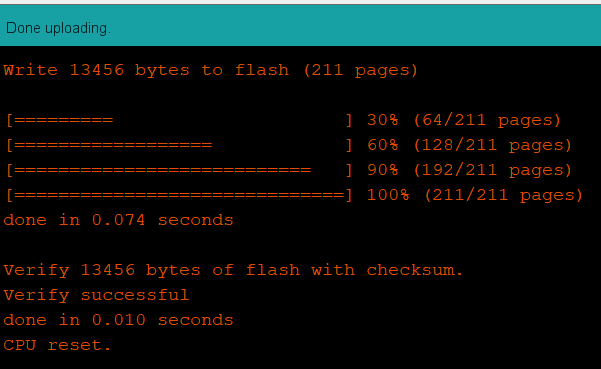
Click Upload button to upload firmware to the Maduino Zero SIM808 GPS Tracer board.

After done uploading, it will show the programming OK, as below:
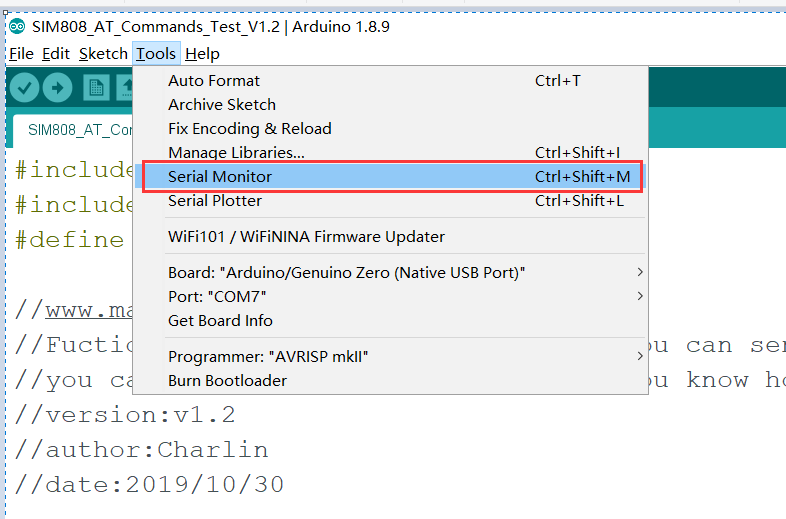
From the top Arduino IDE menu, select Tools → Serial Monitor… to open the Serial Monitor dialog box.
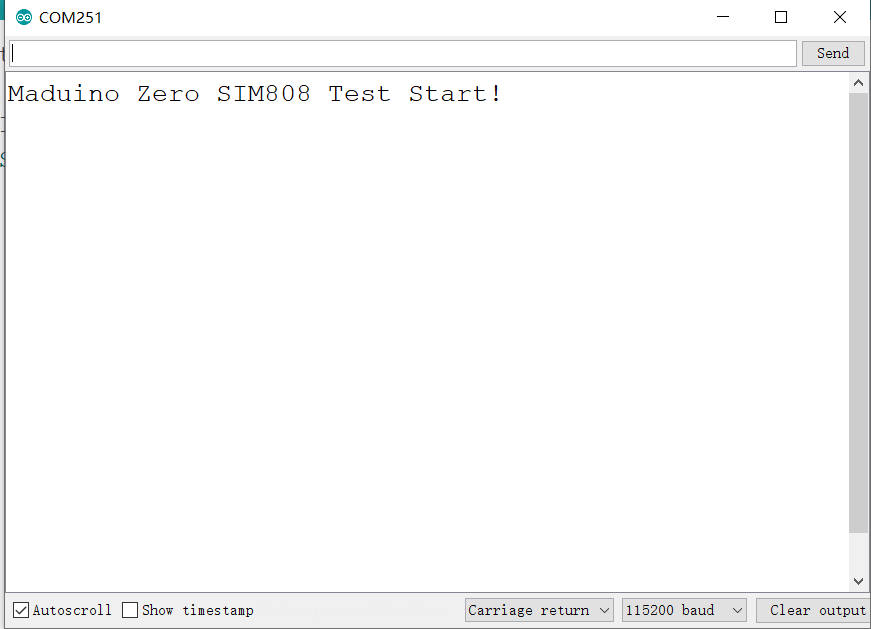
Select “Carriage return”, and baud rate 115200, it will show the board begin to work:
Click Send button after inputting AT and it will respond OK.
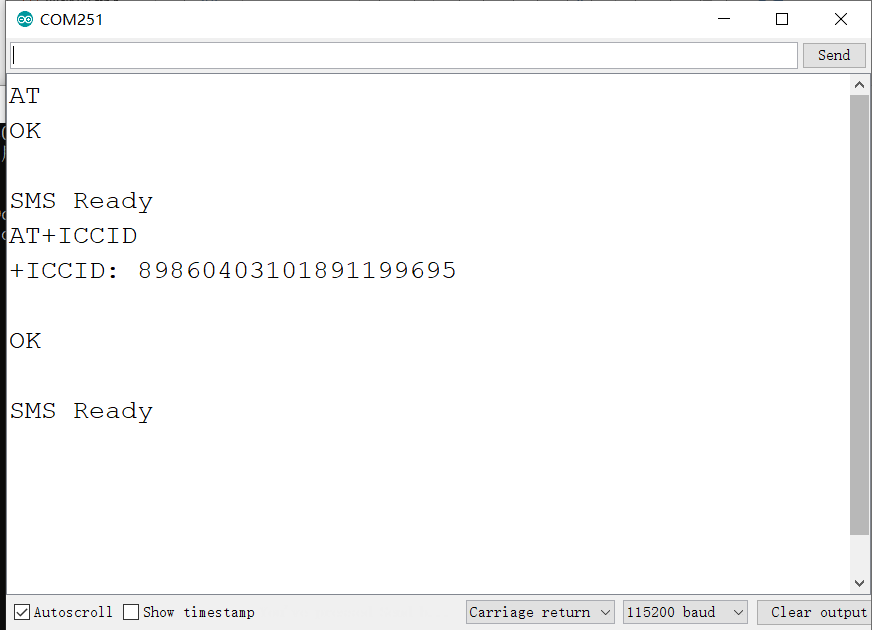
Now you can input other AT Commands refer to SIM800_Series_AT_Command_Manual_V1.09.pdf, Such as AT+ICCID to show ICCID, AT+CSQ to report GSM/GPRS signal quality, and so on.
4.3.1 How to get GPS Location information?
SIM808 Module is a GPRS/GSM+ GPS Quad-band module, with this board, we can use it as a GPS tracker, data acquisition, remote control and a lot of IOT project or smart home project. This example show you how to get GPS location. Attention: To get GPS location, please ensure you are outdoor, and plug the GPS Antenna. Indoor may get the incorrect location or no location information.
1.Turn on GPS, using the AT command “AT+CGNSPWR=1” to turn the GPS:
AT+CGNSPWR=1
2.Define the last NMEA sentence that parsed by AT command “AT+CGNSSEQ=RMC”
AT+CGNSSEQ=RMC
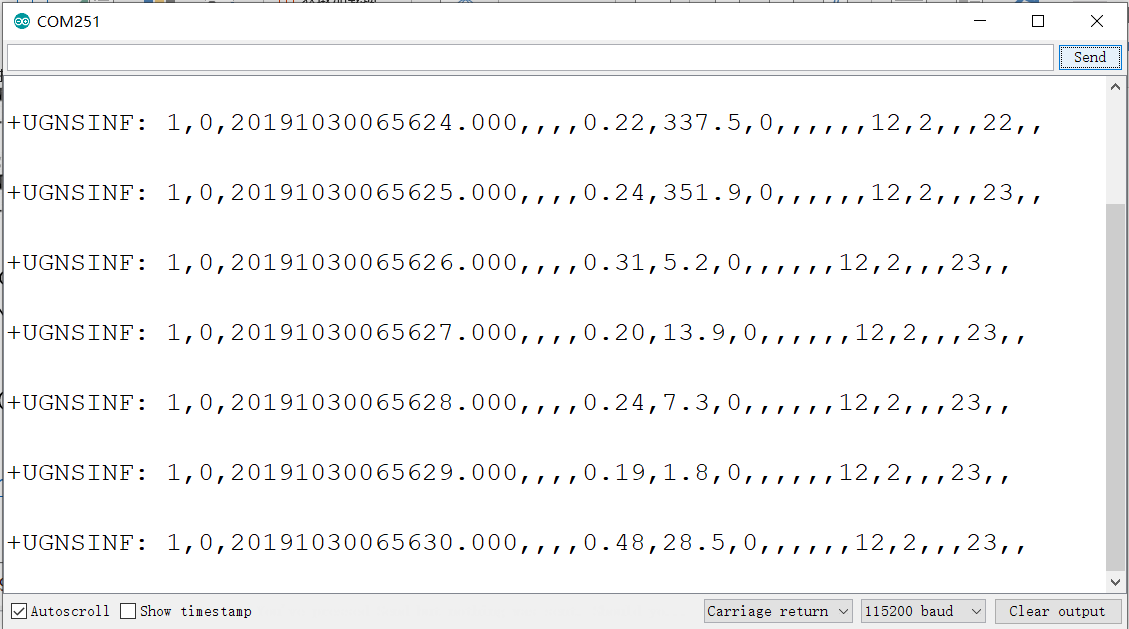
3.GNSS navigation information parsed from NMEA sentences, by AT command” AT+CGNSINF”, then the Maduino GPS will begin to navigate the GPS info:
AT+CGNSINF
4.Turn on navigation data URC report, and report every GNSS FIX, by “AT+CGNSURC=1”
AT+CGNSURC=1
If not get the GPS signal, it returns:
+CGNSINF: 1,0,19800105235944.000,,,,0.00,0.0,0,,,,,,0,0,,,,,
4.3.2 Maduino Zero SIM808 GPS Tracker Projects
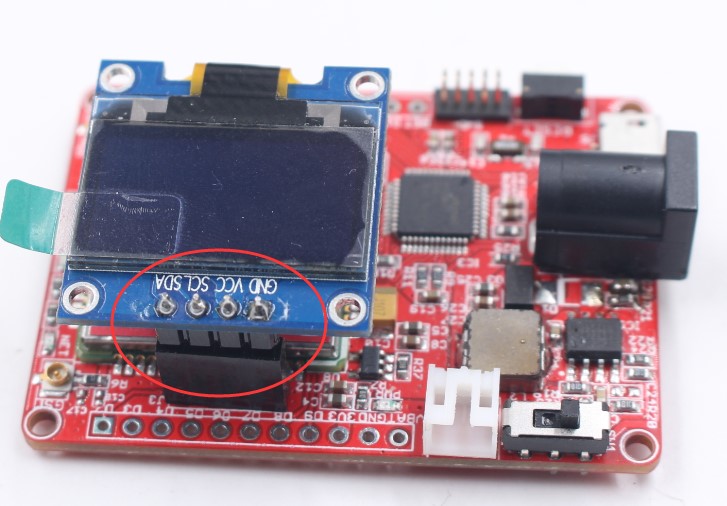
Project_1: Shows the GPS location on OLED display We need a 0.96" I2C OLED 128x64 at:0.96" I2C OLED 128x64 - Blue

Check the Pin J3 on Maduino Zero SIM808 (GND/3V3/SCL/SDA), as the pins definition compatible, plug the OLED directly on J3:.
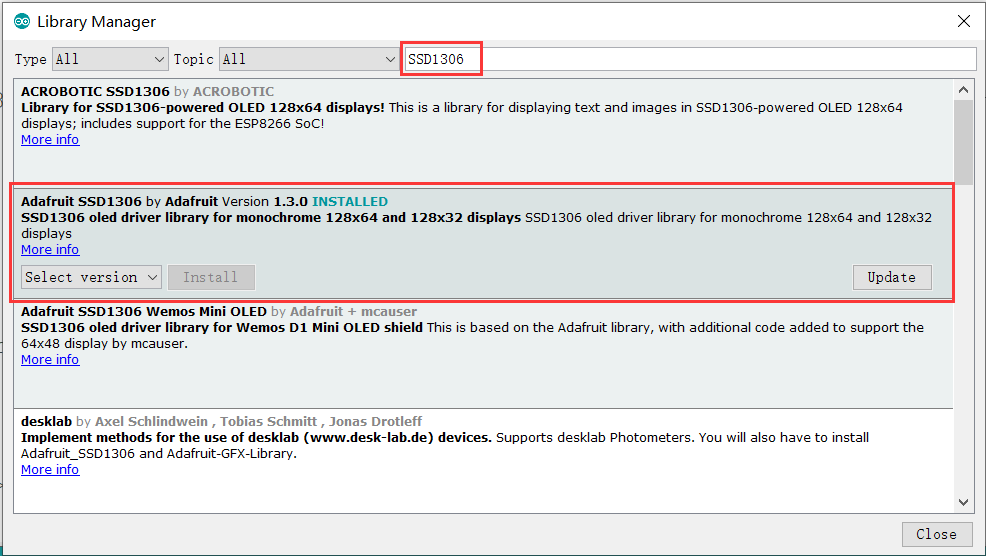
And install the SSD1306 OLED driver library

And then download our example (SIM808_GPS_OLED.ino) to Maduino board, the result show:
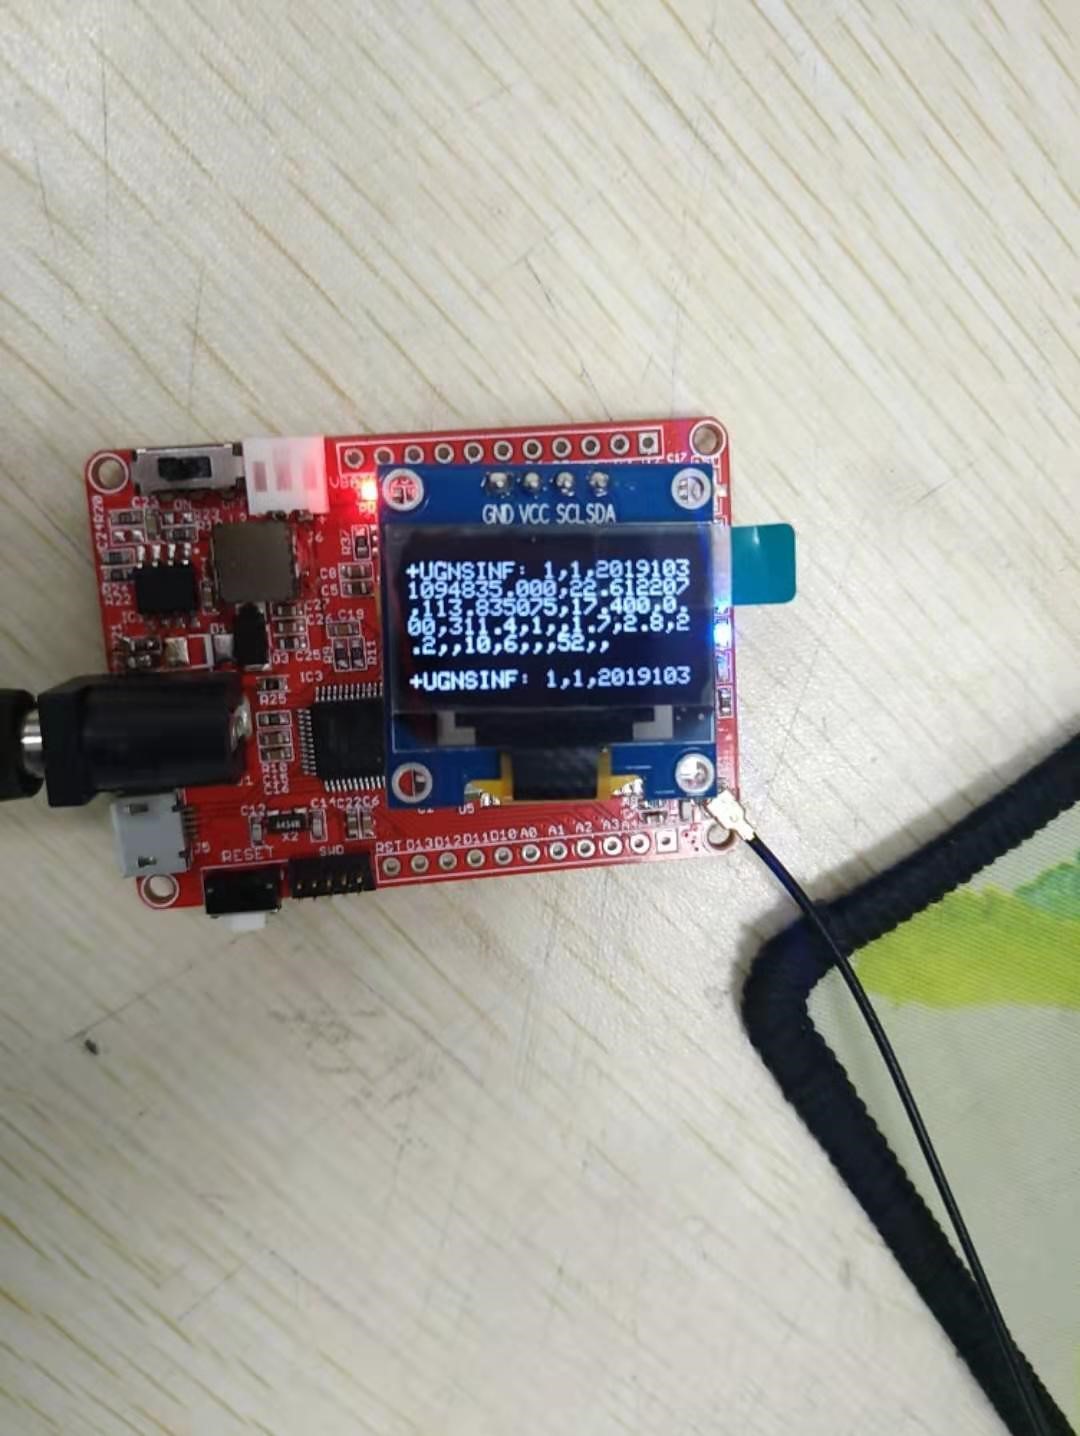
There you can check the local time/longitude/ latitude on the OLED(when making this guide, our local time is 20191031094835, and longitude/ latitude: 22.612207/113.835075 We can show our location where we are in https://www.gps-coordinates.net/
Project_2: A Simple IoT Project- Environment Remote Monitor
SIM808 Module is a GPRS/GSM+ GPS Quad-band module, with this board, we can use it as a GPS tracker, data acquisition, remote control, and a lot of IoT projects or smart home projects. In this project, we will detect the humidity/temperature of our soldering lab, and reports it to internet thingspeak(https://thingspeak.com/channels/916902), so we can monitor the lab environment remotely.
We use the humidity /temperature sensor at:DHT11 Temperature& Humidity Module
1.Sensor Connection Connect the simple sensor to Maduino boards as follows:
| Sensor | Maduino Pins |
|---|---|
| GND | Maduino's GND |
| DATA | Maduino's D6 |
| VCC | Maduino's 3.3V |
2.Insert a Micro SIM card and GSM antenna, power the Maduino with battery or DC The Maduino Zero SIM808 board uses the micro SIM card that is widely used in Android phone, install the Micro SIM card to the holder as below picture, and also the GSM antenna

Note that some fee maybe needed for each SMS depending on your local GSM Operator, make sure that the SIM Card is active and that enough money left for this application.
3.Programming
3.1 Sign up an account in https://thingspeak.com/ . If you already have one, sign in directly.
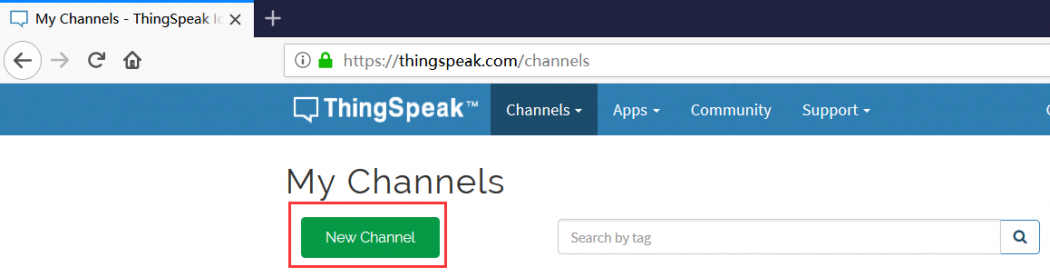
3.2 Click New Channel to create a new ThingSpeak channel.
3.3 Input name, Description, Select Field 1, Field 2, Field3, Field4. Then save channel on the bottom.

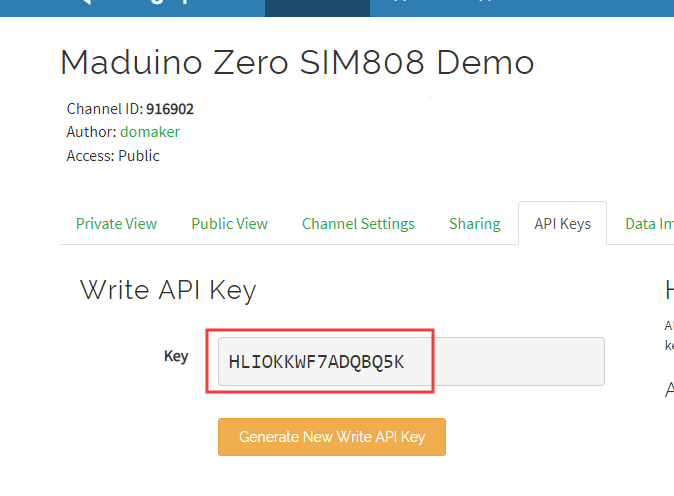
3.4 Copy the API Key, we will use it in the program

The Codes for this application are very simple, define the SIM808 Power control pins: Connect to GPRS/GSM network
//define the power control pin of SIM808:
int PWR_KEY=9;    //power on/off
Connect to GPRS/GSM network
sendData("AT+CGATT=1", 1000, DEBUG);
Initialize HTTP Service
sendData("AT+HTTPINIT", 1000, DEBUG);
Set HTTP parameters value
String command = "AT+HTTPPARA=\"URL\",\"http://api.thingspeak.com/update.json?api_key=" + apiKey + "&field1=" + (String)latitude +"&field2=" + (String)longitude + "&field3=" + (String)temp +"&field4=" + (String)humi + "\"";
sendData(command, 3000, DEBUG);//Set HTTP Parameters Value
POST the data that set in command "AT+HTTPPARA"
sendData("AT+HTTPACTION=1", 1000, DEBUG);//HTTP POST success if get responce: +HTTPACTION: 1,200,0
Select the right port and Arduino board: Arduino Zero(Native USB Port) to upload the code(SIM808_GSM_DHT11.ino) to Maduino Zero SIM808 GPS board.
4.Result Show Open the link: https://thingspeak.com/channels/916902 it will show the data as below:
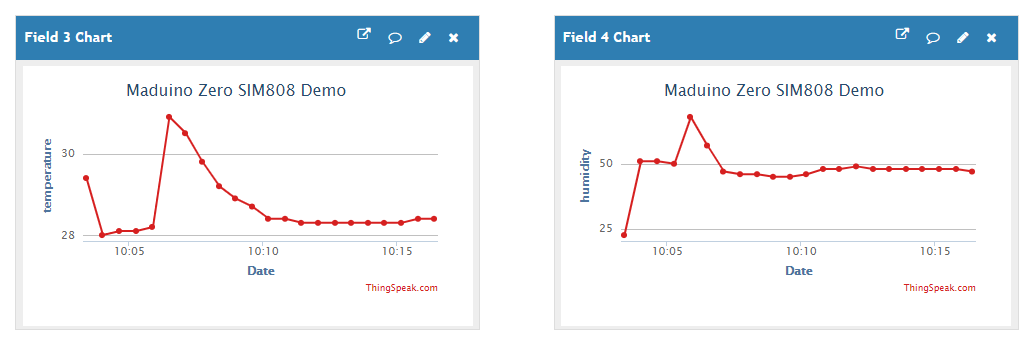
(I touched the sensor to show the result, so the temperature and humidity grow high) There we can get the real-time humidity& temperature results from other places on the internet.
4.3.3 Bluetooth test
- Before the Bluetooth test, we firstly can by means of the command of "AT+GMR" to inquire the firmware version of the SIM808 module, in order to promise it can use the Bluetooth function.
- You can get the code from here: Github
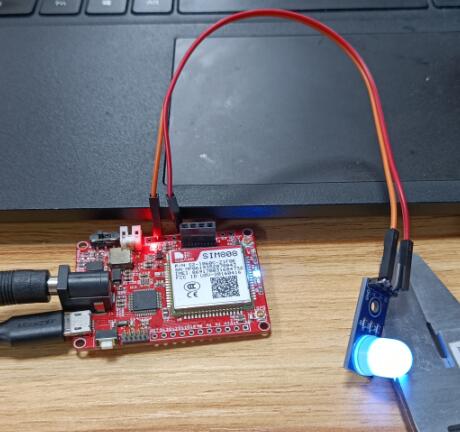
- Connect an LED, the negative pole of LED is grounded, and the positive pole is connected to D8.
- Upload the code SIM808_Demo/sim808_BLE/sim808_BLE.ino.
- Open the Serial Monitor, enter the following command to get the Bluetooth name and physical address.
AT+BTHOST? Inquiry host device name
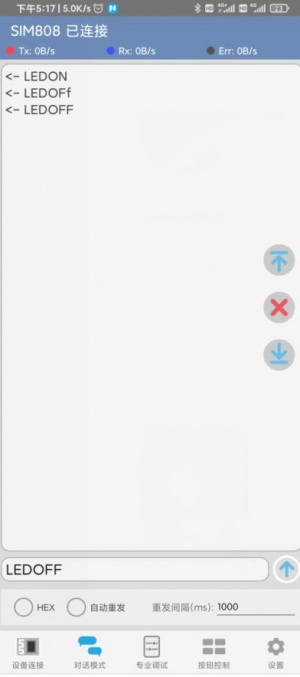
- Just use other Bluetooth devices to pair and connect, send "LED ON" to the module, and the LED will be on, and send "LED OFF", and the LED will be off. You can use the following two Bluetooth solutions to connect to the module.
How to check the SIM808 Bluetooth firmware version?
① we will SIM808 module to connect the power and upload the "Maduino_Zero_AT_Commands_V1.0.ino" to the Maduino Zero SIM808 GPS Tracker when STA light turns on, The Module can normally use.
② open the serial port tool and the baud rate is set to 115200bps.set up the carriage return line feed. Set the command of “AT+GMR” to check the version whether is 1418B02SIM808M32_BT.
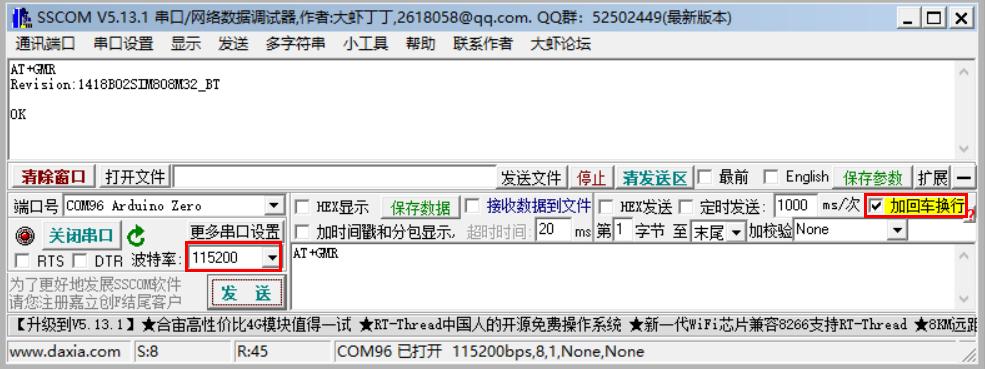
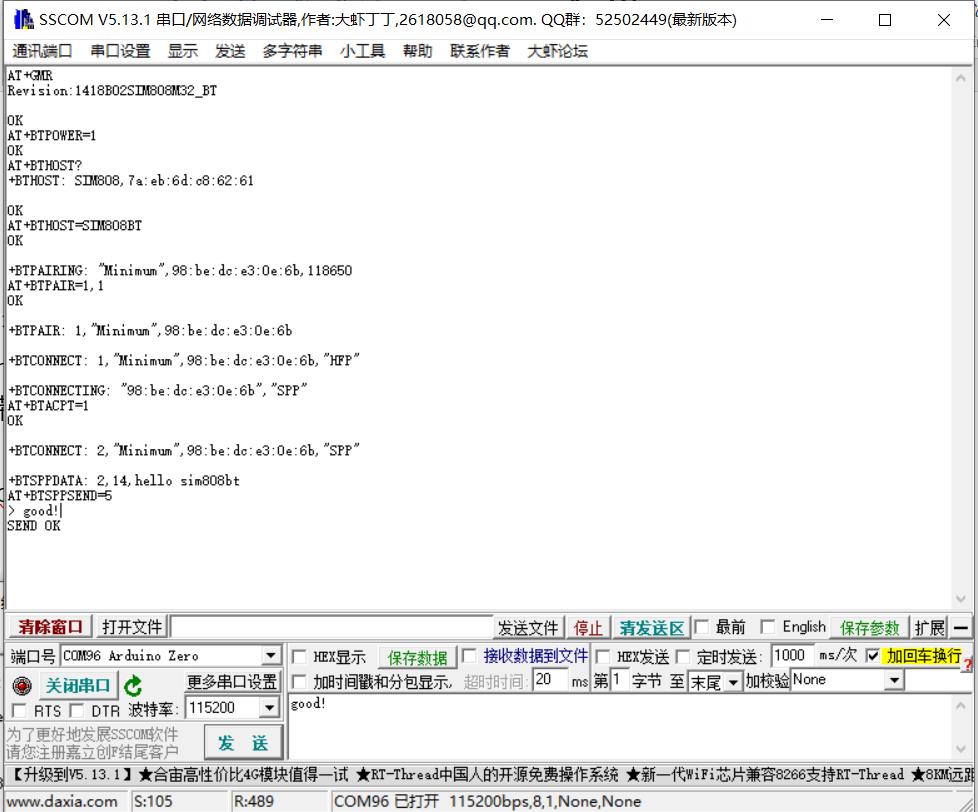
③ Return “OK” if running normally. when the module’s Bluetooth power already was turned on and you execute the above command, it will be returning “ERROR”. The serial port sent the command of “AT+BTHOST?” to query the Bluetooth’s name and address, By means of return value, we can realize that this Bluetooth name is SIM808, address is "7a:eb:6d:c8:62:61".
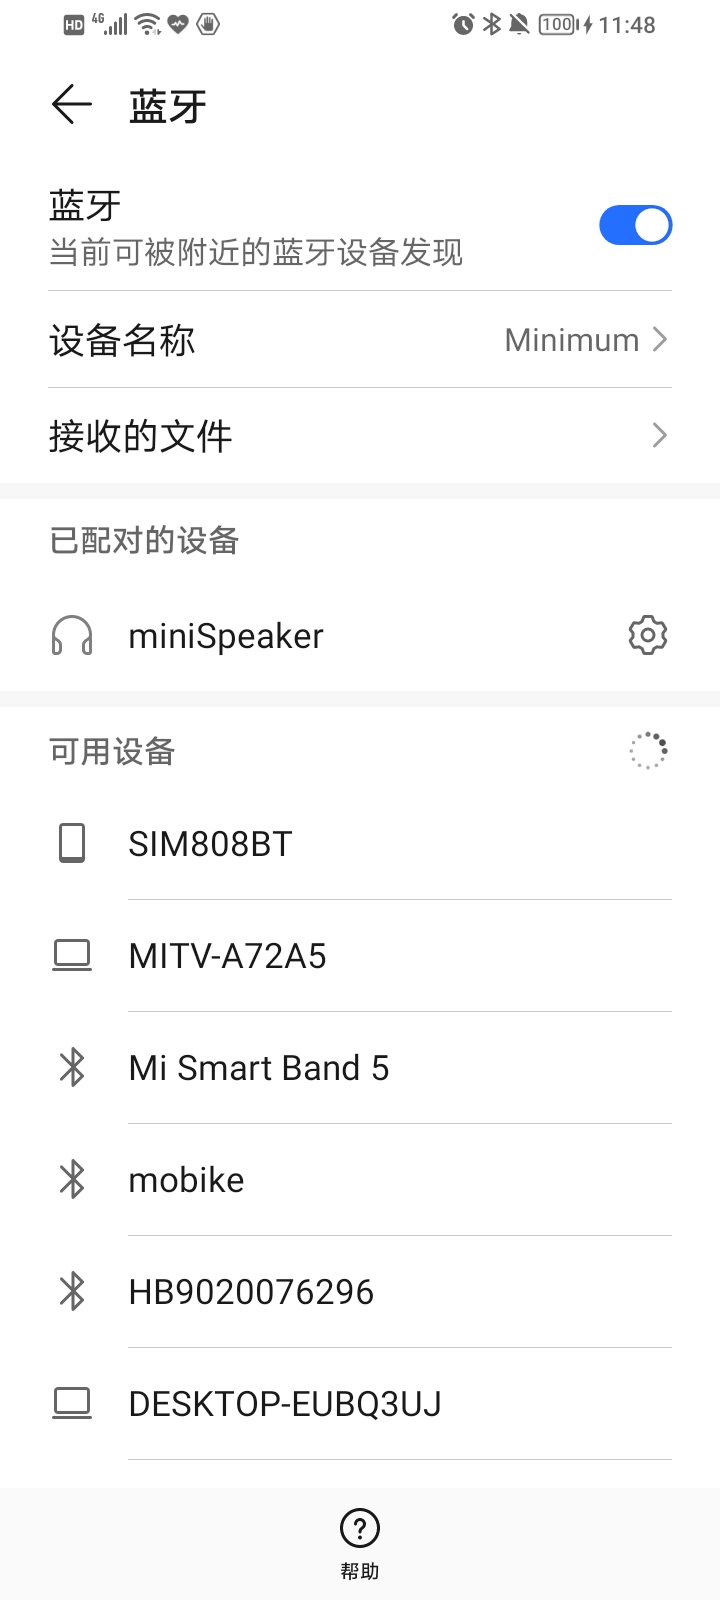
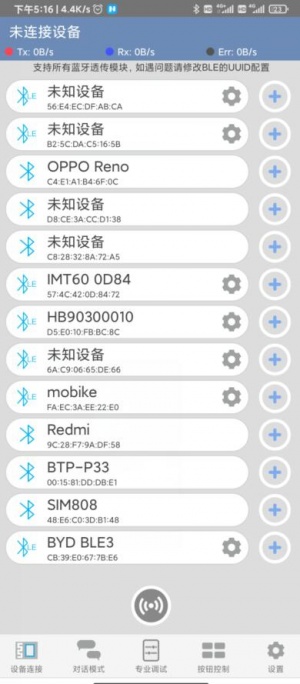
④ open the Bluetooth in the mobile phone, you can seek this Bluetooth whose name is SIM808
⑤ Click matching in the mobile phone and sent the command of “AT+BTPAIR=1,1” in the serial port, allow them to matching.
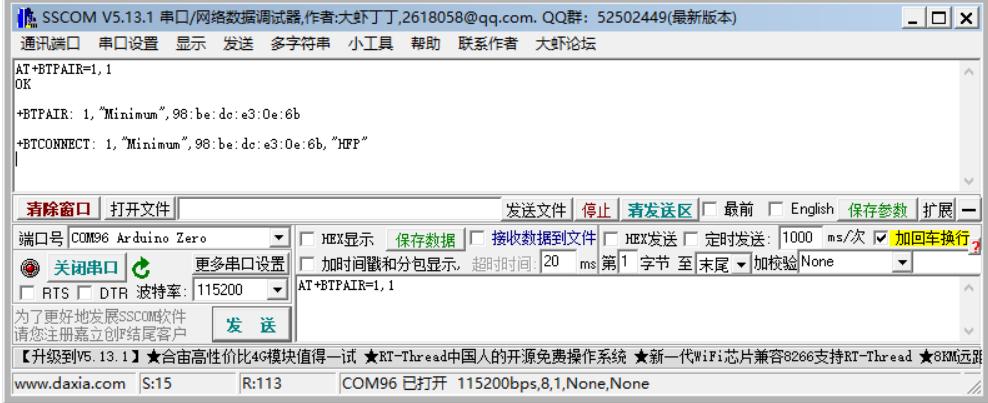
⑥ We can see they are matching successfully on the mobile phone, and then install the Bluetooth debugging assistant APK in the mobile phone and open into it.
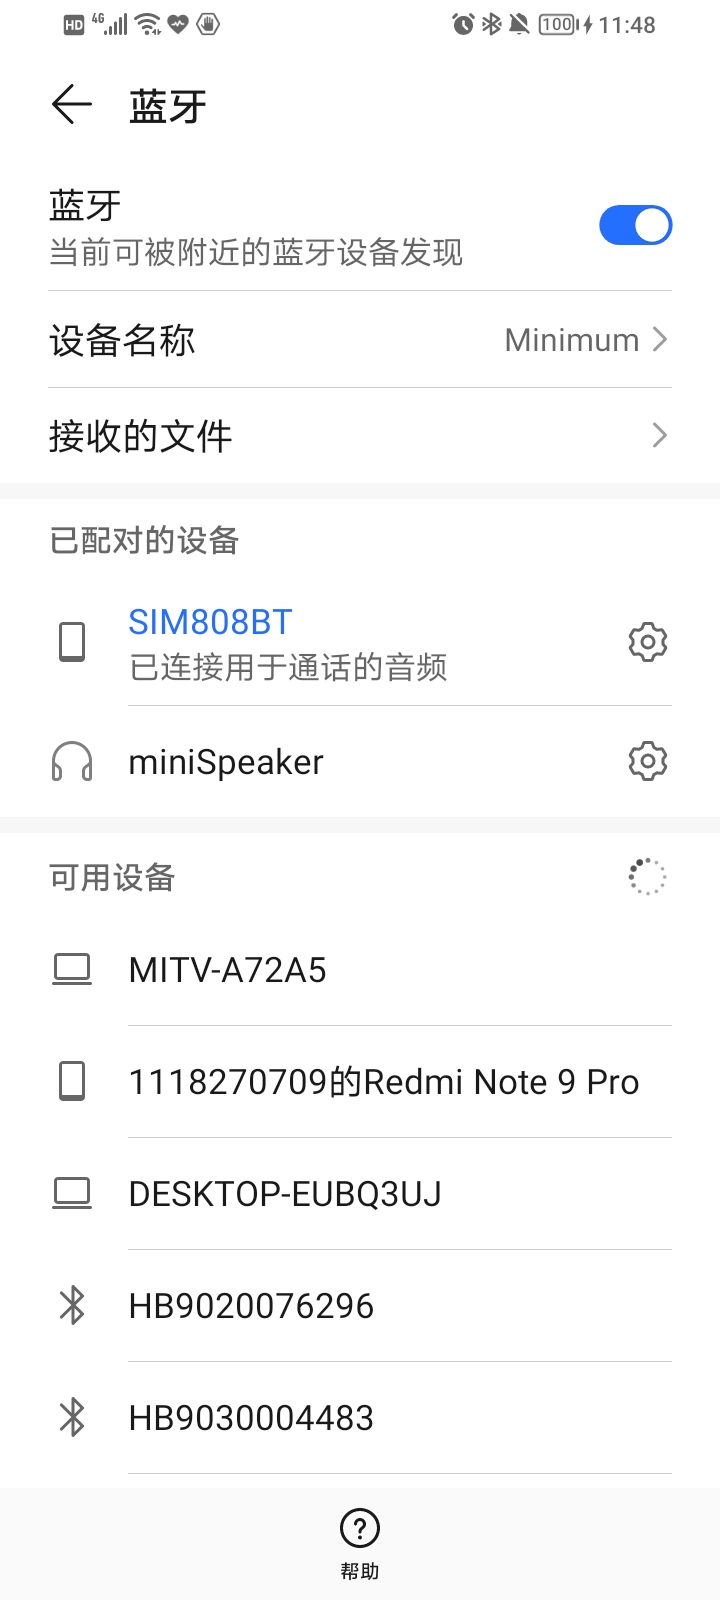
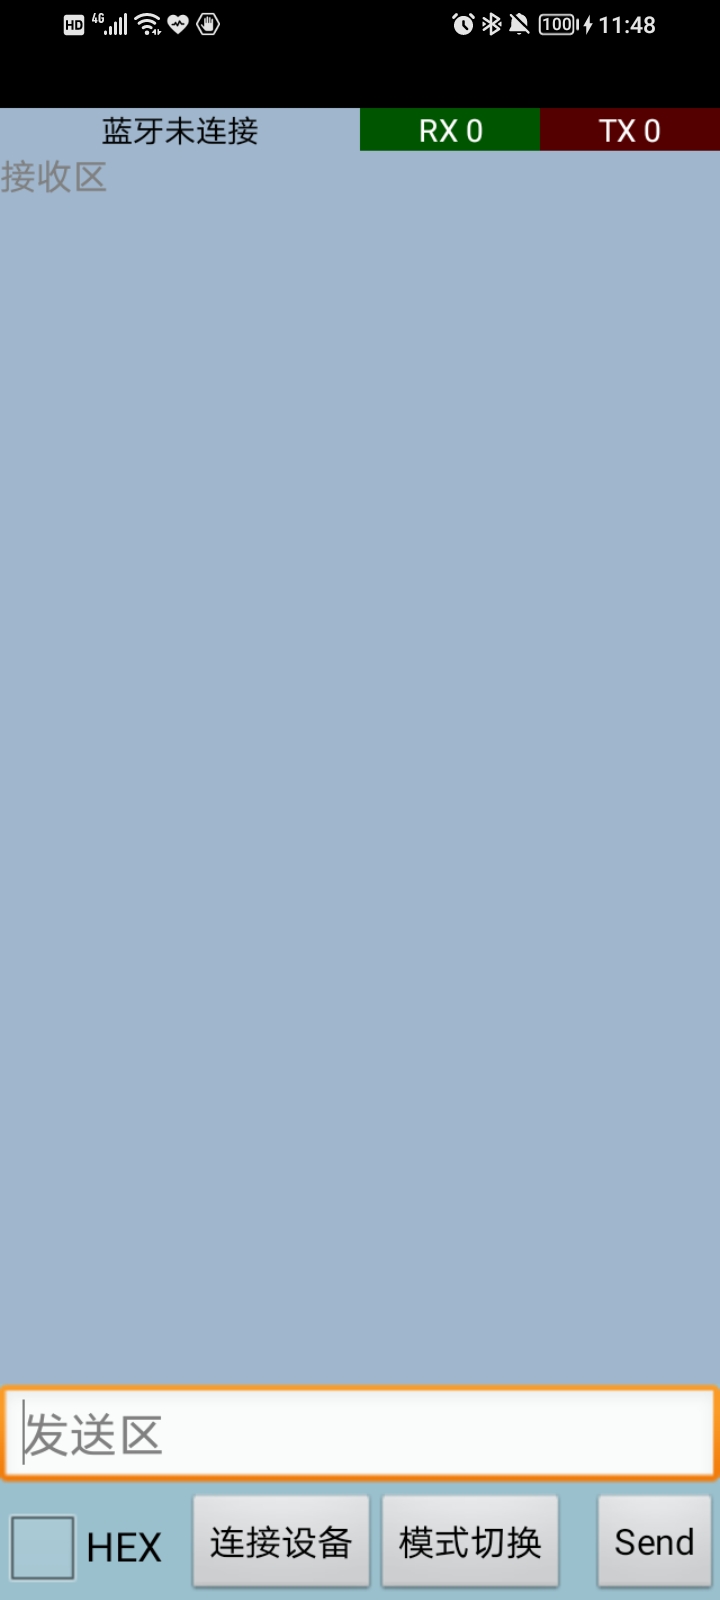
⑦ We can see the mobile phone has linked to the Bluetooth, but Bluetooth debugging assistant has not been linked to the module. Choose the connection device now.

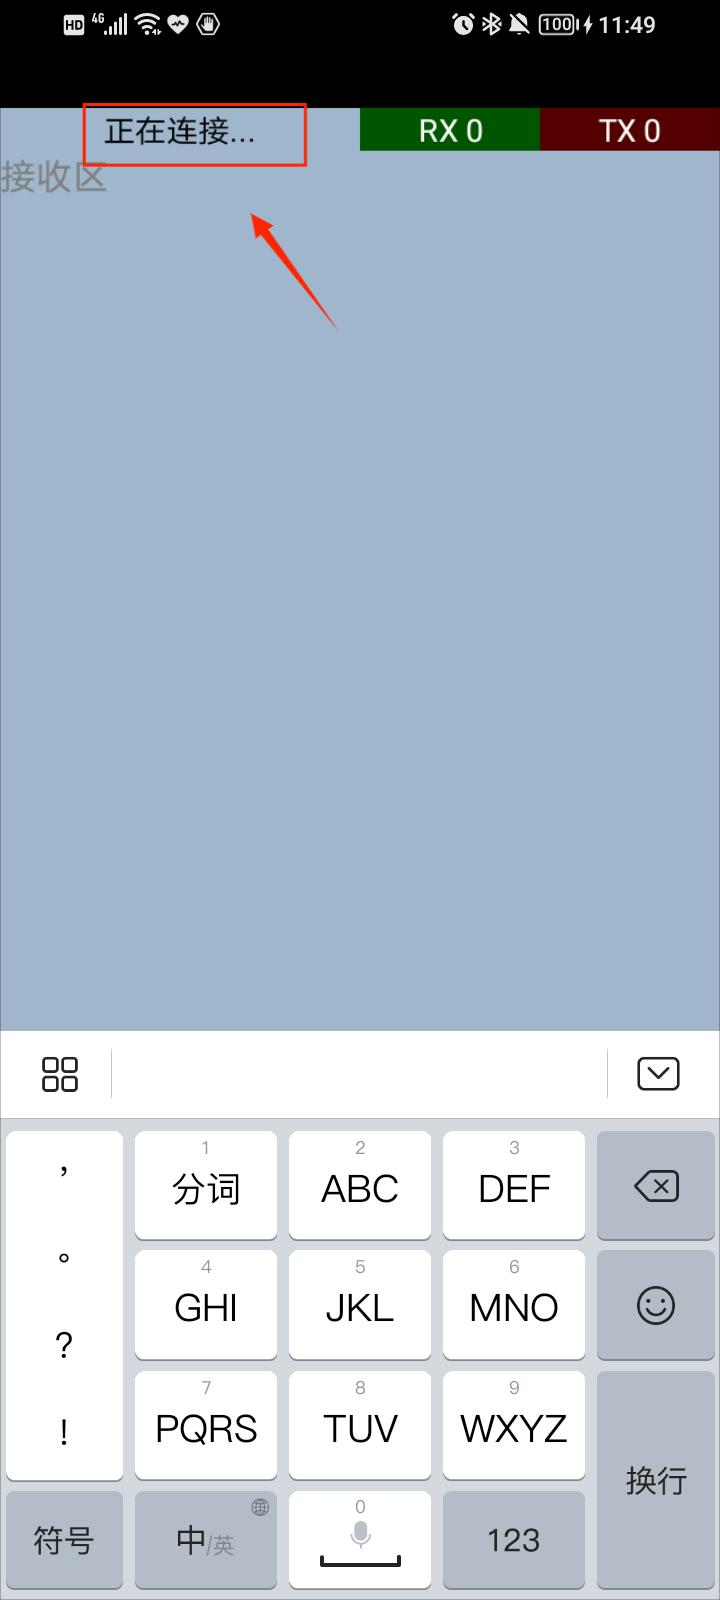
⑧ Showing it is connecting in the APP, you should send the command of “AT+BTACPT=1” through the serial port at this time.
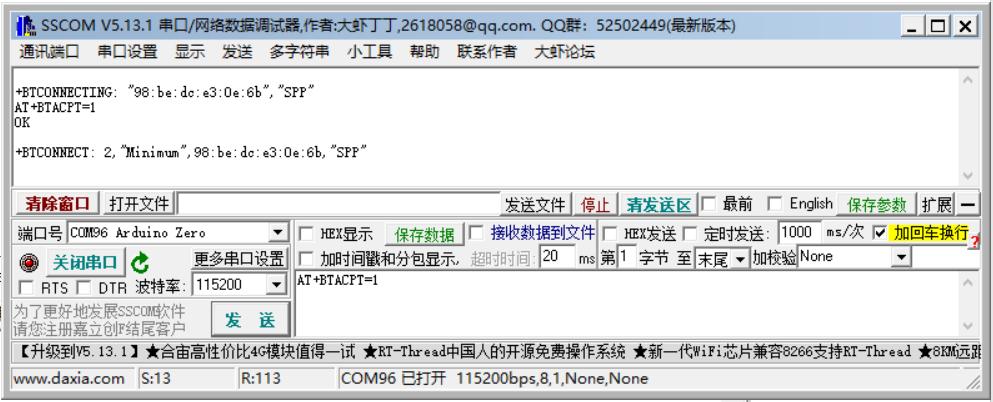
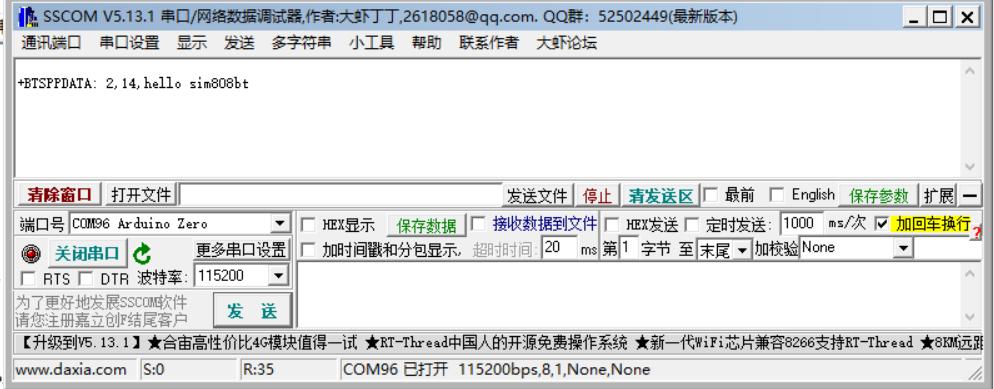
⑨ We can see the SPP protocol has been linked to SIM808BT, input the “hello sim808bt” and then click “sent”. in the serial port, we can receive the “hello sim808bt”, when it has been sent in the APP.
⑩ Serial port sends the command of “AT+BTSPPSEND=5”, when we see the “<” in the serial port, we can send “good!”. We can see the APP receives “good!” from SIM808BT.

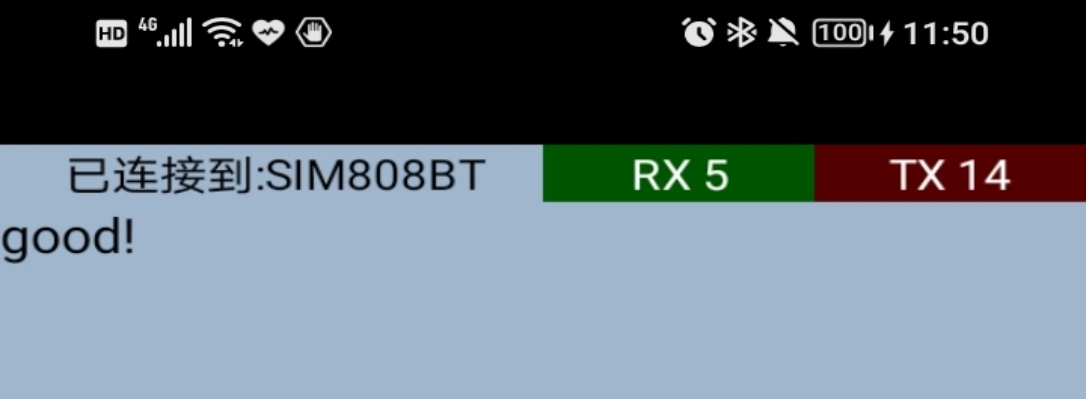
It is concluded that Maduino Zero Bluetooth communication function can be used normally.
The whole process’s serial port screenshots as follow.
1.Install a Bluetooth debugging assistant app on the phone, and then you can use the phone's Bluetooth function to debug.
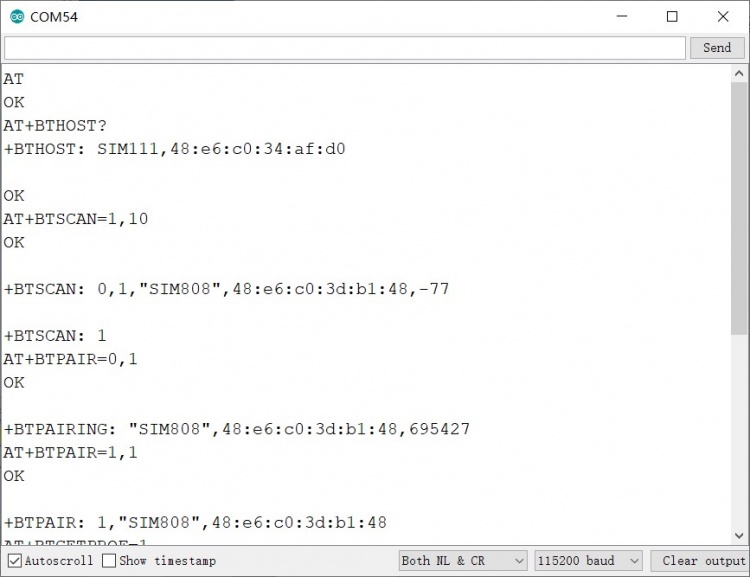
2.Use another sim808 module as a Bluetooth debugging assistant, such as the Maduino Zero SIM808 GPS Tracker module, and upload the program SIM808_Demo/SIM808_AT_Commands_Test.ino. open the Serial Monitor, and enter the following command in order.
AT+BTPOWER=1 Power on BT radio
AT+BTSCAN=1 Scan surrounding BT device
AT+BTPAIR=0,1 Pair BT device1
AT+BTPAIR=1,1 Accept
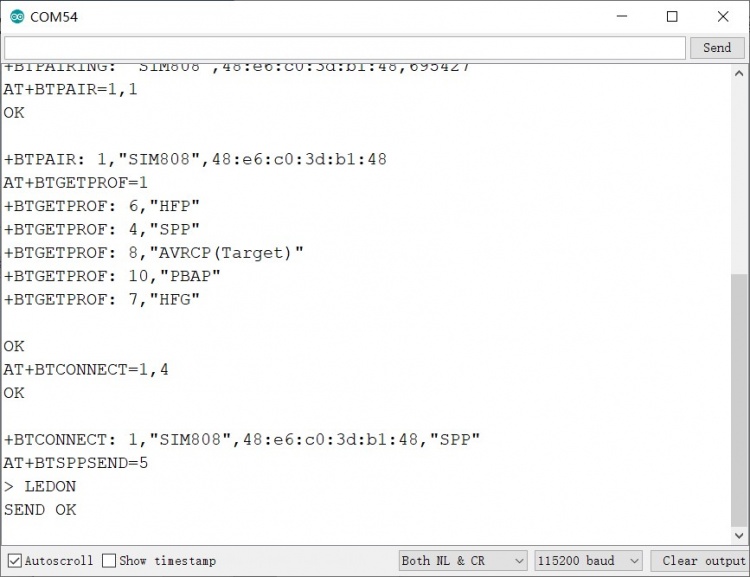
AT+BTGETPROF=1 Get profile provided by paired device
AT+BTCONNECT=1,4 Connect paired BT device based on SPP service
AT+BTSPPSEND=5 Send data based on SPP service
5. FAQ
You can list your question here or contact techsupport@makerfabs.com for technology support. Detailed descriptions of your question will be helped to solve your question.