Maduino Zero SIM868 GPS Tracker
1. Introduction
We already have the Maduino Zero SIM808 GPS Tracker which supports Bluetooth3.0+EDR, and now we would like to introduce a new product Maduino Zero SIM868 GPS Tracker which supports Bluetooth4.0 including BLE, and has more GNSS functions that supports GPS/BEIDOU/GLONASS Location.
2. Features
- ATMEL SAMD21G18A: 32-bit ARM® Cortex®-M0 up to 48MHz, 256KB flash, 32KB SRAM, LQFP48v • Powered by lithium battery(3.4-4.2V) or AC-DC Adapter
- GSM Quad-band: 850/900/1800/1900Mz
- GPS/BEIDOU/GLONASS Location
- Bluetooth4.0 including BLE
- Interface: I2C/SPI/UART/ADC/DAC/I2S/38*GPIO
- Arduino Compatible: You can play it with Arduino IDE
- More cost-effective and high quality than Arduino Zero
- Working Temperature: -20 ~ +85℃
- Default baud rate: 115200bps
3. Arduino IDE preparations
- Install the Arduino IDE V1.8.10/V1.8.19
- Use Type-C USB cable to connect the board and PC.
- Select "Tool --> Board --> Arduino Zero(Native USB Port)" and the port
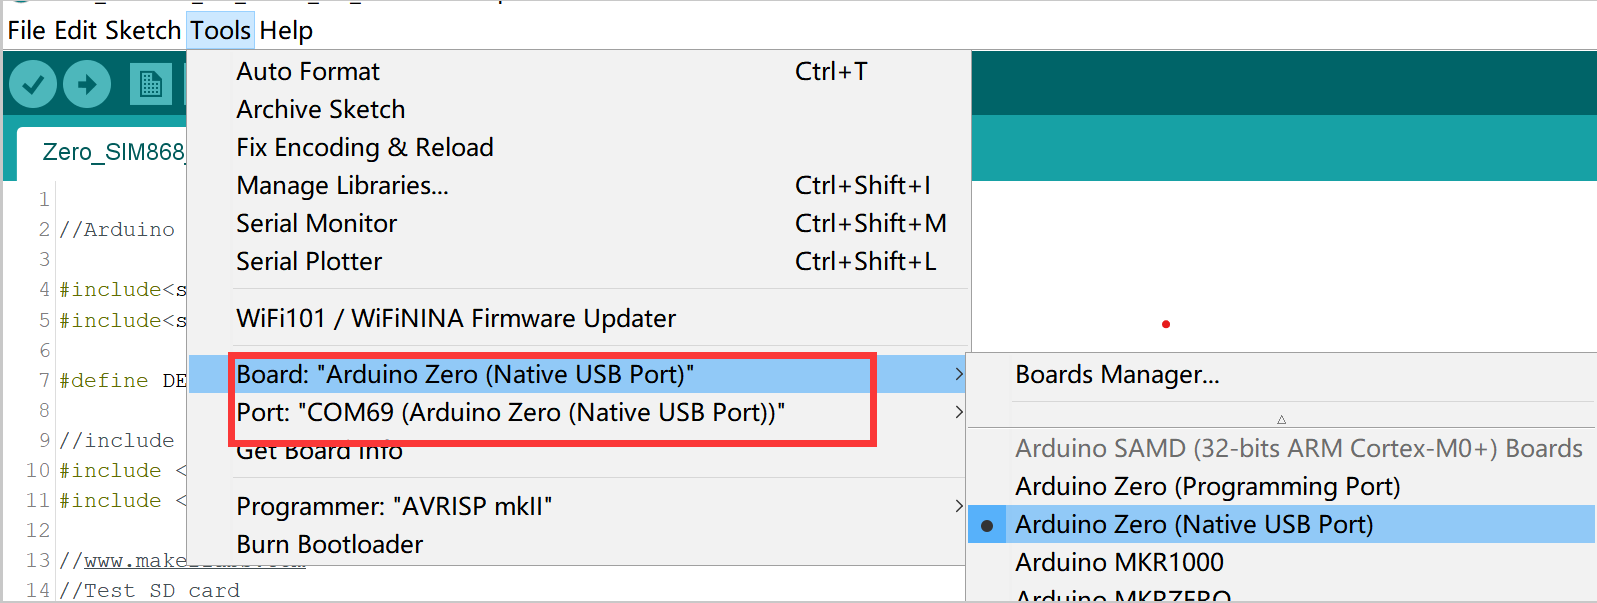 Note: Different computers may have different port numbers when connecting to a development board. Please select the correct port number based on the development board you are connecting to.
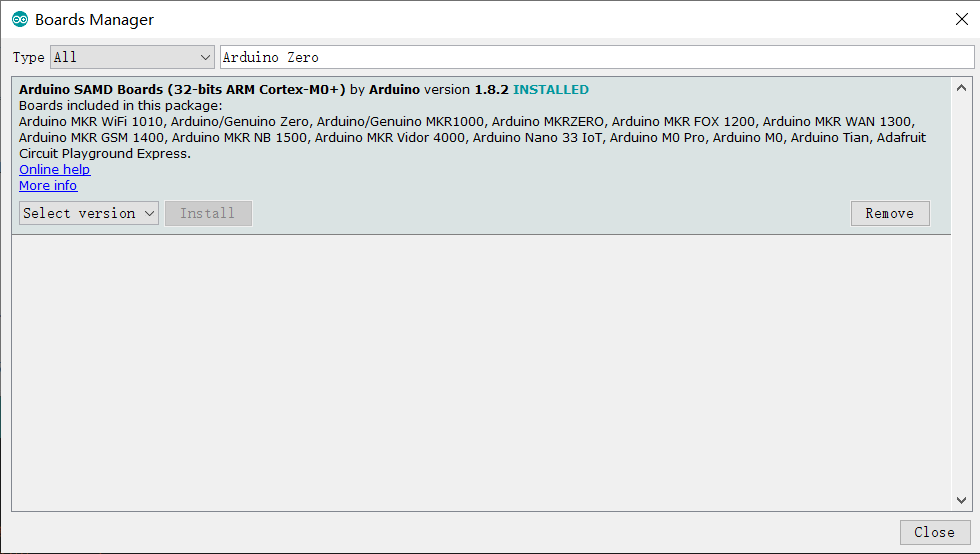
- If you don't find it, you can click -> Boards Manager as the screen snap below. Nest search “Arduino zero” and install Arduino SAMD Boards(32-bit ARM Cortex-M0+).
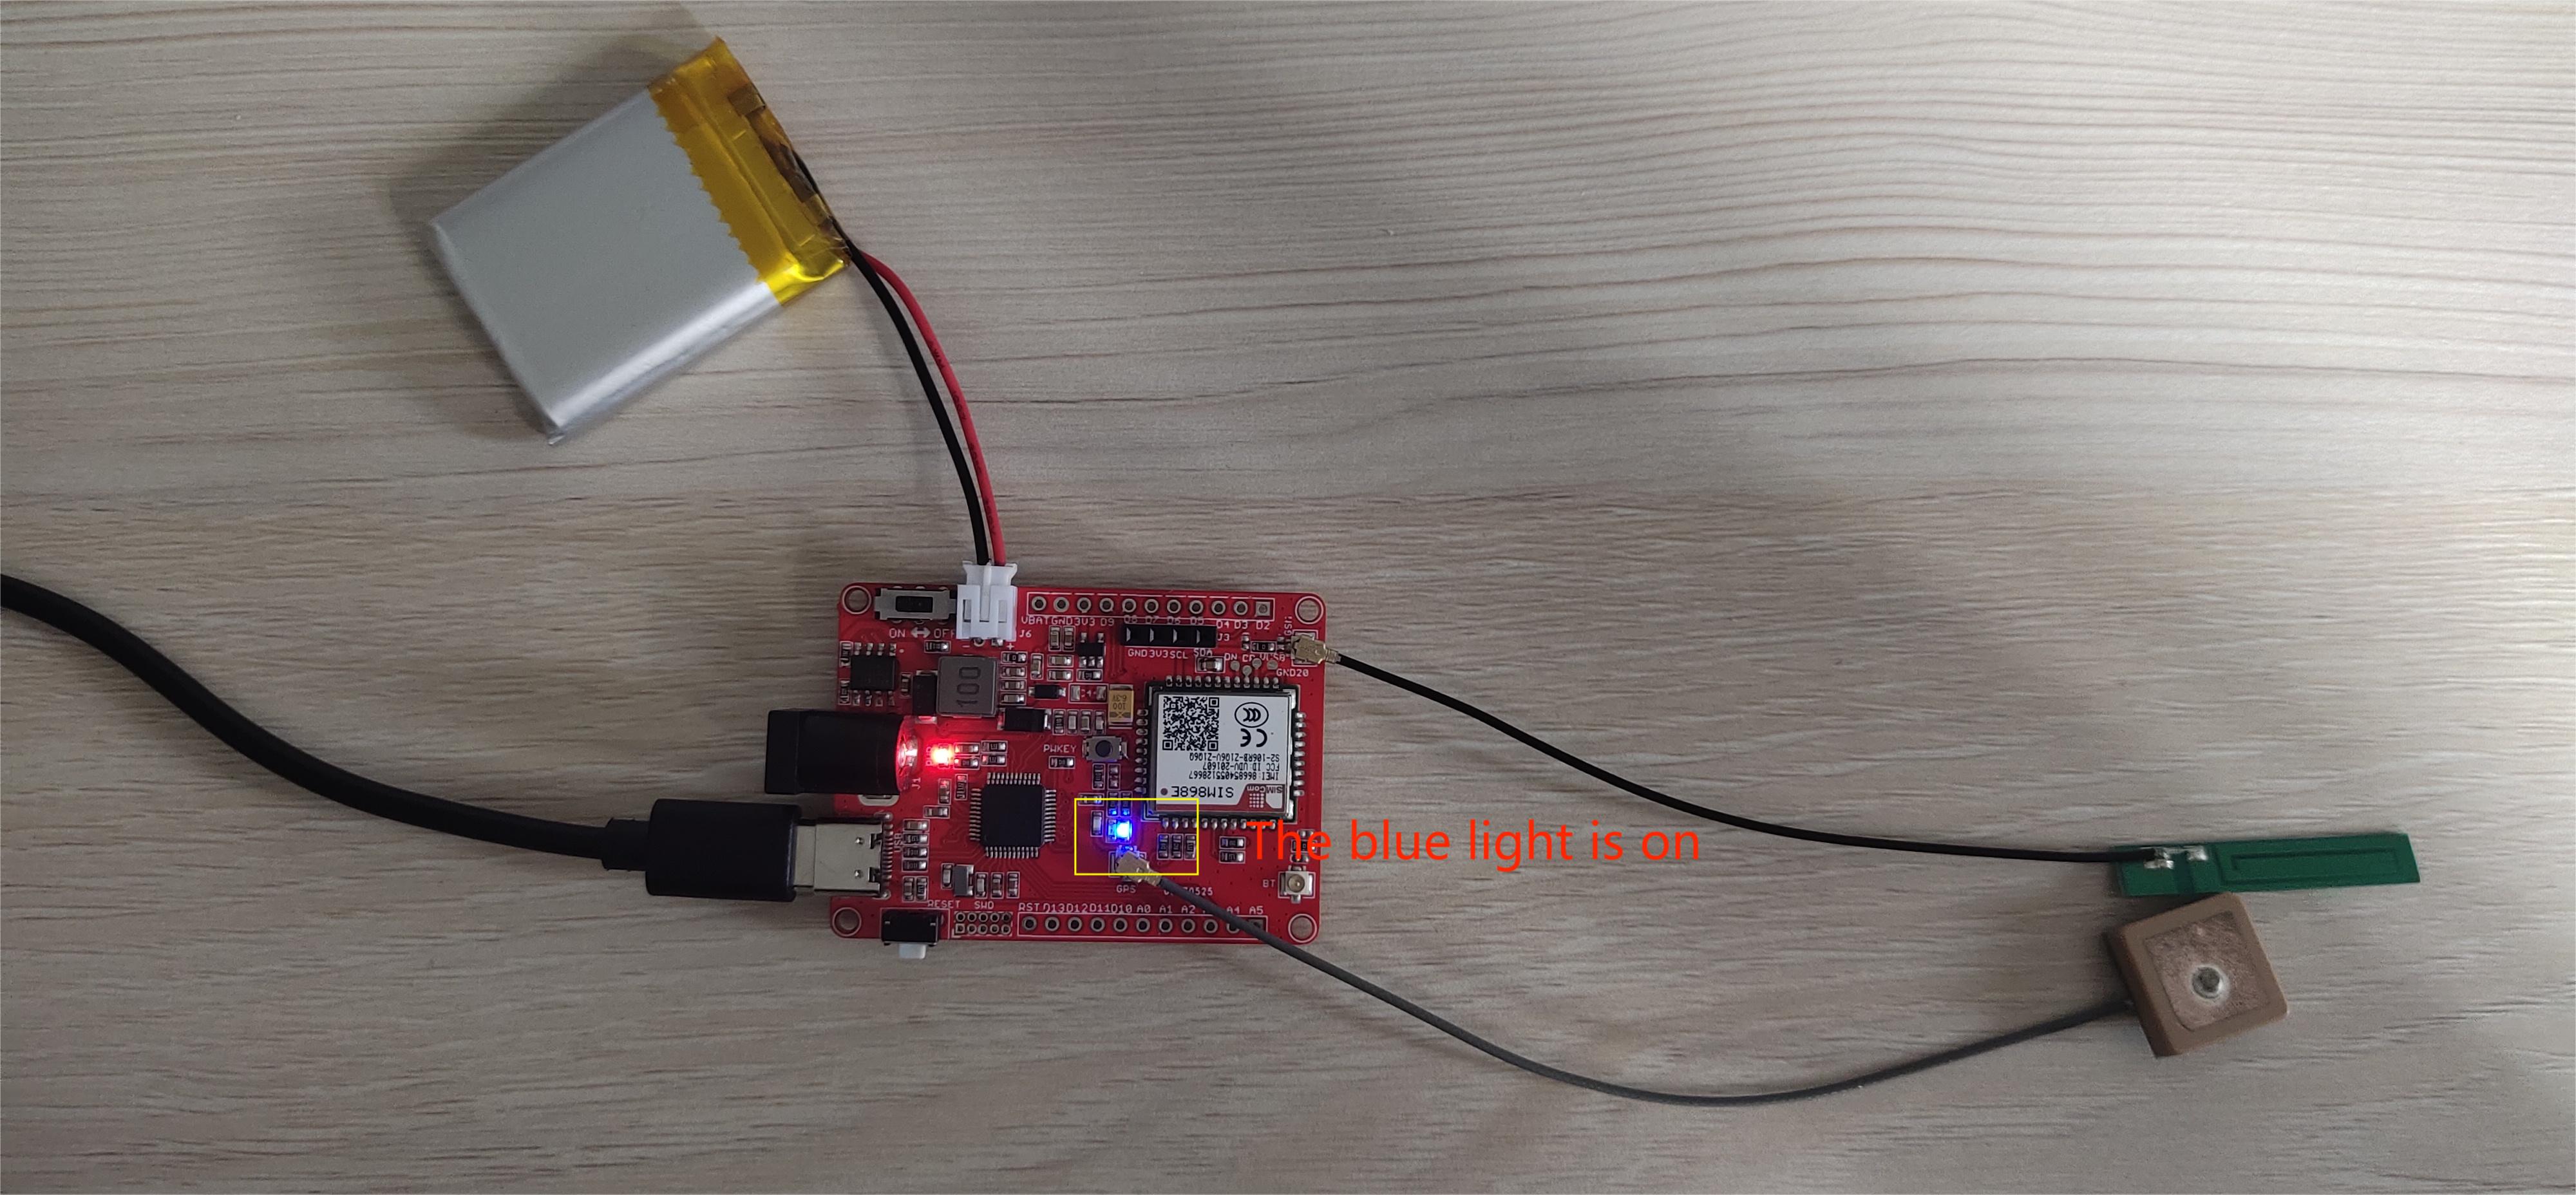
4. Hardware connection
- Plug a MicroSIM card.
- Plug a GPS Antenna to designator which shows GPS.
- Plug a GSM Antenna to designator which shows GSM.
- Plug a Bluetooth Antenna to designator which shows BT.
- Plug a Micro USB Cable to Maduino Zero SIM808.
- Plug a 3.7V lithium battery to J6 or AC-DC Adapter to Maduino Zero SIM868
5. Usage
5.1 Get GPS location
- Open demo by Arduino IDE.
- Verify the code and upload.
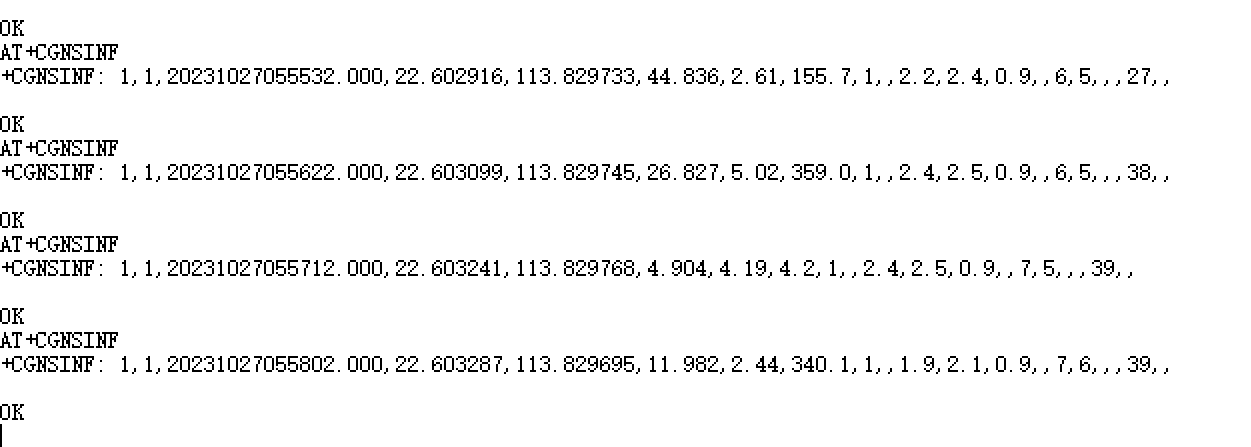
- Open the serial monitor, and you can see the information on GPS.
AT+CGNSPWR=1      //Turn on GPS
AT+CGNSSEQ=RMC    //Define the last NMEA sentence that parsed
AT+CGNSINF        //GNSS navigation information parsed from NMEA sentences
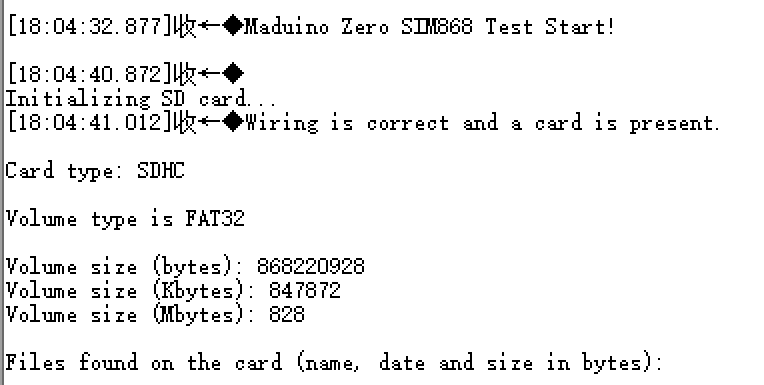
5.2 Get SD card information
- Open demo by Arduino IDE.
- Plug the SD card into the SD card slot.
- Verify the code and upload.
- Open the serial monitor, and you can see the information on SD card.
- If the SD card can't be initialized, you can see the error that:
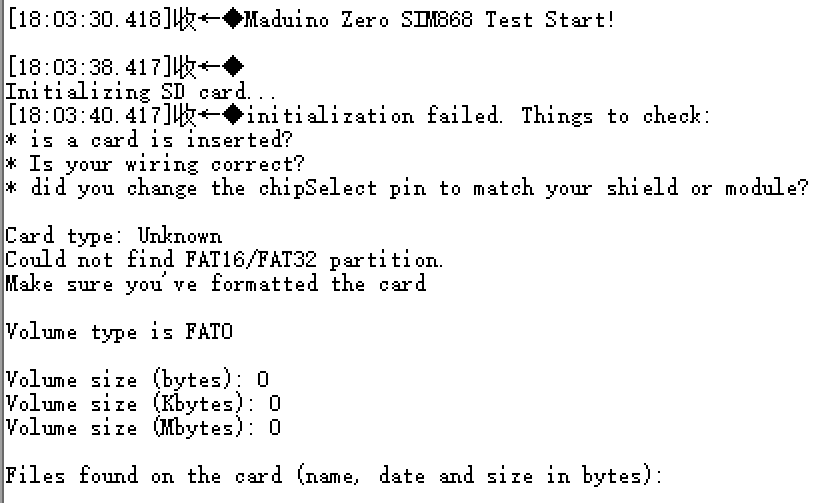
Please check if the pin at the SD card slot is loose.
5.3 HTTP test
-
Open demo by Arduino IDE.
-
You can change the URL.
sendData("AT+HTTPPARA=\"URL\",\"http://www.baidu.com\"", 1000, DEBUG);
-
Verify the code and upload.
-
Open the serial monitor, and you can see the information about HTTP test.
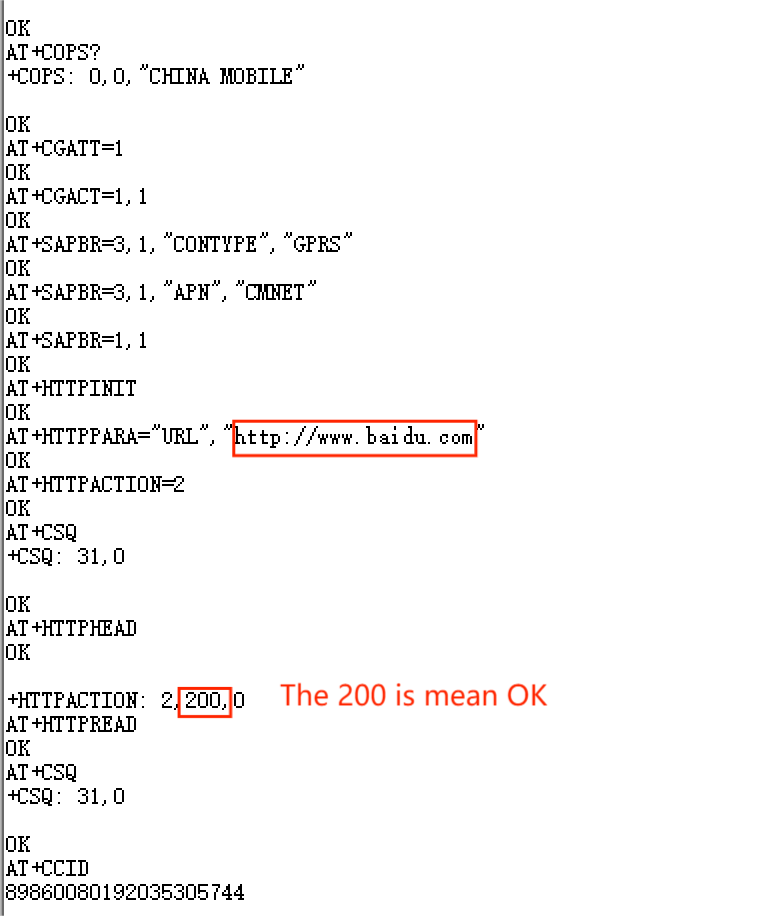
- HTTP Status Code
100 Continue
101 Switching Protocols
200 OK
201 Created
202 Accepted
203 Non-Authoritative Information
204 No Content
205 Reset Content
206 Partial Content
300 Multiple Choices
301 Moved Permanently
302 Found
303 See Other
304 Not Modified
305 Use Proxy
307 Temporary Redirect
400 Bad Request
401 Unauthorized
402 Payment Required
403 Forbidden
404 Not Found
405 Method Not Allowed
406 Not Acceptable
407 Proxy Authentication Required
408 Request Time-out
409 Conflict
410 Gone
411 Length Required
412 Precondition Failed
413 Request Entity Too Large
414 Request-URI Too Large
415 Unsupported Media Type
416 Requested range not satisfiable
417 Expectation Failed
500 Internal Server Error
501 Not Implemented
502 Bad Gateway
503 Service Unavailable
504 Gateway Time-out
505 HTTP Version not supported
600 Not HTTP PDU
601 Network Error
602 No memory
603 DNS Error
604 Stack Busy
5.4 Bluetooth test
- Open demo by Arduino IDE.
- Verify the code and upload.
- Open the serial monitor,enter the following command.
AT+BTPOWER=1 // Turn on the Bluetooth power
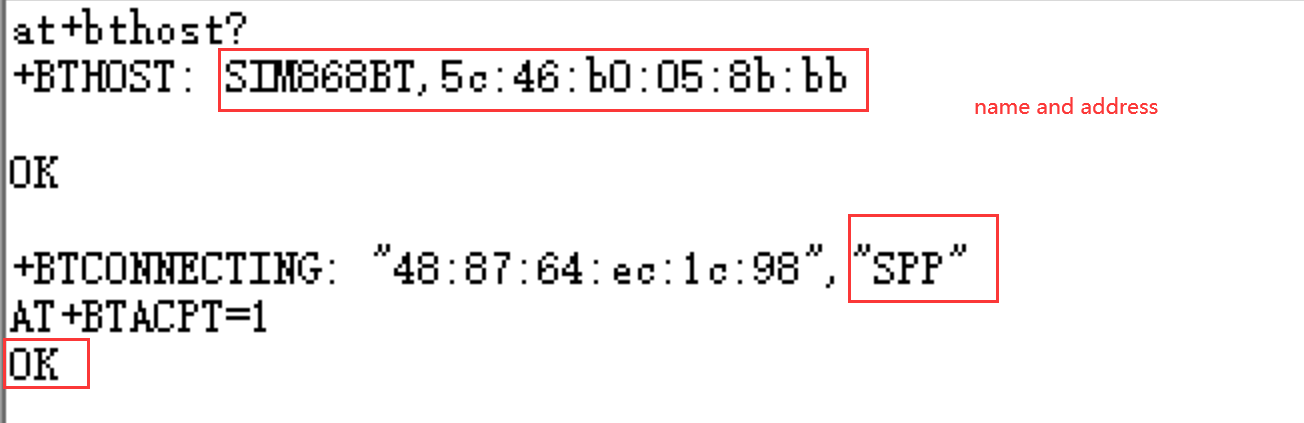
AT+BTHOST? // Query the Bluetooth’s name and address
AT+BTHOS=<Name> // Change the name of Bluetooth
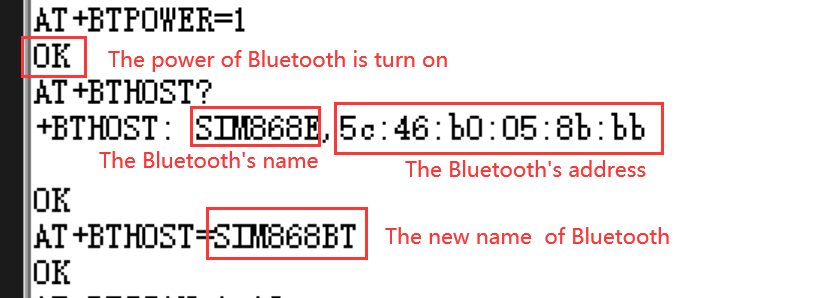
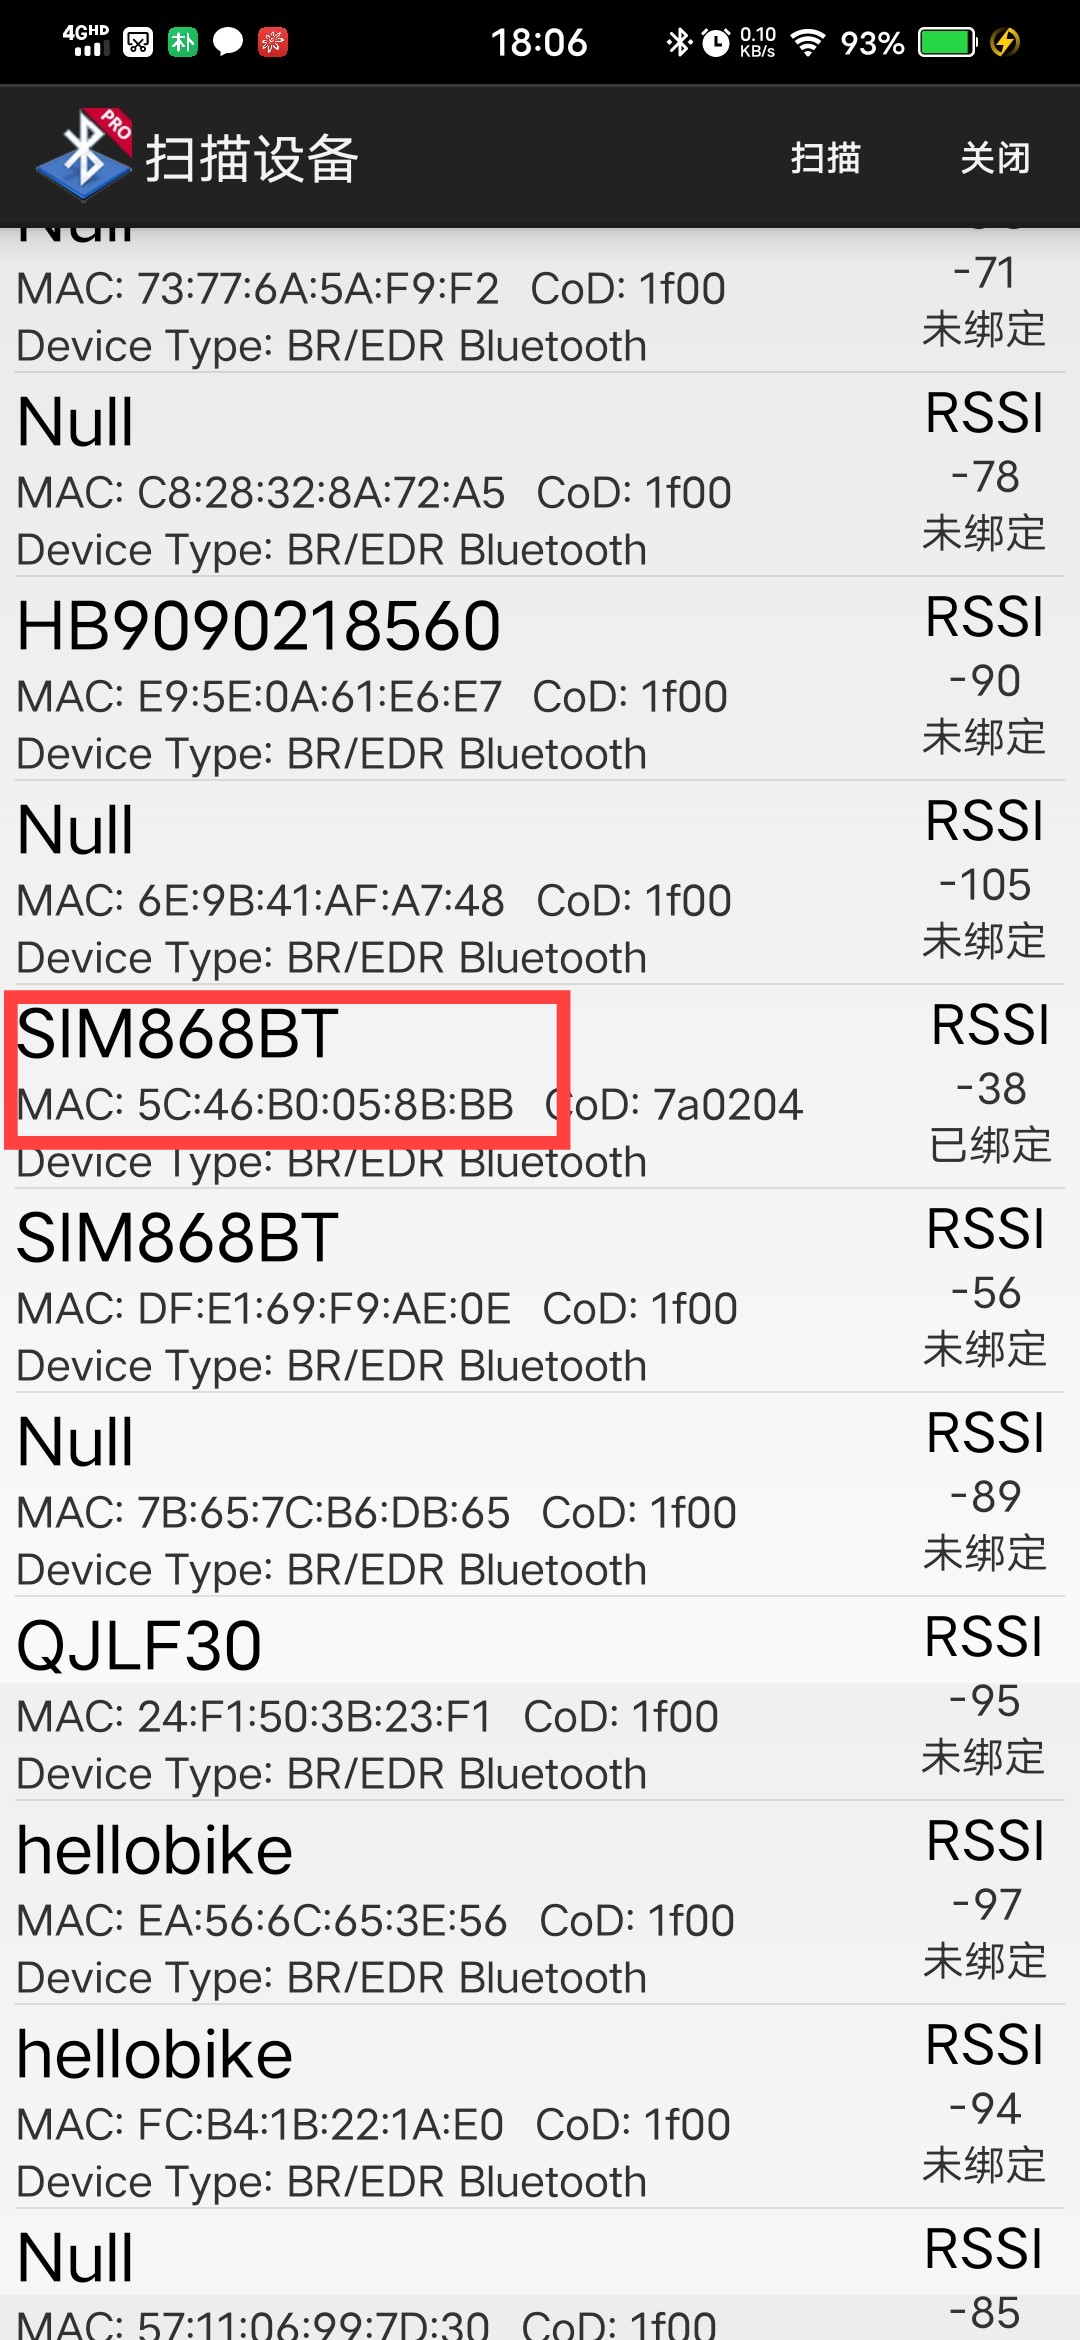
- open the Bluetooth in the mobile phone, you can see a Bluetooth named SIM868BT.
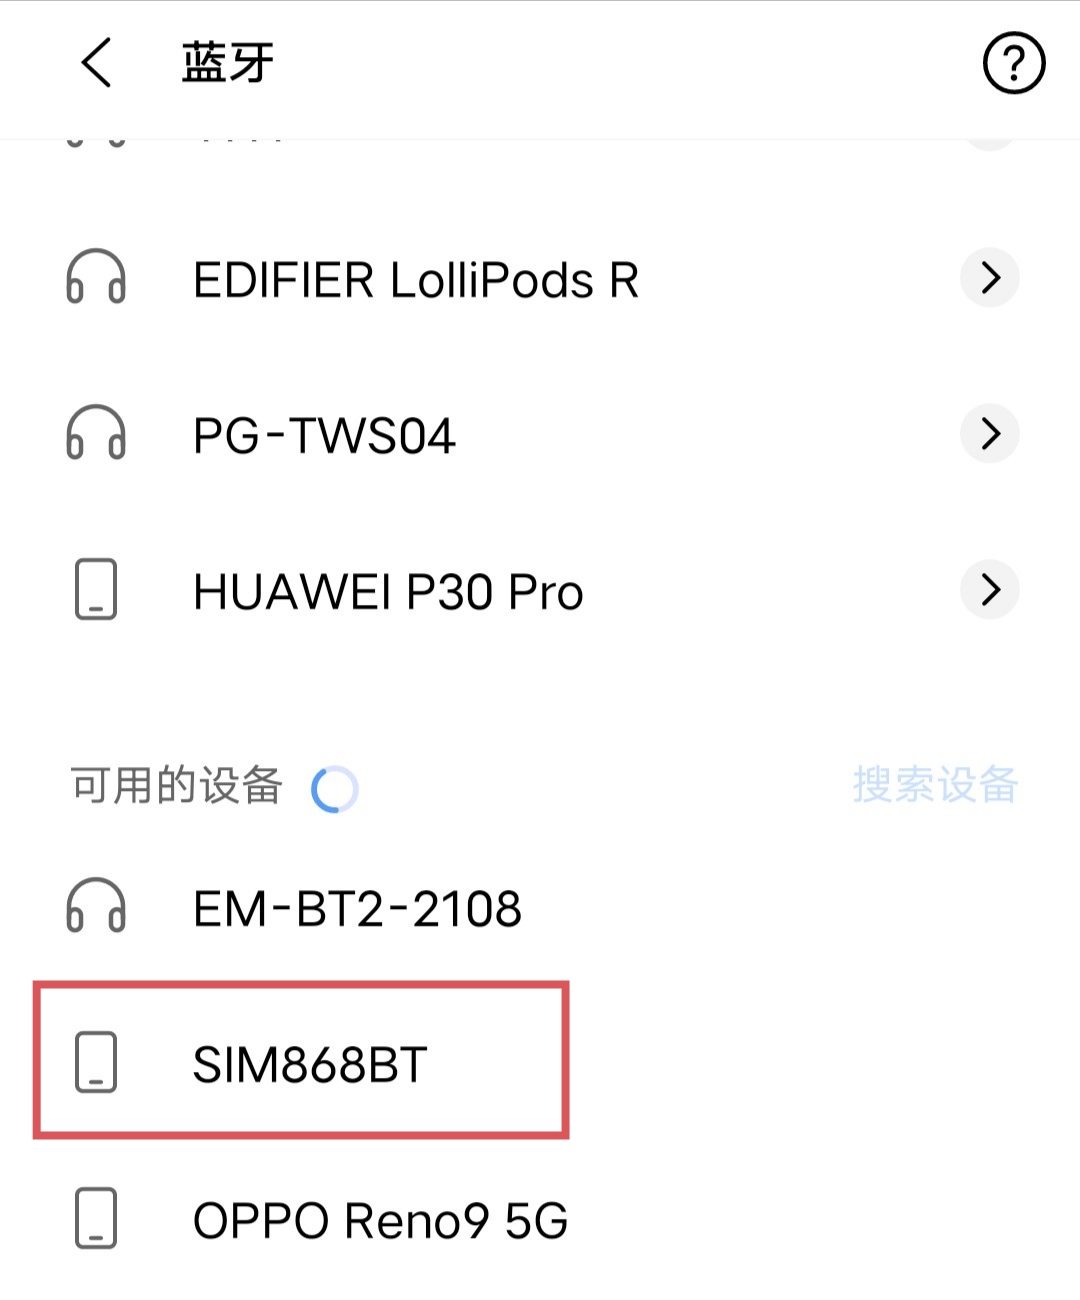
- Click matching in the mobile phone.
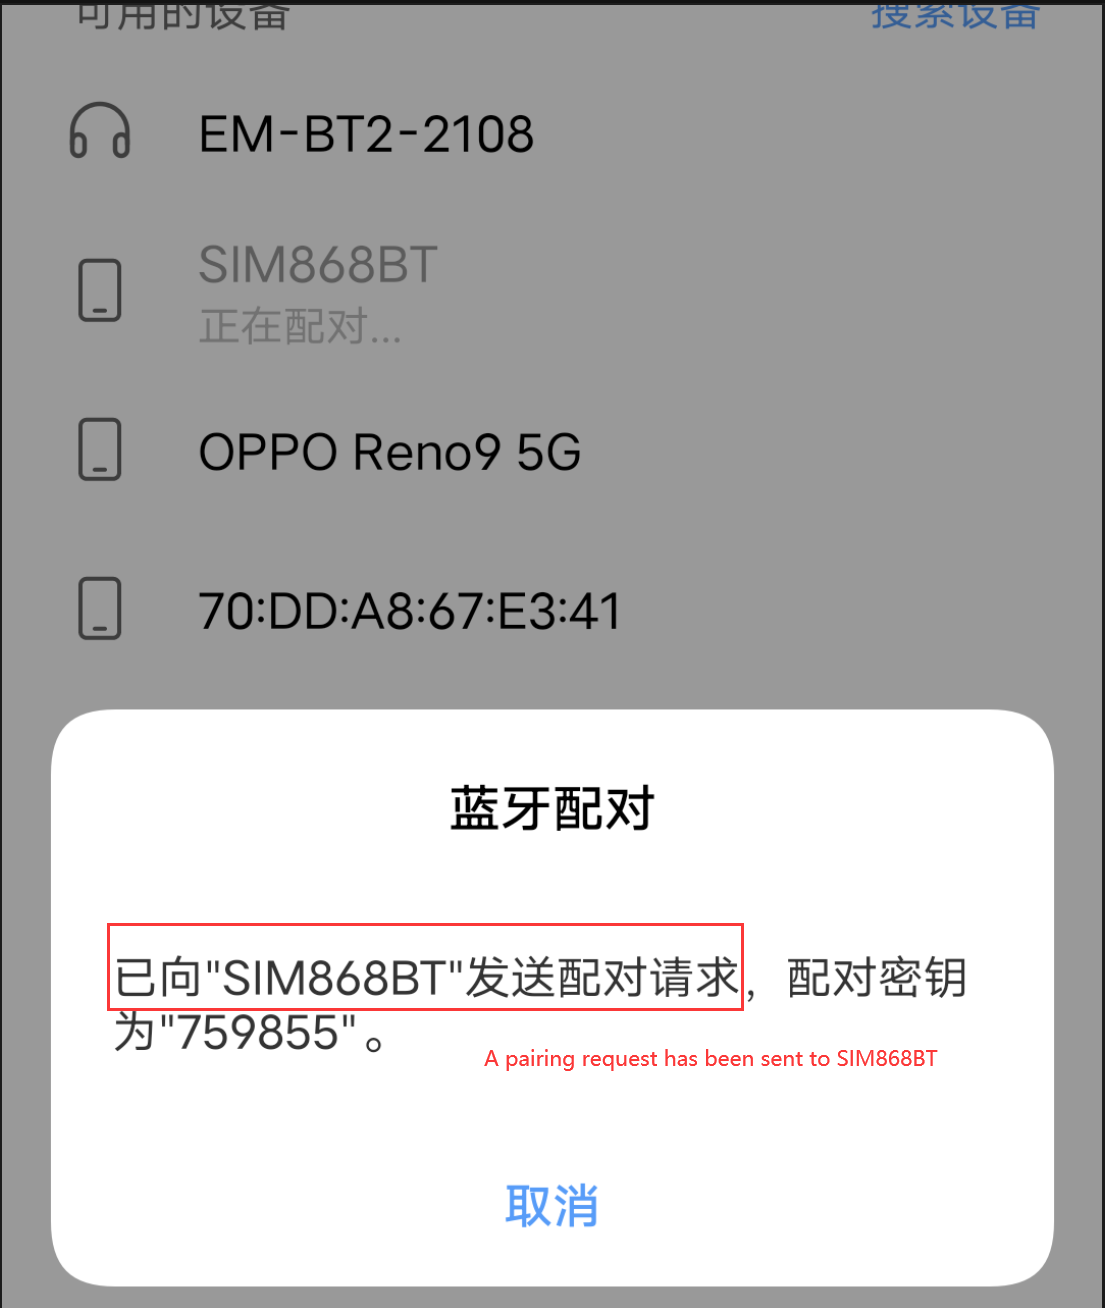
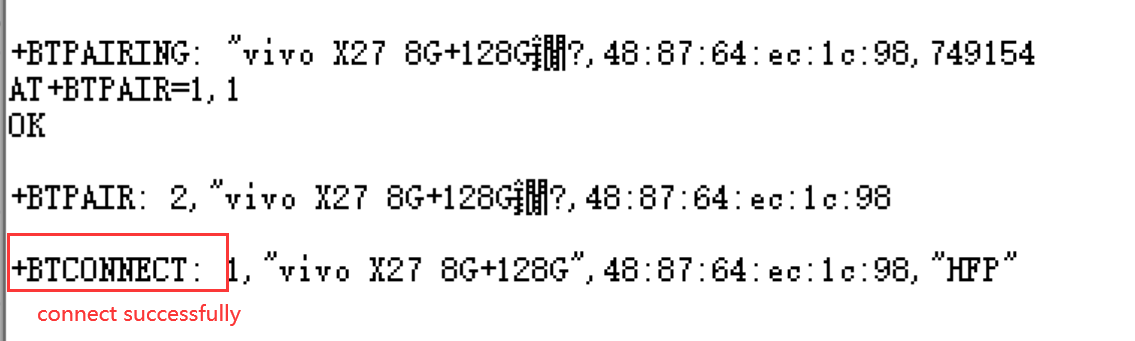
- open the serial monitor and enter the following command.
AT+BTPAIR=1,1 // Confirm pairing
-
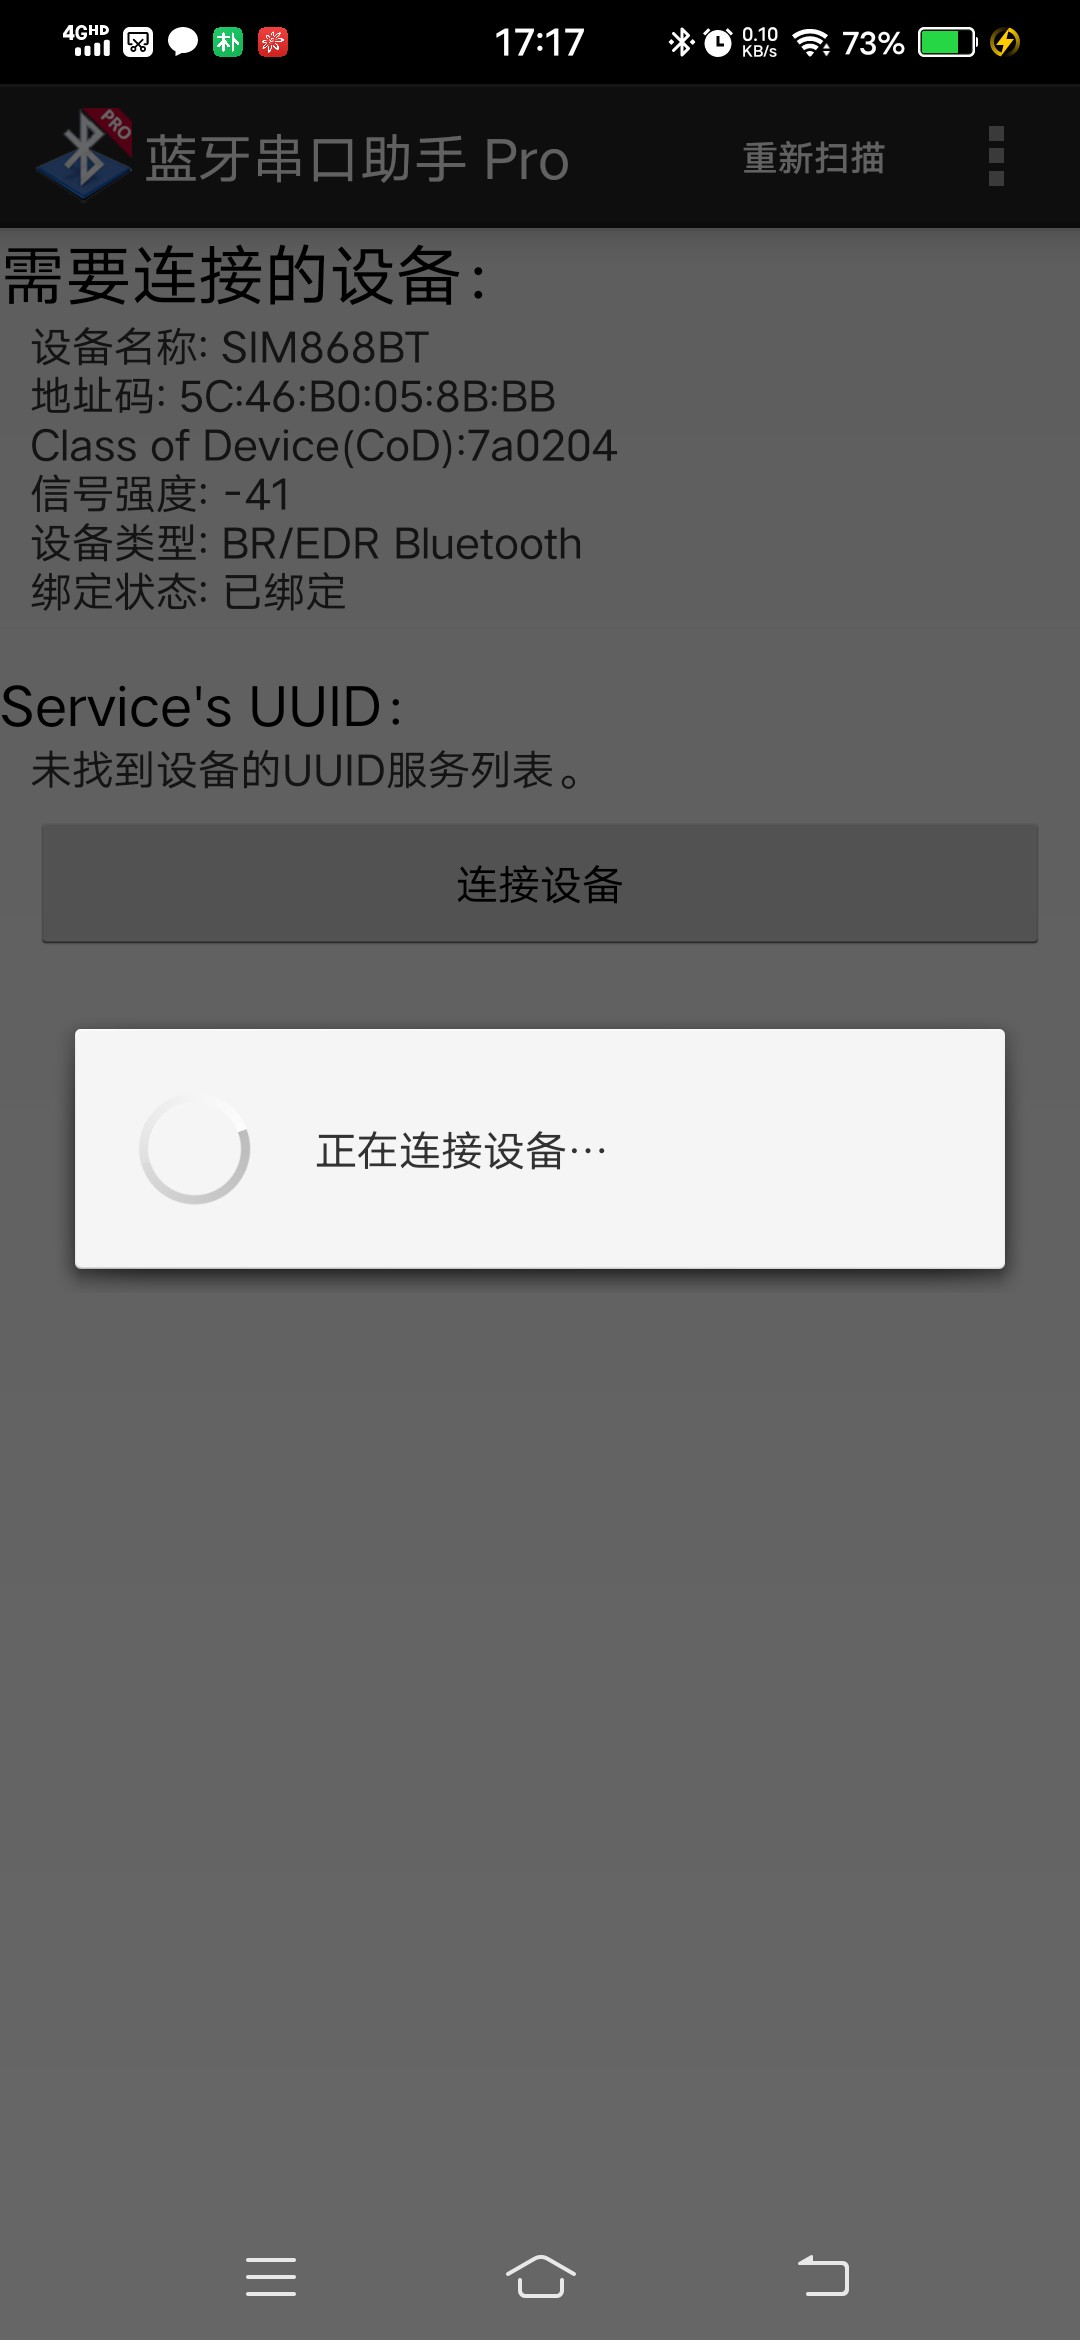
Install the Bluetooth debugging assistant APK in the mobile phone and open into it. Choose the Blue tooth that the name and address are correct, click Connecting device.
-
open the serial monitor and enter the following command.
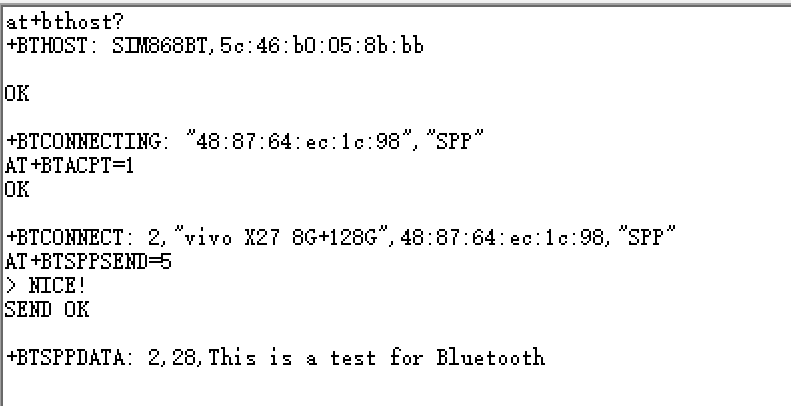
AT+BTACPT=1 //Confirm Bluetooth SPP connection
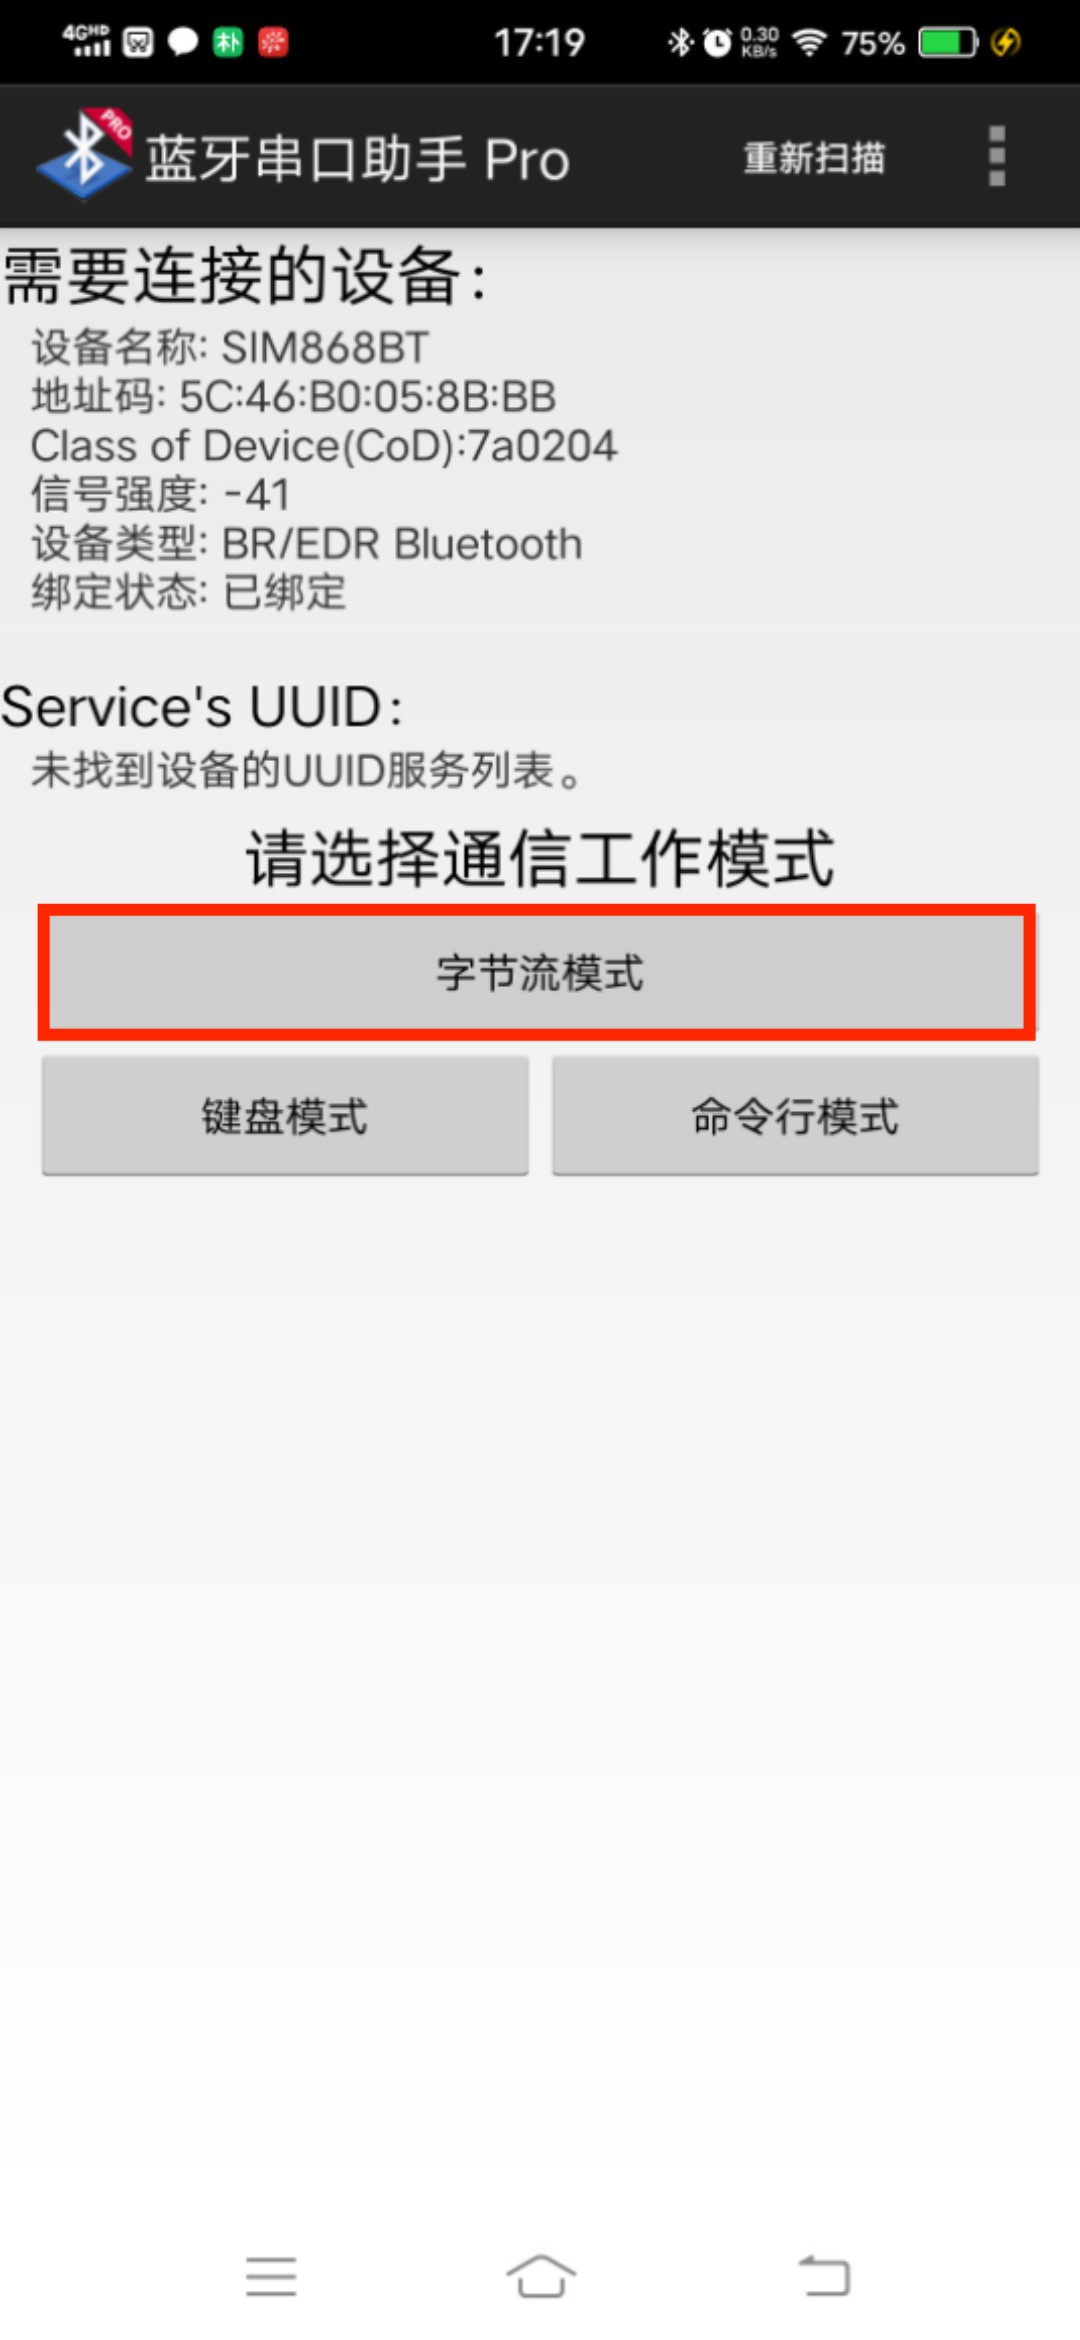
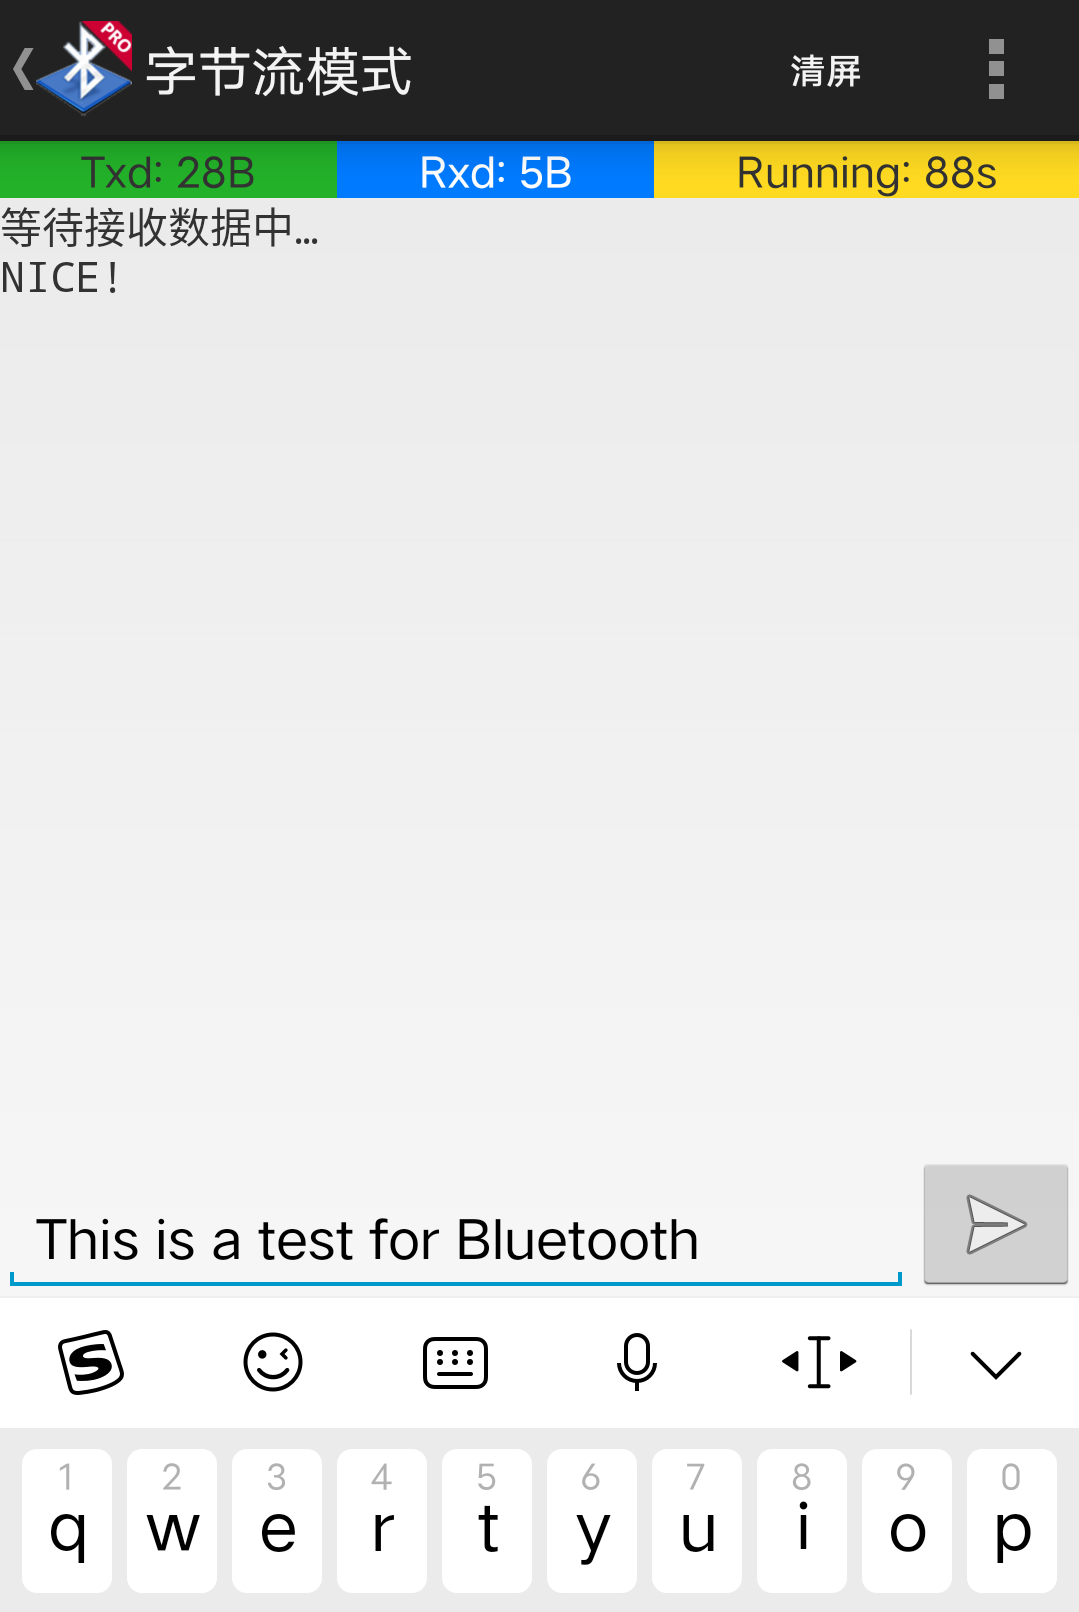
- Choose the Byte stream mode.
-
Serial port sends the command of “AT+BTSPPSEND=5”, when we see the “<” in the serial port, we can send "NICE!",and you can see you phone receives "NICE!".
-
The phone input the “This is a test for Bluetooth” and then click “sent”,and you can see serial receives "This is a test for Bluetooth"
For more AT commands details please check SIM800 Series_AT Command Manual_V1.10
6. FAQ
You can list your question here or contact techsupport@makerfabs.com for technology support. Detailed descriptions of your question will be helped to solve your question.
7. Resources
Maduino Zero SIM808 GPS Tracker
SIM800 Series_AT Command Manual_V1.10