Industrial-grade Soil Remote Monitor V2(Humidity/ Temperature/ PH)
1. Introduction
According to recent reports, between 70% and 80% of agricultural greenhouse-gas emissions, such as Nitrous oxide, come from the production and use of nitrogen fertilizers. Farmers need real-time visibility into soil conditions while working in their fields. During growing season, manual soil tests fail to provide the data growers need and this can cause farmers to either over fertilize or under fertilize, harming profits and/or the environment.
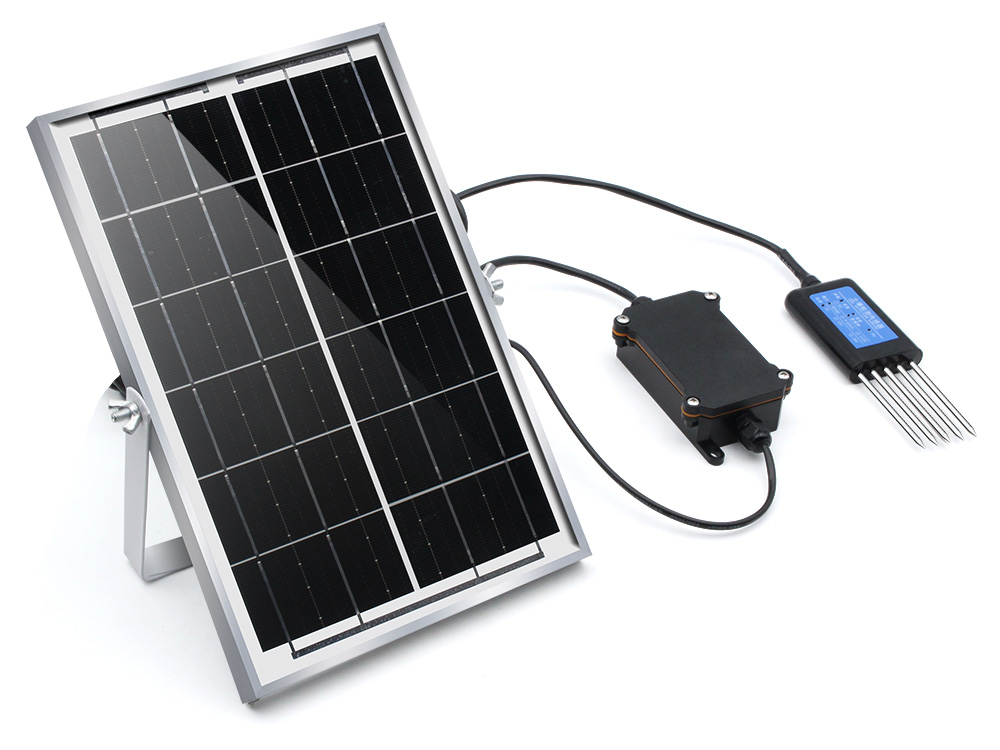
Industrial-grade Soil Remote Monitor V2(Humidity/ Temperature/ PH), which is a wireless remote control soil sensor powered by solar panel, implements LoRa technology in its wireless sensor to allow farmers to monitor conditions such as rainfall, soil moisture and temperature remotely. They can view the data on their cellphones or computer monitors.
Model:MAIGSV2
2. Feature
- ESP32-S3 WROOM module onboard with the WiFi and Bluetooth
- Arduino Compatible: You can play it with Arduino IDE
- Onboard LoRa module (433Mhz or 868Mhz or 915Mhz)
- completely sealed.Dustproof waterproof level:IP68
- Measuring range: -40℃~80℃,0~100% moisture
- Measuring accuracy: ±0.5℃,±3% moisture
- Communication distance: 1.5km or more
- Power by Battery
- 1000mAh battery, charger IC onboard
- PH2.0-2P Battery Connector
3. How can LoRa be useful in your home automation projects
With a quick introduction to LoRa, you will get a better understanding of how Industrial-grade Soil Remote Monitor V2 transfer data remotely. After that, you can easily install our devices to monitor soil conditions.
3.1 What is LoRa?
LoRa is a wireless data communication technology that uses a radio modulation technique that can be generated by LoRa chips. This modulation technique allows long distance communication with low power requirements.
Besides, LoRa uses unlicensed frequencies that are available worldwide. These are the most widely used frequencies:
- 868 MHz for Europe
- 915 MHz for North America
- 433 MHz band for Asia
The features of LoRa such as long distance and low power features, makes it perfect for battery-operated sensors and low-power application in:
- Internet of Things(IoT)
- Machine-to-machine communication
- Smart furniture
- And more...
So, when dealing with sensor nodes running on a coil cell or solar powered, which transmit small amounts of data, LoRa is a good choice.
You can use LoRa in Point-to-point communication or building a LoRa network (using LoRaWAN for example). For example, it is useful to exchange data between two ESP32 boards equipped with LoRa transceiver chips that are relatively far from each other or in environments without WiFi coverage.
3.2 The application of ESP32 with Lora
Imagine that you want to measure the soil moisture in your field. Although it might not be far away from your home, it probably doesn't have Wi-Fi coverage. So, you can build a sensor node with an ESP32 and a soil moisture sensor, that sends the moisture readings once an hour to another ESP32 using LoRa.
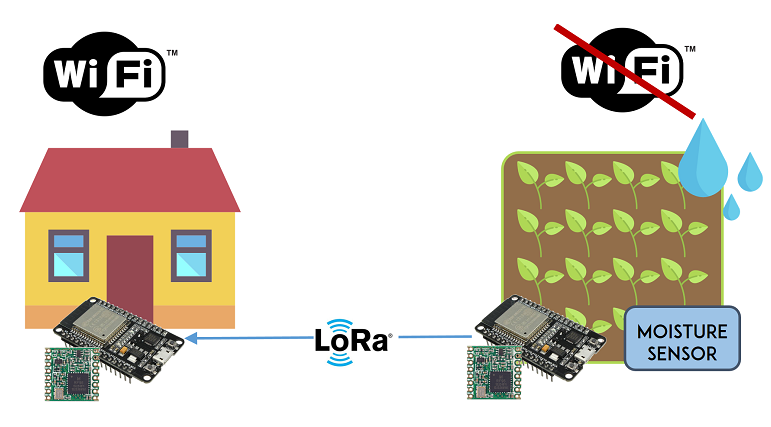
The later ESP32 has access to Wi-Fi, and it run a web server that displays the moisture readings.
This is just an example that illustrates how you can use LoRa in your automation home projects. You can build on all kinds of sensors in your project such as temperature or PH. Industrial-grade Soil Remote Monitor V2 has built-in sensors --- soil temperature, moisture and PH sensors, which enables you to collect comprehensive data of your soil using LoRa.
4. Operation instruction
In this section, we will show you how to use the Industrial-grade Soil Remote Monitor V2 to successfully monitor the soil environment and display the data on the screen or the web.
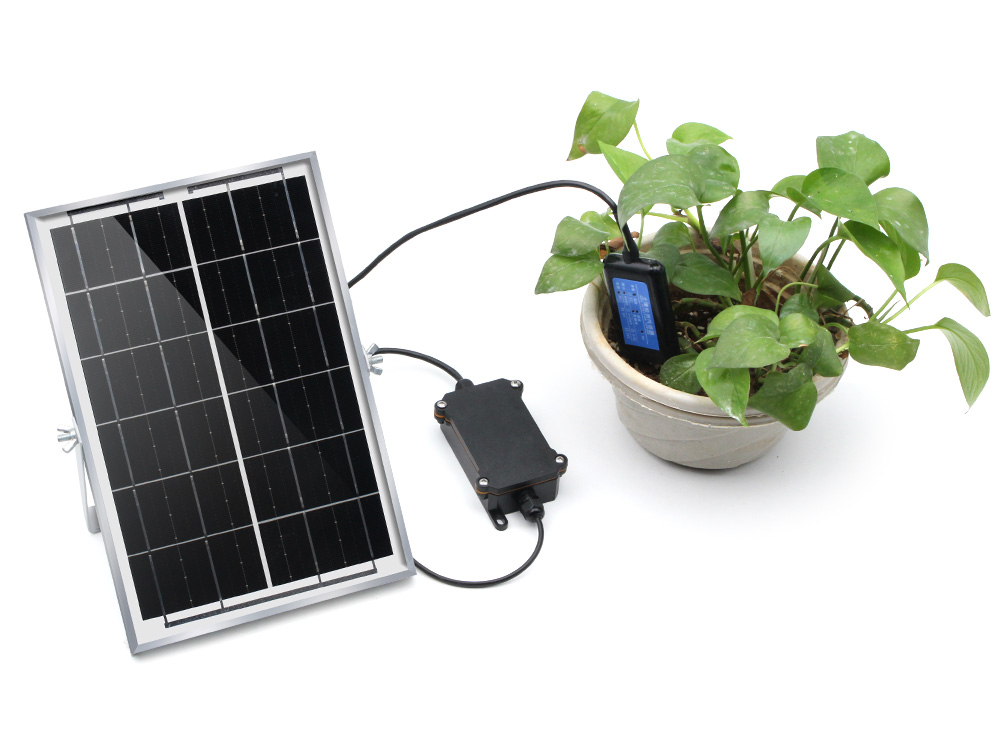
Deploy the soil sensor. Make sure the probe should be buried completely into the soil.
Open the case of Remote Monitor Station. Turn the power supply to On and immediately press the WIFI button in 3 seconds. Pressing the WIFI button can open the WiFi module of the Remote Monitor Station, by which you can use the web to set the configuration of Remote Monitor yourself.
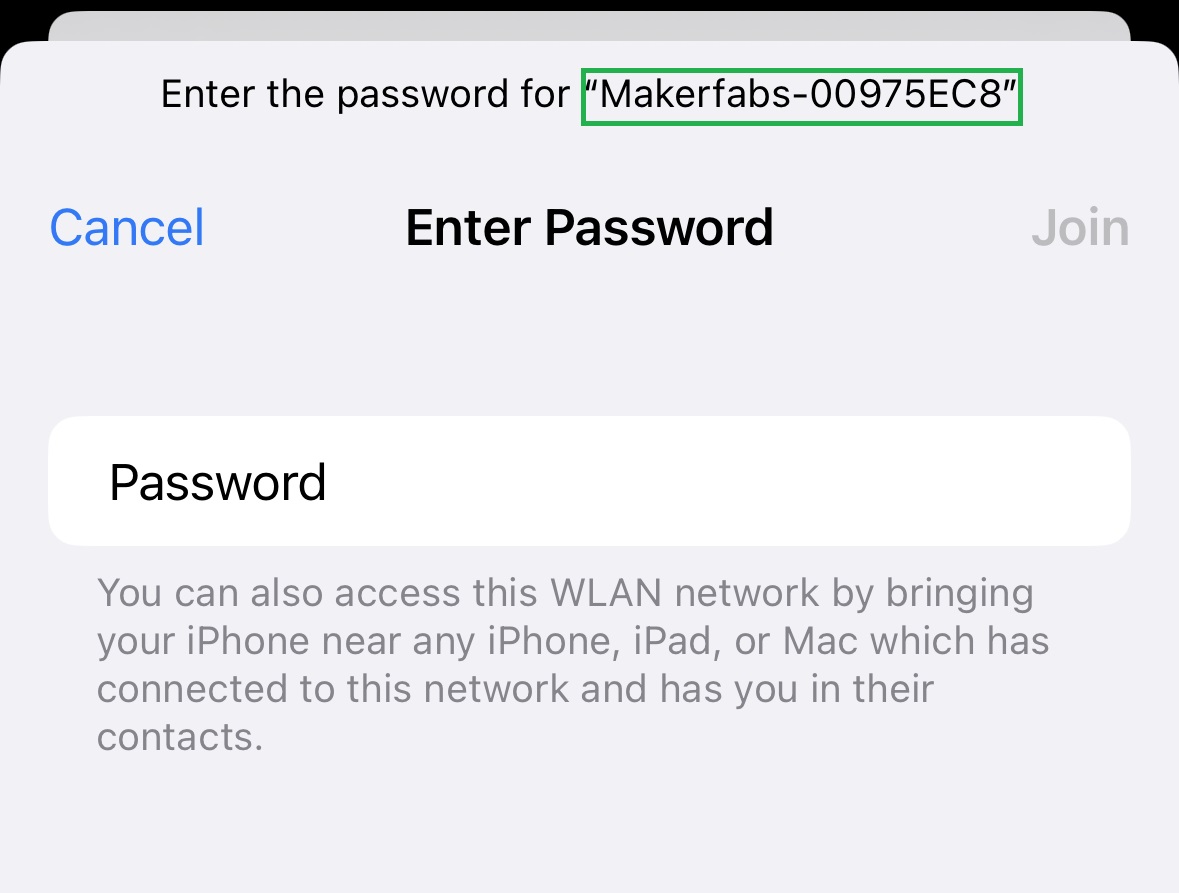
If the WiFi opens successfully, you will find a WiFi named "Markerfabs-xxxxxxxx". The "xxxxxxxx" refers to sensor ID. If not, redo the previous step or press the WiFi button while press the RST button.
Connect to the WiFi you find and the default password is 12345678.
Open the Browse and enter the URL 192.168.4.1. You can name your own Sensor ID and Interval Time. The Interval Time refers to the interval time of data transmission and its unit is second.
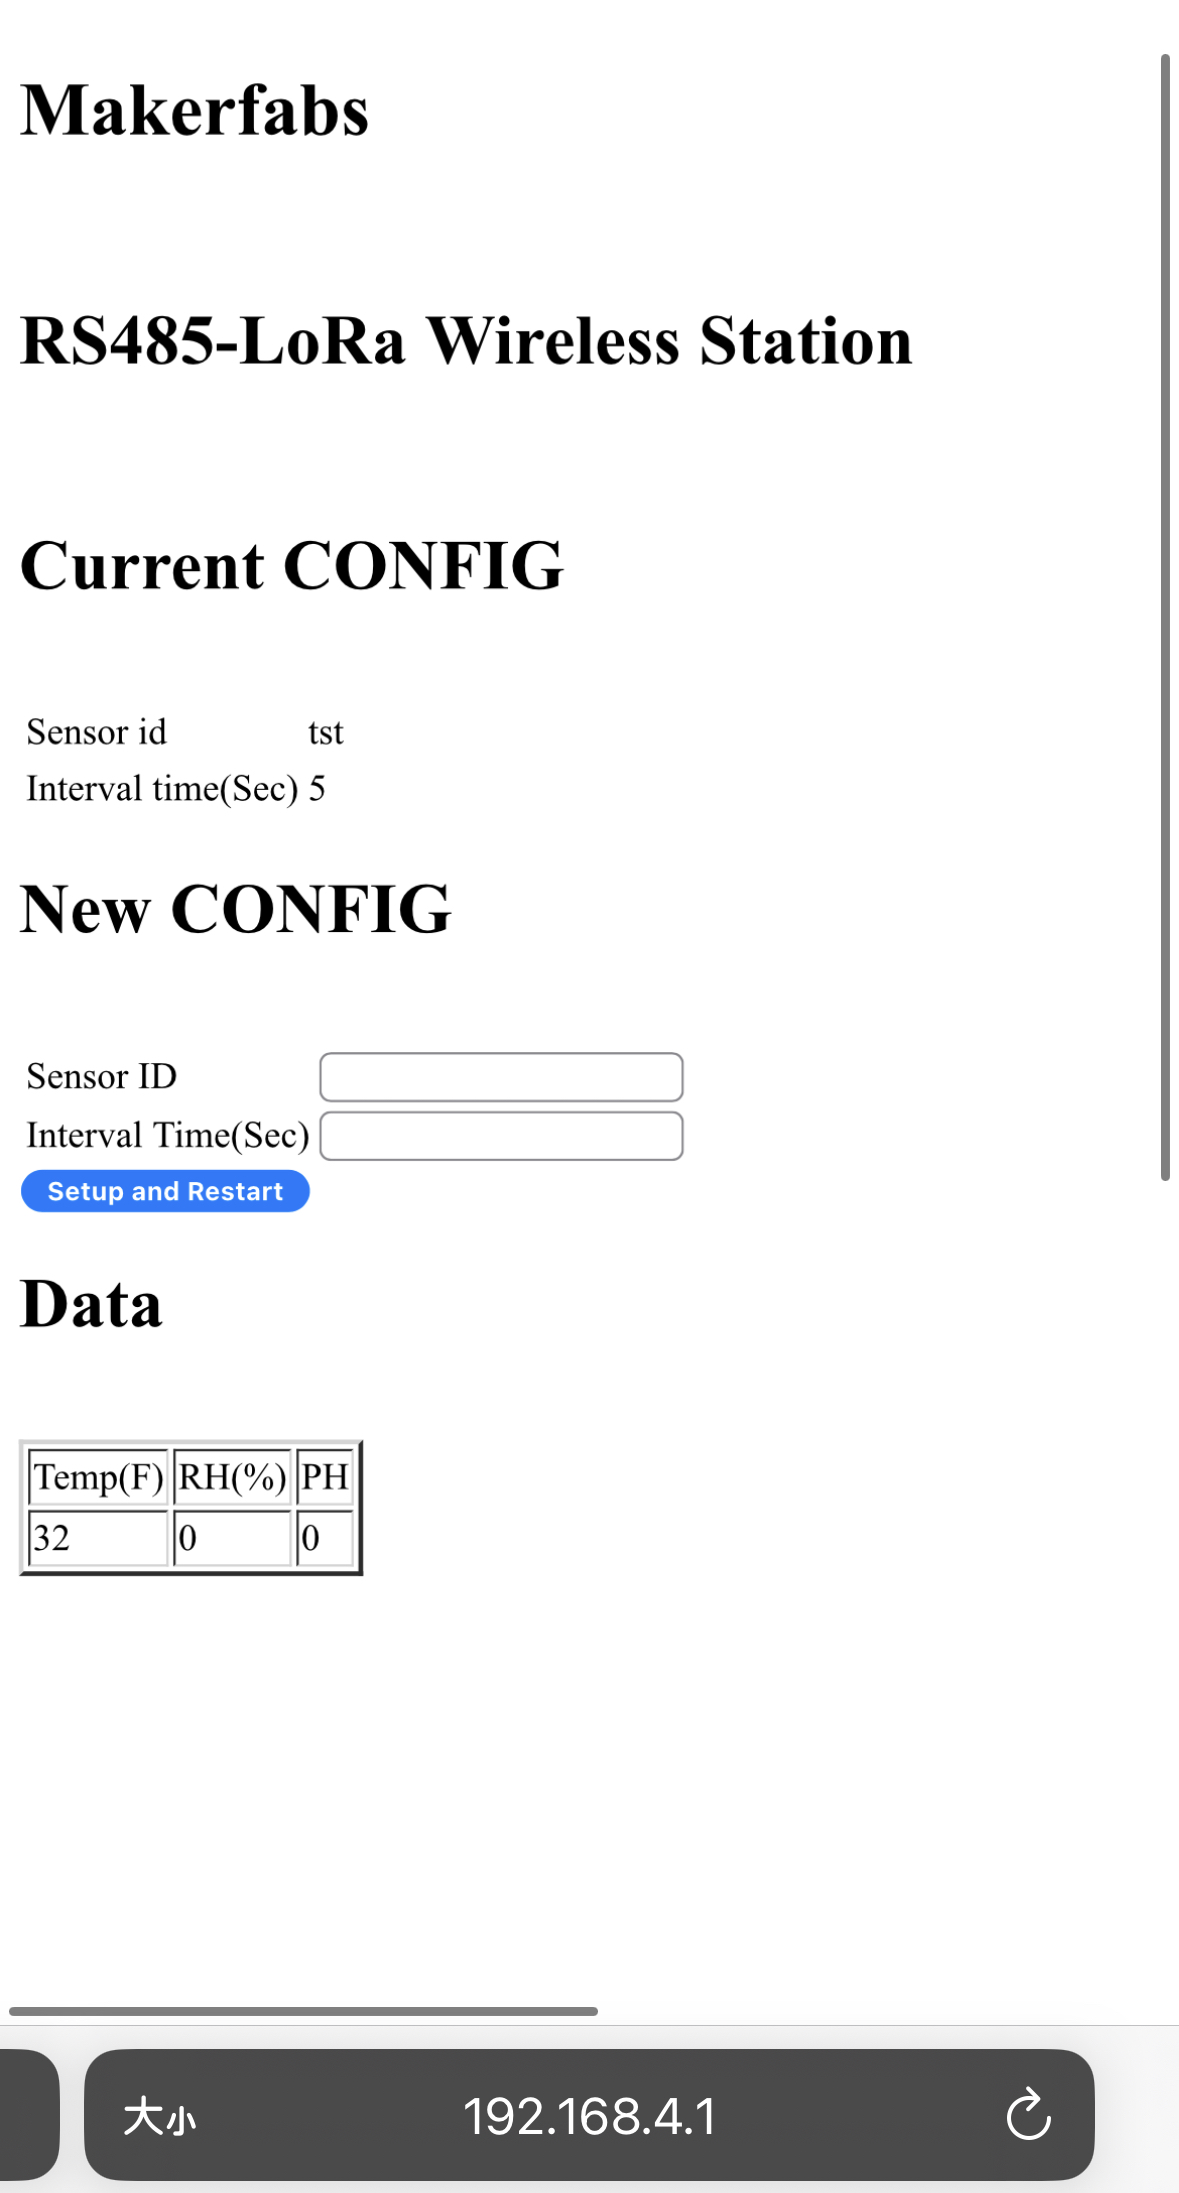
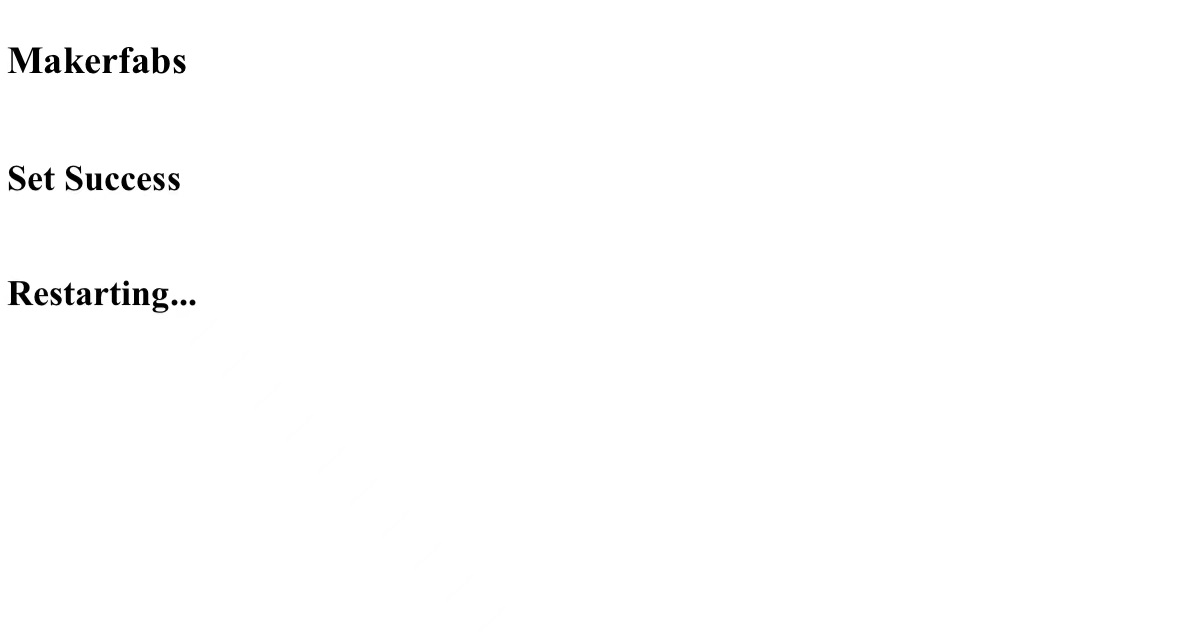
Select Setup and Restart after you set up your own Sensor ID and Interval Time. If the browse turns into the following website, congratulations, you have deployed your Remote Sensor Monitor successfully. Now you Remote Sensor Monitor is sending the soil condition based on your interval time.
Now, it's time for you to set up the LoRa Receiver.
Use the USB Type-C wire to power the LoRa Receiver up. Make sure the power is lower than 5V.
We provide two working status for the LoRa Receiver. The LCD screen on the board can still display the soil environment condition without WiFi connection. However, if you want to monitor the data through the website, you need to write your WiFi SSID and password in the sketch we provide and burn it to the board. Follow the step in the section and your LoRa Receiver will successfully connect to WiFi.
Once the WiFi connection succeed, the LCD screen will display like this.
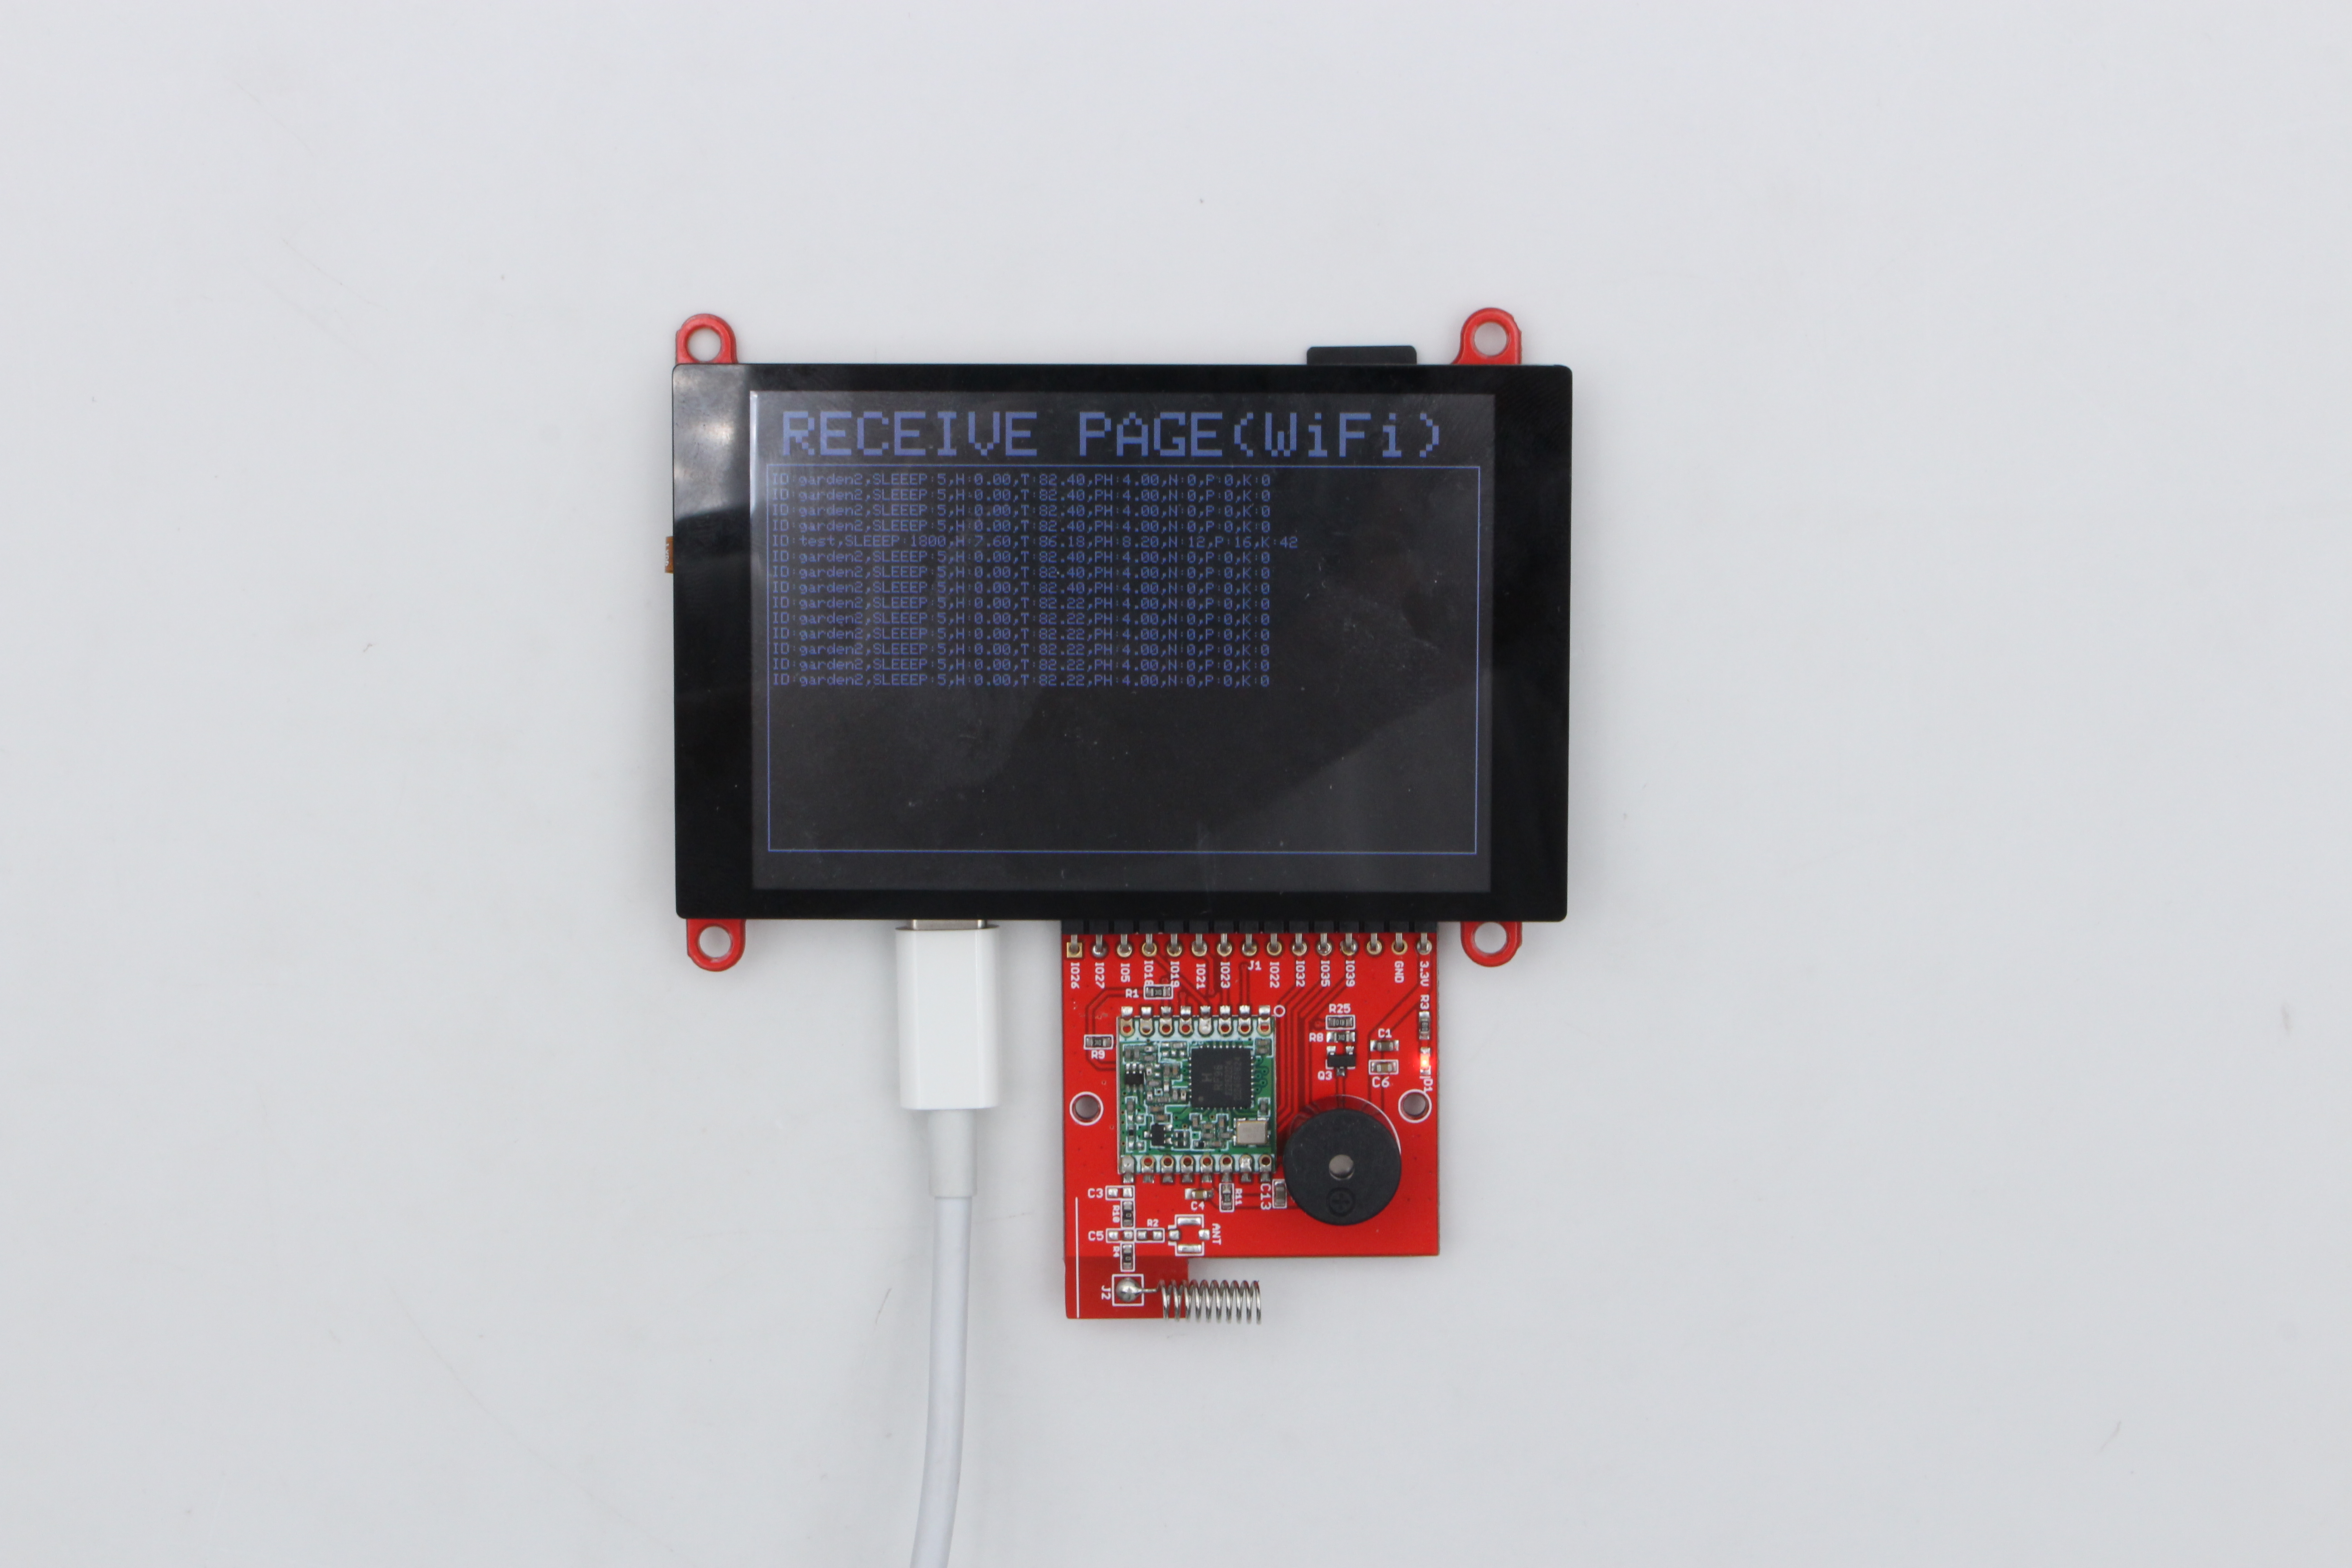
This picture is a example when your LoRa Receiver is connected to WiFi successfully. If your LoRa Receiver fails to connect to WiFi, the title will be display as "RECEIVE PAGE". Both of these two status can display soil environment conditions.
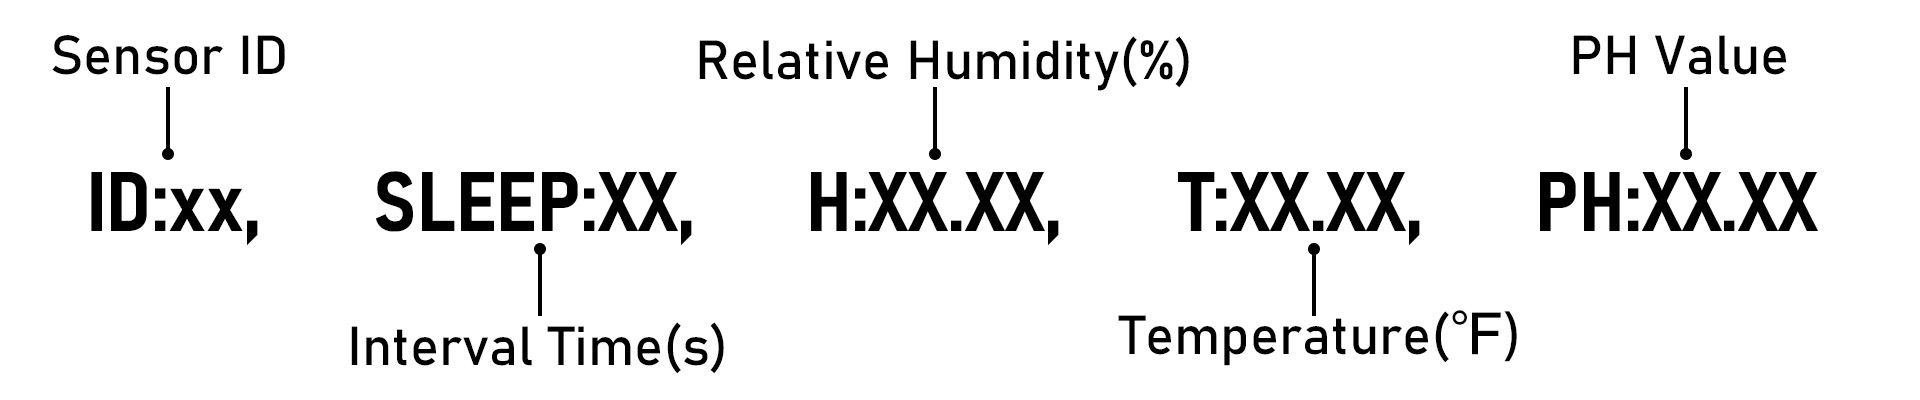
ID is sensor ID set up by you on the previous step. Sleep refers to interval time. H refers to the relative Humidity, and its unit is %. T refers to temperature, and its unit degree Fahrenheit. PH refers to PH value.
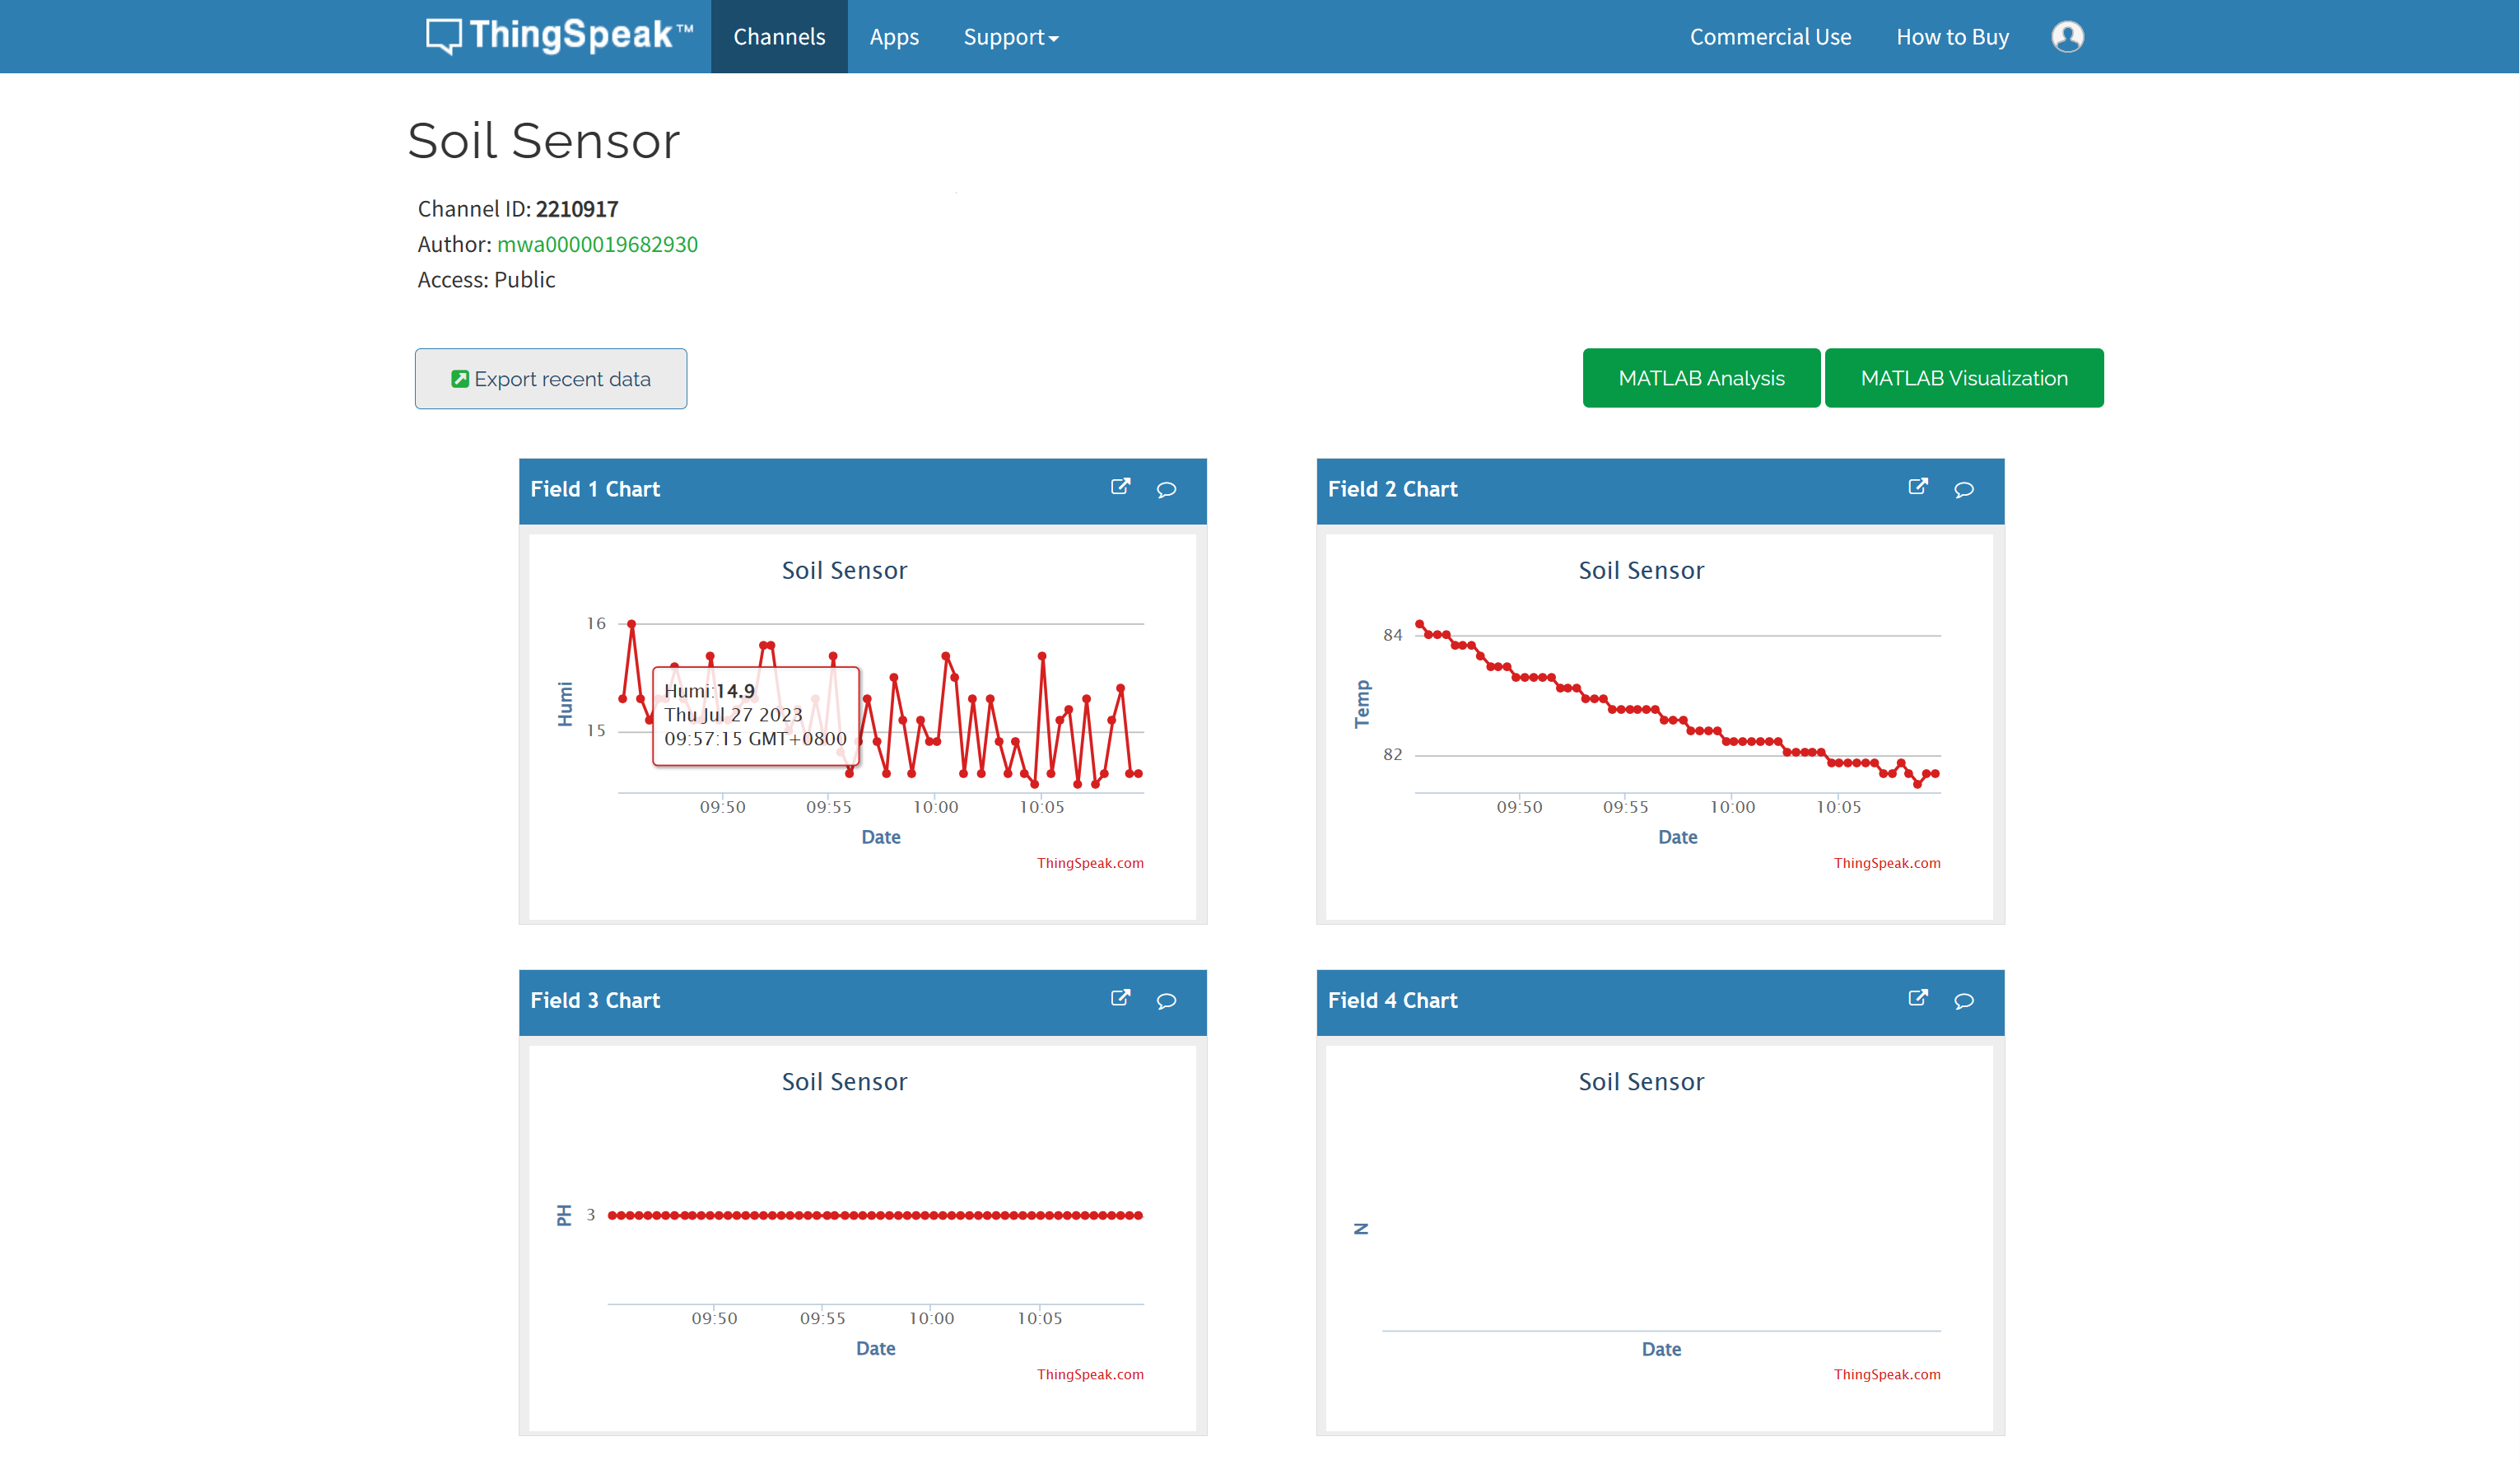
Open the browse and enter the URL https://thingspeak.com/channels/2210917. The data will be displayed in the screen by time.
5. Started with Industrial-grade Soil Remote Monitor V2
In this section, we will show you how to get started with Industrial-grade Soil Remote Monitor using Arduino IDE. We will show you how to set configuration for the LoRa Sender and the LoRa Receiver of the Industrial-grade Soil Remote Monitor. The soil sensor collects the environment condition data and send it through the LoRa Sender, which will be received by LoRa Receiver ultimately. The LoRa Receiver is build on ESP32 board with LCD screen that can display the data correctly. Besides, we provide a web for you to monitor the data by time when the LoRa receiver is connected to WiFi.
To follow this part, you need the following components:
- Remote Monitor Station with the case
- Soil Sensor
- Solar panel
- LoRa Receiver build on ESP32 board
5.1 Preparing the Arduino IDE
Arduino IDE allows you to program the ESP32 using its programming language. Follow the tuition online to prepare your Arduino IDE to work with the ESP32, if you haven't already.
5.1.1 Installing the relevant library
There are several libraries available to set up for the LoRa system.
Open your Arduino IDE, and go to Sketch>Include Library>Manage Libraries and search for the following library:
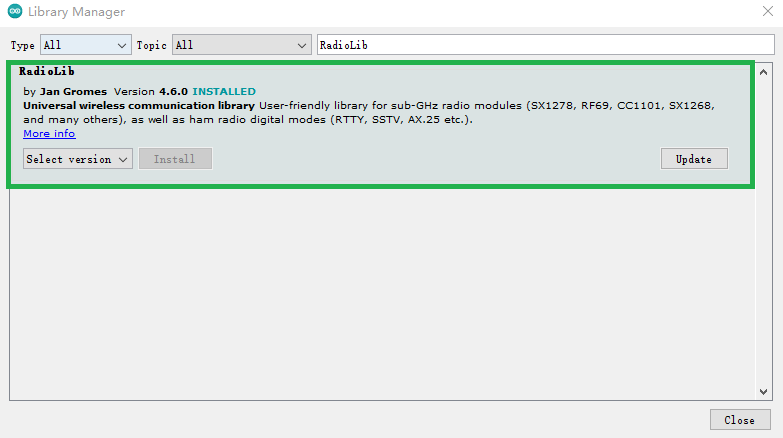
- RadioLib (Version: 4.6.0)
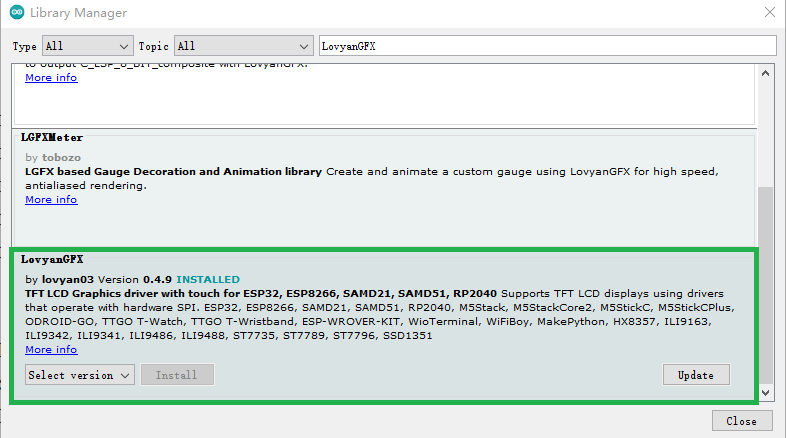
- LovyanGFX (Version: 0.4.8)
It is recommended to download the RadioLib library of version 4.6.0 because RadioLib library version newer than 5.0 is required to add "RADIOLIB_" before macro definitions.
It is recommended to download the LovyanGFX library of version 0.4.8 because the LovyanGFX version older than 1.0 do not support SD card anymore. If you download the wrong version of LovyanGFX library, it might cause the board auto reboot problem.
5.1.2 Installing the Arduino board
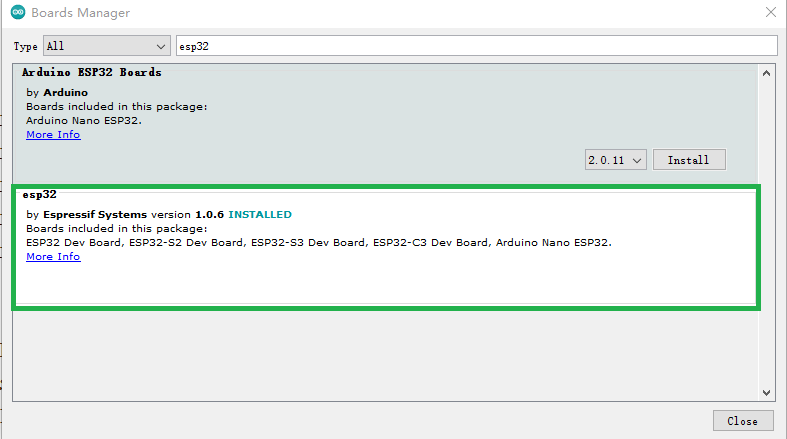
To ensure the sucessful running of our environment, we recommend you to install the same version. Please install the ESP32 boards supporting V1.0.6.
Open your Arduino IDE. And go to Tools>Board>Board Manager and search for the ESP32. Select the ESP32 version of 1.0.6 and install.
5.2 Burn sketches to the Arduino board
We have prepared the Sketchs for you to burn them to the Arduino board. Go to Github of Industrial-grade Soil Remote Monitor V2 and download the zip file.
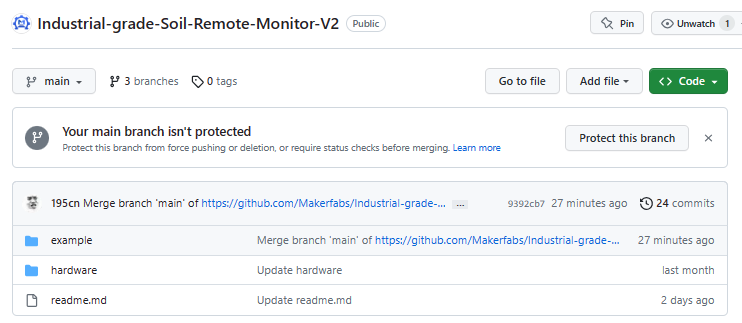
Unzip the file you download and we have write 2 sketches in the example file. example file consists the following 2 files: - esp32_lora_485 for Remote Monitor Station - tft_receiver for LoRa Receiver
5.2.1 Remote Monitor Station
The Remote Monitor Station you received has been burned with the sketch. However, if you want to burn the sketch to the board, buy the USB to Serial Converter and connect the board to the computer using the USB to Serial Converter.
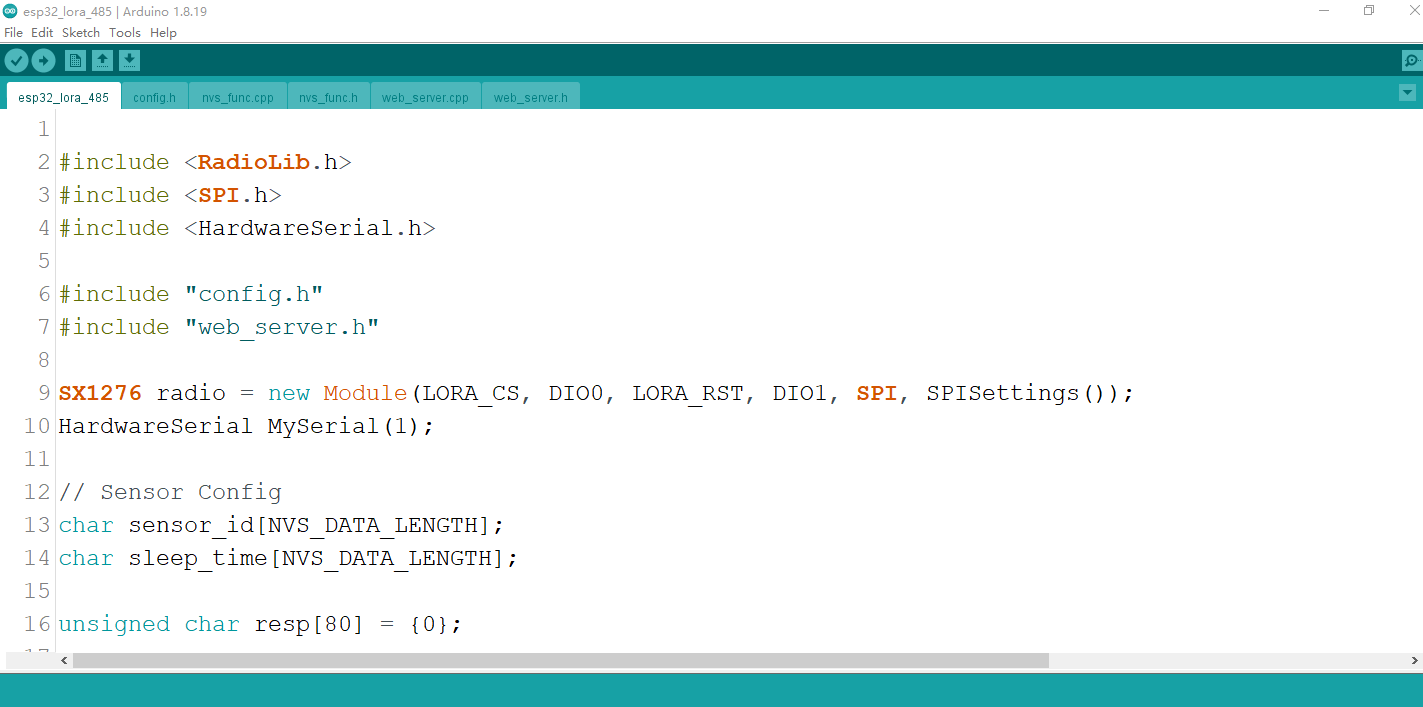
Open examples>esp32_lora_485>esp32_lora_485.ino.
Select the development board “ESP32 Dev Module" and the port.
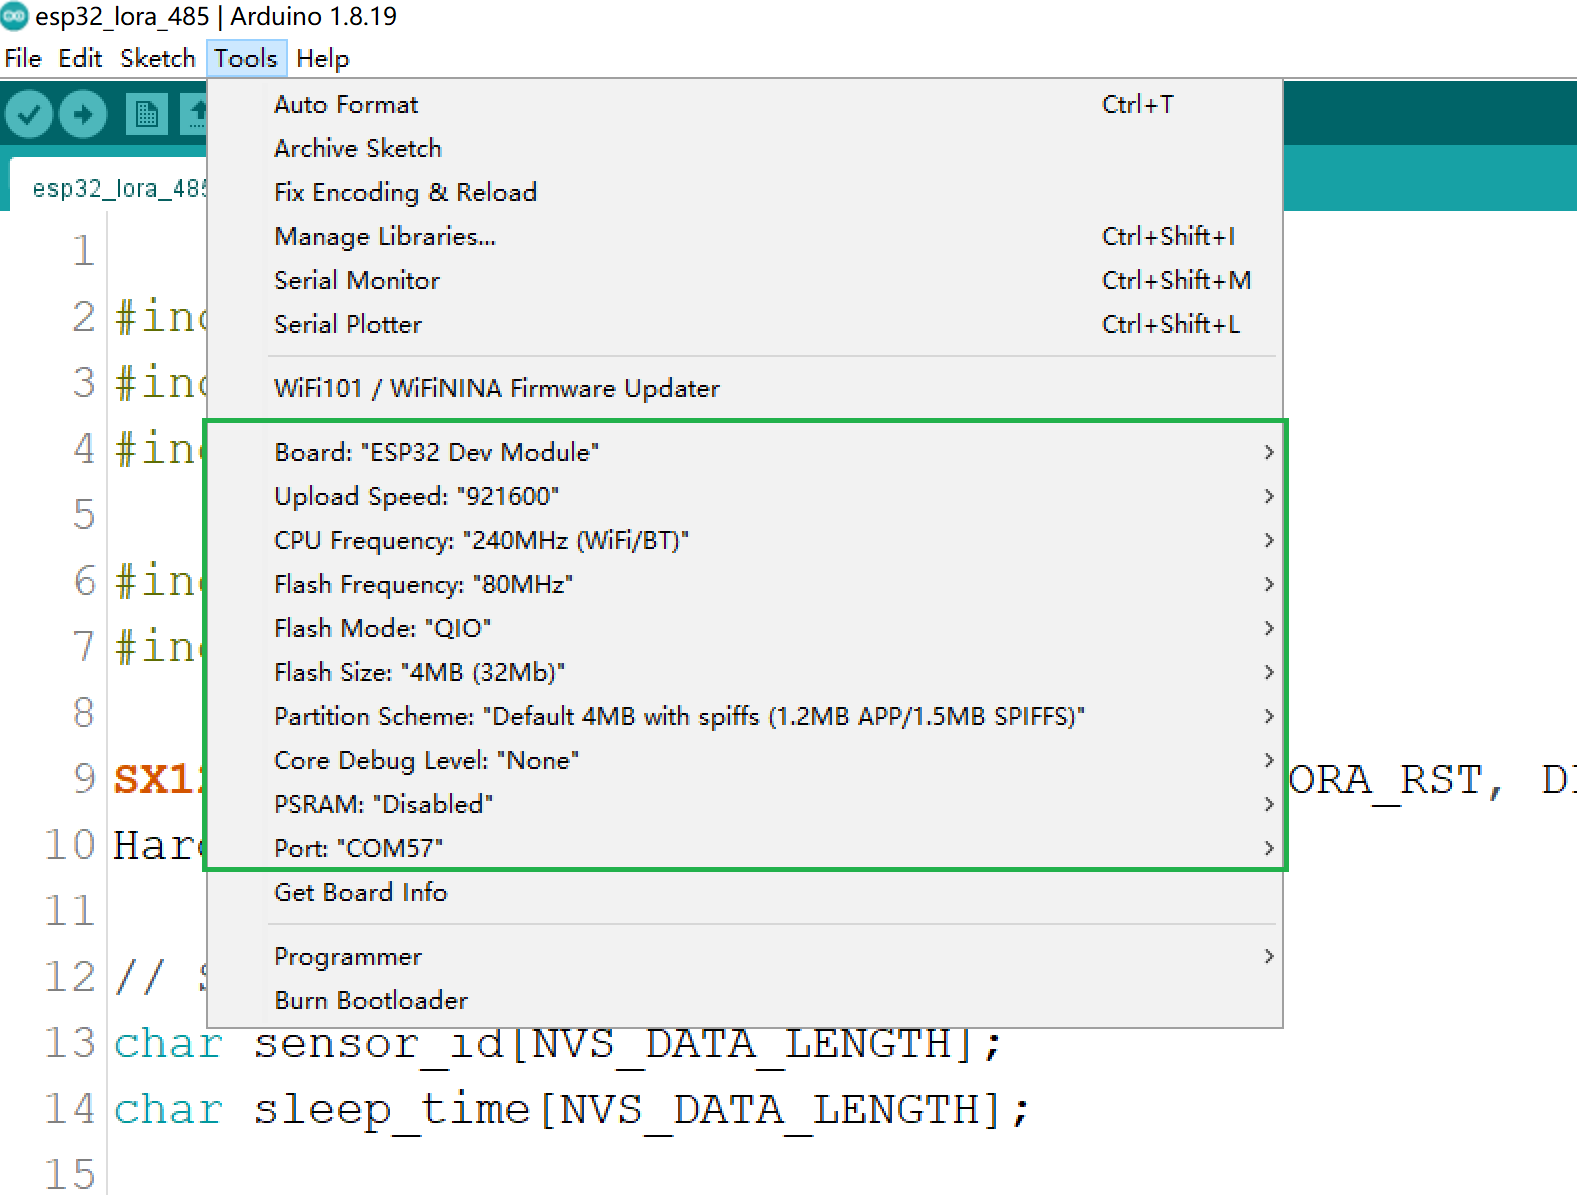
Upload the sketch to the board.
5.2.2 LoRa Receiver
Open examples>tft_receiver> tft_receiver.ino.
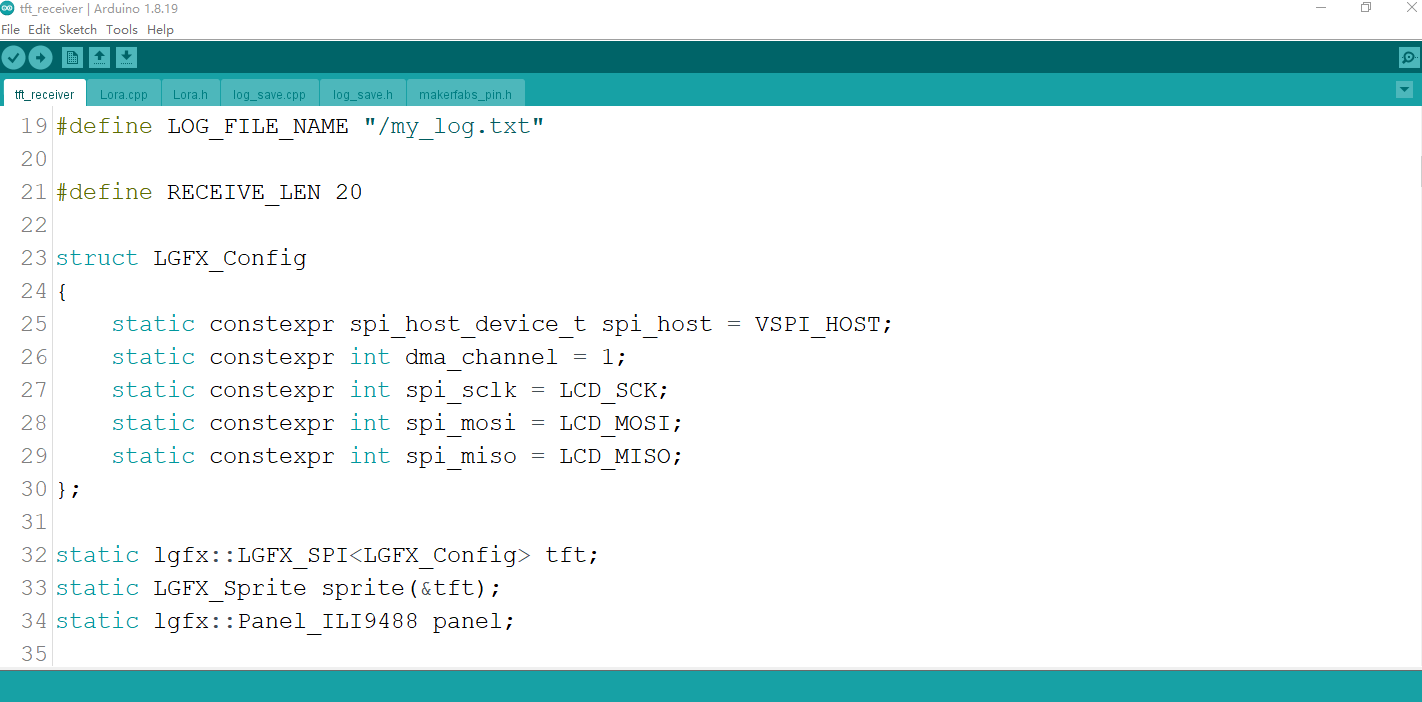
Change the WiFi SSID and password to your household WiFi. The board will connect to your household WiFi automatically, through which you can check out the environment condition through the website.
#define SSID "Enter your WiFi ID"
#define PASSWORD "Enter your WiFi password"
Select the development board “ESP32 Dev Module" and the port. The setting is the same as Remote Monitor Station.
Upload the sketch to the board.
6. Usage with 4G Gateway
7. FAQ
You can list your question here or contact techsupport@makerfabs.com for technology support. Detailed descriptions of your question will be helped to solve your question.