MaESP ESP32-C3 OLED
1. Introduction
MaESP ESP32-C3 OLED is a development board for IoT applications. Base on esp32-C3, which is open-source RISC-V architecture. The development board can act as a WIFI node easily, at the same time it can use Bluetooth to communicate. OLED displays have some advantages of being lightweight and working well under low-temperature environment, and it also saves energy, which can work for a long-time. It can still display normally at -40℃, but LCD can't do.
Model: MAESPC3OL
2. Features
- Integrated ESP32-C3 with 2.4 GHz WiFi and Bluetooth5 (LE)
- UltraLowPower SoC with RISCV SingleCore CPU
- Simultaneous support for Infrastructure BSS in Station mode, SoftAP mode, Station + SoftAP mode, and promiscuous mode
- Wi-Fi Protocols: 802.11b/g/n(802.11n up to 150Mbps),A-MPDU and A-MSDU aggregation and 0.4us guard interval support
- Bluetooth Have High power mode(18dBm) and different speed to choose(125 Kbps, 500 Kbps, 1 Mbps, 2 Mbps)
- 22 or 16 programmable GPIOs and 3 x SPI, 2 x UART, 1 x 12C, 1 x I2S
- LED PWM controller, with up to 6 channels, Full-speed USB Serial/JTAG controller, General DMA controller (GDMA), with 3 transmit channels and 3 receive channels
- Flash encryption, 4096-bit OTP, up to 1792 bits for use, Cryptographic hardware acceleration: AES-128/256 (FIPS PUB 197)
- 2 x 12-bit SAR ADCs, up to 6 channels, 1 x temperature sensor, 2 x 54-bit general-purpose timers, 3 x watchdog timers, 1 x 52-bit system timer.
- Power supply: 5V, Type-C USB
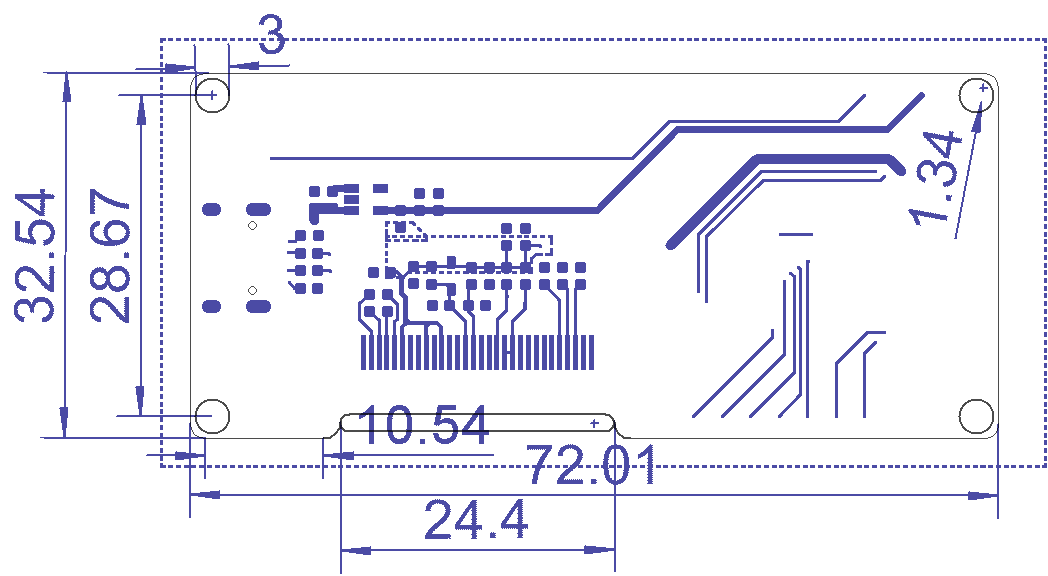
- Board size: 32.5mm * 72mm
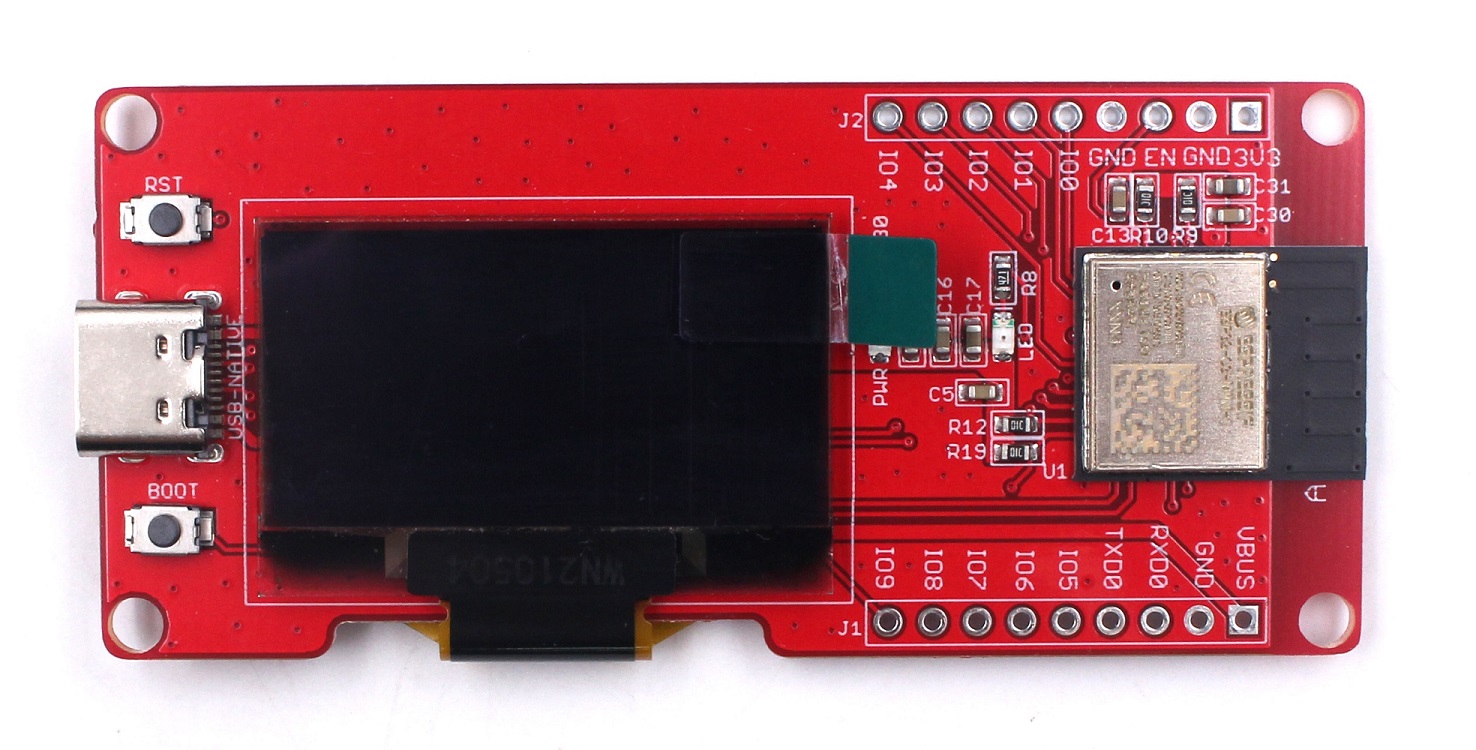
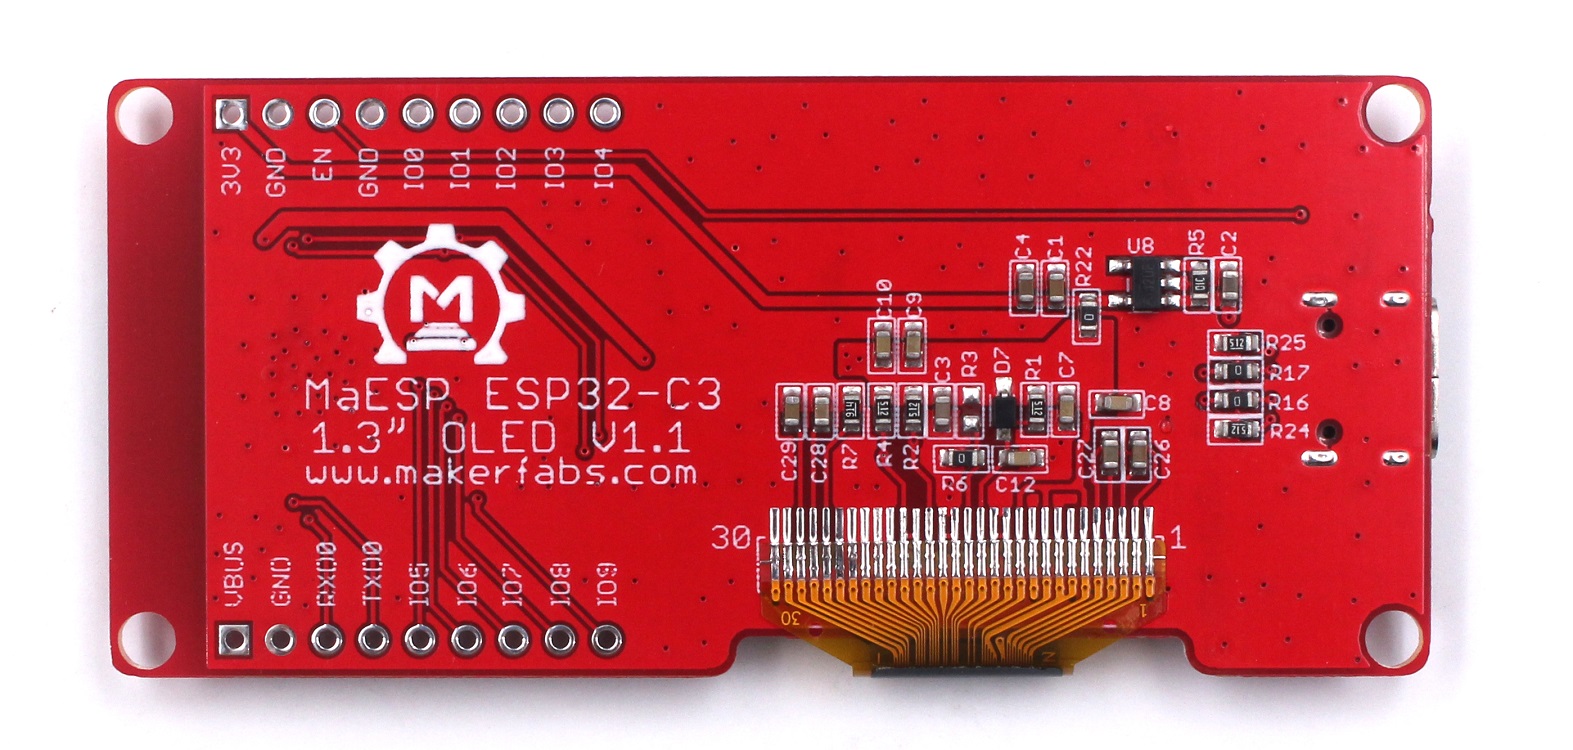
3. Diagram
Usage
ESP32-C3 combines with OLED, which will be a good experience by using it. Let's take a look at what projects we have.
3.1 Arduino IDE preparations
To ensure the running environment, the same version is recommended.
All the projects are based on MaESP32 C3 OLED development board.
1.Install the Arduino IDE V1.8.19.
2.Install the ESP32-C3 boards supporting package V2.0.5
- After an Arduino IDE is installed, there is no package to support ESP32-C3, we need to install the ESP32 package in Arduino IDE to continue.
- Select “File>Preferences>settings>Additional Boards Manager URLs” to fill the link: https://raw.githubusercontent.com/espressif/arduino-esp32/gh-pages/package_esp32_dev_index.json
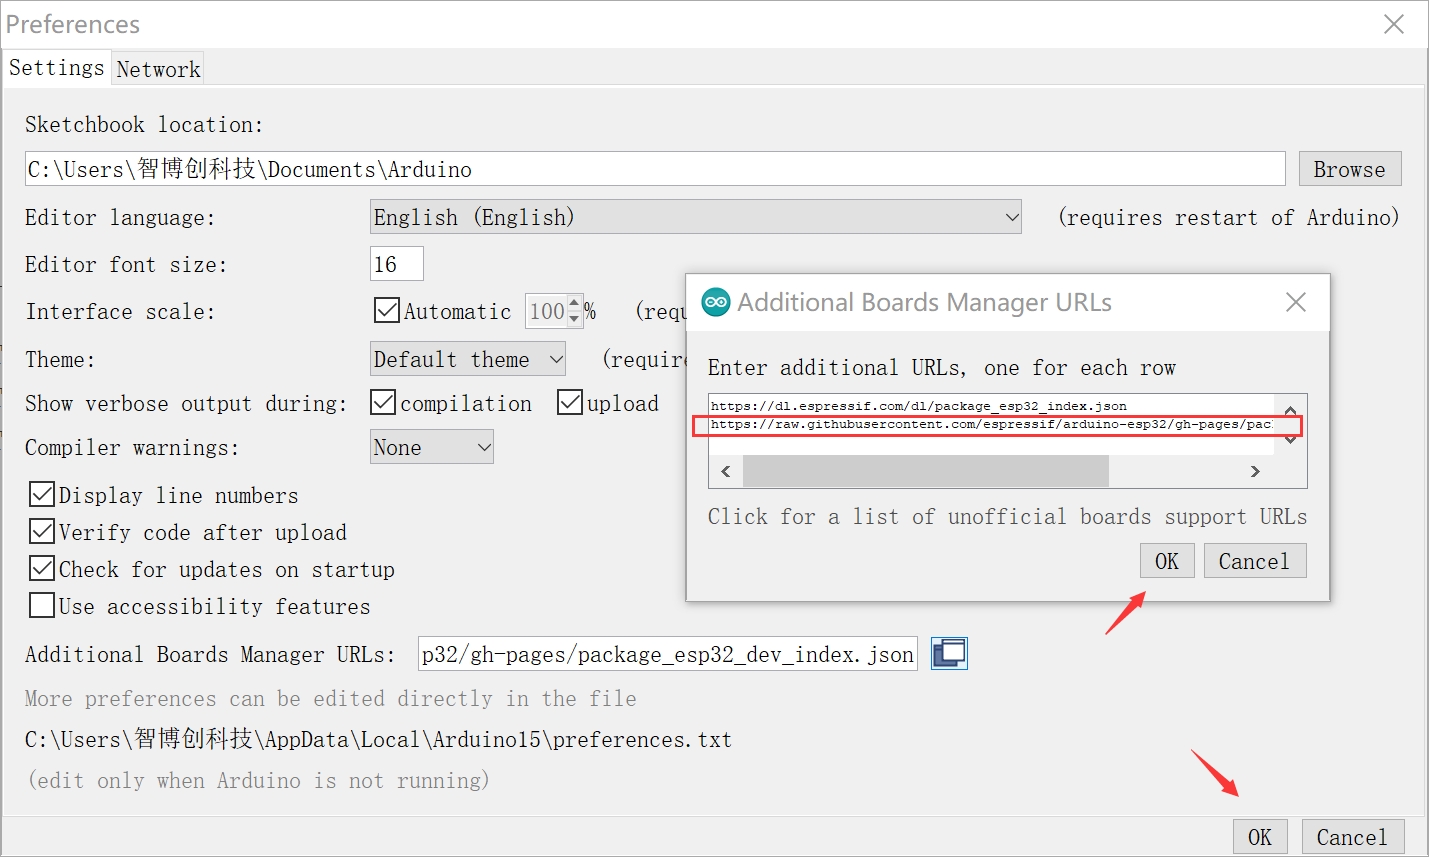
- Click “Tools>Board>Boards Manager” to search for and install the ESP32 library:

3.Select and set the parameter in the Tools menu, as the picture:
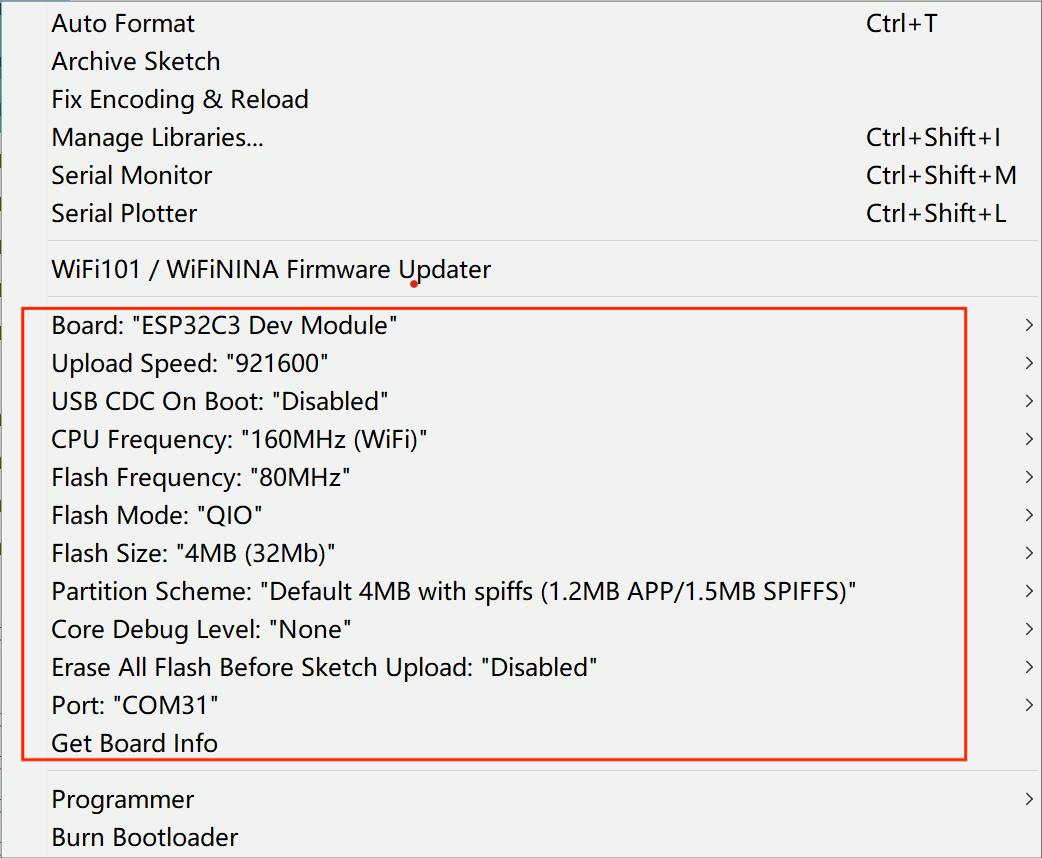
Note: Different PC has different Serial COM number.
3.2 Project 1 OLED display test
1.You can get the source code from Github.
2.Open the file CDC_oled under the example file.
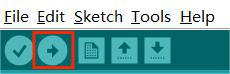
3.Verify and upload it.
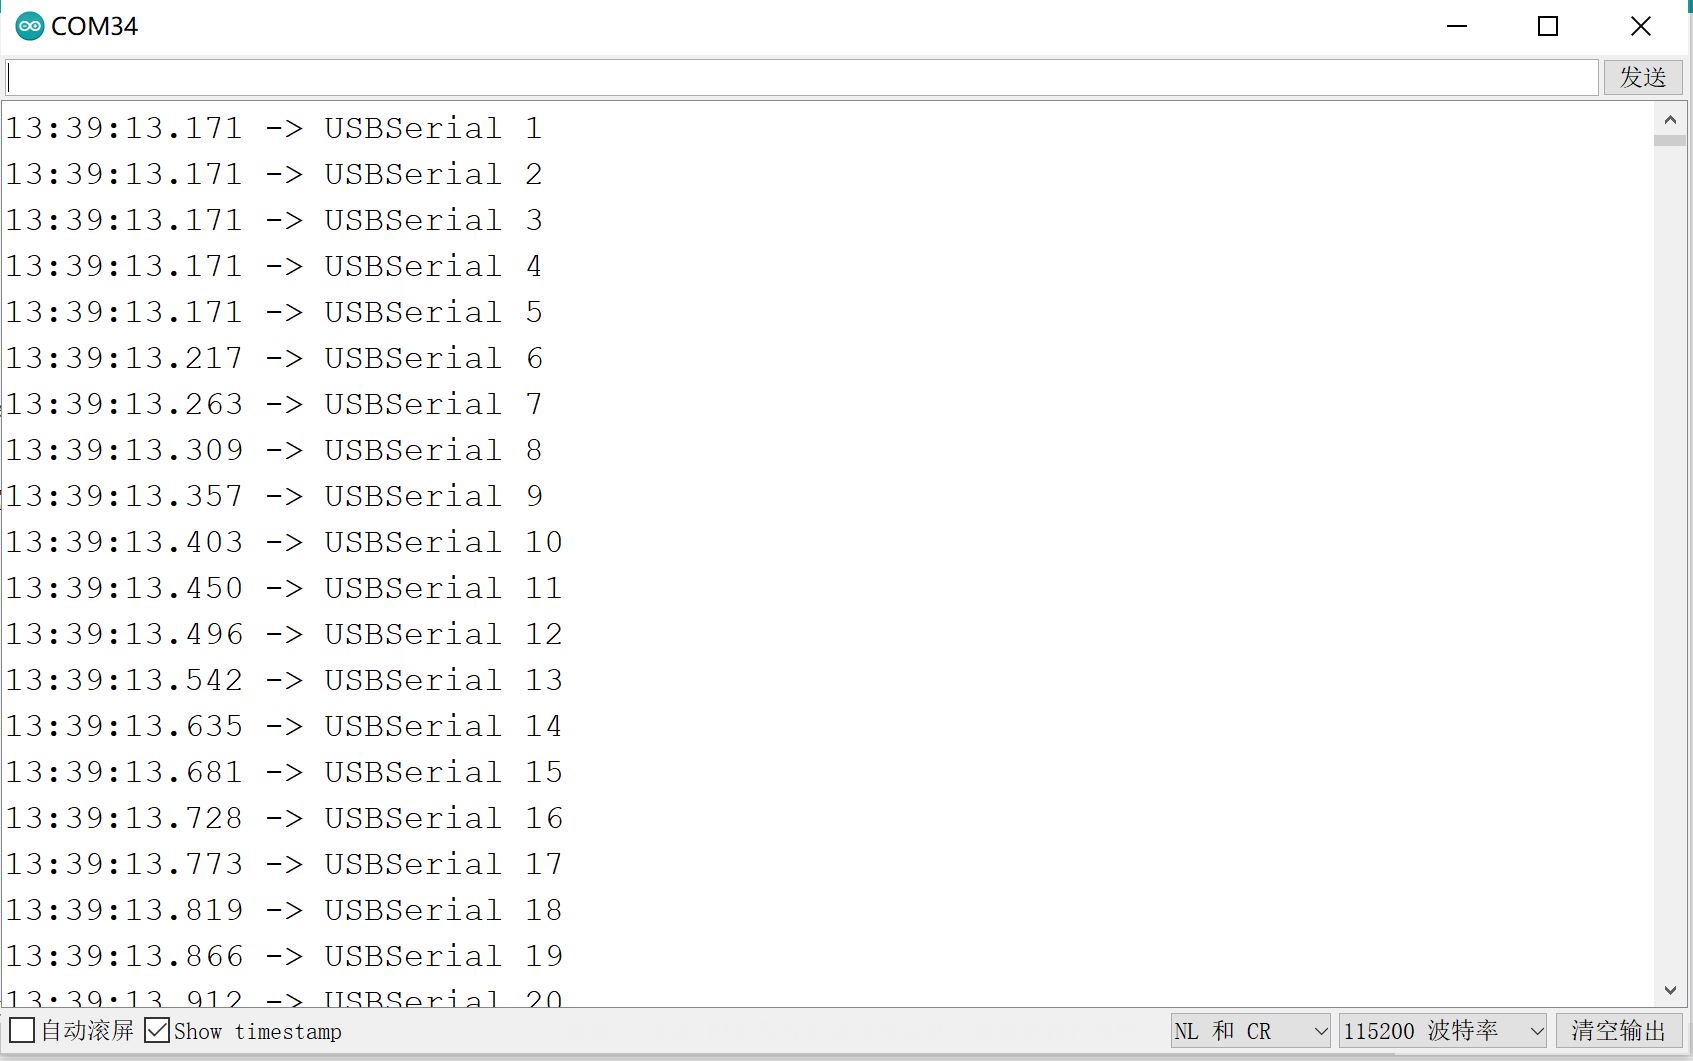
4.After uploading, you will see the Serial Monitor as follows.

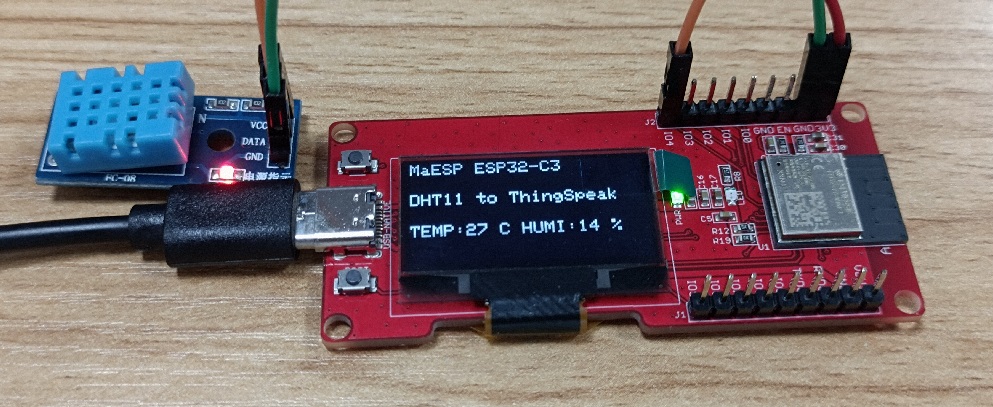
3.3 Project 2 DHT11_ThingSpeak Demo
Using the DHT11 sensor model in this Demo.
| Sensor | MaESP ESP32-C3 |
|---|---|
| Sensor's GND | MaESP ESP32-C3' GND |
| Sensor's DATA | MaESP ESP32-C3's GPIO4 |
| Sensor's VCC | MaESP ESP32-C3's VCC |
1.You can get the source code from Github.
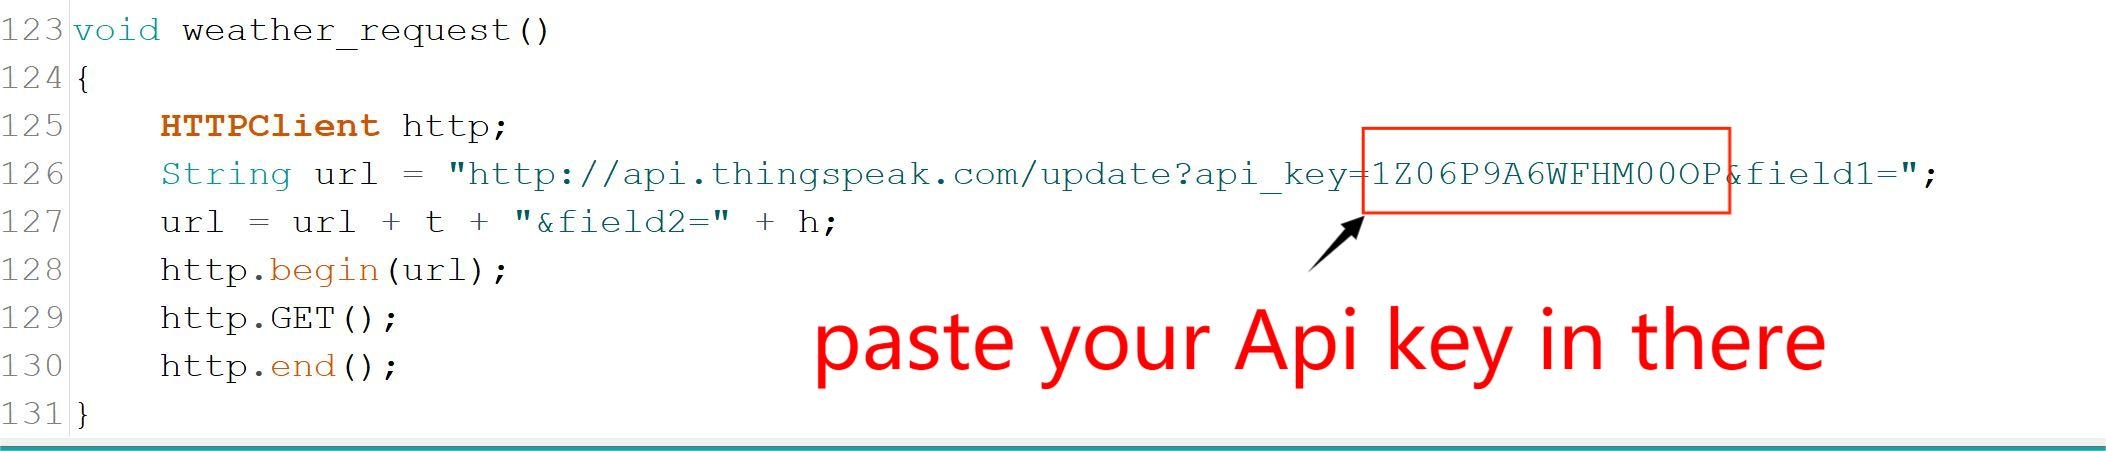
2.Open the file DHT11_ThingSpeak under the example file.
3.Modify your Wi-Fi ssid, password and ThingSpeak API key in the code.
4.Verify and upload it.

5.After uploading, the sensor data will be displayed as follows.
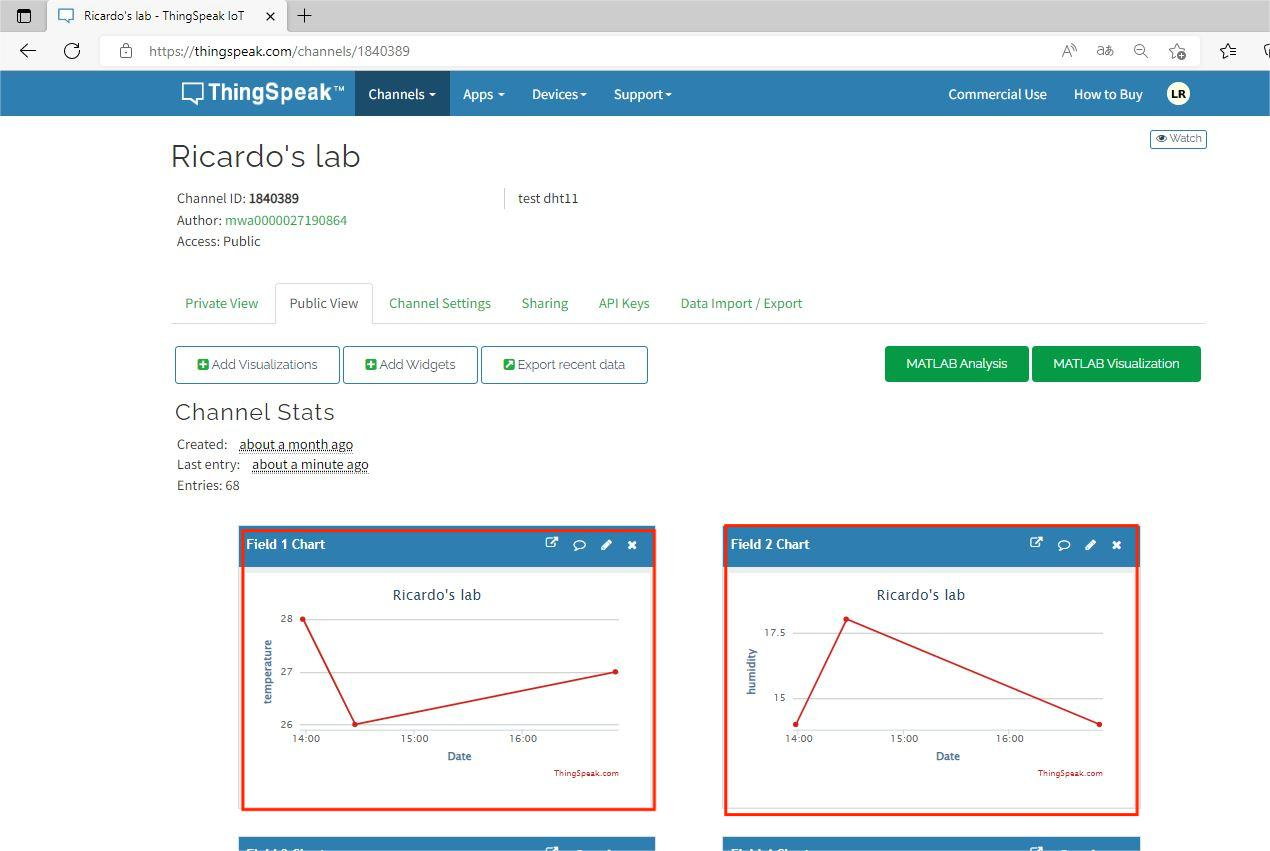
Note: Click http://wiki.makerfabs.com/ESP8266_WiFi_Shield.html#iot-project, and it will teach you how to apply for a new Thingspeak account.
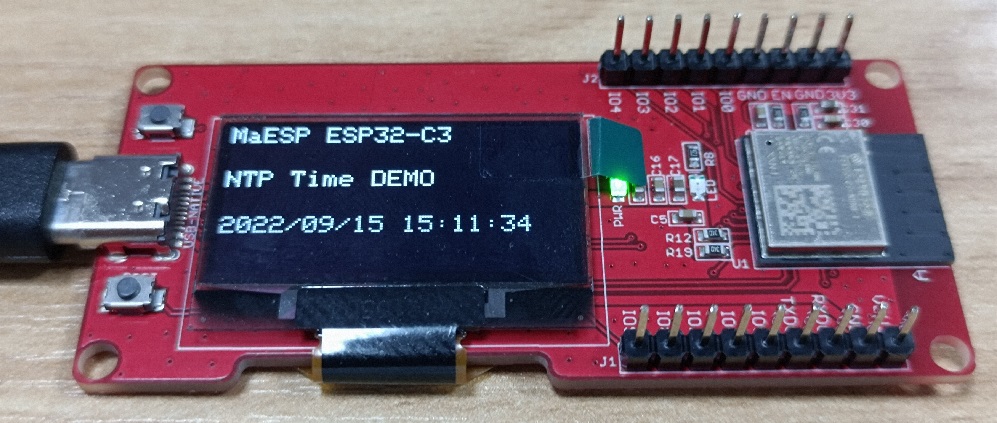
3.4 Project 3 NTP Time Demo
1.You can get the source code from Github.
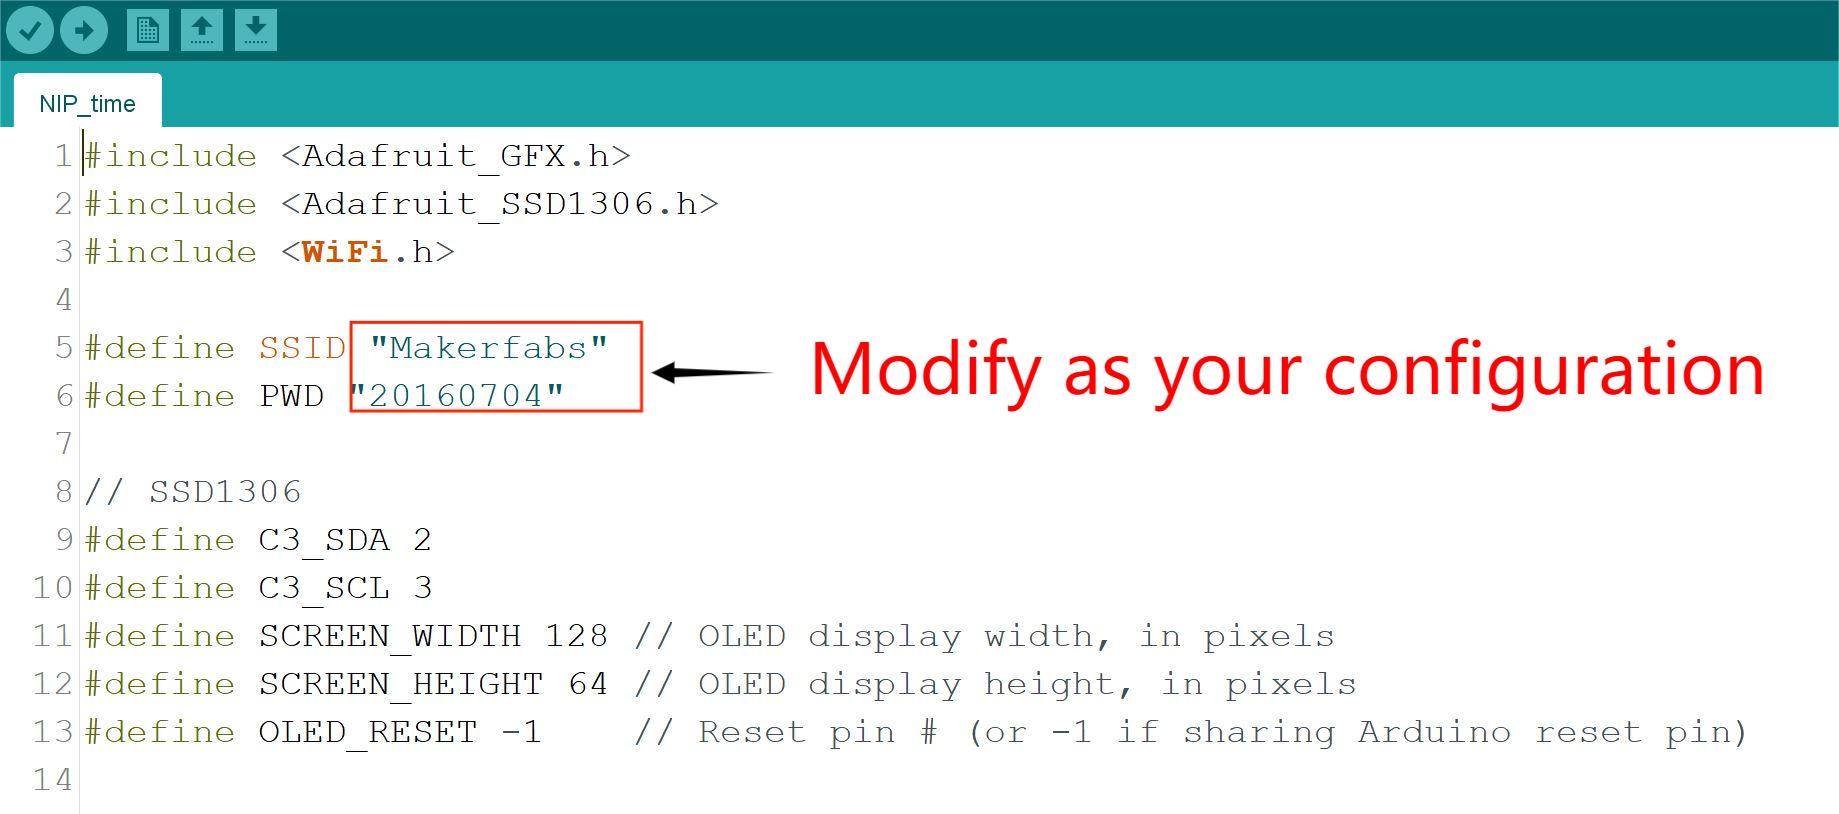
2.Open the file NTP_time under the example file.
3.Modify your Wi-Fi ssid, password and ThingSpeak API key in the code.

4.Verify and upload it.

5.After uploading, OLED screen will display the NTP time as follows.
4. FAQ
You can list your question here or contact techsupport@makerfabs.com for technology support. Detailed descriptions of your question will be helped to solve your question.
- Q1:Can't upload the code
- A1:Let ESP32 in download mode by pressing the RESET key after holding the FLASH key when you're uploading the code.