ESP32_S3_Parallel_2.8_TFT_with_Touch
Introduction
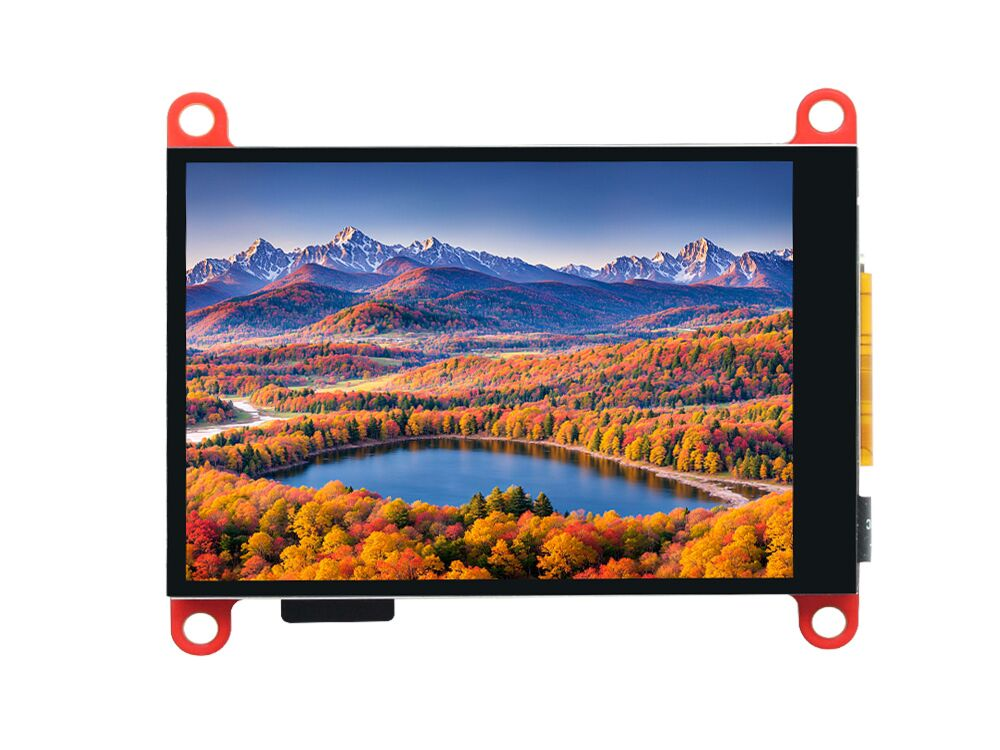
This 2.8” display touch based on ESP32S3 could be really a good solution for IOT projects that need human interfaces. The IPS display has 320x240 resolution, with capacitive touch, compares to resistive version, the capacitive touch much more convenient and smooth touch feeling.
model: MA028IPST
Features
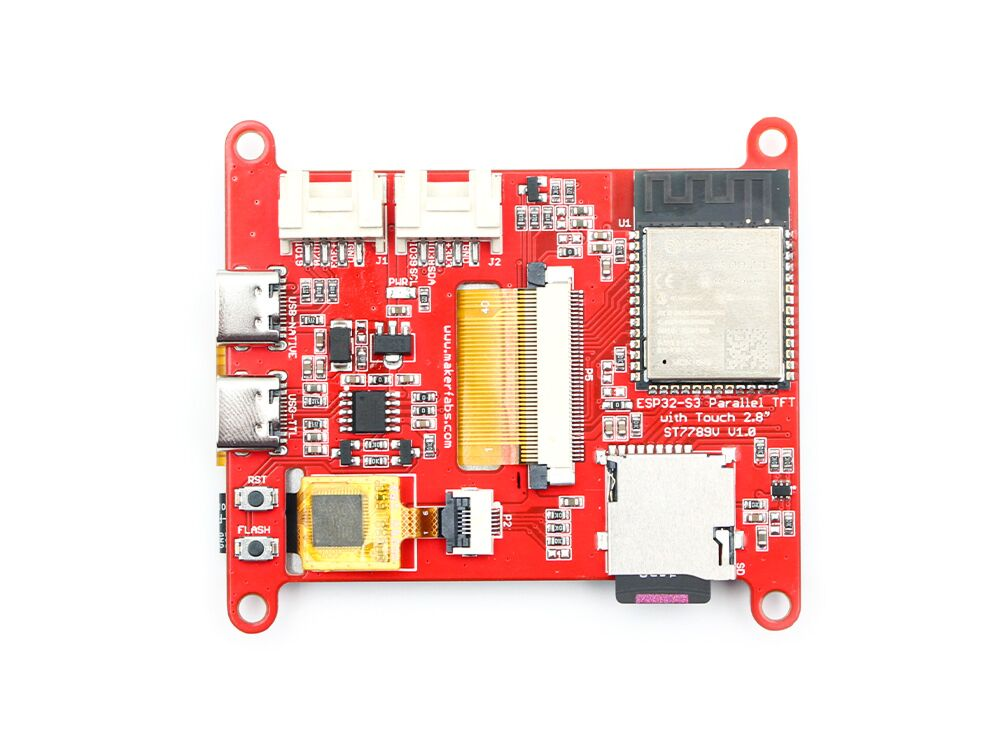
- Controller: ESP32-S3
- Wireless: WiFi& Bluetooth 5.0
- LCD: 2.8", 320x240 resolution, driver ST7789V
- LCD interface:16bit
- FPS: >30
- Flash:16MB Flash
- PSRAM:8MB
- Touch Panel: 5 Points Touch, Capacitive
- Touch Panel Driver: GT911
- USB: 1 * USB to UART, 1 * USB_native
- Power Supply: USB Type-C 5.0V(4.0V~5.25V)
- Button: Flash button and reset button
- Expansion interface: 1 * GPIO, 1 * I2C
- MicroSD: Yes
- Arduino support: Yes
- Operation temperature: -40℃ to +85℃
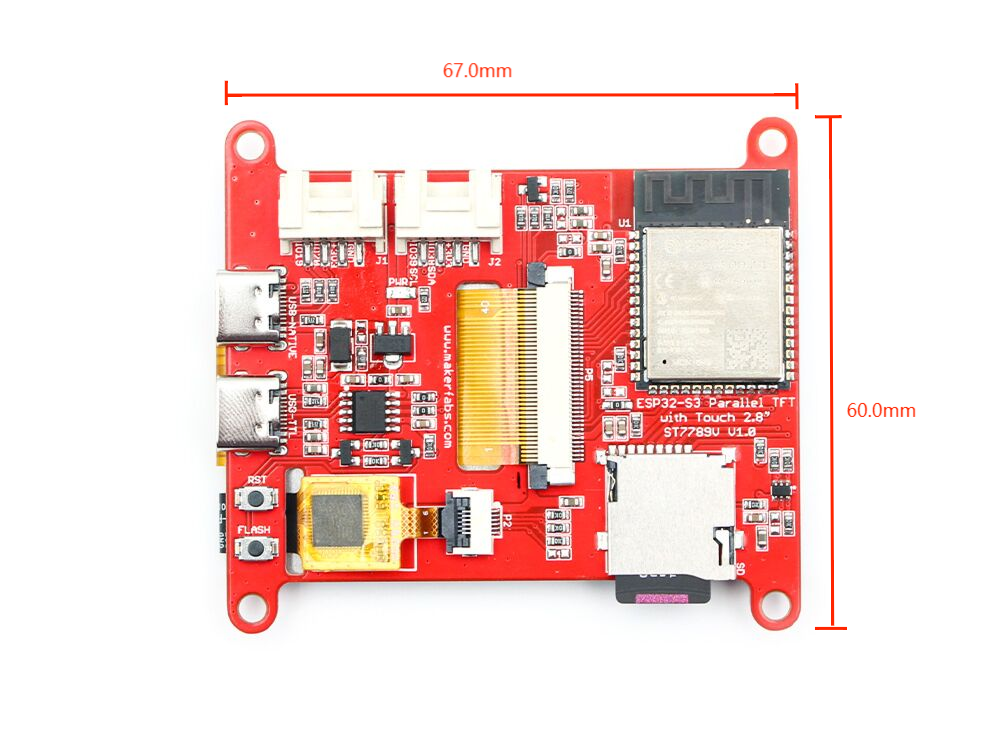
- About 67.0 mm long, 60.0 mm wide and 10.30 mm thick.
Usage
The Arduino IDE supports ESP32 development board programming, before uploading the code, it is crucial to prepare the compilation environment for ESP32. If you haven't installed the ESP32 Board SDK yet, follow the steps to start quickly.
1.Install the Arduino IDE V1.8.10/V1.8.19.
2.Additional Board Manager URLs:
Select "File>Preferences>settings>Additional Boards Manager URLs" to fill in the link:
https://dl.espressif.com/dl/package_esp32_index.json
https://raw.githubusercontent.com/espressif/arduino-esp32/gh-pages/package_esp32_dev_index.json
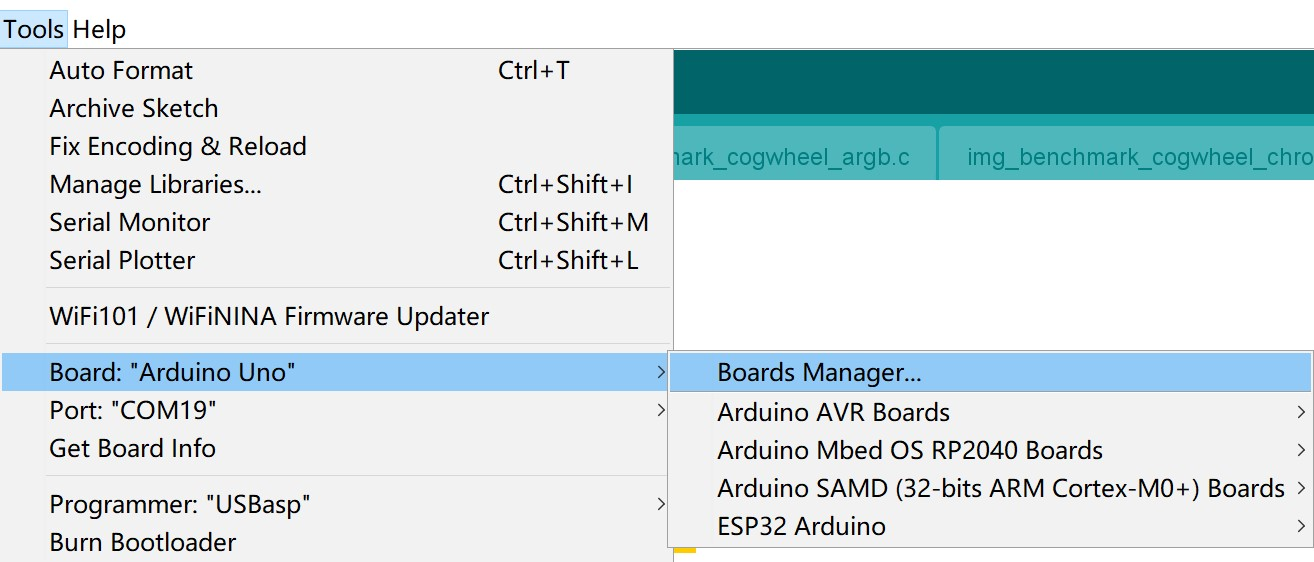
3.Boards Manager.
Open the Boards Manager. Go to Tools > Board > Boards Manager.Search for ESP32 and press install button for the “ESP32 by Espressif Systems“. For the ESP32-S3 Development board version, we recommend using versions that have been verified, such as 2.0.8 / 2.0.10, which is more stable, and less prone to errors.
4.Connect board
Use Type-C USB cable to connect the board and PC, note plug the cable to USB-TTL interface.
5.Choose the ESP32 Arduino
Choose the “ESP32-S3 Dev module”, and choose the com.
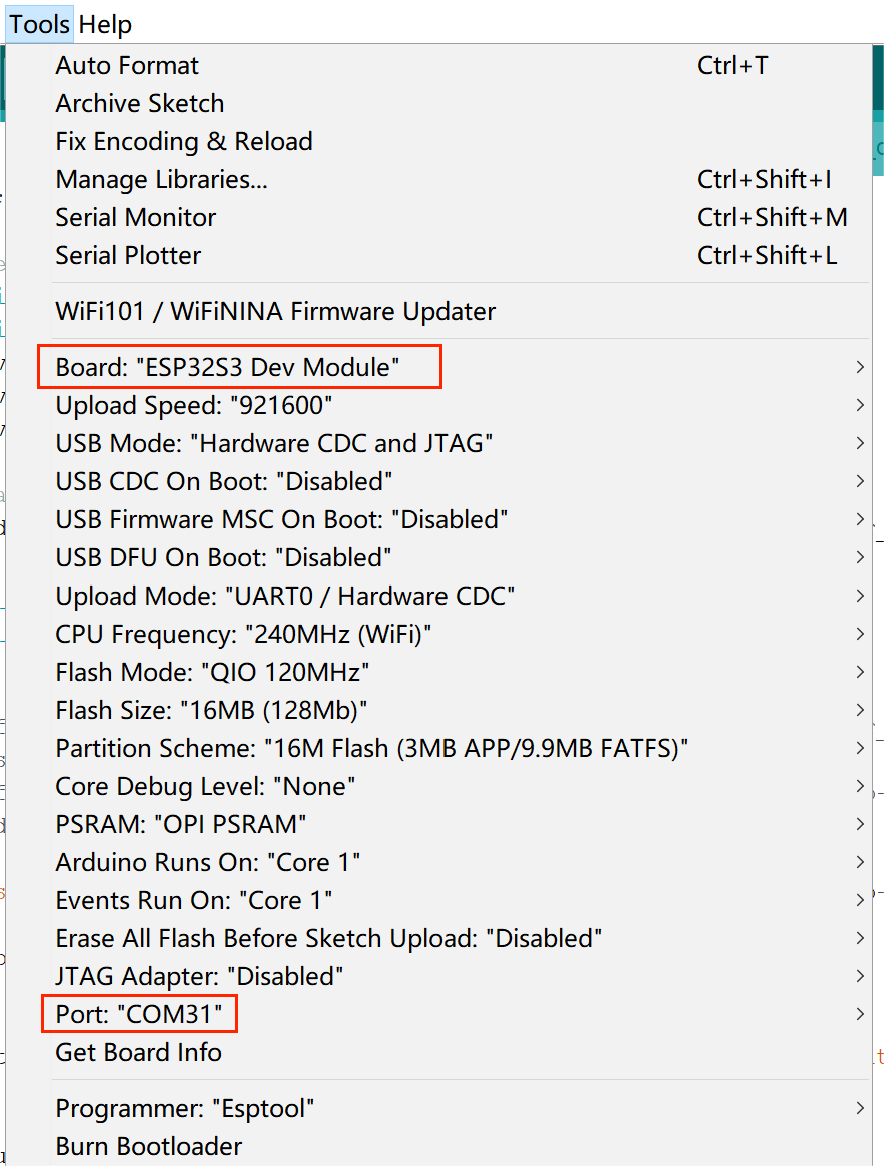
Note: Different computers may have different port numbers when connecting to a development board. Please select the correct port number based on the development board you are connecting to.
6.Install libraries needed.
Open the Arduino IDE, choose the >>tools>> Manage libraries, and install the libraries needed:
Version 1.0.1 bb_captouch
Version 2.0.0 Wire
Version 1.1.9 LovyanGFX
Version 2.0.0 FS
Version 2.0.0 SD_MMC
Version 1.2.8 JPEGDEC
7.Install "mf_Lvgl" library
unzip the "mf_Lvgl.zip", add it to the library file of Arduino, General Arduino library folder path for: C:/Users/Document/Arduino/libraries.
The lvgl_conf.h file is included in the library.
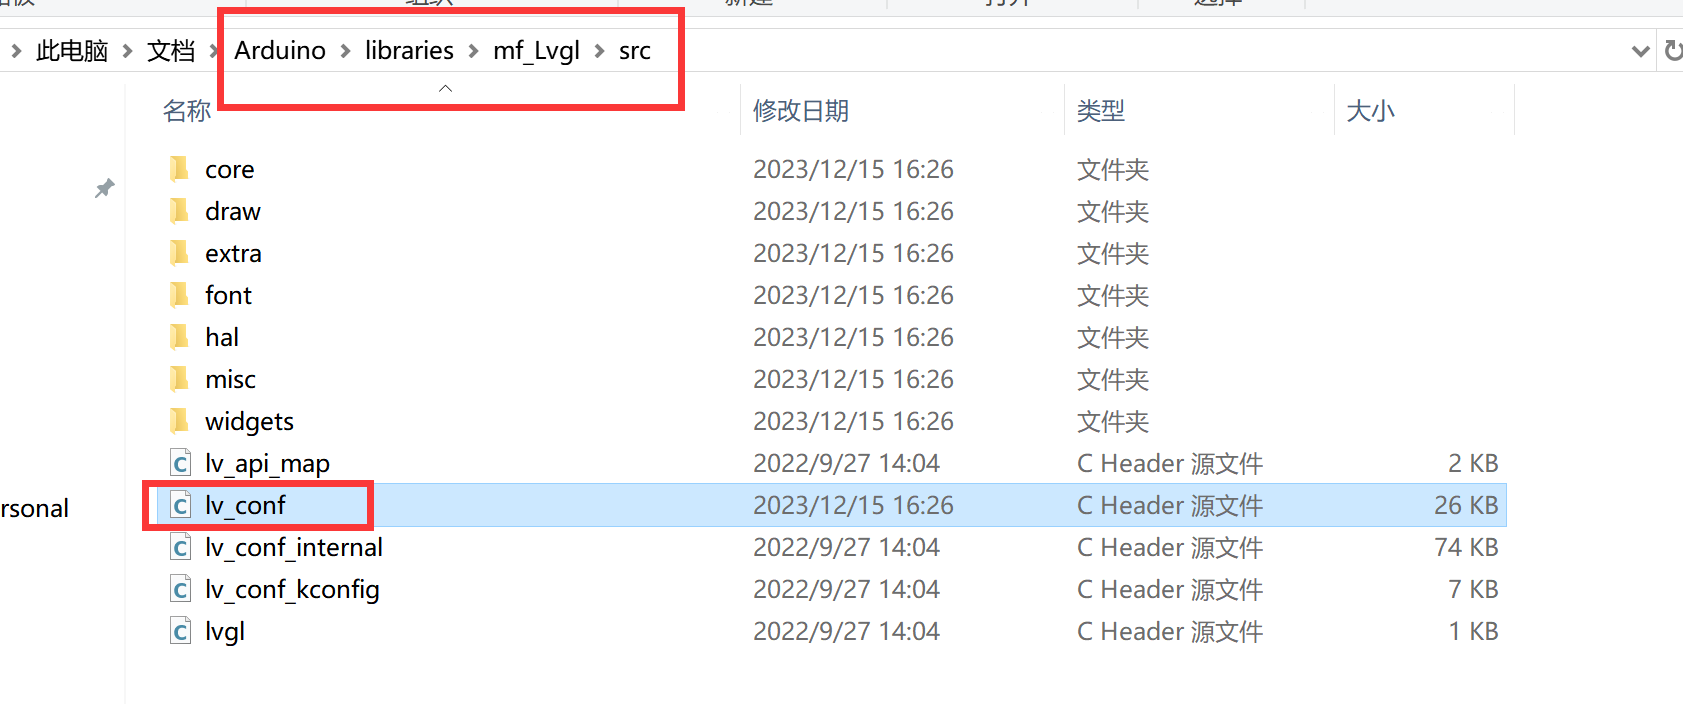
The lvgl_conf.h file is a setup file used to configure the lvgl library. It contains options for turning on/off features, choosing colors, and setting up fonts. Please manually set the numbers after all fonts to 1 to enable the use of fonts.
/*==================
 *   FONT USAGE
 *===================*/

/*Montserrat fonts with ASCII range and some symbols using bpp = 4
 *https://fonts.google.com/specimen/Montserrat*/
#define LV_FONT_MONTSERRAT_8  1
#define LV_FONT_MONTSERRAT_10 1
#define LV_FONT_MONTSERRAT_12 1
#define LV_FONT_MONTSERRAT_14 1
#define LV_FONT_MONTSERRAT_16 1
#define LV_FONT_MONTSERRAT_18 1
#define LV_FONT_MONTSERRAT_20 1
#define LV_FONT_MONTSERRAT_22 1
#define LV_FONT_MONTSERRAT_24 1
#define LV_FONT_MONTSERRAT_26 1
#define LV_FONT_MONTSERRAT_28 1
#define LV_FONT_MONTSERRAT_30 1
#define LV_FONT_MONTSERRAT_32 1
#define LV_FONT_MONTSERRAT_34 1
#define LV_FONT_MONTSERRAT_36 1
#define LV_FONT_MONTSERRAT_38 1
#define LV_FONT_MONTSERRAT_40 1
#define LV_FONT_MONTSERRAT_42 1
#define LV_FONT_MONTSERRAT_44 1
#define LV_FONT_MONTSERRAT_46 1
#define LV_FONT_MONTSERRAT_48 1
Touch test
-
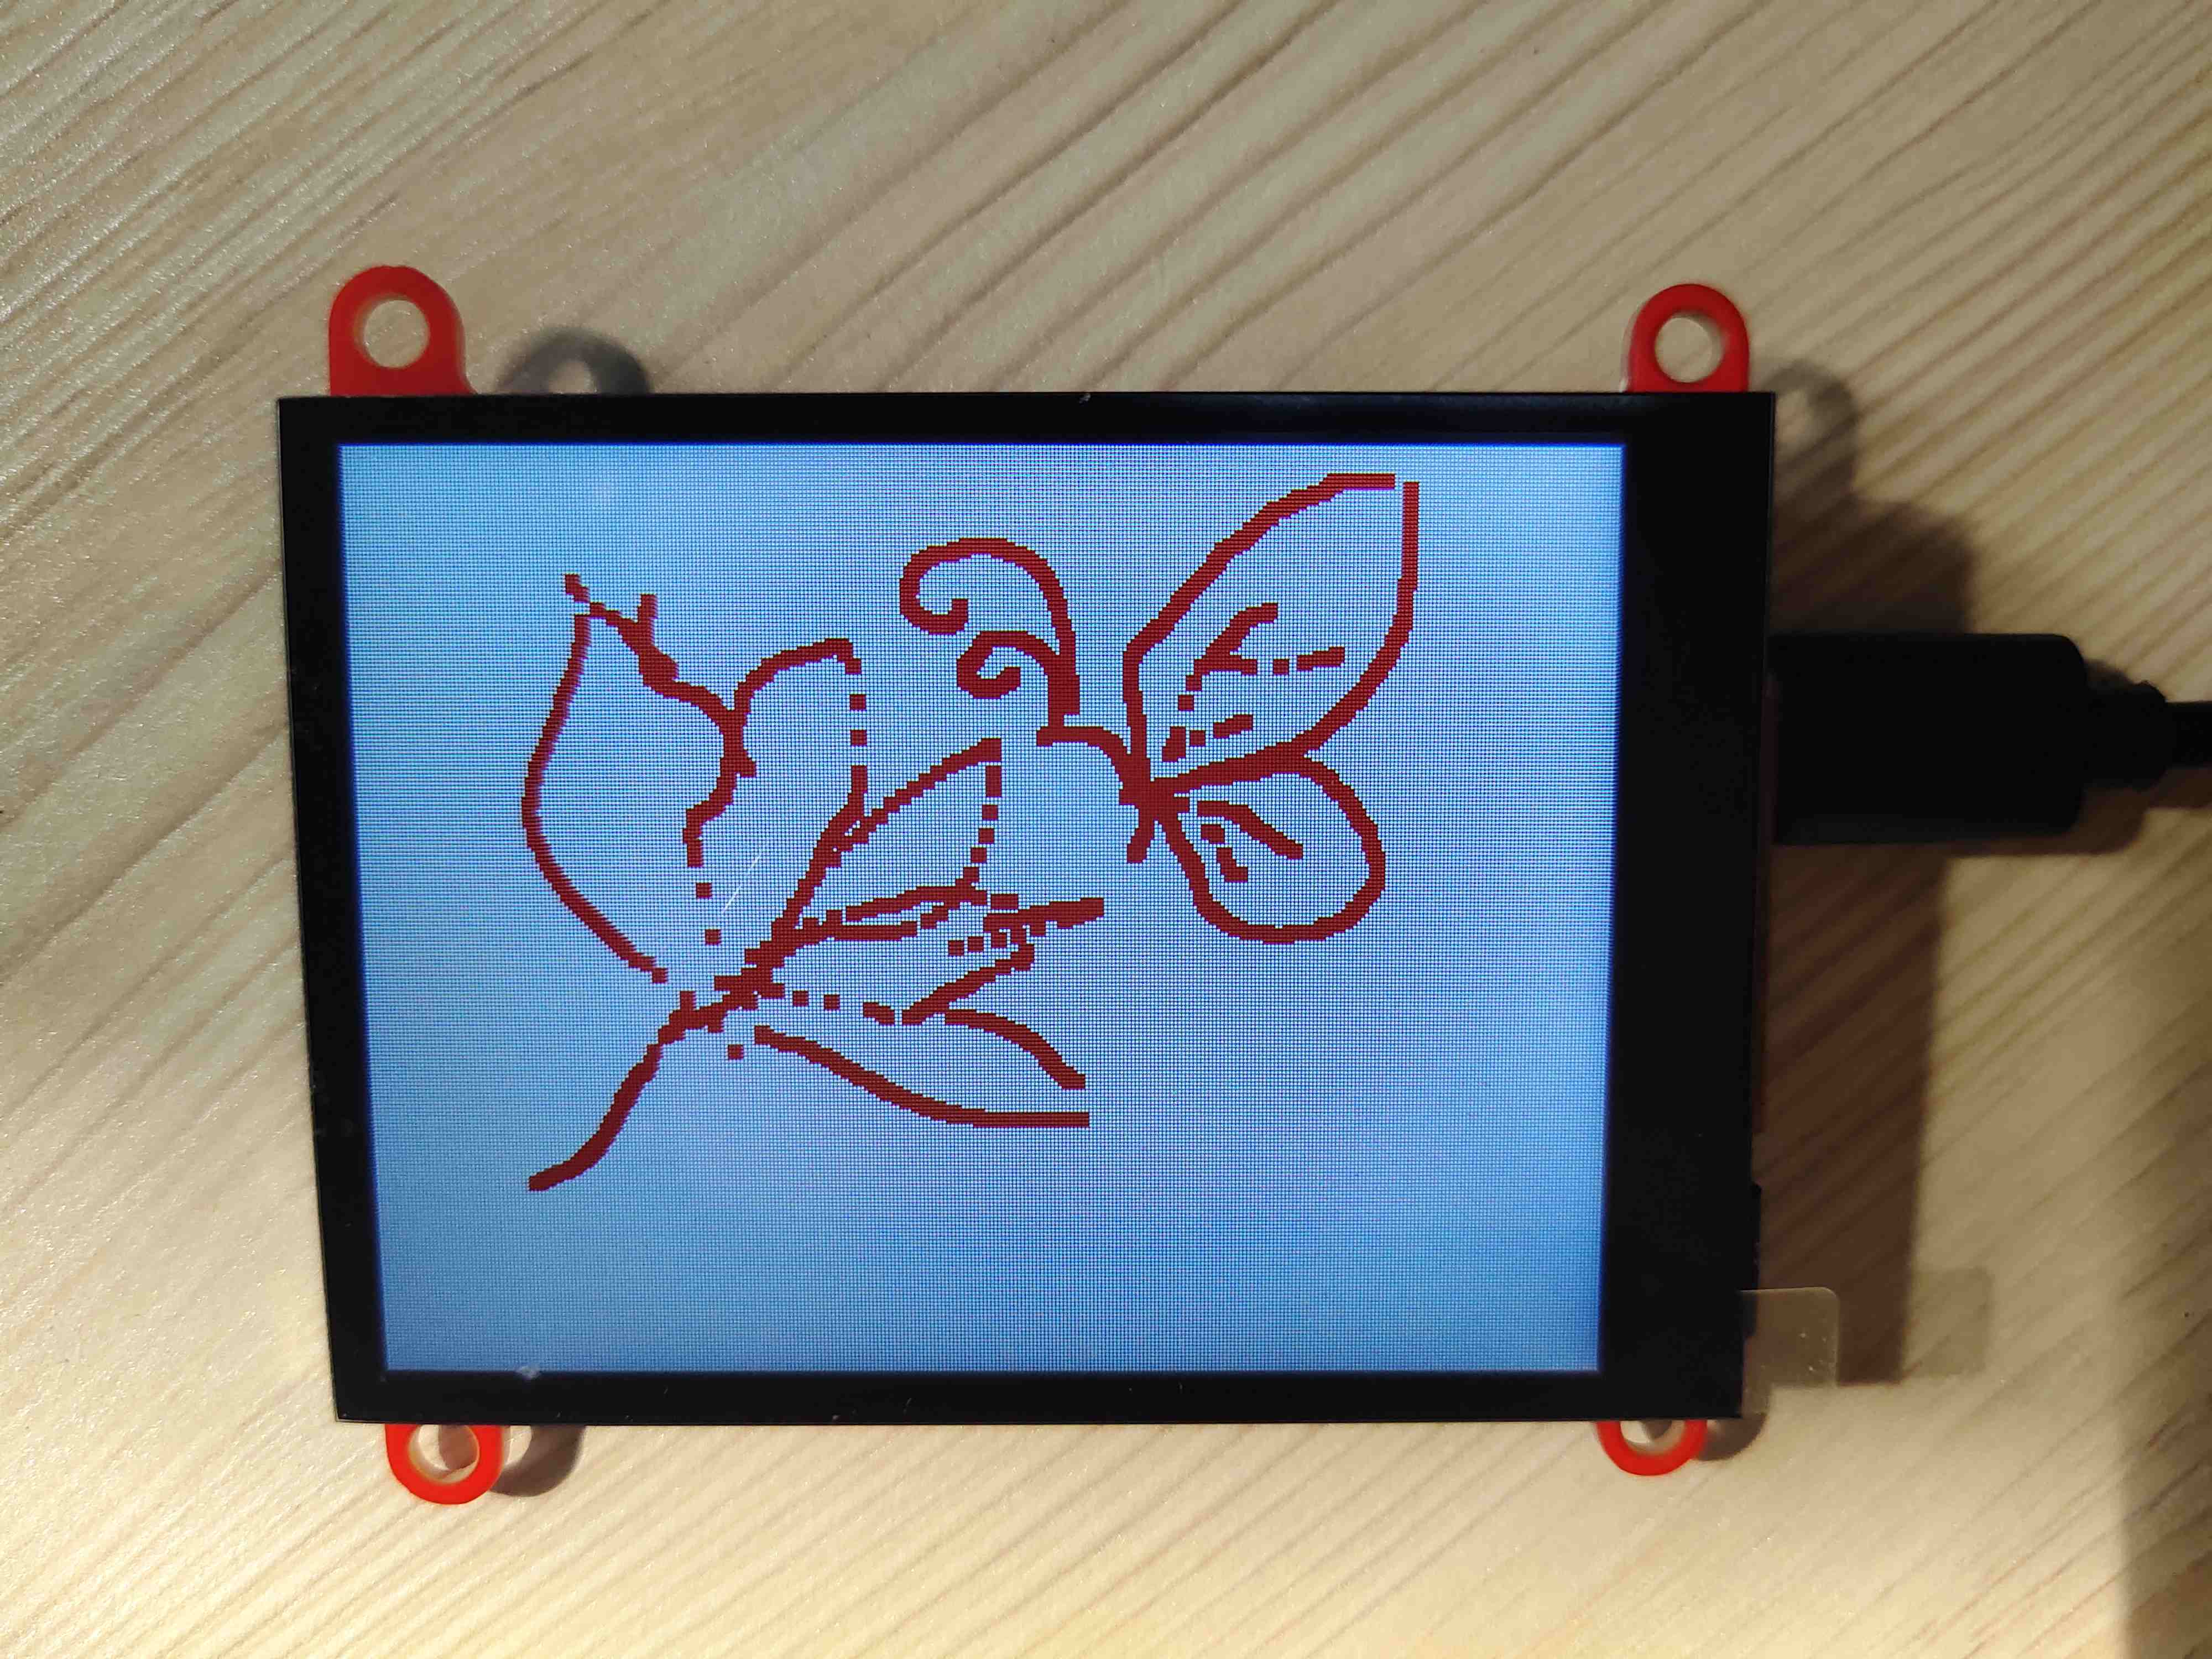
Open touch_draw.ino.
-
Choose the “ESP32-S3 Dev module”, and choose the com.
-
Verify the code and upload.
-
When it is successful, you can draw small rectangular points on the screen.
LVGL demo
-
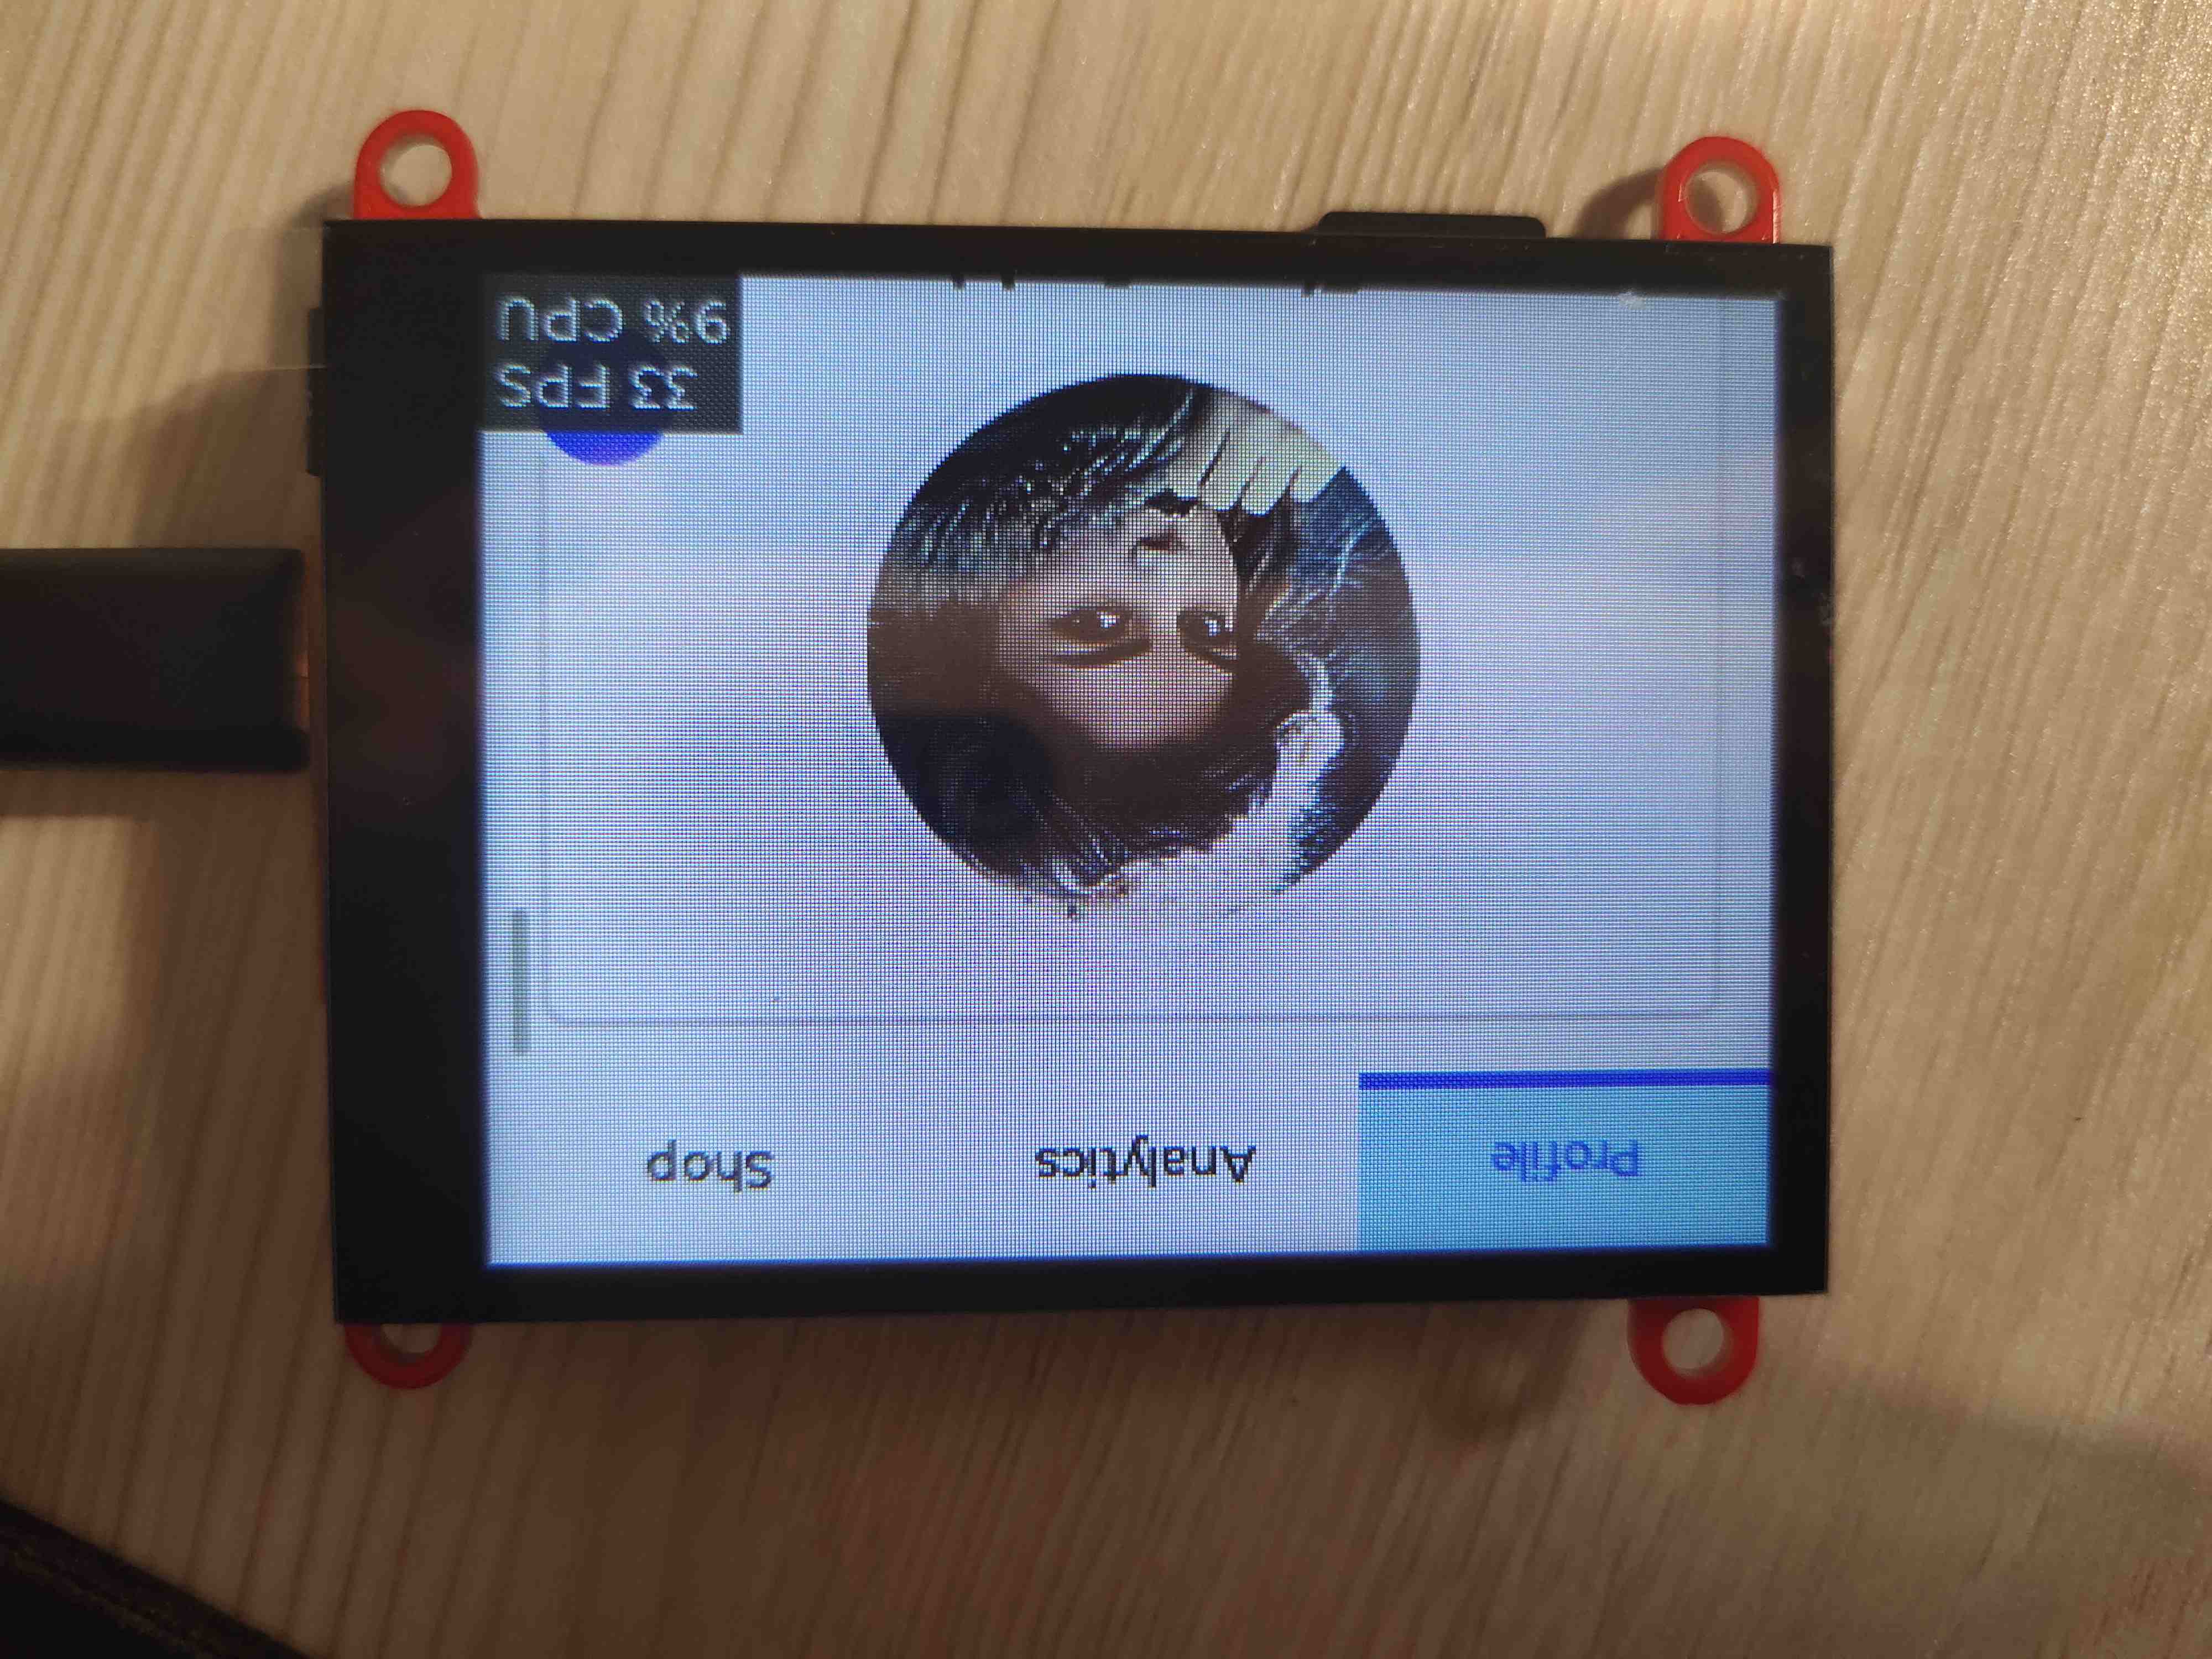
Open LvglWidgets.ino.
-
Choose the “ESP32-S3 Dev module”, and choose the com.
-
Verify the code and upload.
-
When it is successful, you can interact with the screen.
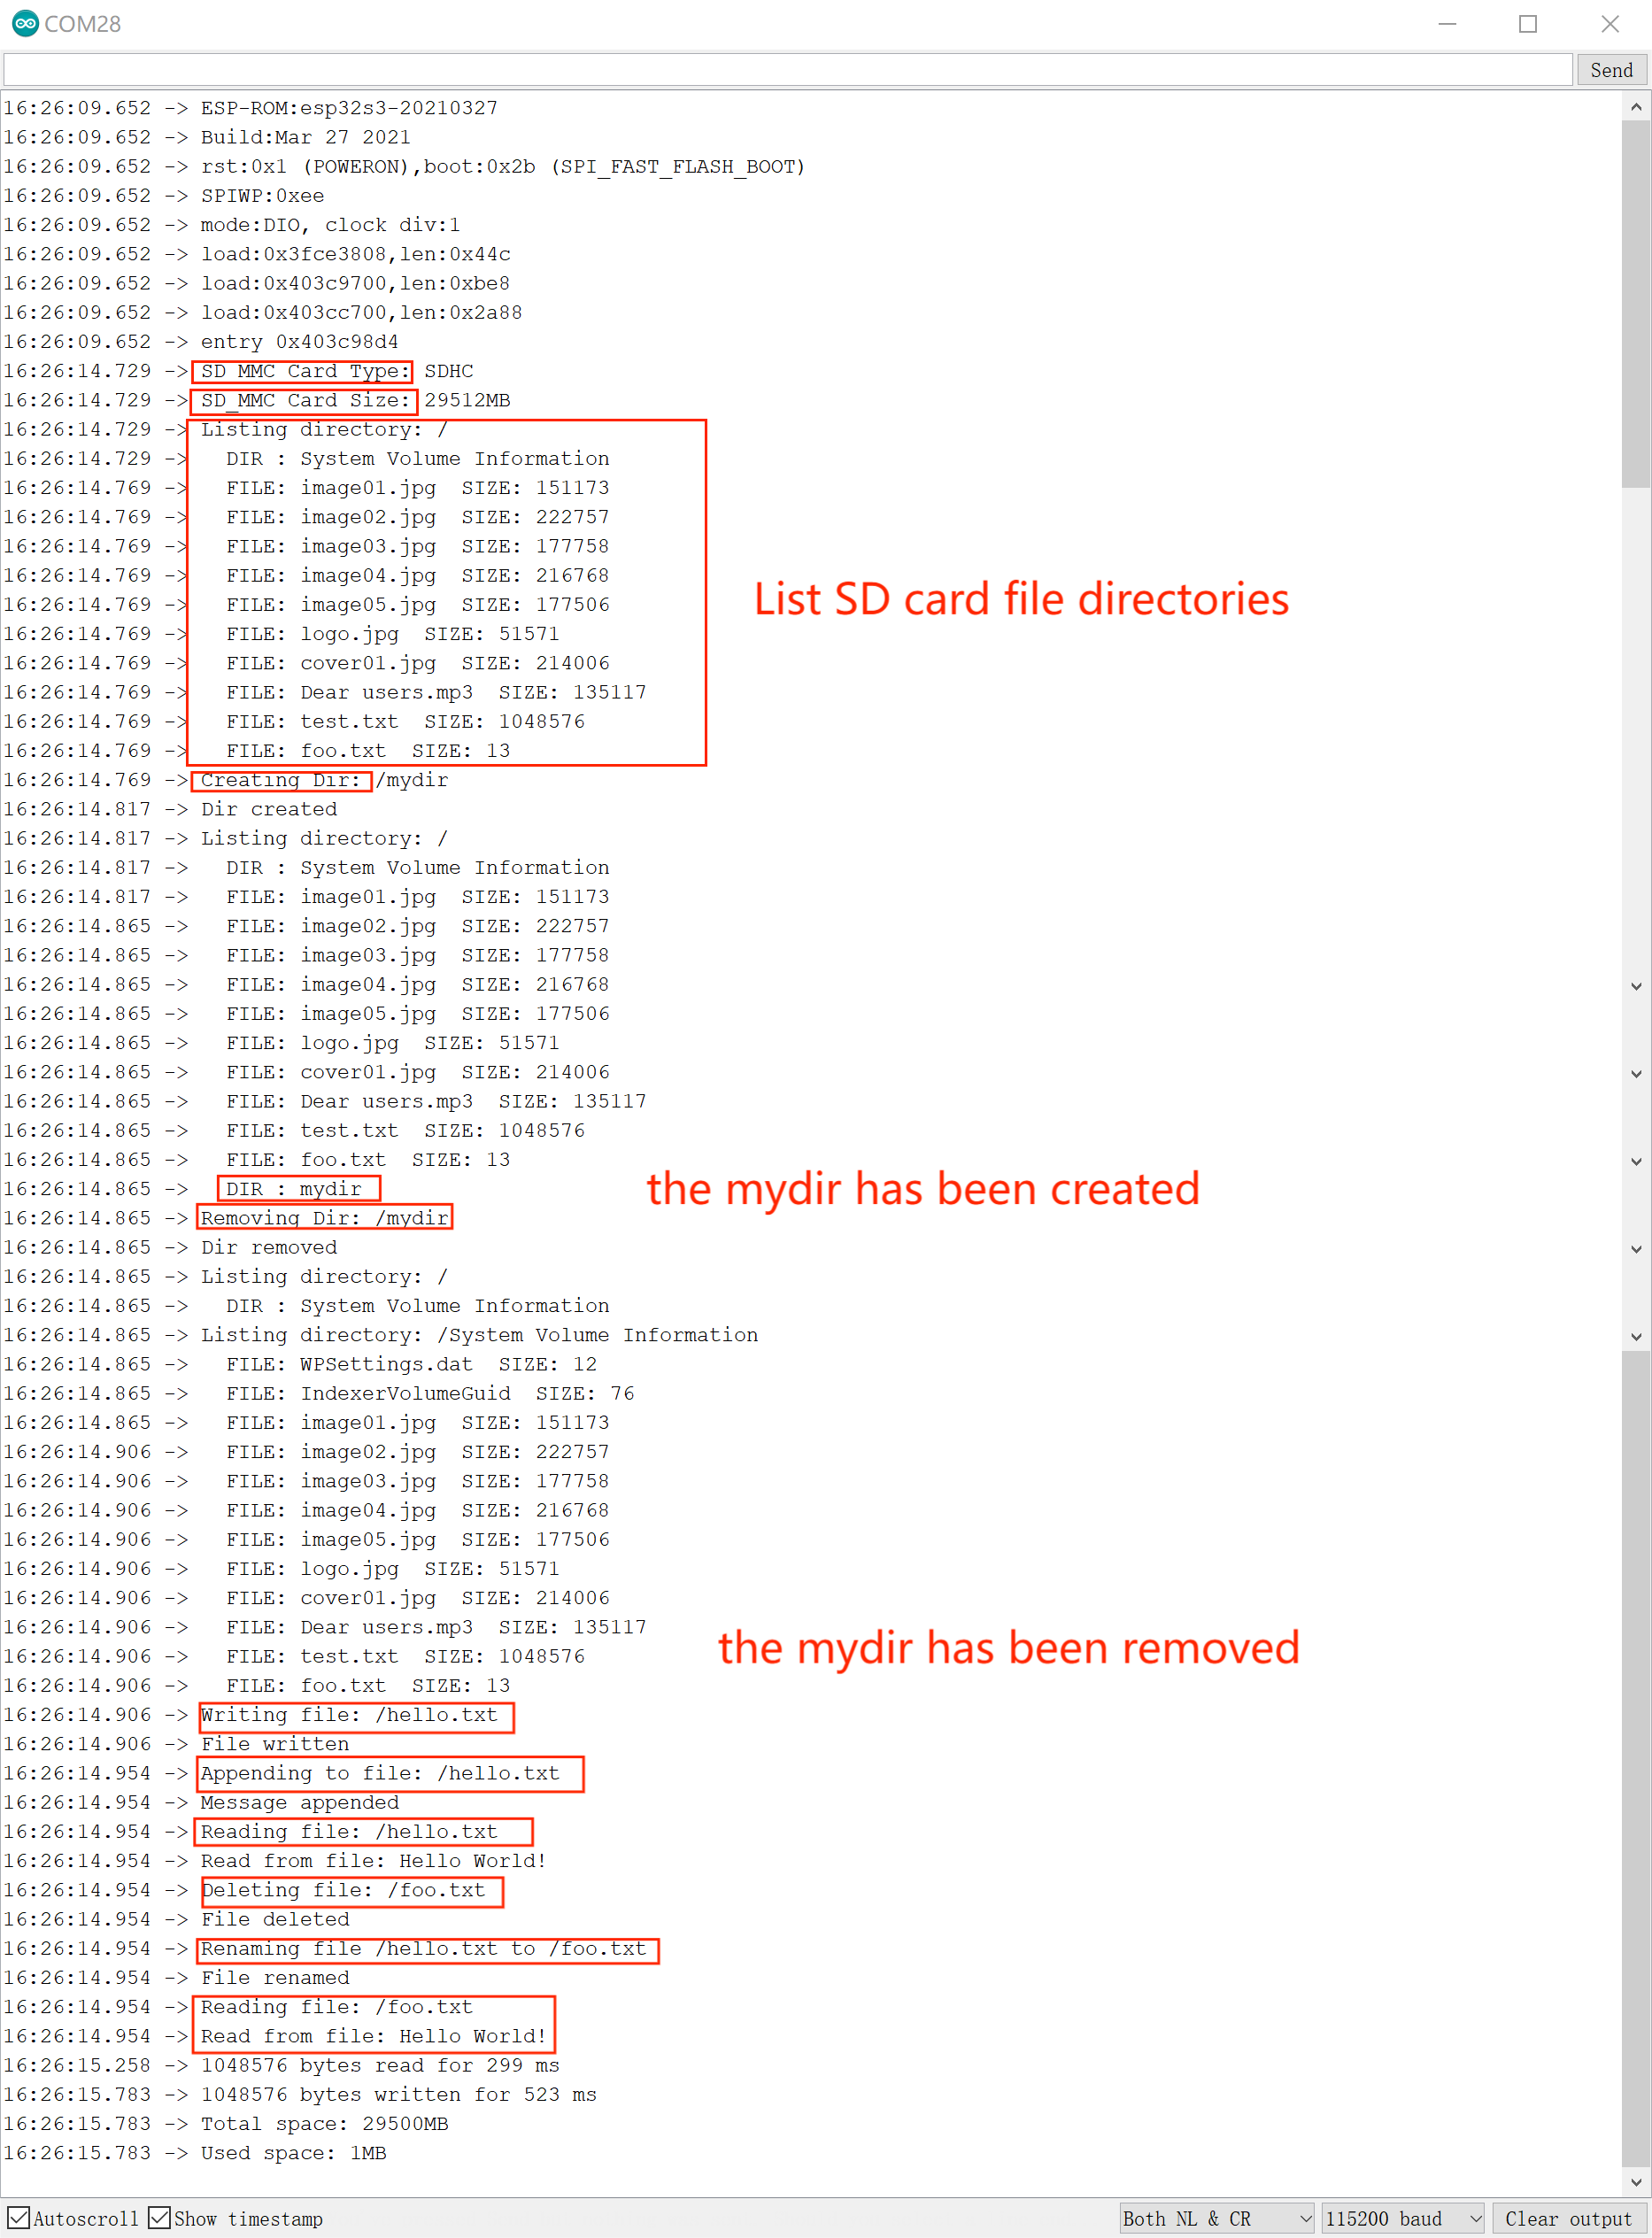
SD test
-
Open sdio_demo.ino.
-
Plug the SD card into the SD card slot.
-
Choose the “ESP32-S3 Dev module”, and choose the com.
-
Verify the code and upload.
-
When it is successful, open the serial monitor, it will print the message of the SD.
FAQ
You can list your question here or contact techsupport@makerfabs.com for technology support. Detailed descriptions of your question will be helped to solve your question.