MaTouch ESP32-S3 AMOLED with Touch 1.8'' FT3168
1. Introduction
The "MaTouch ESP32-S3 AMOLED with Touch 1.8'' FT3168" is a high-definition display and touch function product that adopts the ESP32S3 chip and built-in Wi-Fi function; it is equipped with a 1.8-inch AMOLED screen that has excellent high contrast ratio and colour saturation, which can present clearer and more vivid images. It also incorporates the FT3168 touch chip, which enhances the user interaction experience.
Model:MTEA18FT
2. Features
- Controller: ESP32-S3(R8)
- Wireless: WiFi& Bluetooth 5.0
- Resolution: 1.8”, 368*448
- Display Driver IC : SH8601
- Display Interface: SPI 3-wire / QSPI
- Driving Mode: Active Matrix.
- Color Mode: Full Color (16.7M color)
- Touch Driver IC : FT3168
- Touch Interface: IIC [ Slave Addr A[6:0]---0X38]
- Input: USB Type-C 5V(native USB)
- Input Voltage: 3.7V lion battery
- Output: 2X12 1.27mm Header
- Buttons: Reset, Boot and User button
- LED: WS2812
- Arduino support: Yes
- LVGL support: Yes
- High definition display
3. Arduino IDE
- Install the Arduino IDE V1.8.19/V2.3.2 If you haven’t installed the ESP32 Board SDK yet, follow the steps in this guide to get started quickly.
For the ESP32-S3 Development board version, we recommend using versions that have been verified, such as 2.0.14/2.0.16, which is more stable, and less prone to errors.
Note: Different computers may have different port numbers when connecting to a development board. Please select the correct port number based on the development board you are connecting to.
4. Usage
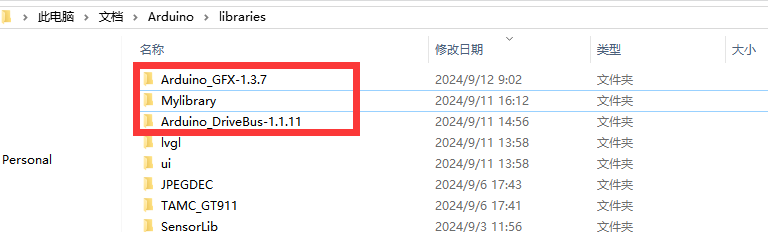
Please download the relevant driver libraries before using these demos.
Download the library from github.
Once the download is complete, copy these libraries into the Arduino library.
- The default is usually in the "C:\Users\Your username\Documents\Arduino\libraries"
4.1 Touch Test
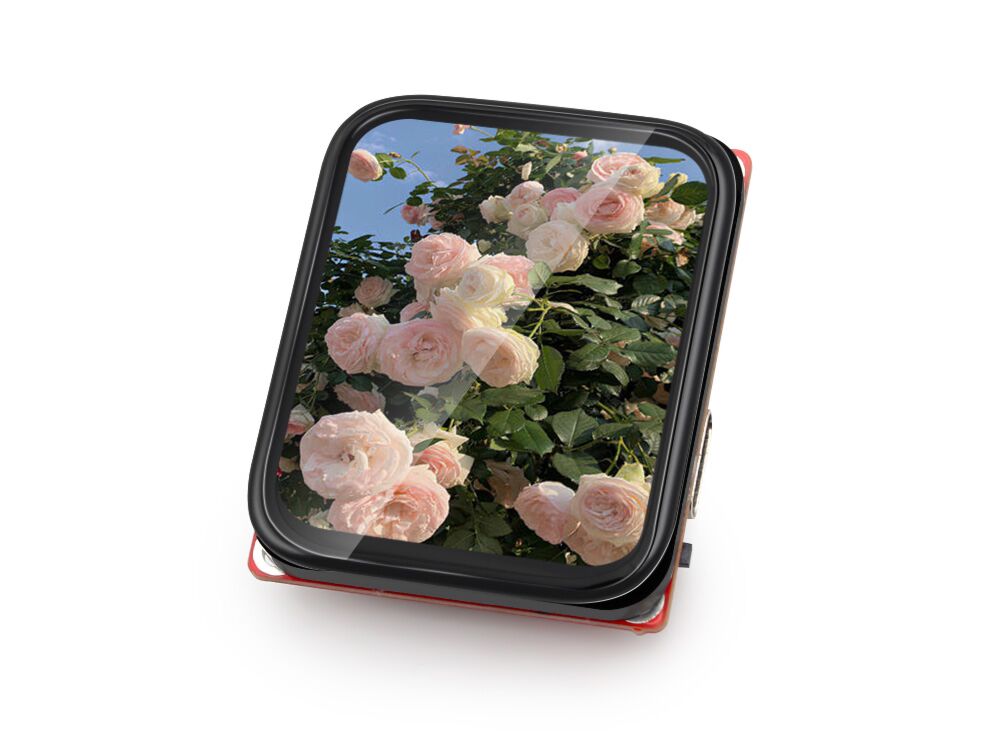
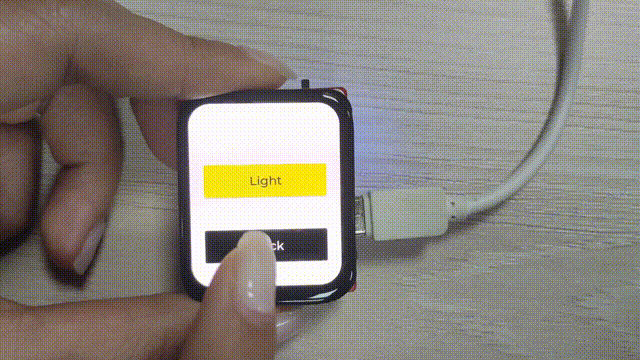
This demo detects the display effect and touch response of the screen, demonstrating the high-definition display effect of the MAOLED screen.
- Open the GFX_FT3168_Image by Arduino.
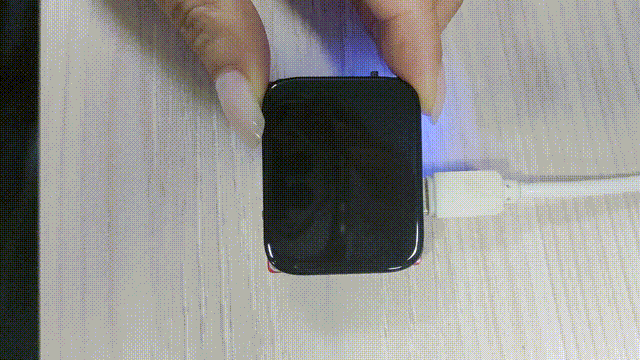
Use Type-C USB cable to connect the board and PC, and select the development board "ESP32S3 Dev Module" and the port.
-
Select "Tools > board:"xxx" > ESP32 > ESP32S3 Dev Module".
-
Select "Tools > Port",Select the port number of the board.
-
Select Flash Size is 16MB(128MB), Partition Scheme is 16M Flash (3MB APP/9.9MB FATFS), PSRAM is OPI PSRAM.
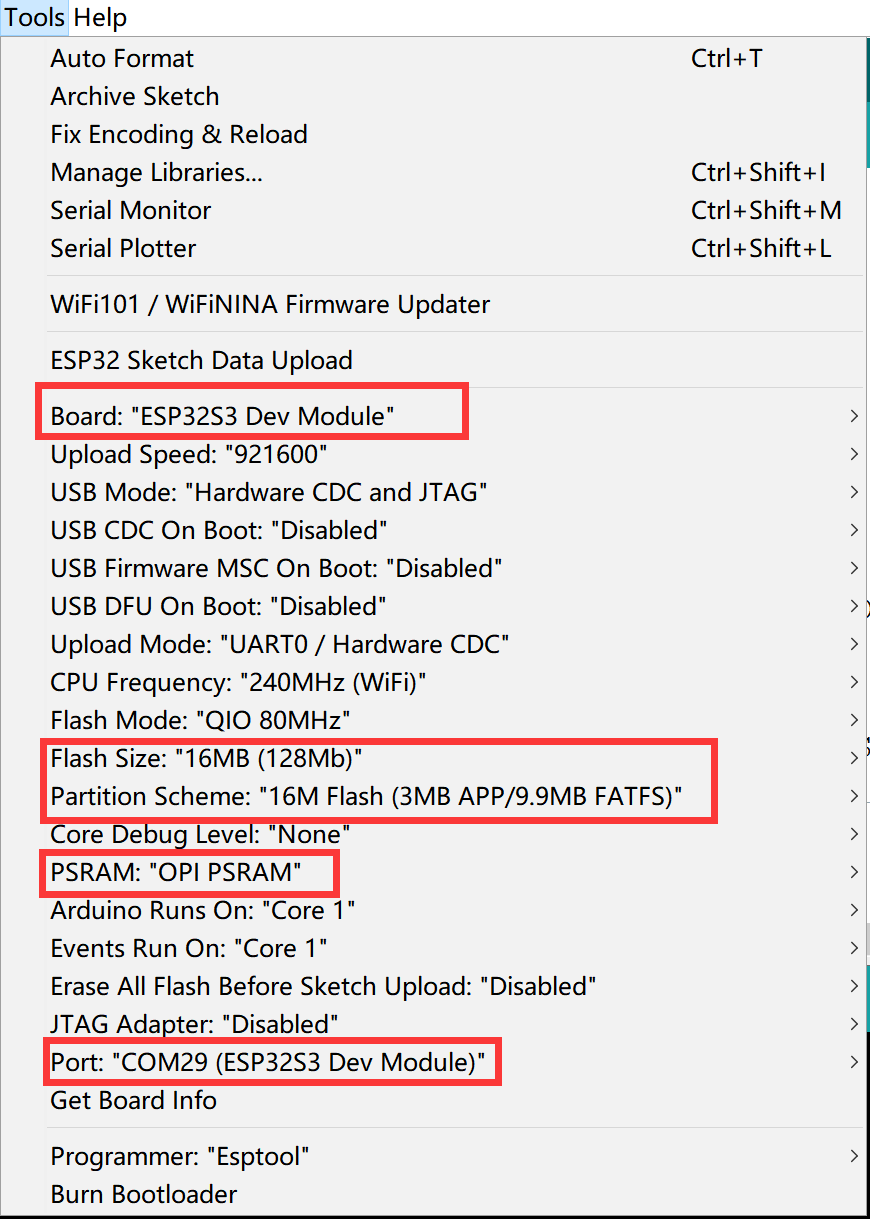
Note: Different computers may have different port numbers when connecting to a development board. Please select the correct port number based on the development board you are connecting to.
- Click the Upload button in the Arduino IDE and wait a few times while the code compiles and uploads to your board.
Results
4.2 LVGL demo
4.2.1 Change background
This demo is based on the functionality of the LVGL buttons, which allows you to change the background color by pressing the buttons.
- Download the library from github.
Once the download is complete, copy these libraries into the Arduino library.
- The default is usually in the "C:\Users\Your username\Documents\Arduino\libraries"

Note: If there is already an ui or lvgl library in the library file of Arduino, delete it first and then add the new ui or lvgl library.
- Open the LVGL_change_background by Arduino.
Use Type-C USB cable to connect the board and PC, and select the development board "ESP32S3 Dev Module" and the port.
-
Select "Tools > board:"xxx" > ESP32 > ESP32S3 Dev Module".
-
Select "Tools > Port",Select the port number of the board.
-
Select Flash Size is 16MB(128MB), Partition Scheme is 16M Flash (3MB APP/9.9MB FATFS), PSRAM is OPI PSRAM.
-
Click the Upload button in the Arduino IDE and wait a few times while the code compiles and uploads to your board.
Results
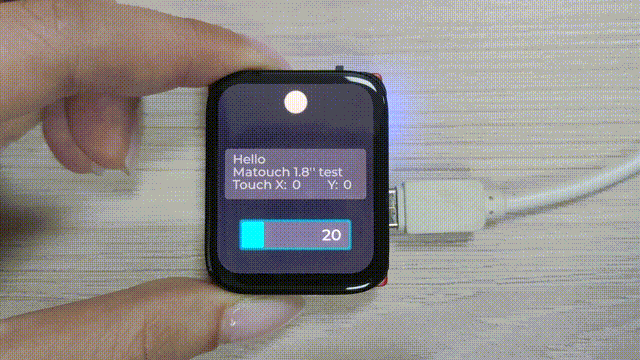
4.2.2 Animation
This demo is based on the LVGL animation feature. When you touch the ball, it will start bouncing and at the same time the touch coordinates will be displayed on the screen. There is also an adjustable slider for you to use.
- Download the library from github.
Once the download is complete, copy these libraries into the Arduino library.
- The default is usually in the "C:\Users\Your username\Documents\Arduino\libraries"
Note: If there is already an ui or lvgl library in the library file of Arduino, delete it first and then add the new ui or lvgl library.
- Open the LVGL_Animation by Arduino.
Use Type-C USB cable to connect the board and PC, and select the development board "ESP32S3 Dev Module" and the port.
-
Select "Tools > board:"xxx" > ESP32 > ESP32S3 Dev Module".
-
Select "Tools > Port",Select the port number of the board.
-
Select Flash Size is 16MB(128MB), Partition Scheme is 16M Flash (3MB APP/9.9MB FATFS), PSRAM is OPI PSRAM.
-
Click the Upload button in the Arduino IDE and wait a few times while the code compiles and uploads to your board.
Results
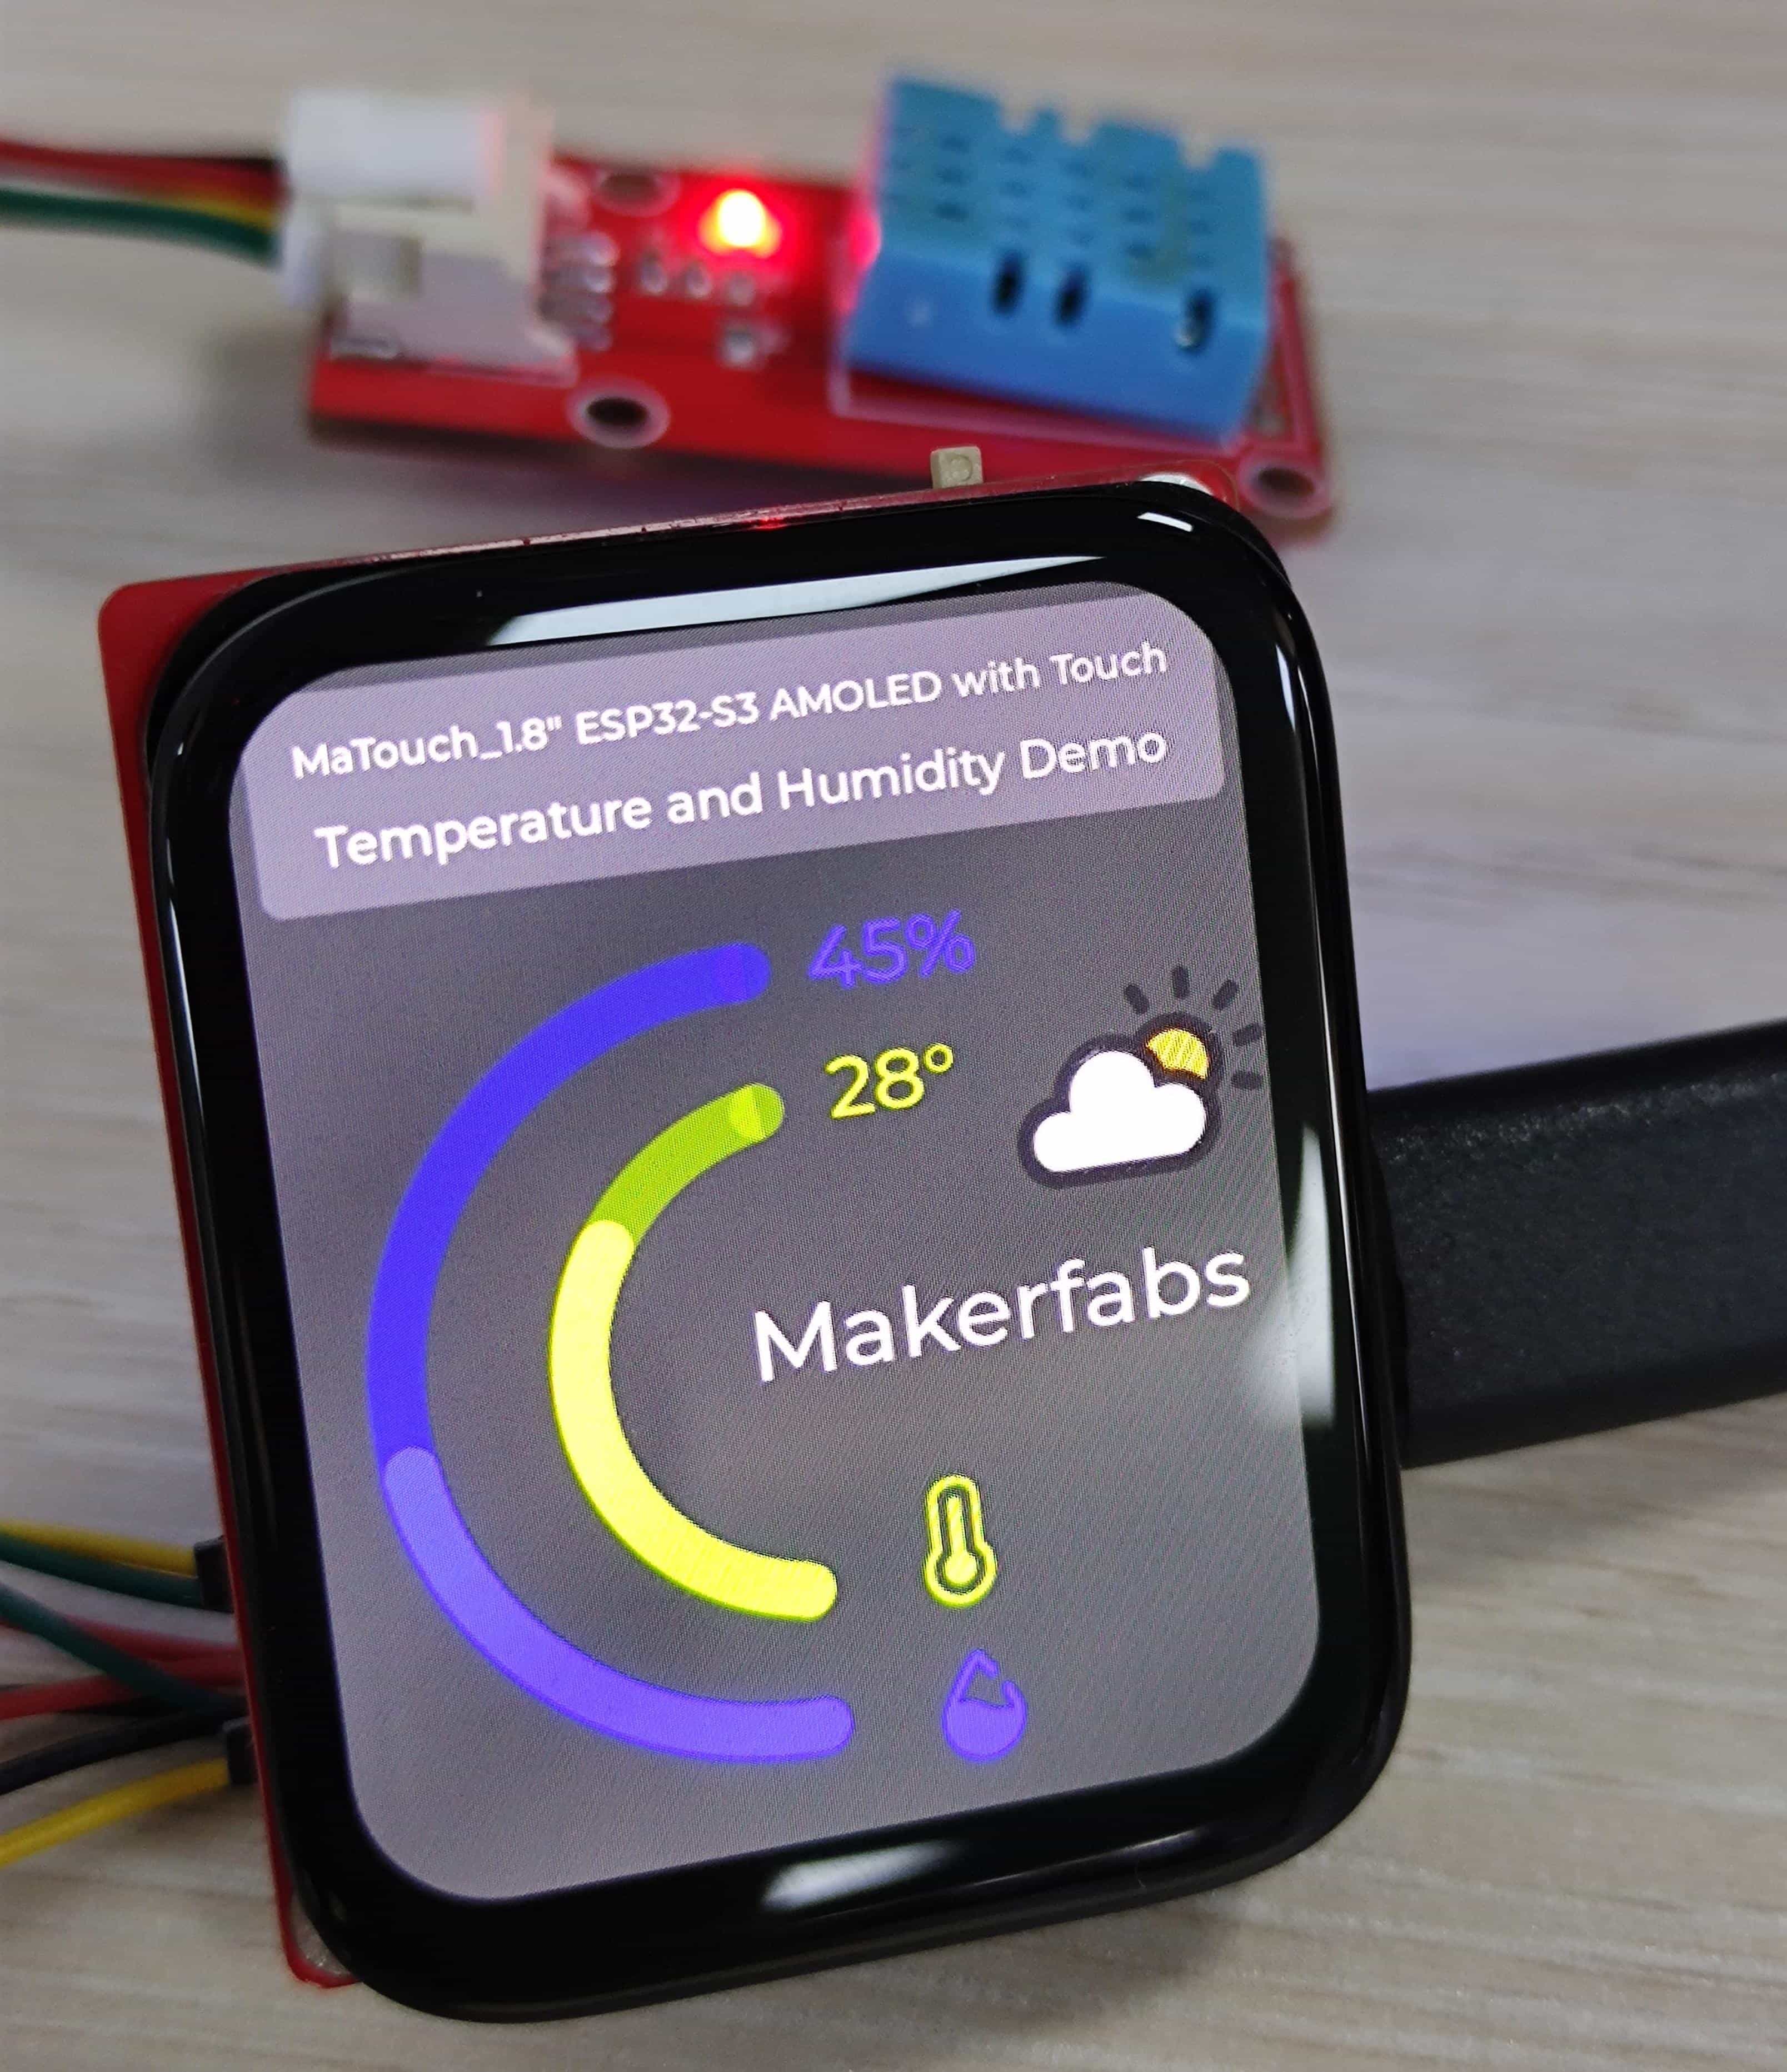
4.2.3 T&H demo
This demo is a temperature and humidity detection system designed by combining Squareline Studio and Arduino. First, we use Squareline to design the UI interface, then output the code to Arduino for programming, then add the DHT11 sensor to display the detected temperature and humidity to the screen.
Wiring schematic:
| MAOLED | DHT11 |
|---|---|
| IO17 | DATA |
| 3V3 | VCC |
| GND | GND |
- Download the library from github.
Once the download is complete, copy these libraries into the Arduino library.
- The default is usually in the "C:\Users\Your username\Documents\Arduino\libraries"
Note: If there is already an ui or lvgl library in the library file of Arduino, delete it first and then add the new ui or lvgl library.
- Open the LVGL_T&H by Arduino.
Use Type-C USB cable to connect the board and PC, and select the development board "ESP32S3 Dev Module" and the port.
-
Select "Tools > board:"xxx" > ESP32 > ESP32S3 Dev Module".
-
Select "Tools > Port",Select the port number of the board.
-
Select Flash Size is 16MB(128MB), Partition Scheme is 16M Flash (3MB APP/9.9MB FATFS), PSRAM is OPI PSRAM.
-
Click the Upload button in the Arduino IDE and wait a few times while the code compiles and uploads to your board.
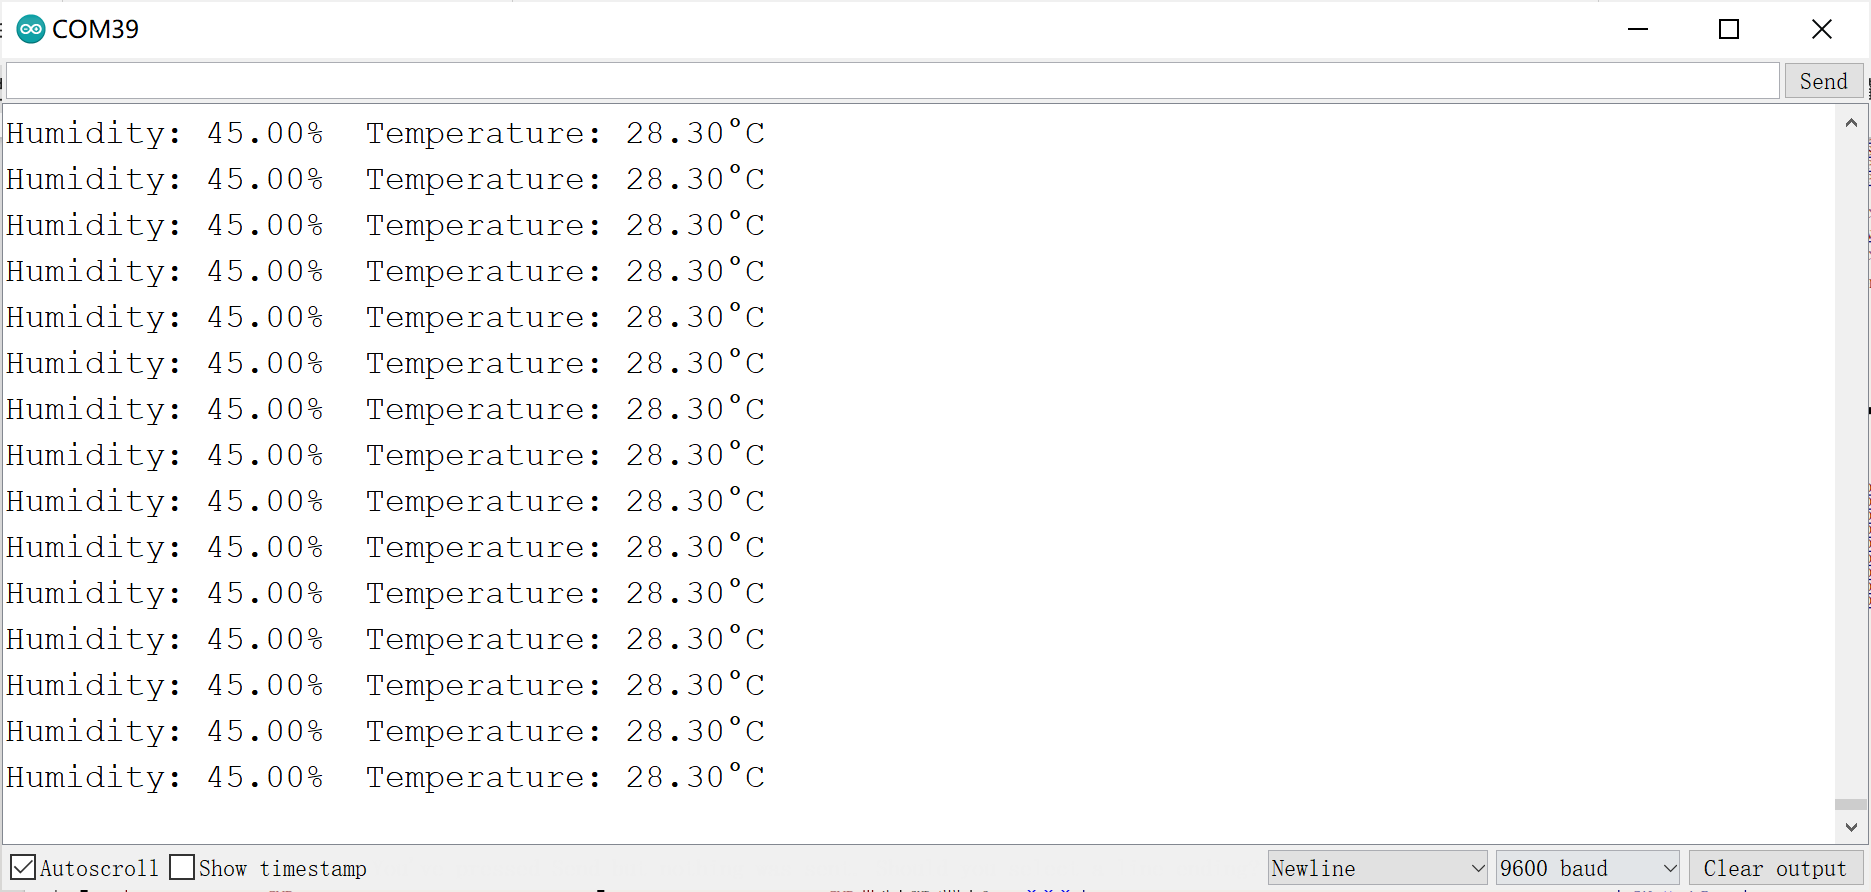
Results
Open the serial monitor and you will be able to see the value of T&H.
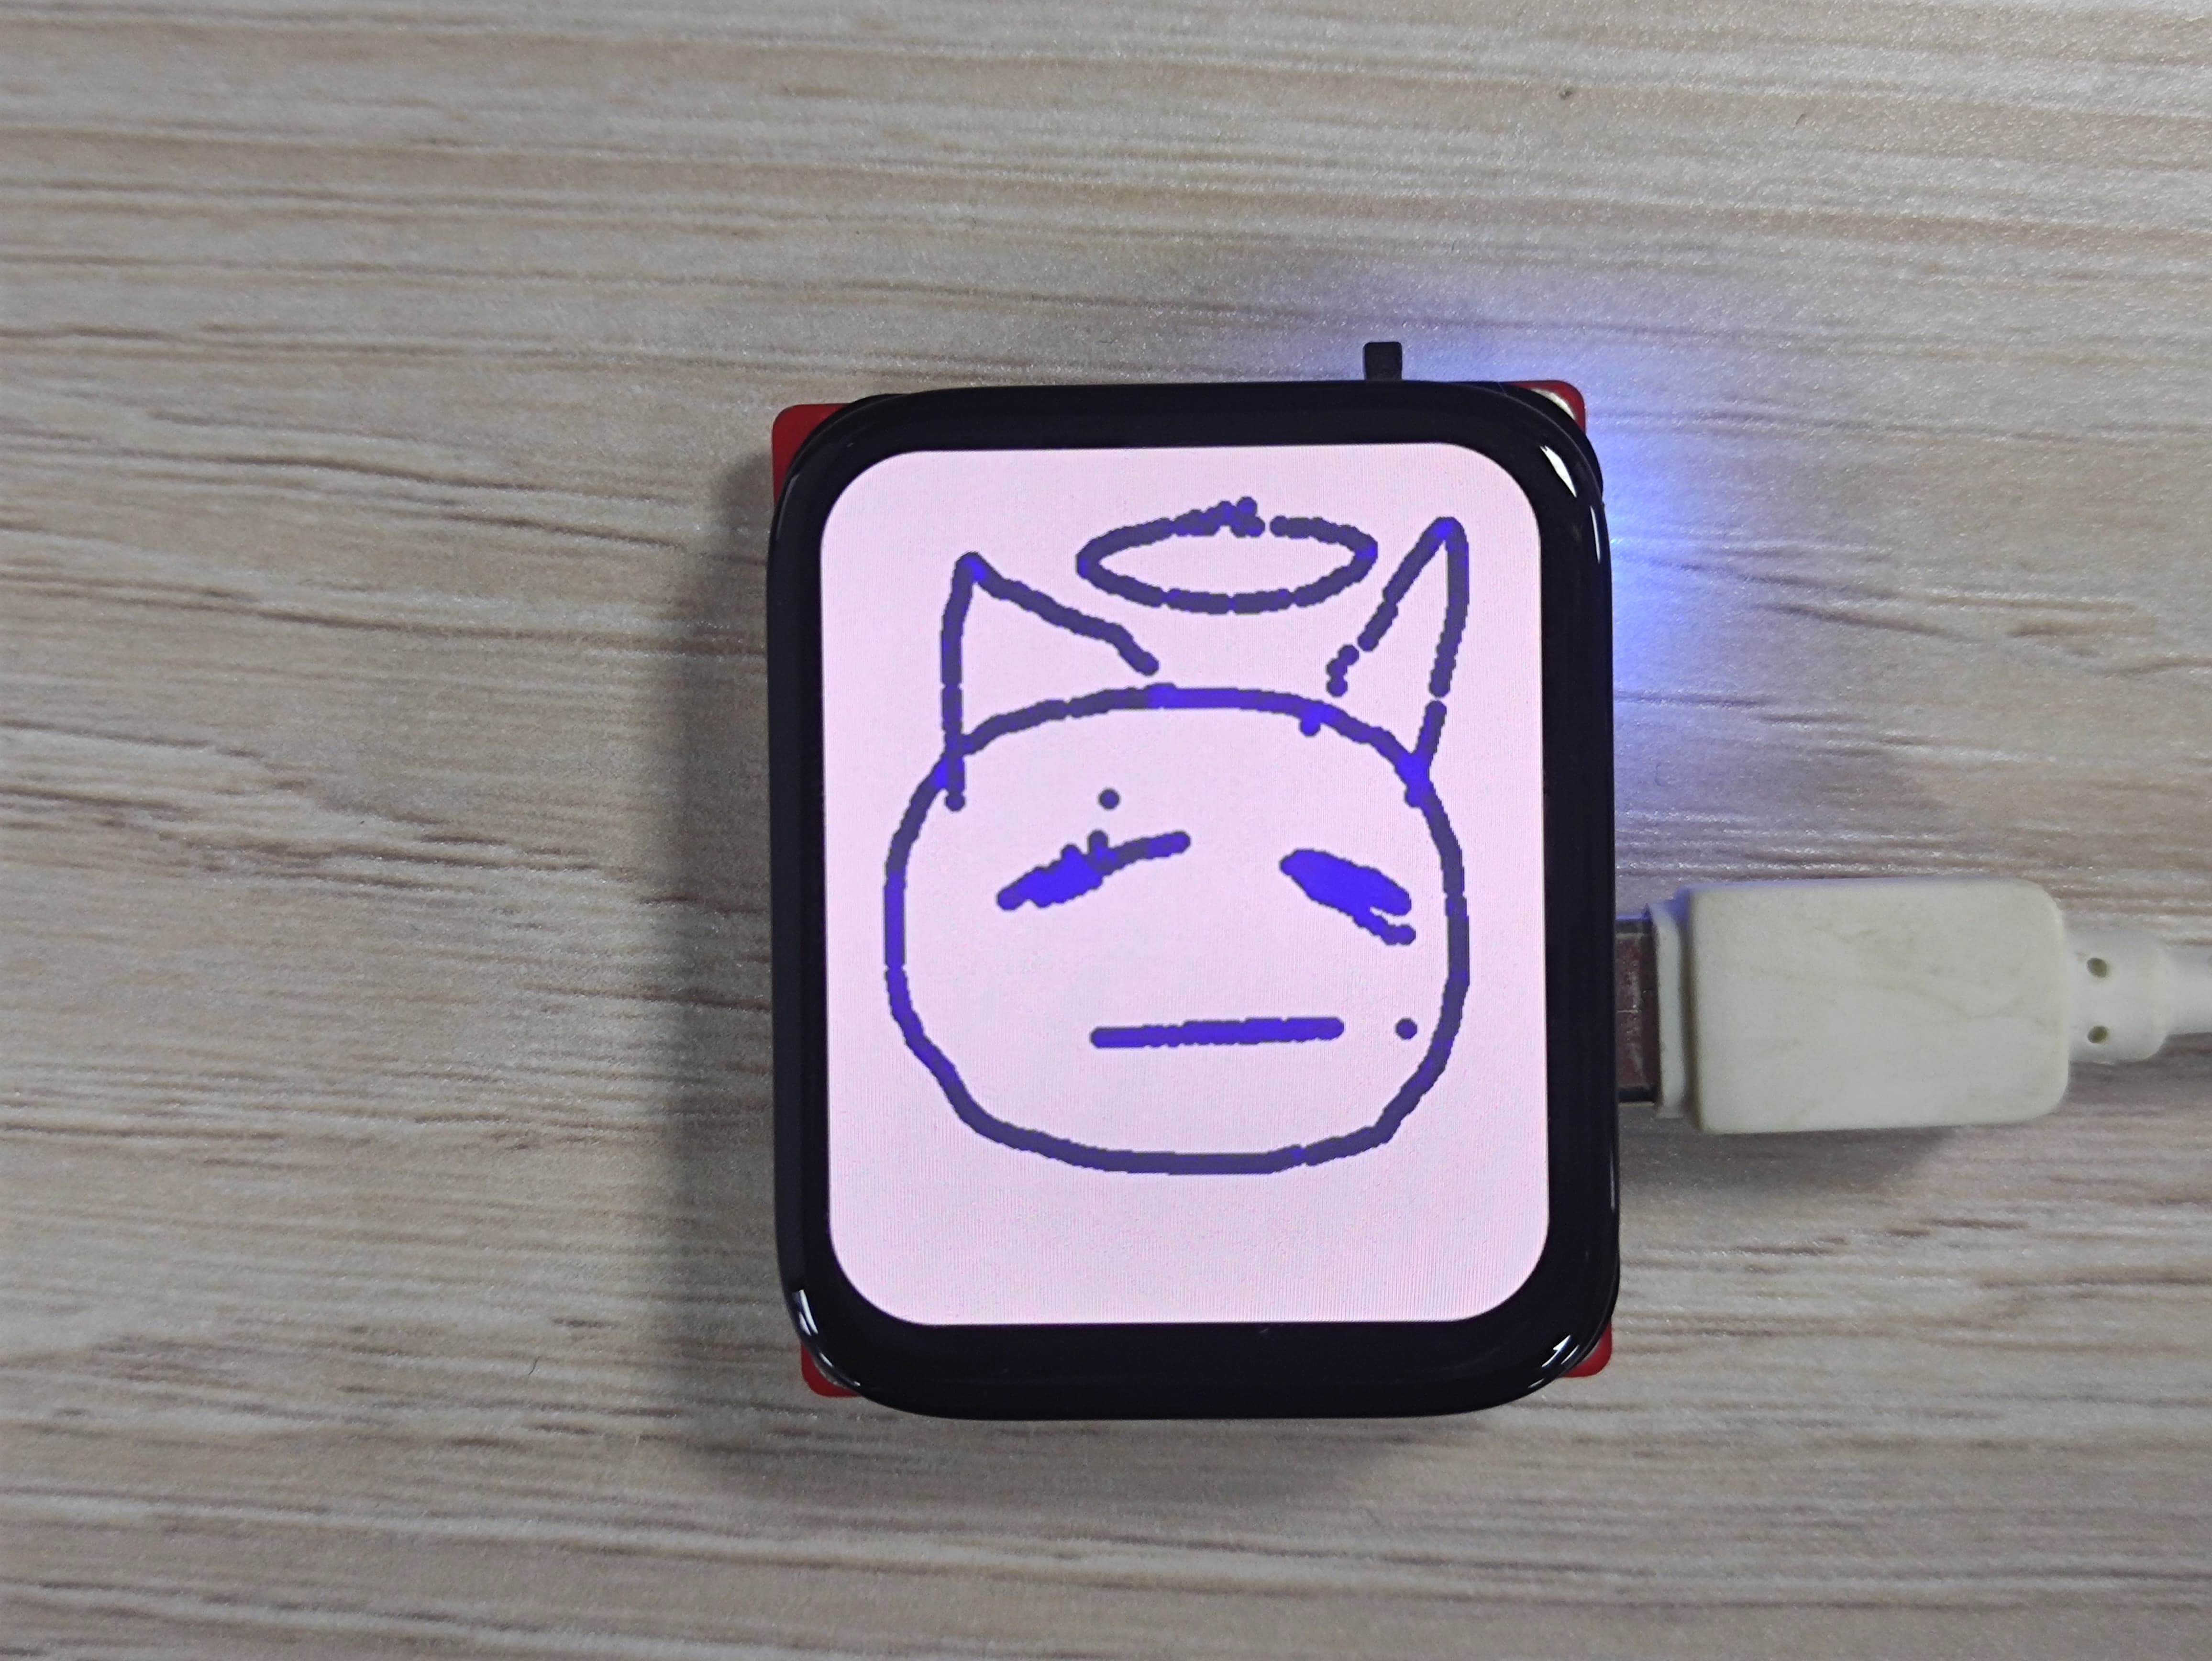
4.3 Drawing Board demo
This demo is a simple drawing board that allows you to draw your patterns in it.
- Open the Drawing_board by Arduino.
Use Type-C USB cable to connect the board and PC, and select the development board "ESP32S3 Dev Module" and the port.
-
Select "Tools > board:"xxx" > ESP32 > ESP32S3 Dev Module".
-
Select "Tools > Port",Select the port number of the board.
-
Select Flash Size is 16MB(128MB), Partition Scheme is 16M Flash (3MB APP/9.9MB FATFS), PSRAM is OPI PSRAM.
-
Click the Upload button in the Arduino IDE and wait a few times while the code compiles and uploads to your board.
After completing the upload, open the serial monitor and you will be able to see the coordinates of your finger touches and draw them on the corresponding drawing board.

Results
5. FAQ
You can list your questions here or contact techsupport@makerfabs.com for technology support. Detailed descriptions of your question will help to solve your question.