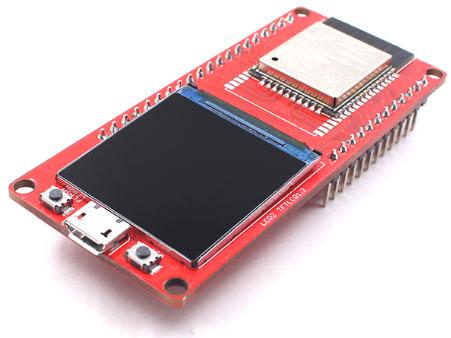
MaESP ESP32 Color LCD
Introduction
MaESP ESP32 color LCD is a development board for IoT applications. Based on ESP32, the board can act as a WIFI node easily; there on-board UART-USB converters to enable this module to be programmed anytime with a PC. The 1.3-inch LCD display screen is suitable for applications that need colorful displays. MaESP ESP32 color LCD is preloaded with MicroPython, simple and suitable for beginners to learn basic programming with MicroPython, Of course, users can free to change it to make it work with other platforms such as Arduino/GCC. It is very suitable for beginners to learn the Internet of things knowledge development board.
Model:MAKT32CL
Feature
- Wi-Fi Protocols: 802.11b/g/n(802.11n up to 150Mbps),A-MPDU and A-MSDU aggregation and 0.4us guard interval support
- Wi-Fi Frequency range: 2.4GHz ~ 2.5GHz
- Bluetooth Protocols: Bluetooth v4.2 BR/EDR and BLE specification
- Bluetooth Radio: NZIF receiver with-97 dBm sensitivity, Class-1/class-2 and class-3 transmitter, AFH
- Bluetooth Audio: CVSD and SBC
- CPU: Two low-power Xtensa® 32-bit LX6, ESP32-D0WDQ6
- CPU clock frequency: 80MHz to 240MHz
- Module interface: SD card,UART,SPI,SDIO,I2C,LED PWM,Motor PWM,I2S,IR,pulse,GPIO,capacitive touch sensor,ADC,DAC
- On-chip sensor: Hall sensor
- On-chip Internal RAM: 520KB
- Integrated crystal: 40MHz crystal
- Integrated SPI flash: 4MB
- Integrated PSRAM: NO(MakePython ESP32 WROOM), 8MB(MakePython ESP32 WROVER)
- Power supply: 5V, integrate 5V-to-3.3V LDO
- Operating current: Average 80 mA
- Minimum current delivered by power supply: 500 mA
- LCD: 1.3inch TFT ST7789 driver
- Recommended operation temperature range: --40℃ ~ +85℃
- Board size: 70*32.6mm
- Moisture sensitivity level(MSL): Level 3
Usage
How to use the Thonny
1.1Installing Thonny IDE
- Click this link to download Thonny IDE for Windows: https://thonny.org/ After a few seconds, you should see a similar file (Thonny.exe) in your Downloads folder
1.2Connection
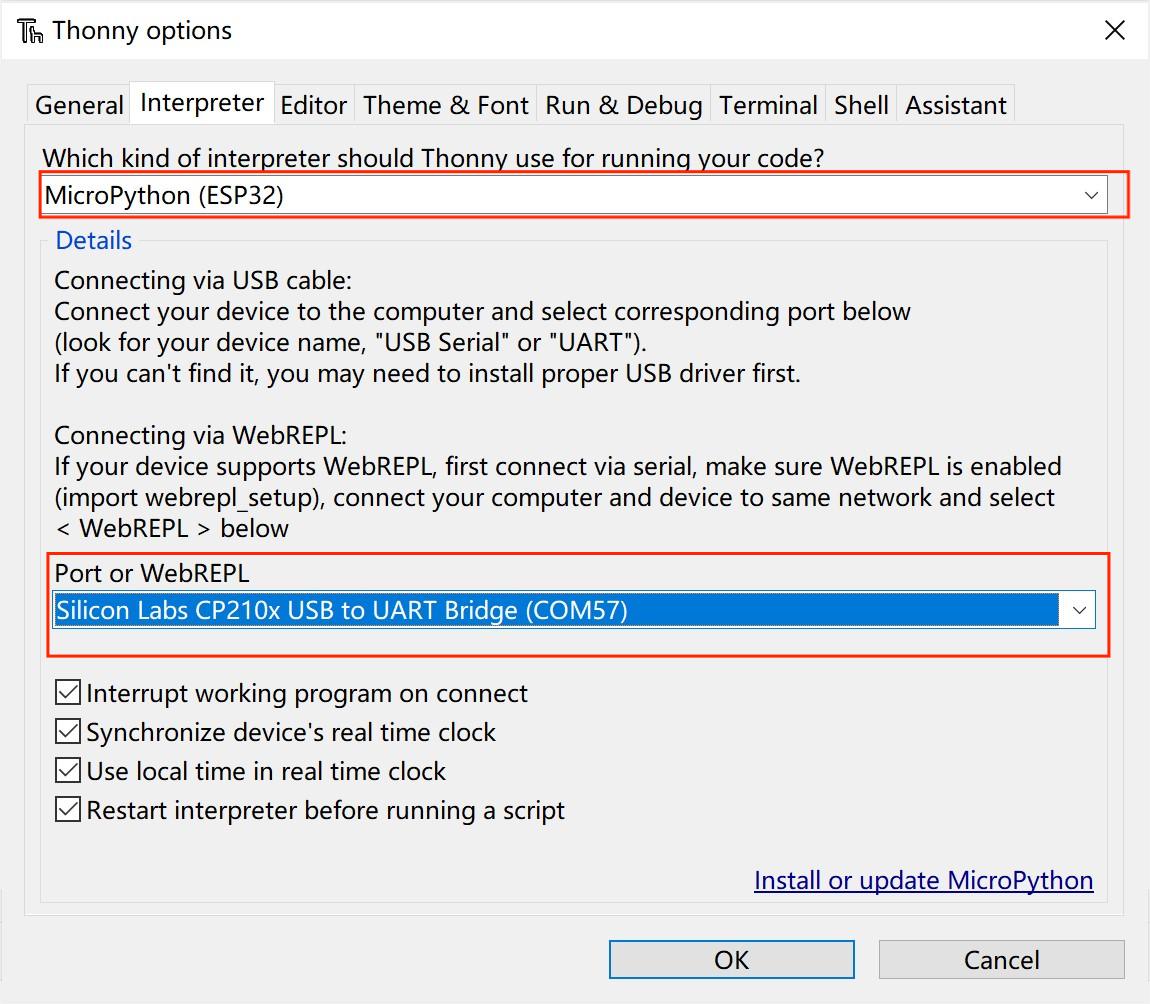
Connect MaESP ESP32 OLED to your computer through an USB cable, follow the steps:
- Tools > Option>>interperter
Choose the interpreter and port:
- Go to View > Files
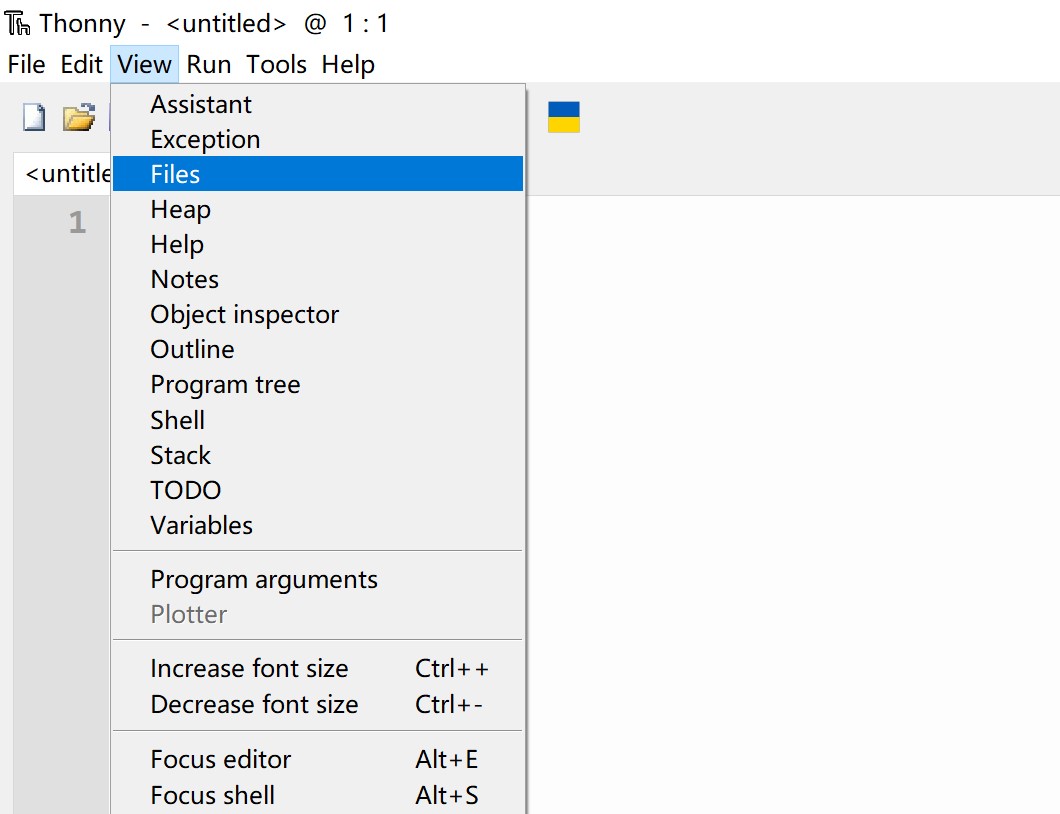
- Go to the path where you downloaded the file, upload the code in MicroPython device
You will see “>>> “ appear in the Shell window after a successful connection with your board. You can type the print command to test if it's working. Try to print:
print(“hello, world”)
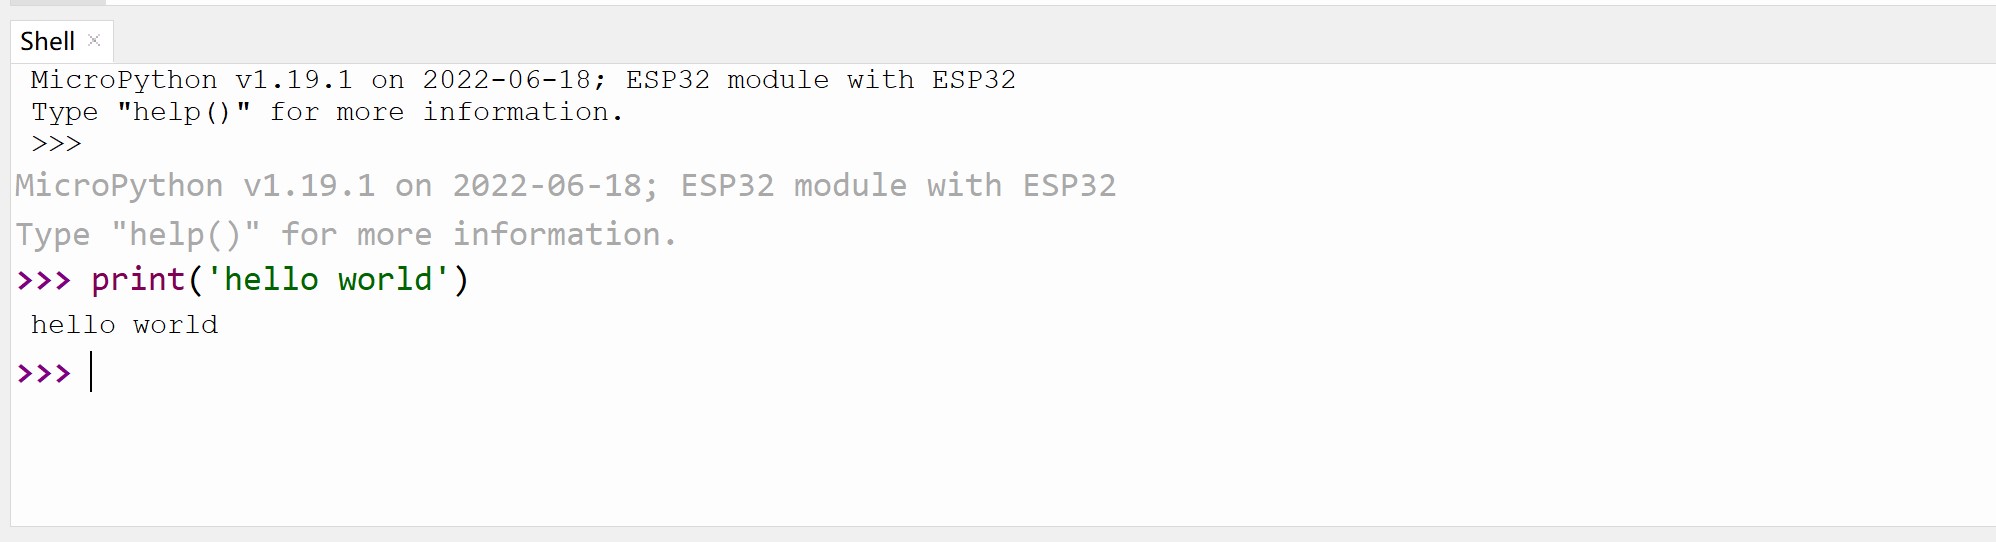
It should print the “Hello,World” message.
Display color words
Connect MaESP ESP32 Color LCD to your computer through an USB cable
Download the st7789.py driver library, romans.py and italicc.py file from here:Code
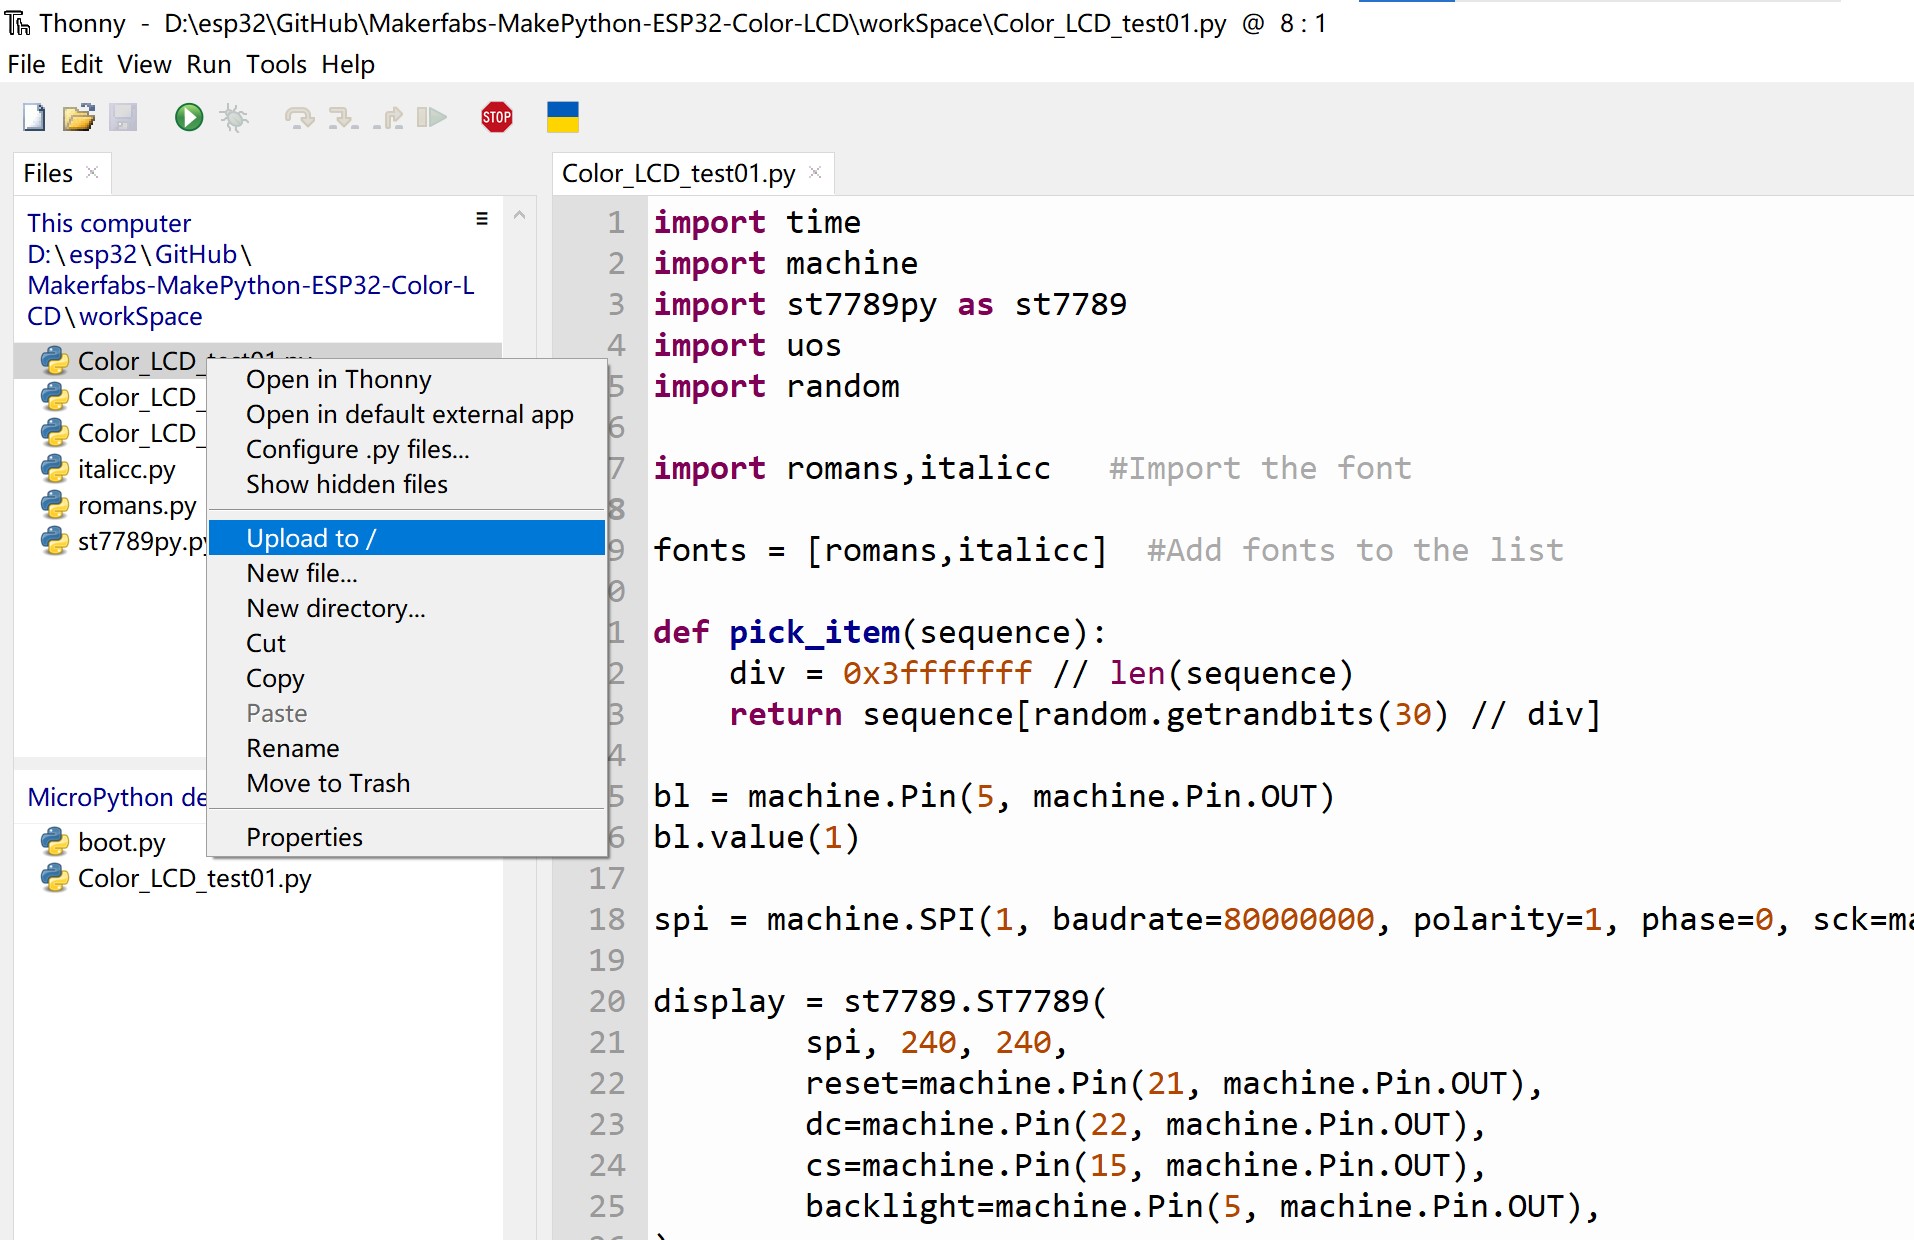
File > open and select the st7789.py, romas.py and italicc.py just downloaded
- Click on the right to DownloadAndRun
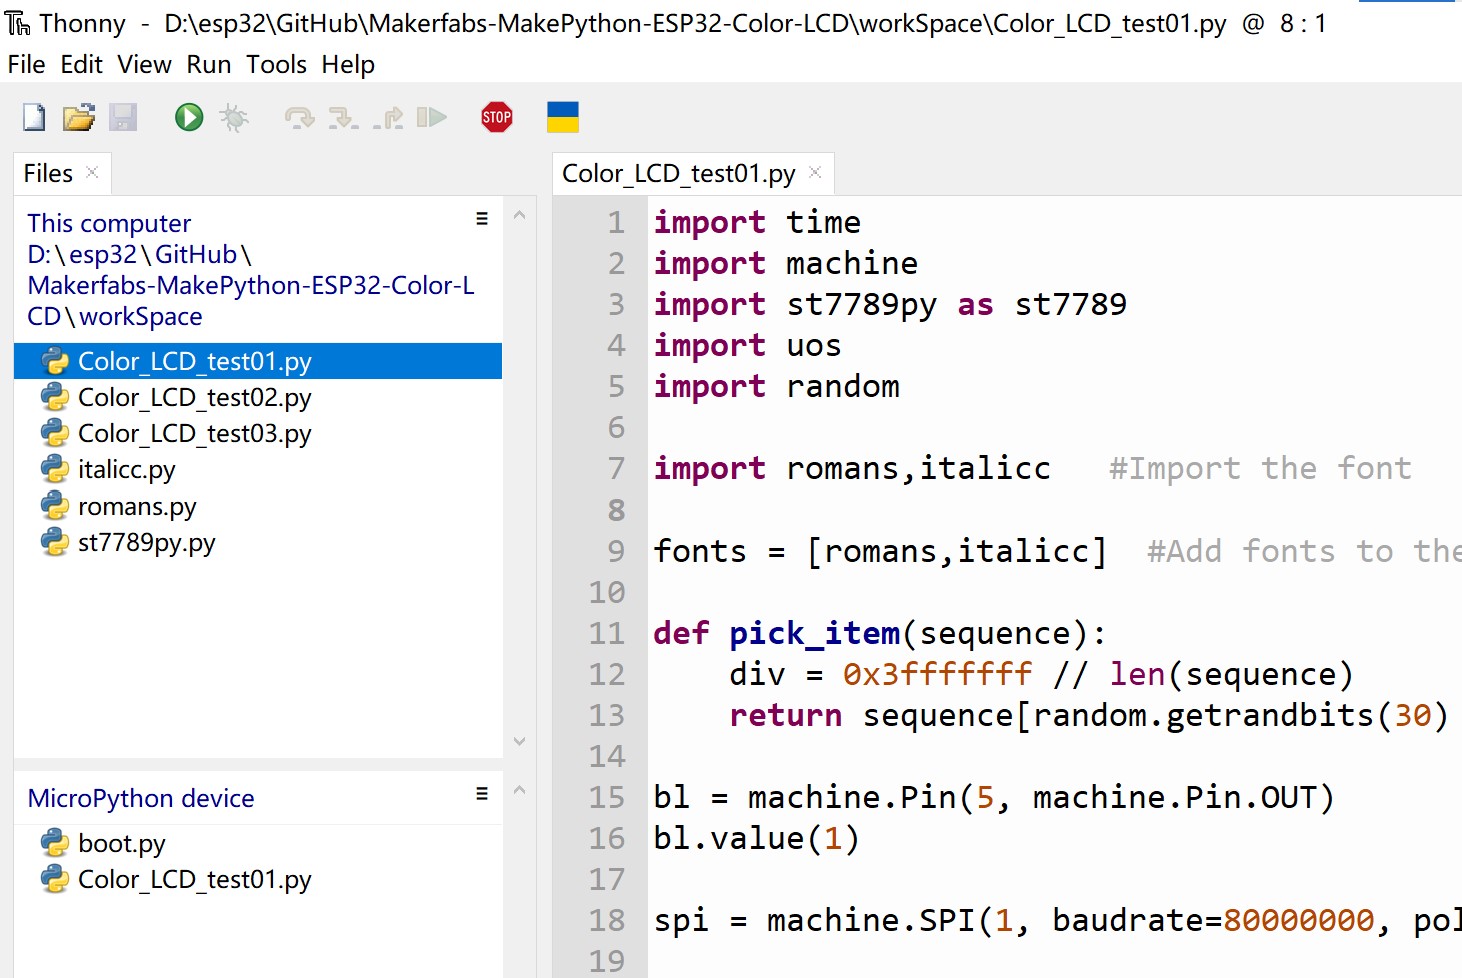
Download the sample code: Color_LCD_test01.py
- File > open and select the Color_LCD_test01.py, then click the runing button

Successful download will show similar results
import romans,italicc       #Import the font
fonts = [romans,italicc]    #Add fonts to the list
display.text()          #Display font, content, x and y positions, color
display.fill(st7789.BLACK)  #Clear screen
Show:
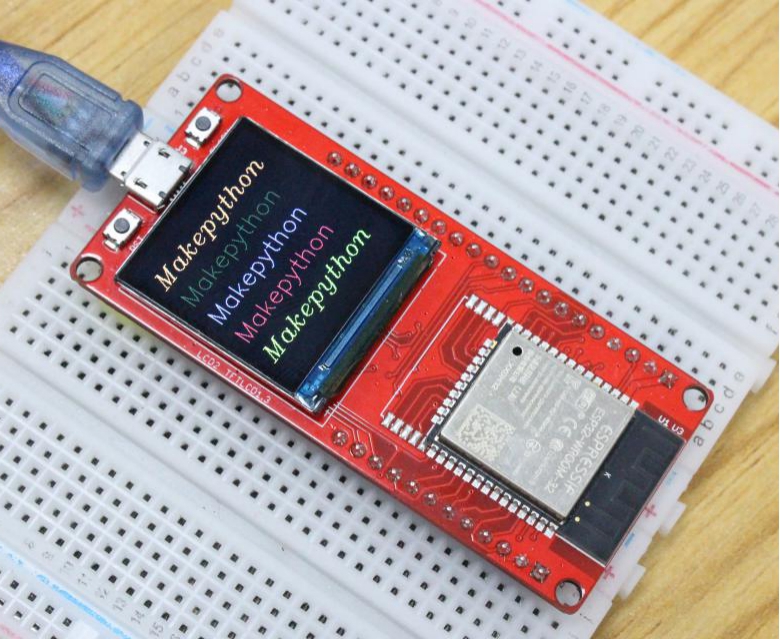
The screen randomly displays words in different fonts and colors
Get network time and display temperature and humidity
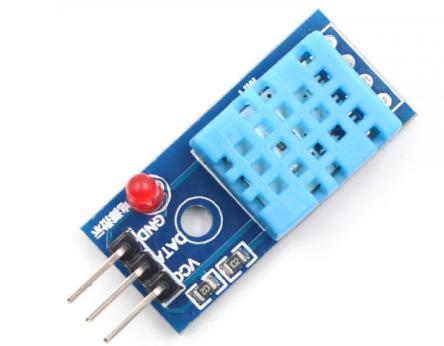
We use the humidity /temperature sensor at:
https://www.makerfabs.com/dht11-temperature-humidity-module.html
-
Sensor Connection
-
Connect the simple sensor to ESP32 boards as follows:
| DHT11 Pins | MaESP ESP32 Color LCD Pins |
|---|---|
| GND | GND |
| DATA | IO18 |
| VCC | 3V3 |
Connect MaESP ESP32 Color LCD to your computer through a USB cable.
-
Download the st7789.py driver library and romans.py file from here: Code
-
File > open and select the st7789.py and romas.py just downloaded
-
Download the sample code: Color_LCD_test02.py
-
File > open and select the Color_LCD_test02.py
-
You need to change the network name and password below :
connectWiFi("Makerfabs", "20160704") #Change the network name and password
- Then click DownloadAndRun
Show:
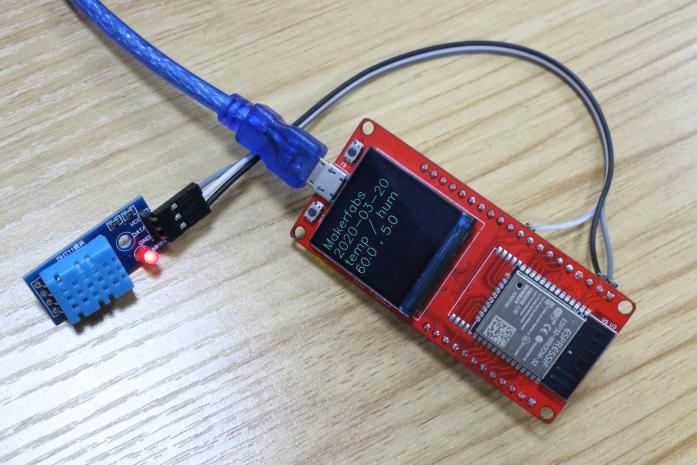
The screen shows today's date and the measured temperature and humidity
Display color pictures
1.Upload images to MaESP ESP32 Color LCD, steps are as follows:
-
Install PIP, download address: https://pypi.org/project/pip/#downloads (skip this step if already installed, python3 or above comes with PIP)
-
Install ampy, use the upload file function, type the following command and press enter (skip this step if already installed)
```pip install adafruit-ampy
- Enter cd + image path, enter the following command and press enter
cd C:\Users\yuan\Desktop\MakePython ESP32

Connect MMaESP ESP32 Color LCD to your computer through a USB cable
View COM port in device manager, mine is COM21

- Modify the corresponding COM port, upload the BMP picture, enter the following command and press enter
```ampy --port COM21 put logo01_240X240.bmp

2.Open uPyCraft software. After connecting the module, you can see the uploaded image name in the device directory Download the st7789.py driver library. File > open and select the st7789.py, then click DownloadAndRun Download the sample code Color_LCD_test03.py If you want to display other images, simply change the following statement in the program after uploading the image:
test_main('logo01_240X240.bmp')
Show:
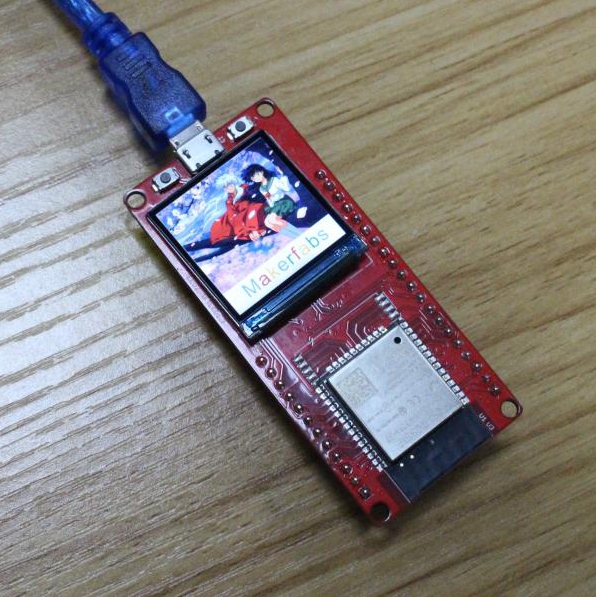
You can see the picture on the screen
How to use the Arduino
Arduino test
1.Install Arduino IDE.
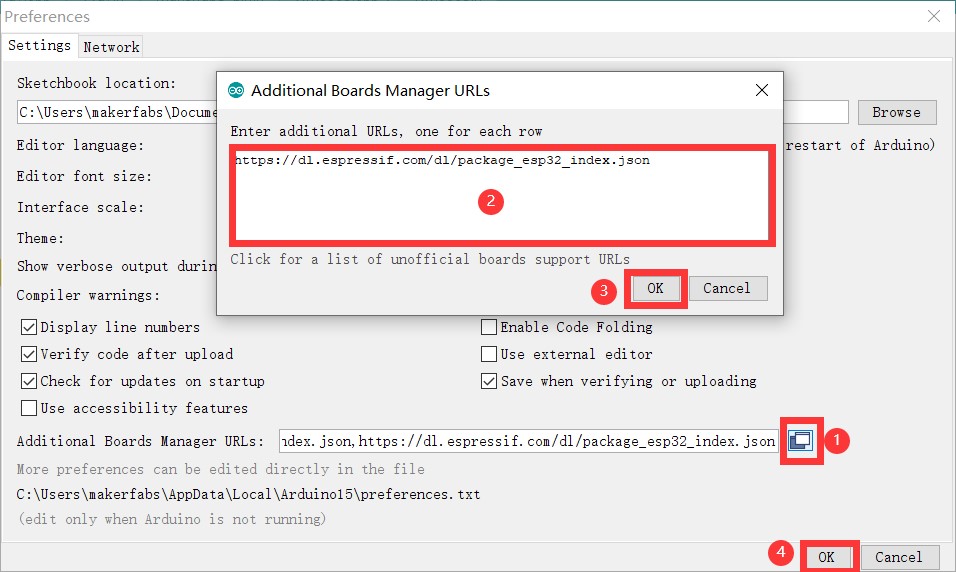
2.Install ESP32-supported packages.
- Select “File>Preferences>settings>Additional Boards Manager URLs” to fill in the link
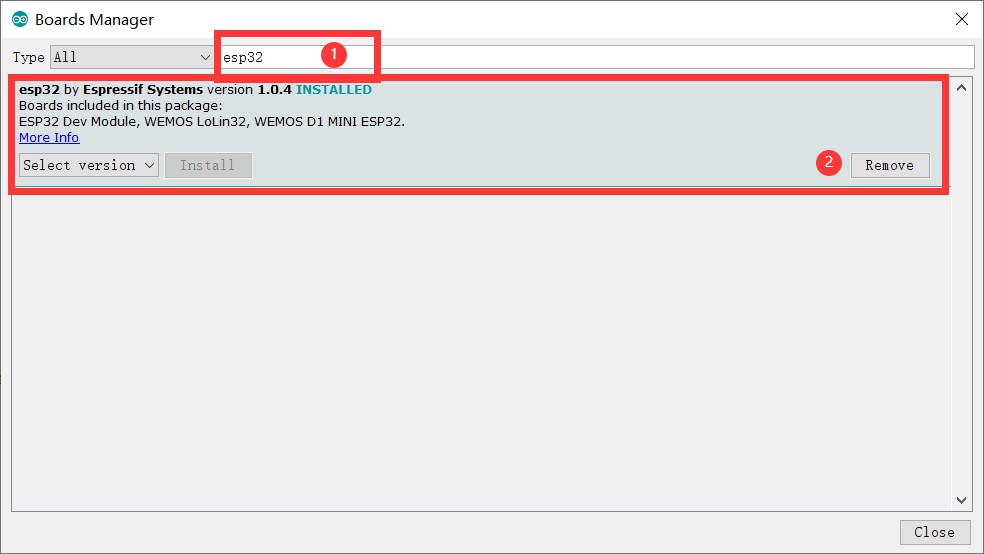
- Click “Tools>Board>Boards Manager” to search for and install the ESP32 library.
3.Install the LovyanGFX library. Click “Tools> Manager Libraries” to search for and install the LovyanGFX library.

4.Open the code.
5.Select Tools-> Board-> ESP32 Wrover Module, and Tools-> Port-> COM… .
6.Verify and upload the code Makerfabs-MakePython-ESP32-Color-LCD/Color_LCD_test/Color_LCD_test.ino.
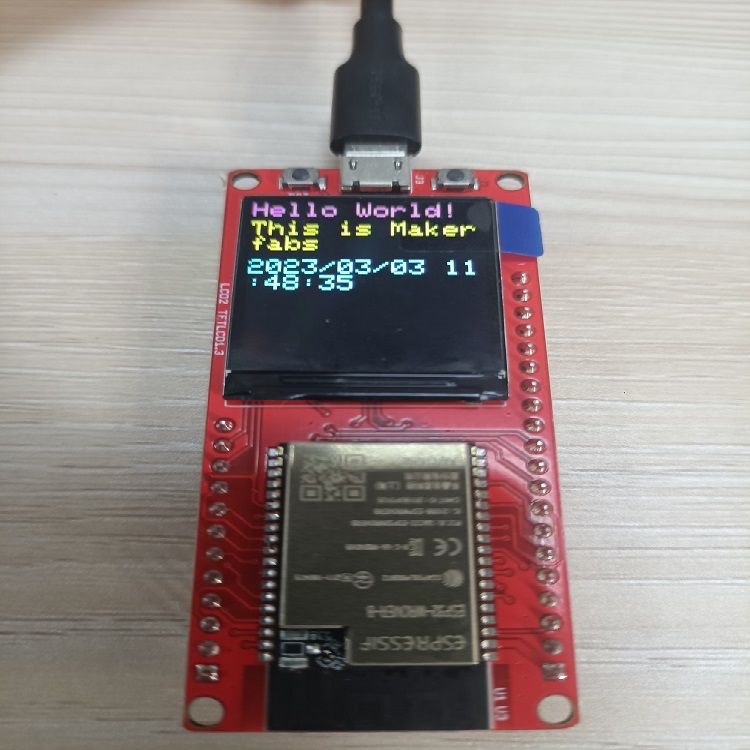
7.The LCD will show "Hello World, This is Makerfabs", and the NTP time display in the screen.
FAQ
You can list your question here or contact techsupport@makerfabs.com for technology support. Detailed descriptions of your question will be helped to solve your question.