LoRaWAN Temperature/ Humidity Soil Moisture Sensor
1. Introduction
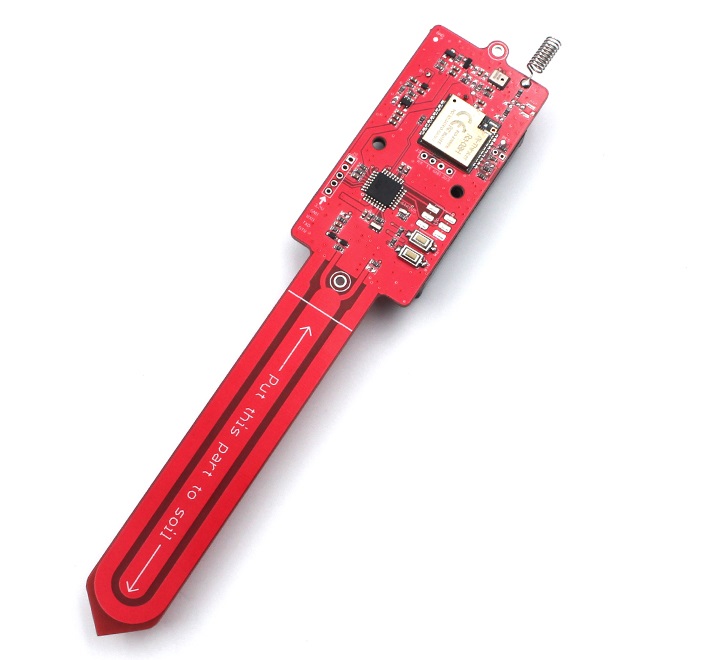
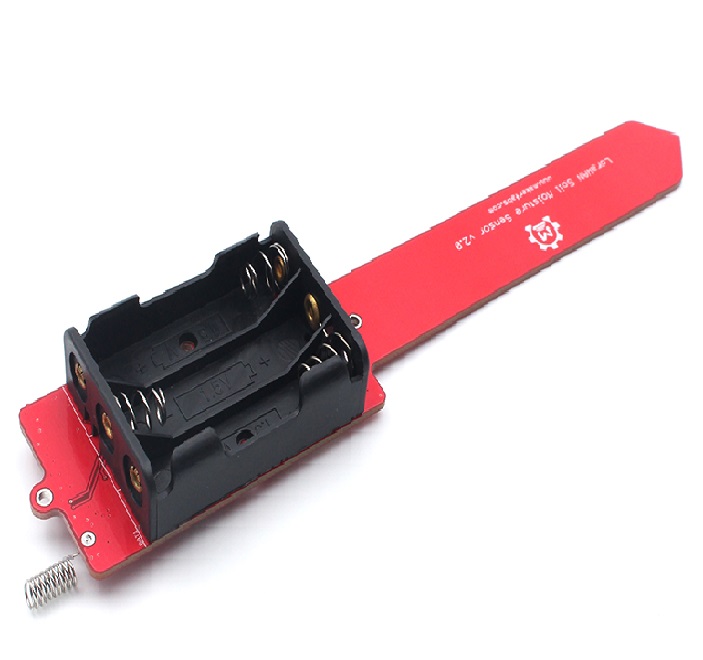
This module monitor soil moisture via capacitive method, with waterproof coating, it avoids the corrosion problem that usually happens on cheap resistor-mode soil moisture sensor. There is also onboard AHT10 -air temperature/ humidity sensor, to monitor air status, proper for usage in the greenhouse. This module uses 3x AAA battery as power, with sleep current of 26uA and working current of 4mA, the average working time can be more than 1 year. (with 1-hour message interval, Class A ).
This module is mainly for prototyping/ creating, we provide the firmware frames to users, In the firmware frame, we have set the lower power module, PWM setting, etc, users can simply modify a few codes (Appkey/ AppEUI/ DevEUI), to achieve a LoRaWAN application in few minutes. Also, users can modify the setting, such as LoRaWAN message interval, add/ remove functions freely in the codes. Of course, you need to make sure you have a LoRaWAN router in advance.
Comparing the LoRa or LoRawan, please click this blog link. it maybe helps you to realize them more.
Model:OHLWSMS01
2. Features
- LoRaWAN Nodes, RA08H
- Soil Moisture Measurement based on capacitive Testing
- Low power: 7.1uA when sleeping/4mA in message sending turn around
- Onboard AHT10 sensor to monitor air temperature and air humidity
- Onboard Battery Voltage Measurement
- Full Open Source- all hardware and software open at GitHub
- Compatible with Arduino
- Supply power voltage: 4.7~3.5V
3. Usage
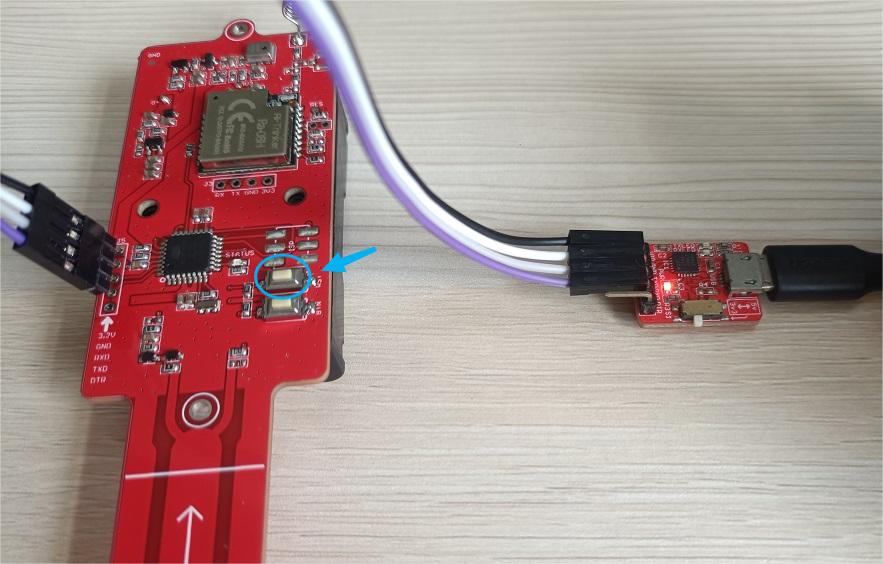
Note that if you want to re-upload the code, you need a USB-to serial tool, when uploading the code, you need to press the Reset button to enter the burning mode.
3.1 Gateway Setting
The module is communicated with the gateway by LoRaWAN, so users must have a gateway to support the module working well. The LoRaWAN module has a unique communication frequency to work. for example 433MHz, 868 MHz(EU)、915 MHz(NA)and 923 MHz(ASIA).
The following example uses gateway 915MHz
In this project, we use the LPS8N from dragino. It is a 915MHz getaway, users can learn how to configure the gateway as follows.
When we use the gateway, it will auto generate a WiFi network called dragino-xxxxxx with password: dragino+dragino. If it connects successfully, users can go on to log in to the LoRawan Gateway Web UI.
Users can use a PC to connect to this WiFi network. The PC will get an IP address 10.130.1.xxx and the LPS8N has the default IP 10.130.1.1
Open a browser on the PC and type the LPS8N IP address. You will see the login interface of LPS8N as shown below, and input the Username and password.
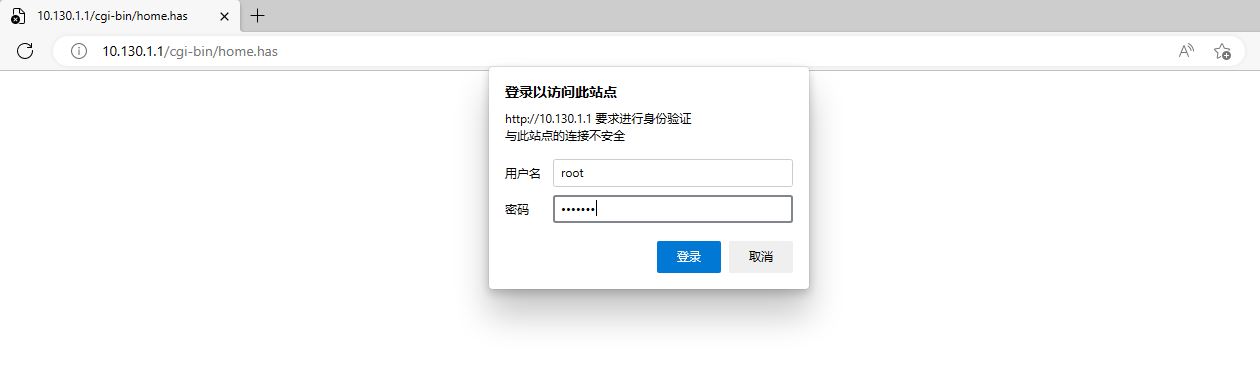
The account details for Web Login are:
UserName: root
Password: dragino
If users log in to this web UI successfully, they can see the interface of LoRawan Gateway as follows.
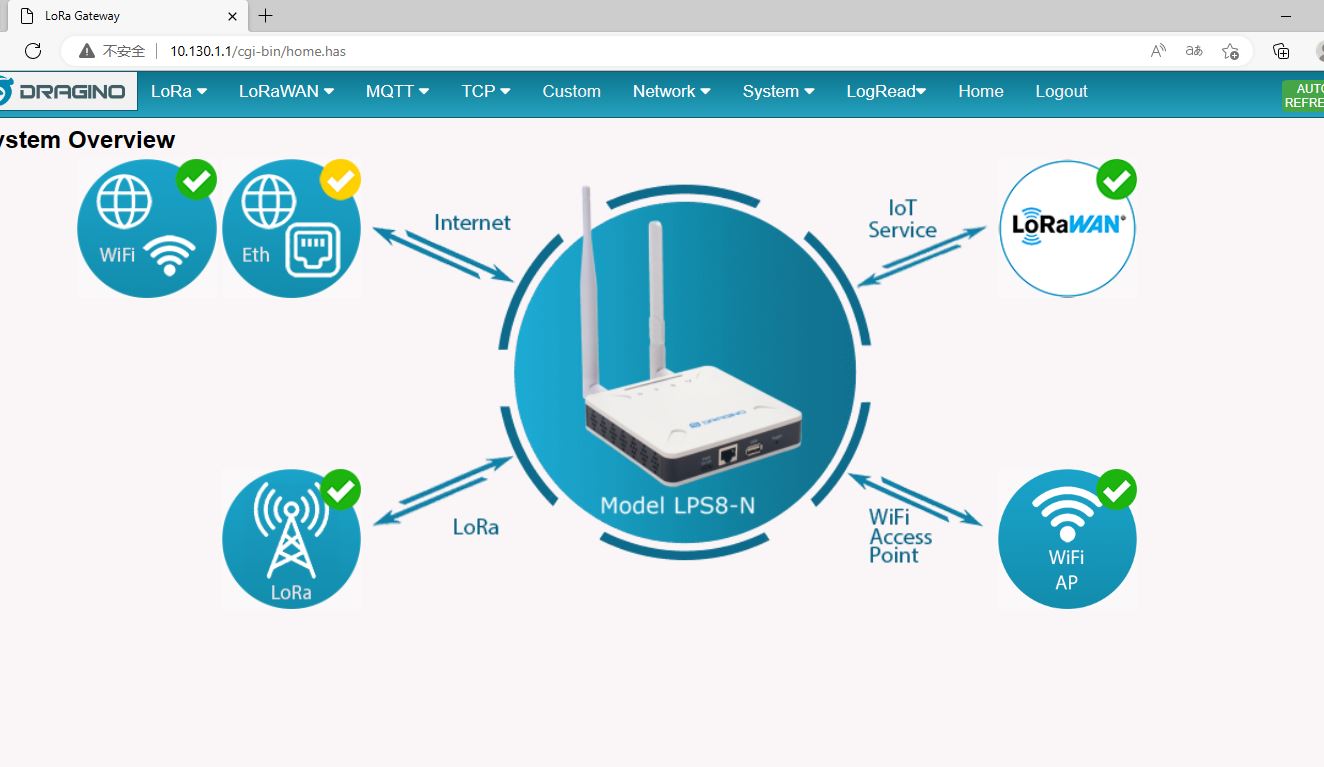
- Access the Internet as a WiFi Client
Click The WIFI Access Point.
Then start to configure the wifi client in order to access the internet.
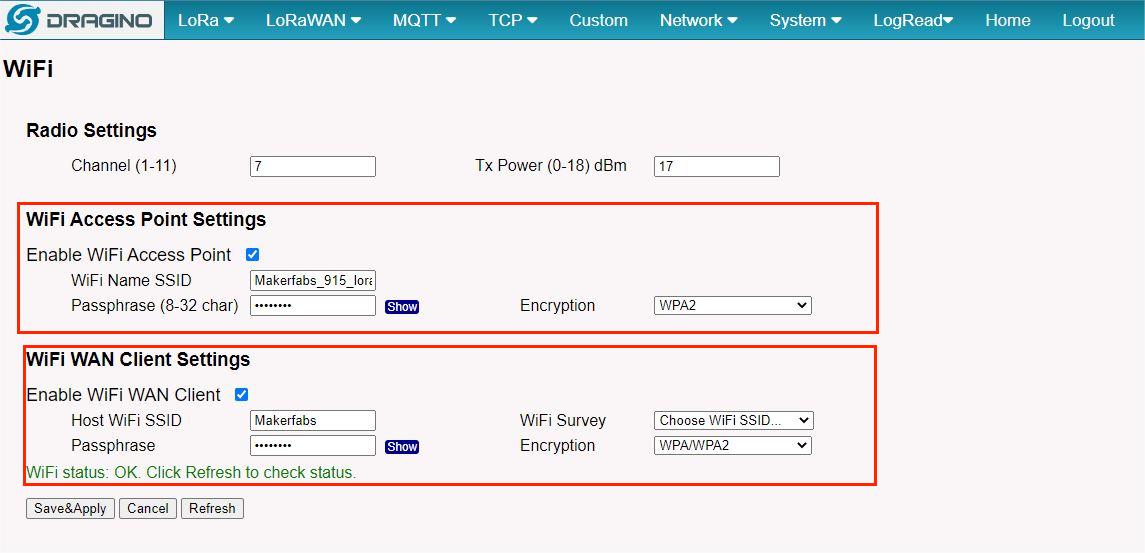
WiFi Access Point Settings can make the gateway to AP mode, and the PC or other devices can use the account to surf the Internet.
The WIFI SSID can Set it to the name you want, when users configure it successfully, it can be searched in your computer's Network settings. And the passphrase is this new wifi's password. users can set the password that they like.
WFII WAN Client Settings can make the gateway to STA mode, It can connect your WIFI, like WDS. to build a WiFi mesh.
The host WiFi SSID and passphrase are the user's original WiFi settings, and WiFi Survey is choose the user's original WiFi name. it can search near all the WiFi.
Note: Encryption mode can be set as in the picture. it depends on your wifi.
Click Save&Apply to configure the gateway.
- Gateway LoRaWAN Setting
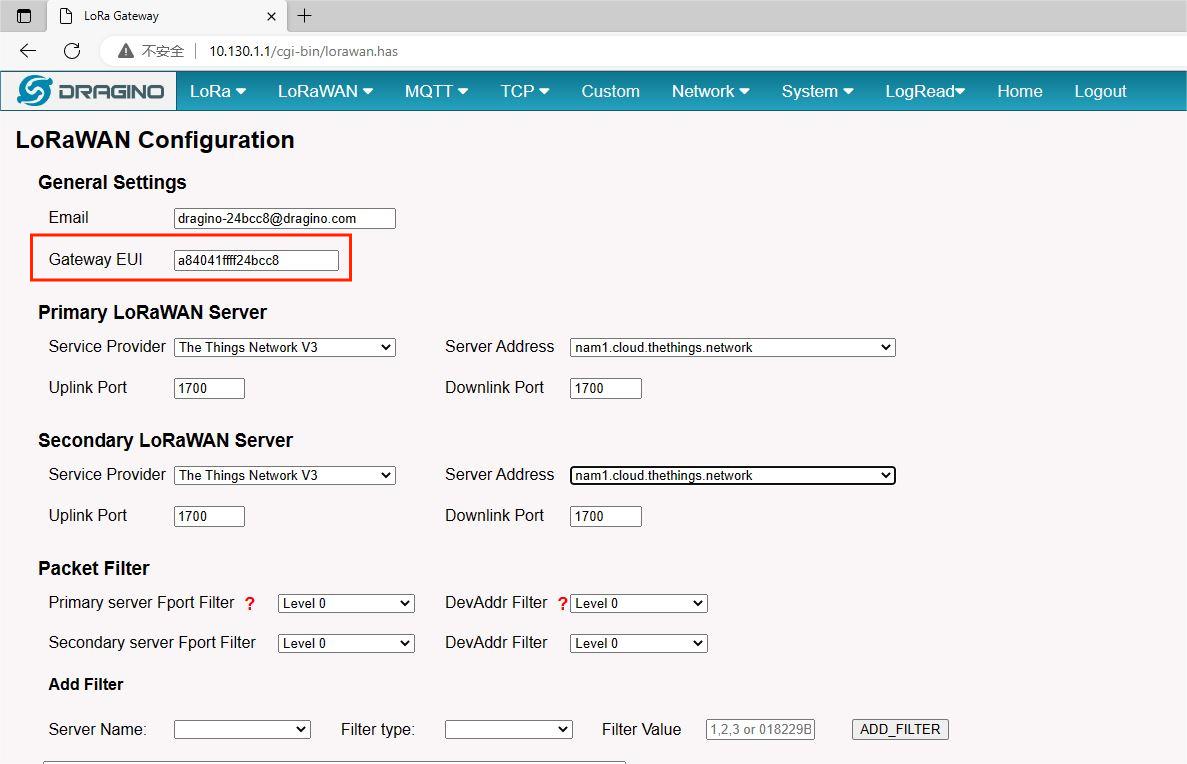
Users should remember the Gateway EUI(every gateway has its unique EUI), the EUI will be set in the The Things Network(TTN)
For other settings, users can follow the picture,
The Primary LoRaWAN Server can link to the TTN Server By users setting the "Service Provider", and TTN has three different frequencies of servers, choose the nam1.cloud.thethings.network
For example, the Primary LoRaWAN Server setting.
Then Click Save&Apply to configure the gateway.
3.2 TTN Setting
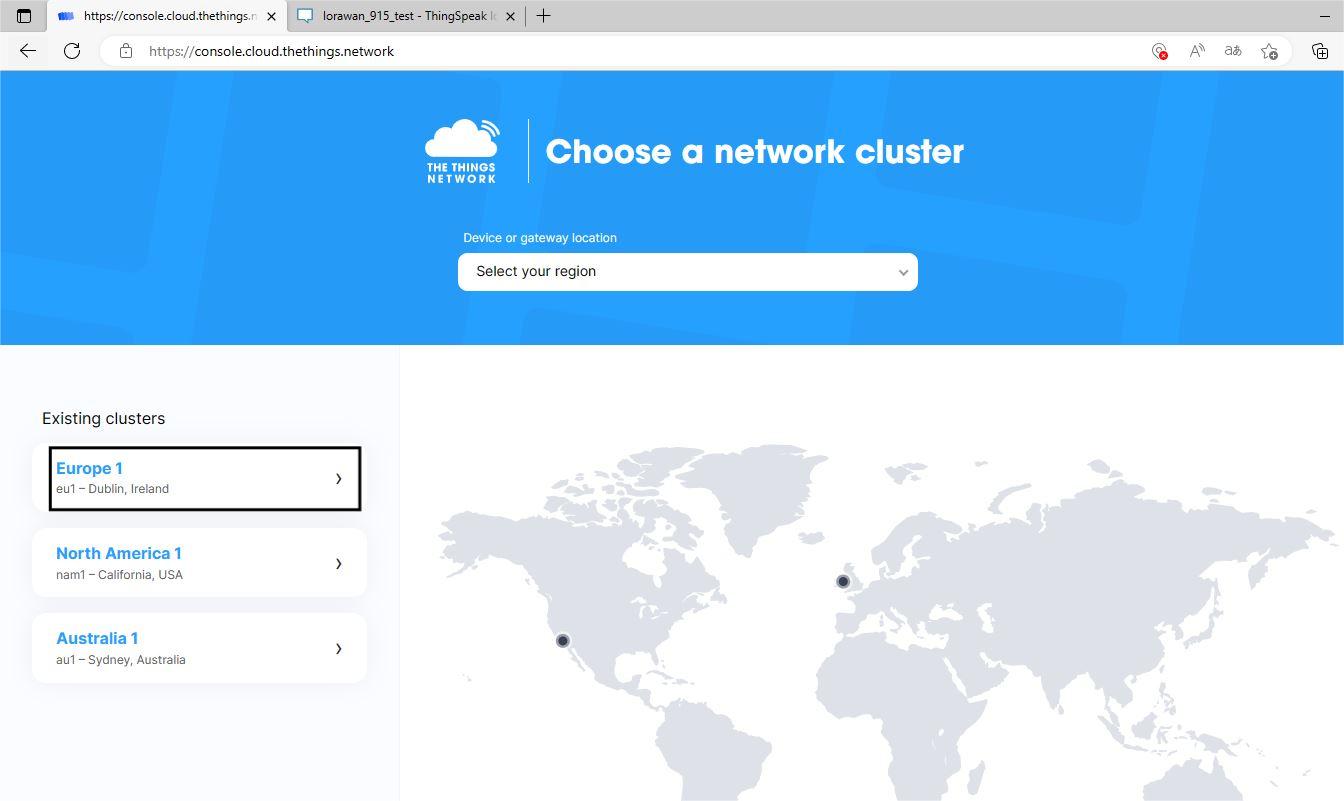
Search the TTN on the web and apply for a new account, login to the account and select a cluster network. For example 915MHz frequency.
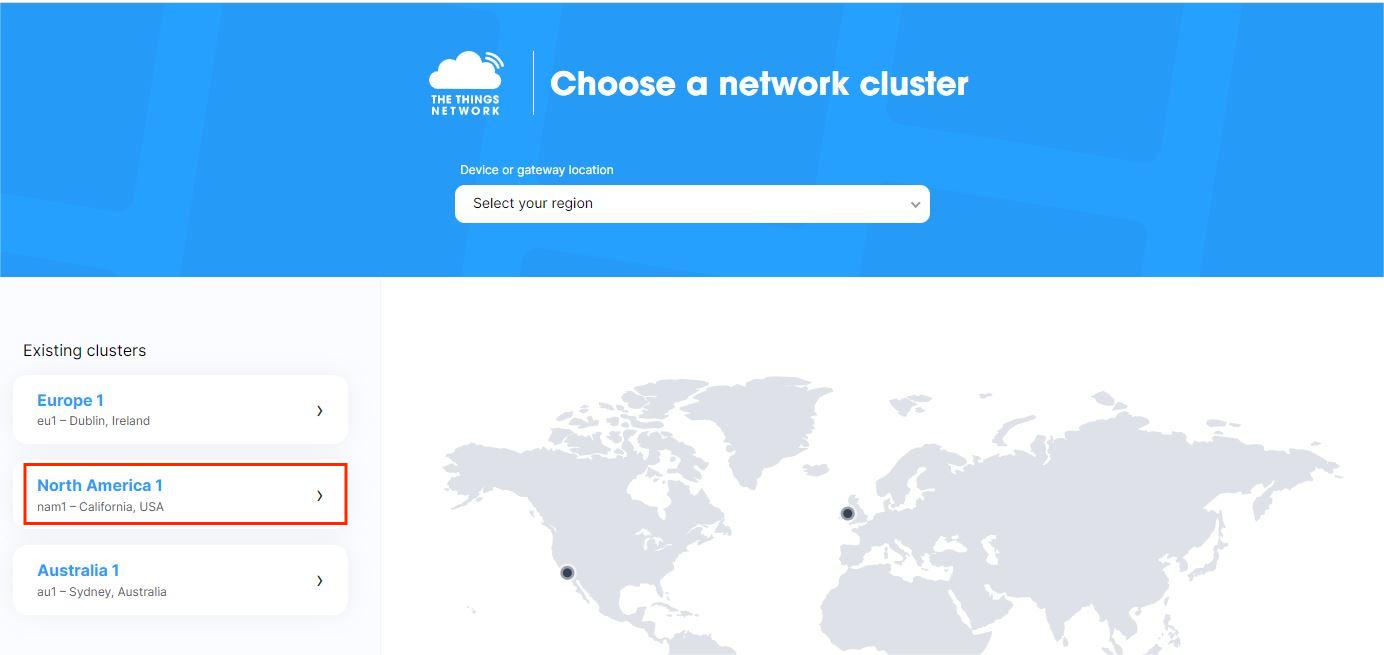
Choose the North America 1 in Existing clusters.
- Setting the Gateway in TTN
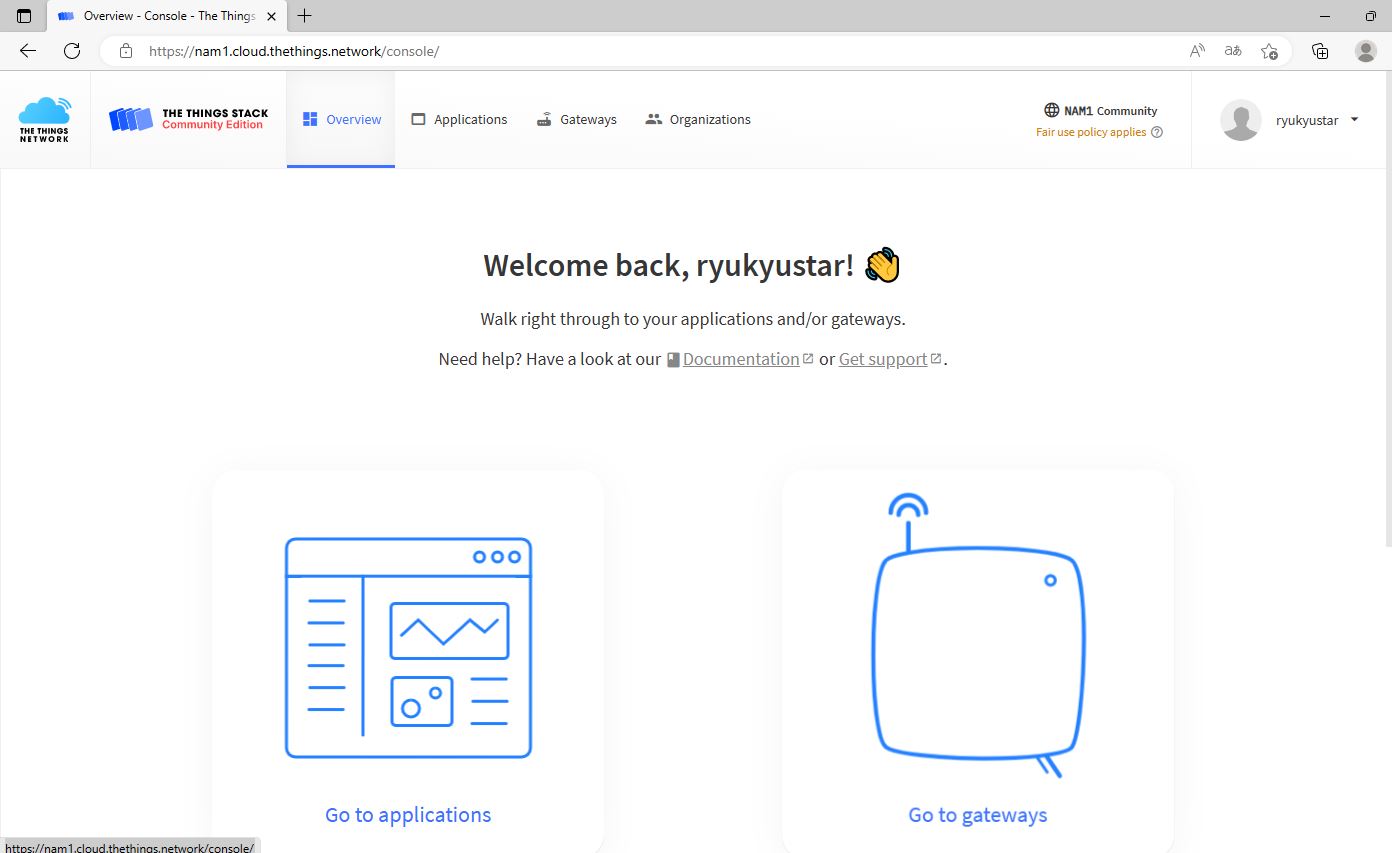
Users choose to set the gateway by clicking the go to gateways.
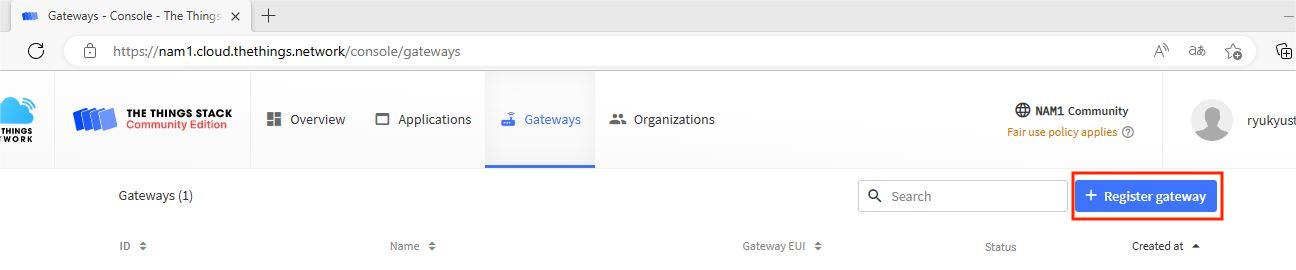
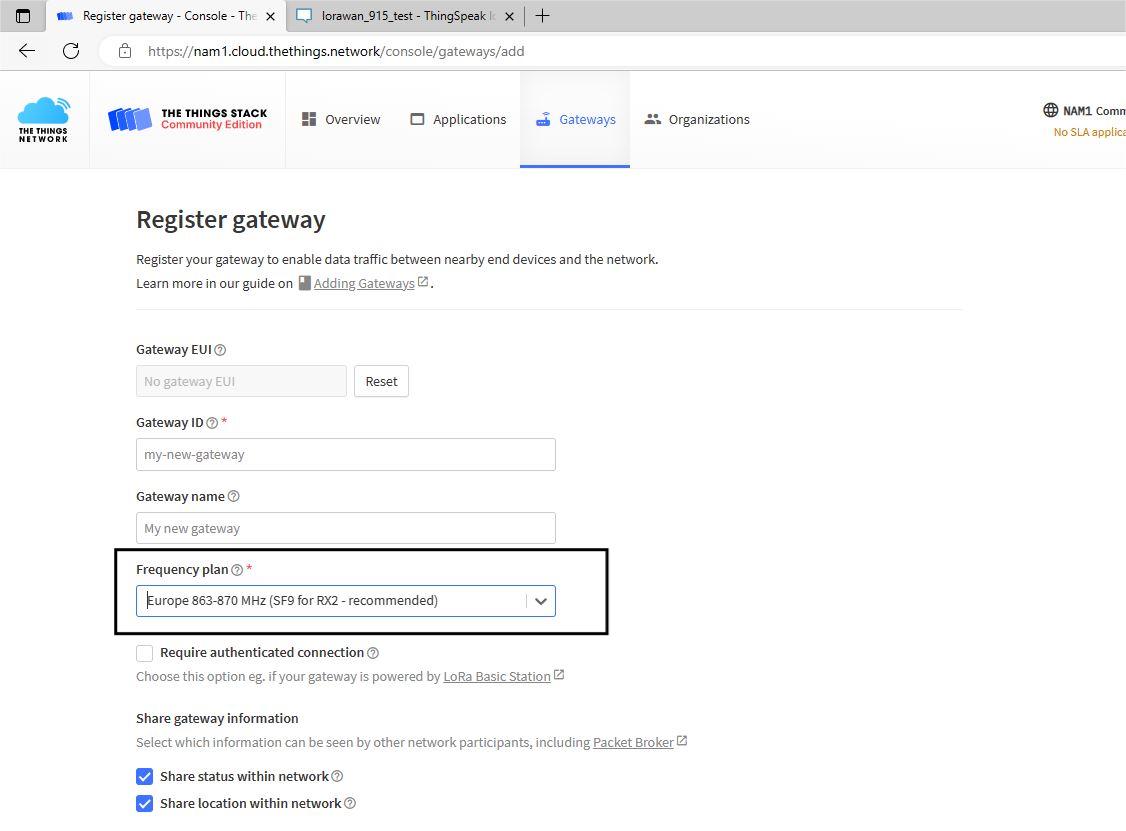
Click the Register gateway
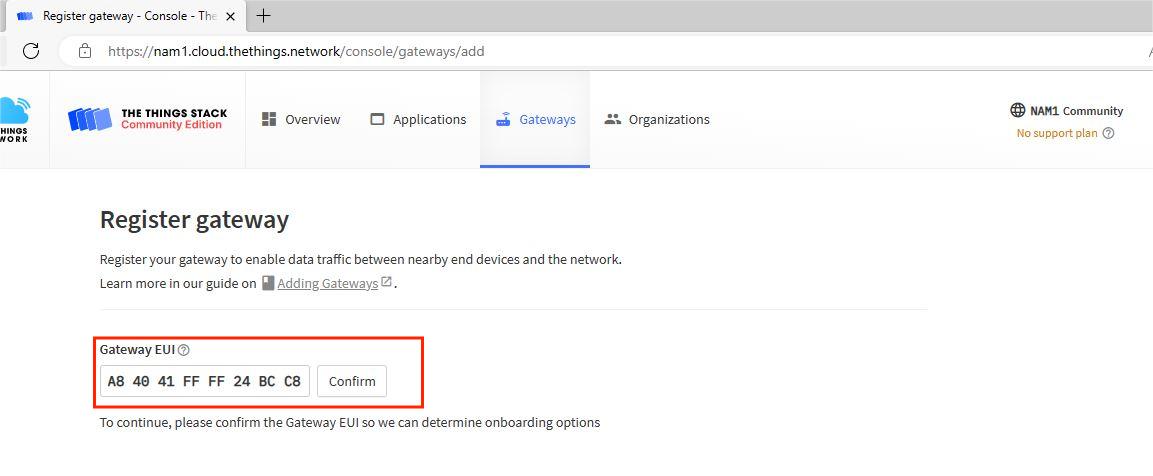
Copy LoRaWAN Gateway EUI here, and click the confirm.
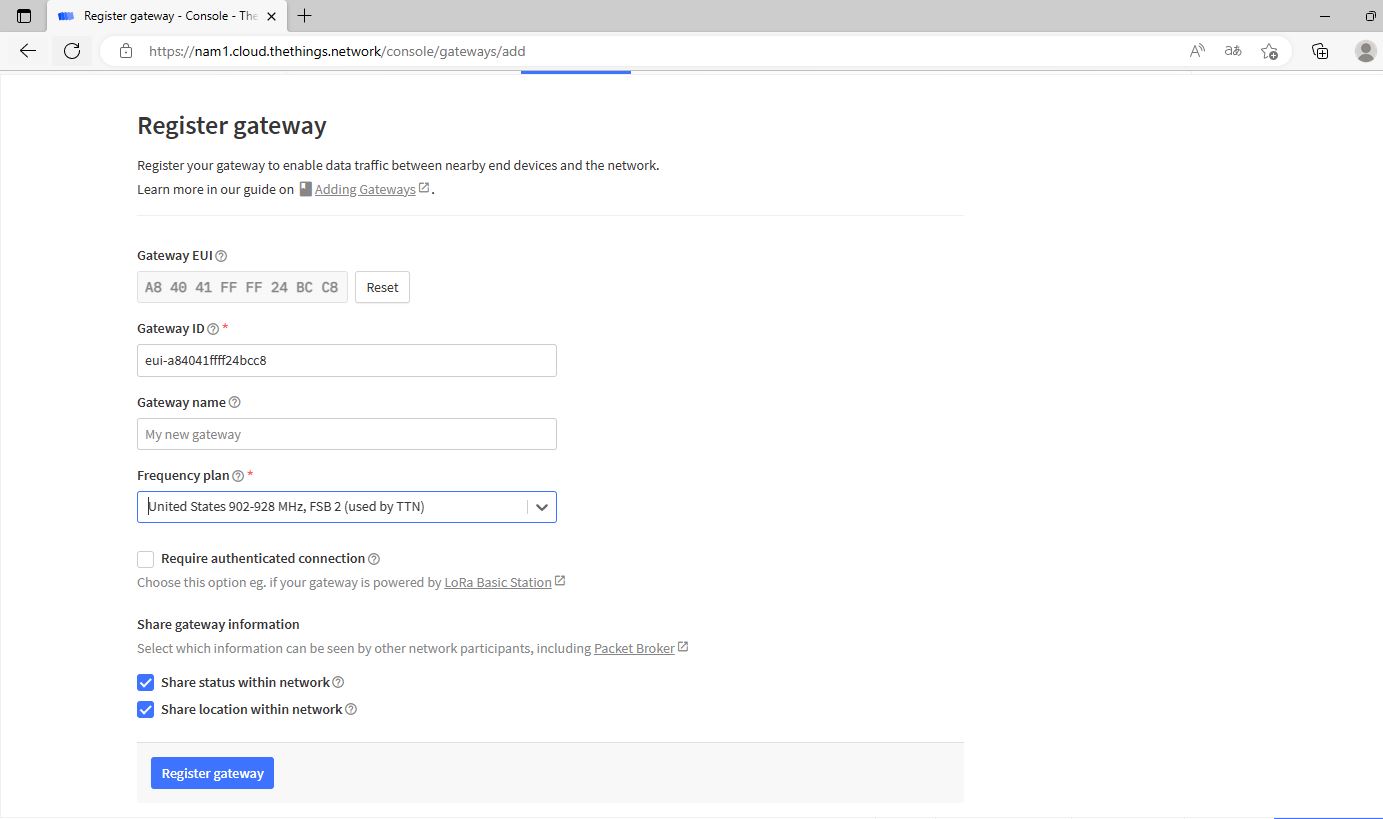
Set the Gateway ID and Gateway name. The Frequency plan can be set as the picture.
Then click the Register gateway
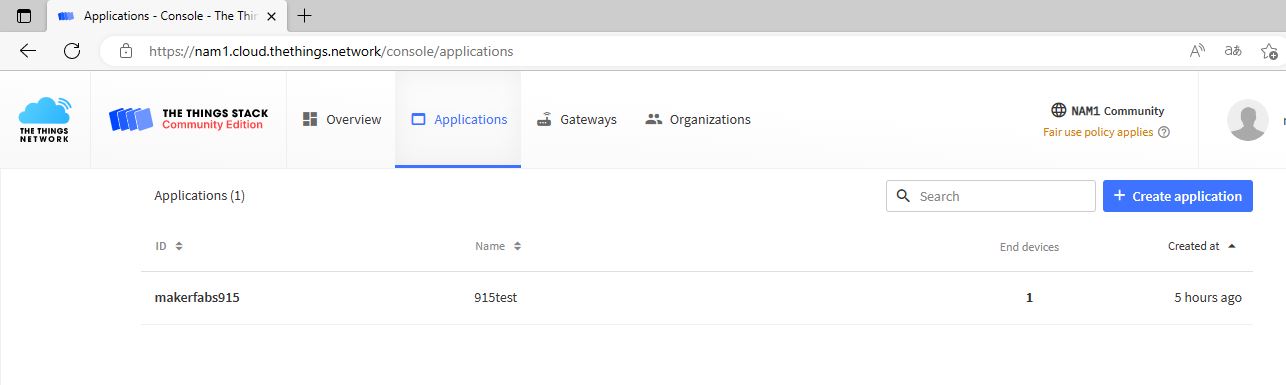
- Setting the application in TTN
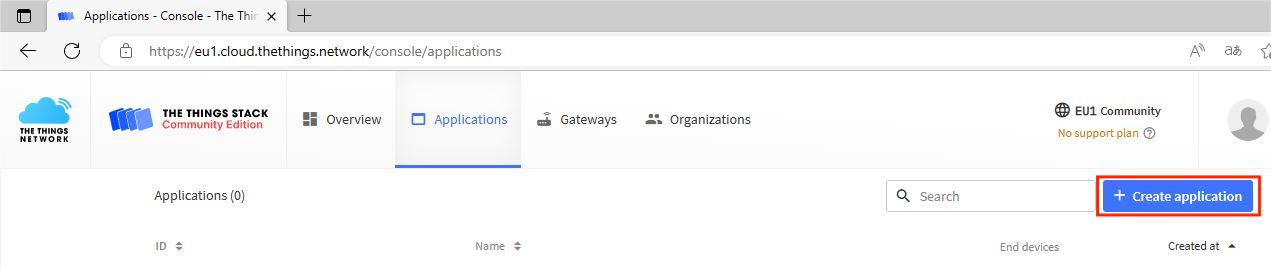
Click the Create application
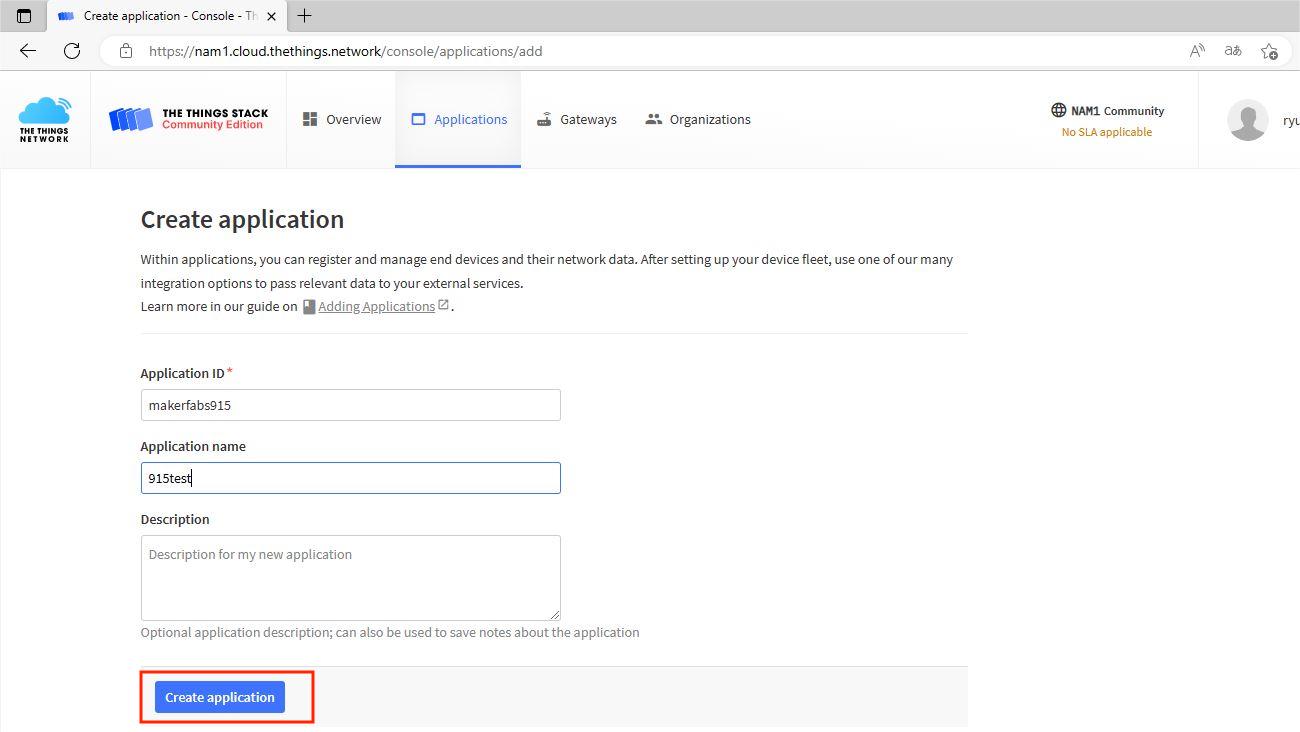
Set the Application ID and Application name that you want, then click the Create application.
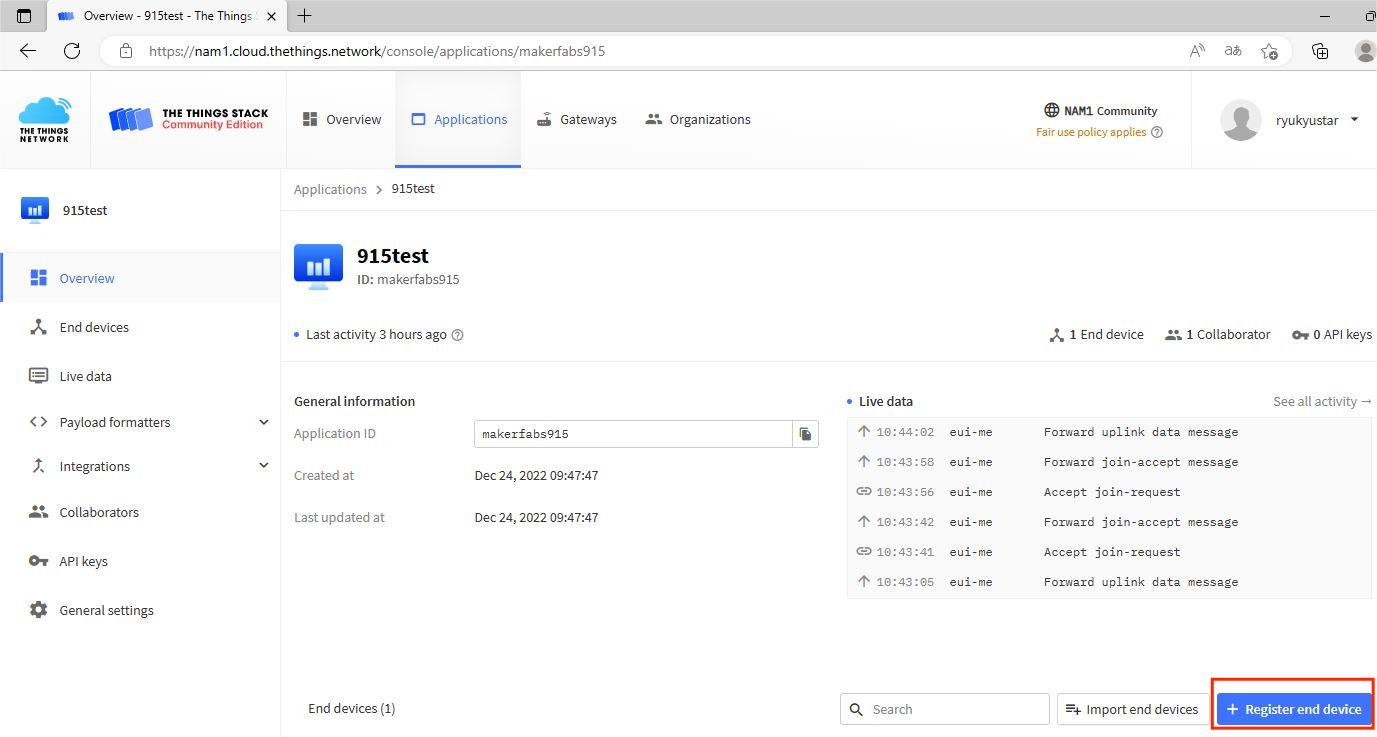
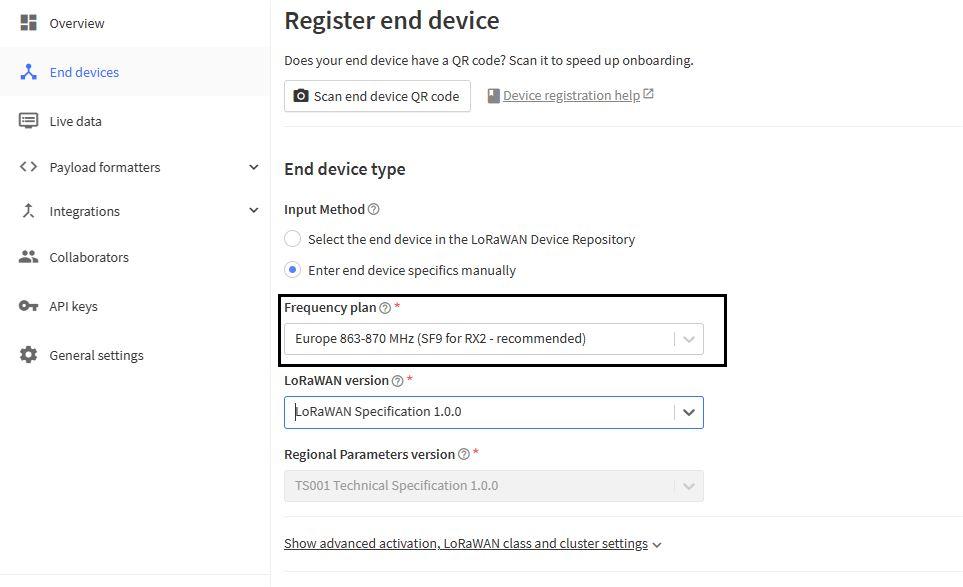
Click the Register end device to add an end device to the application.
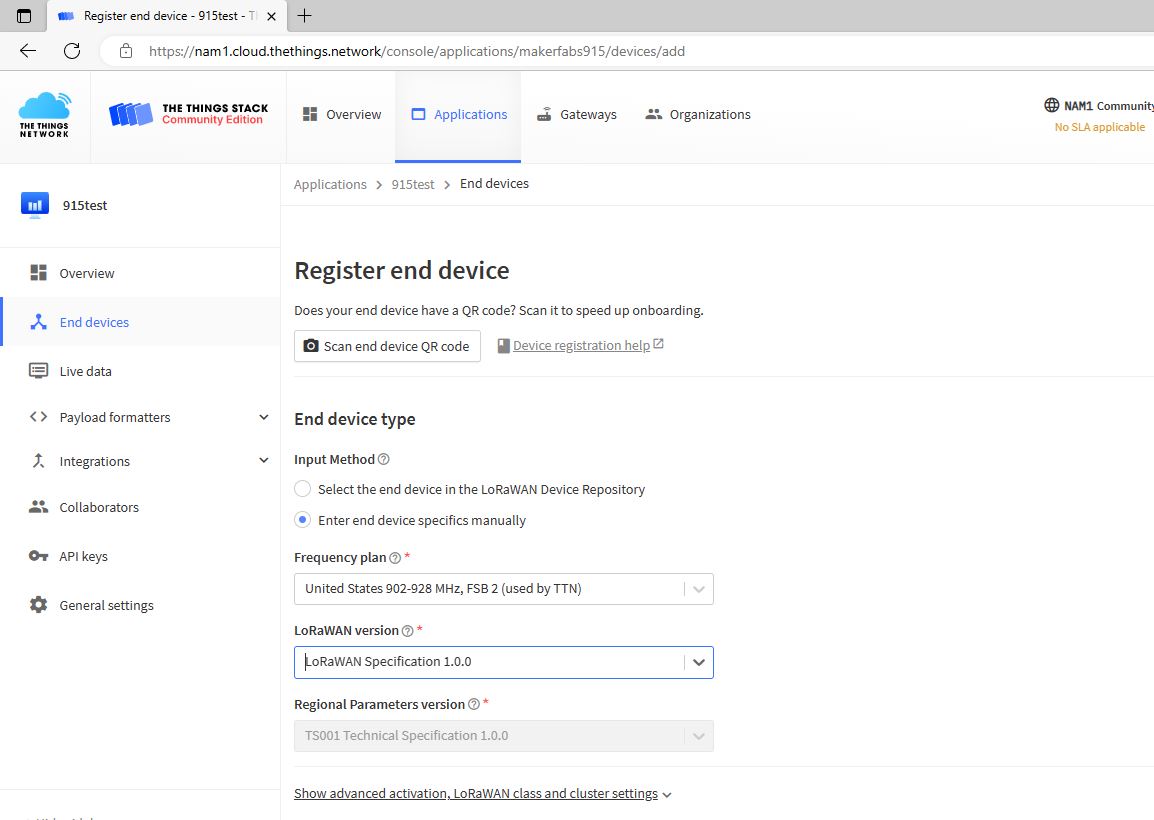
Configure the information according to the picture above.
Click the Show advanced activation, LoRaWAN class, and cluster settings to finish the setting.
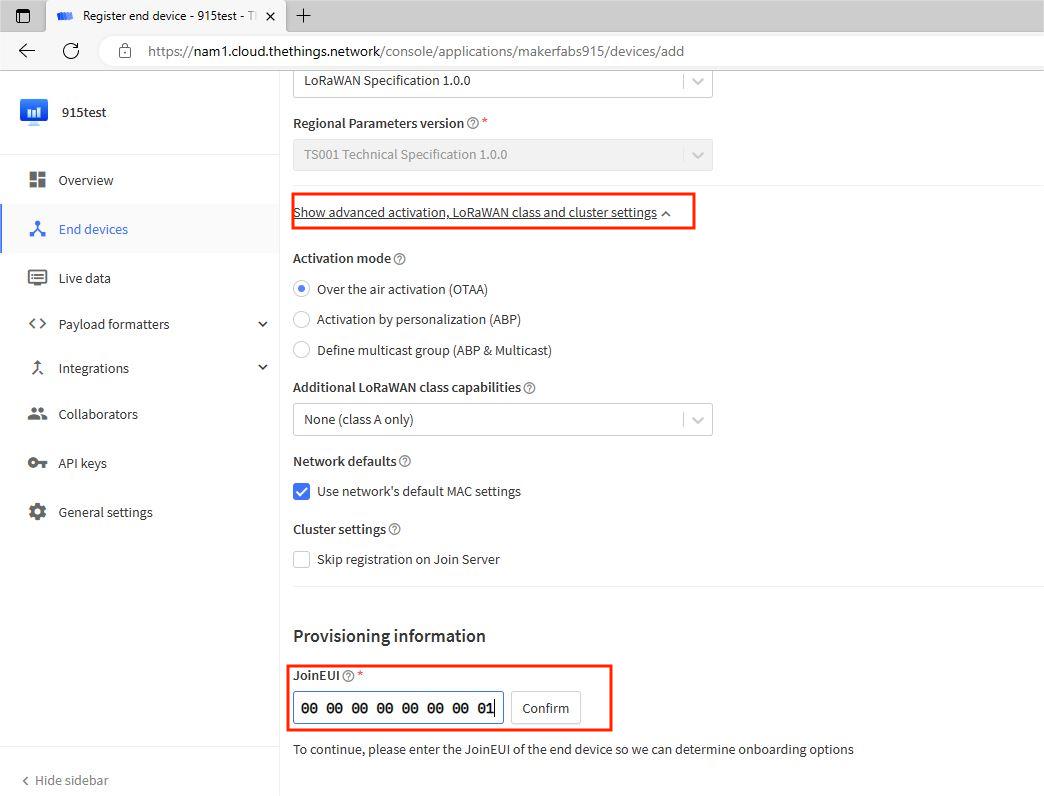
Choose the (OTAA) mode. and joinEUI. You can set up a joinEUI with any 16 digits, then click the confirm
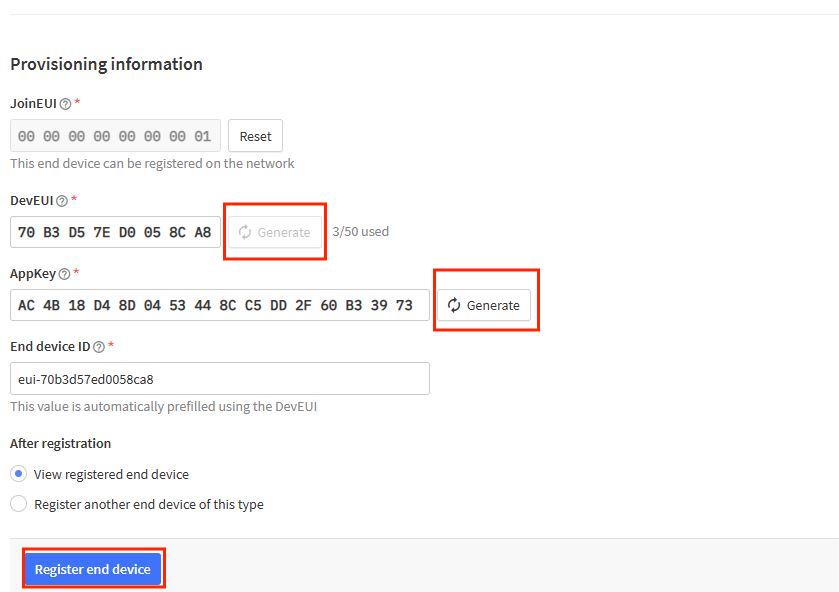
The DevEUI and AppKey can be set by clicking the generate.
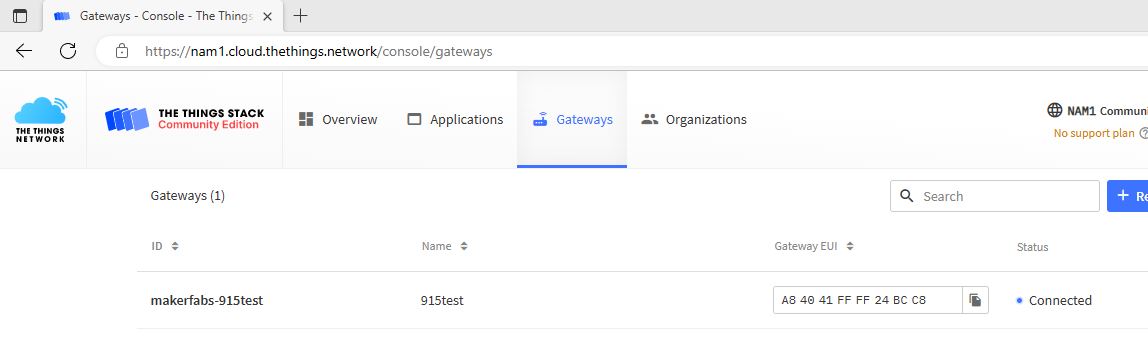
If end device been created successfully, users can see a new end device.
- Data processing in TTN
When the end device transmits data to TTN, which receives it with the byte stream format. in the Payload formatters. Users can configure analytic procedures.
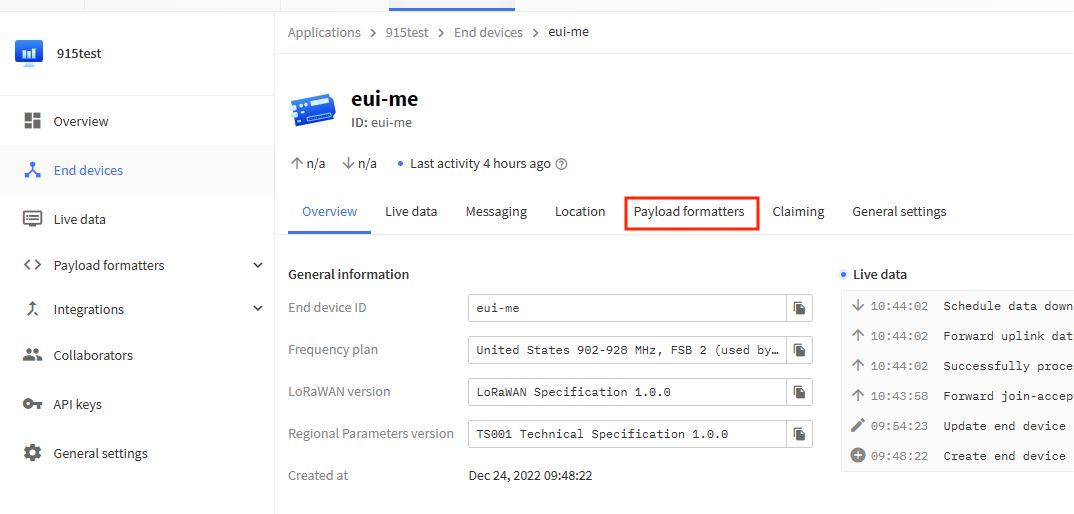
Click the Payload formatters, and choose the Custom Javascript formatters. then users can copy the code to Formatters code.
function decodeUplink(input) {
var temp = input.bytes[0]
var humi = input.bytes[1]
var adc = input.bytes[2]*256+input.bytes[3]
var bat = input.bytes[4]/10
return {
data:{
//adc,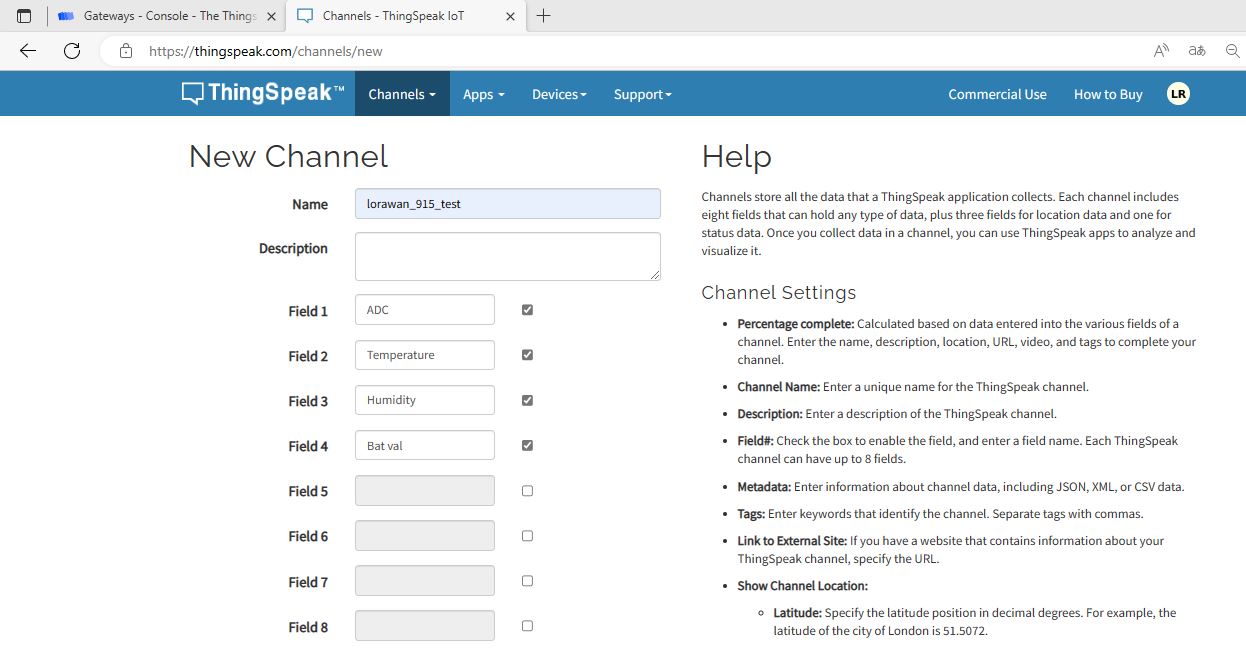
//temp,
//humi,
//bat,
//num,
field1:adc,
field2:temp,
field3:humi,
field4:bat
},
};
}
Save changes to this configuration.
- Transfer TTN data to thingspeak
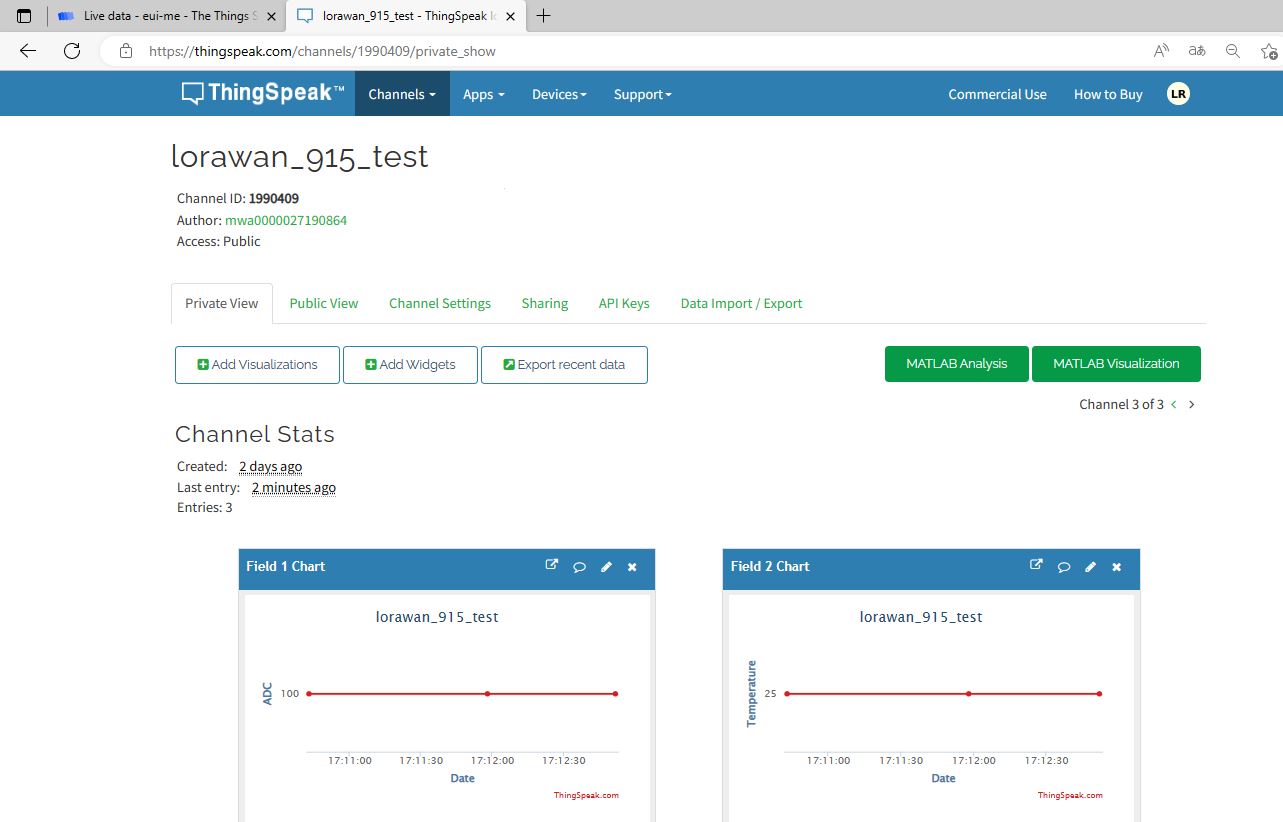
As the data goes to TTN, to display the data more clearly& friendly to end users, we forward the data to Thingspeak, to diagram display, so end-user can monitor the data more directly.
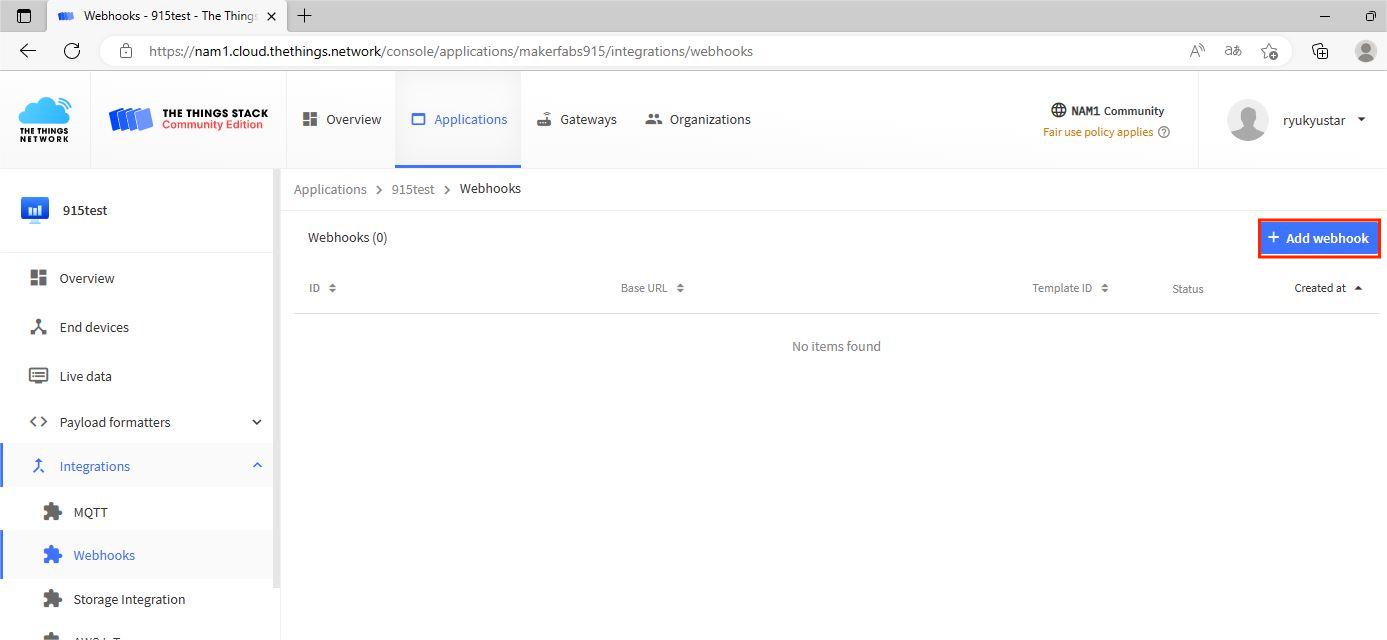
Click the integrations>>Webhooks
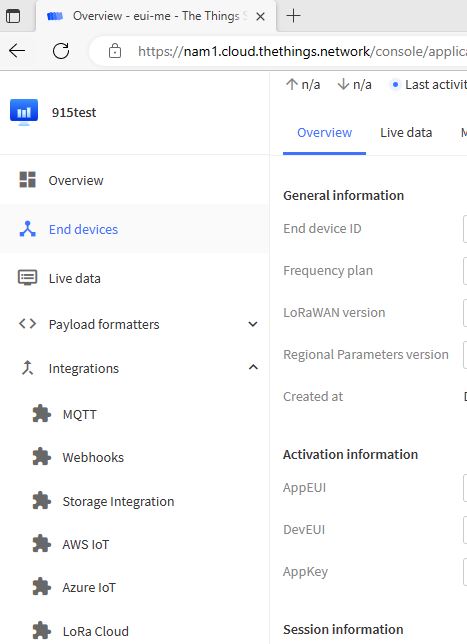
Choosing the Add Webhook
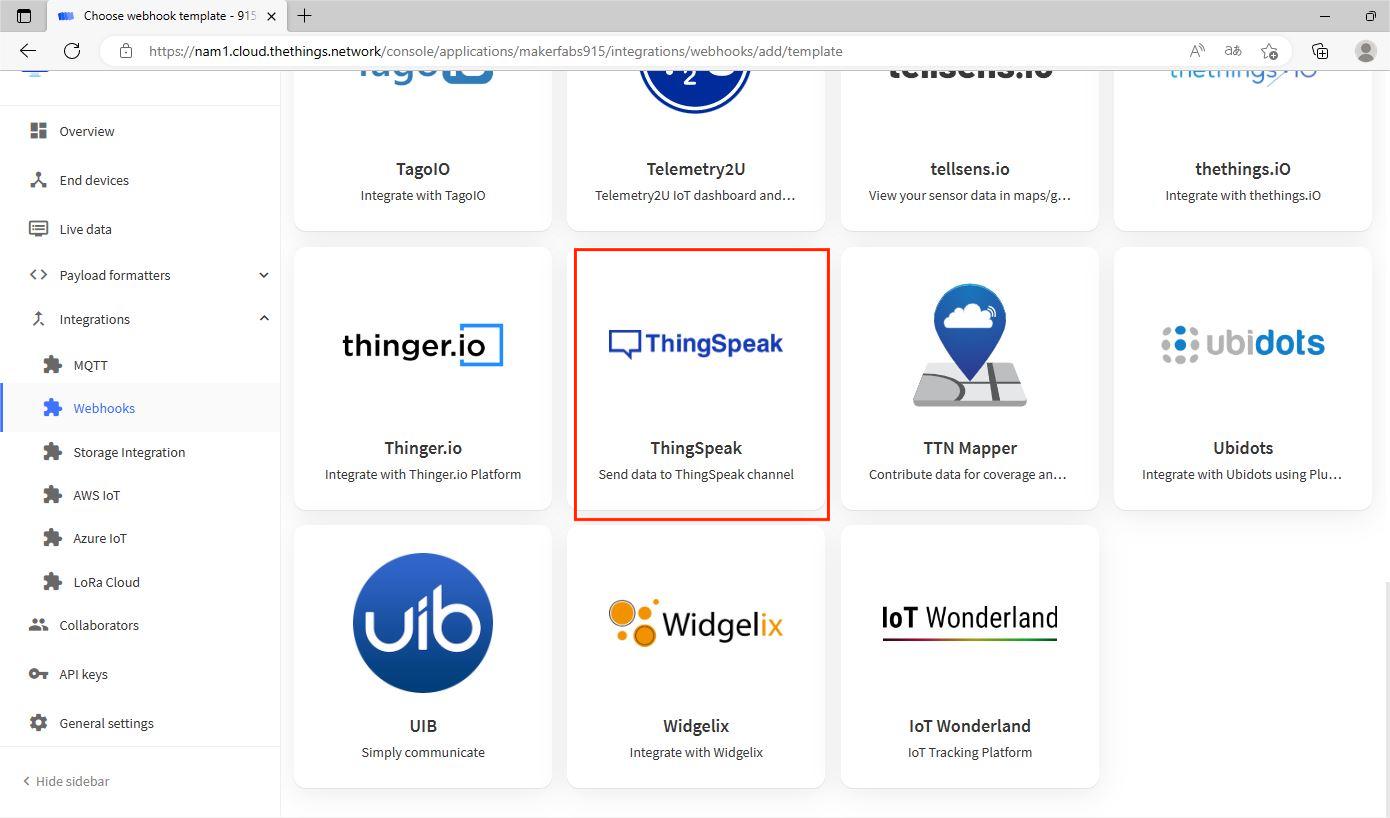
Search the icon of Thingspeak, and click it.
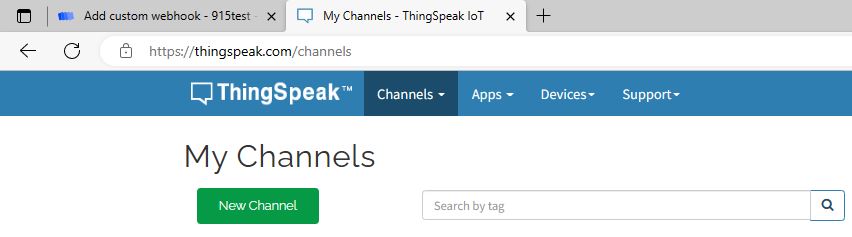
Log in the Thingspeak, and create a new channel.
Configure the channel as in the picture.

Then save the Channel, click the loraLoRaWAN-915-test, then choose the API Keys.
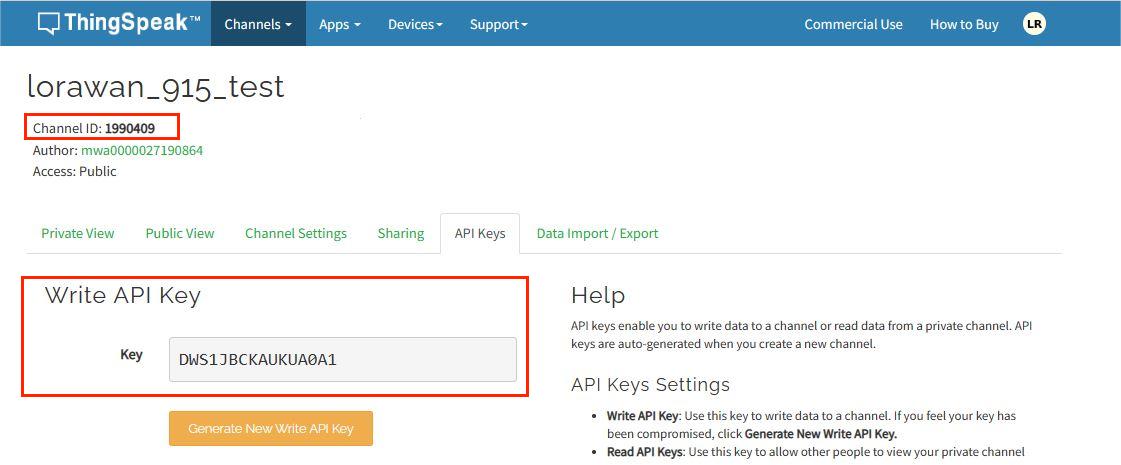
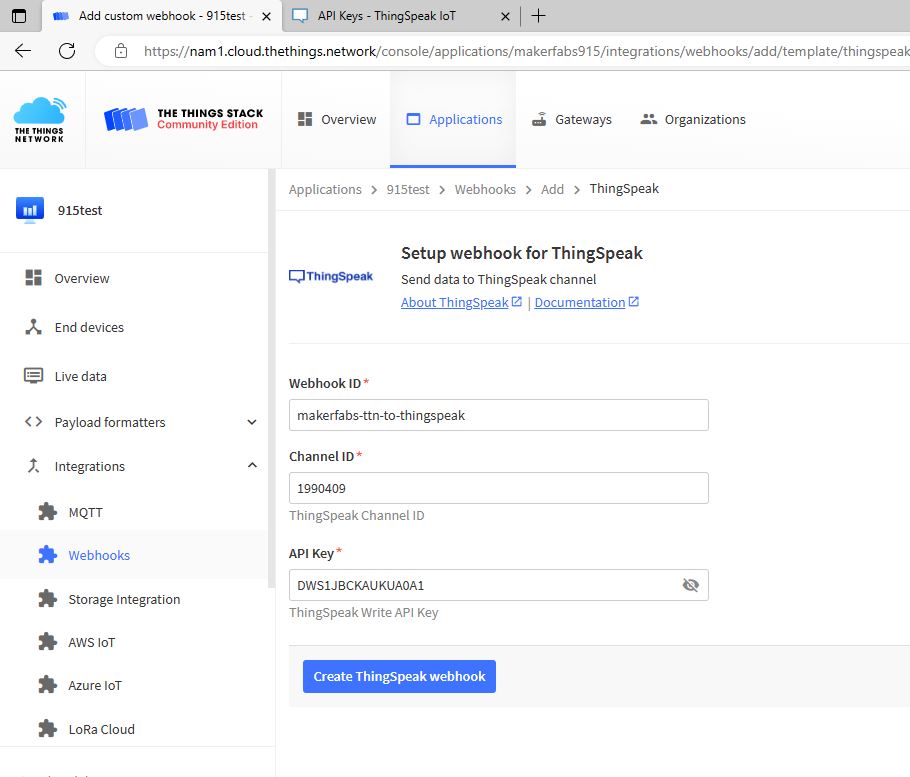
Copy the Channel ID and write API Key to the Webhook, and create ThingSpeak webhook.
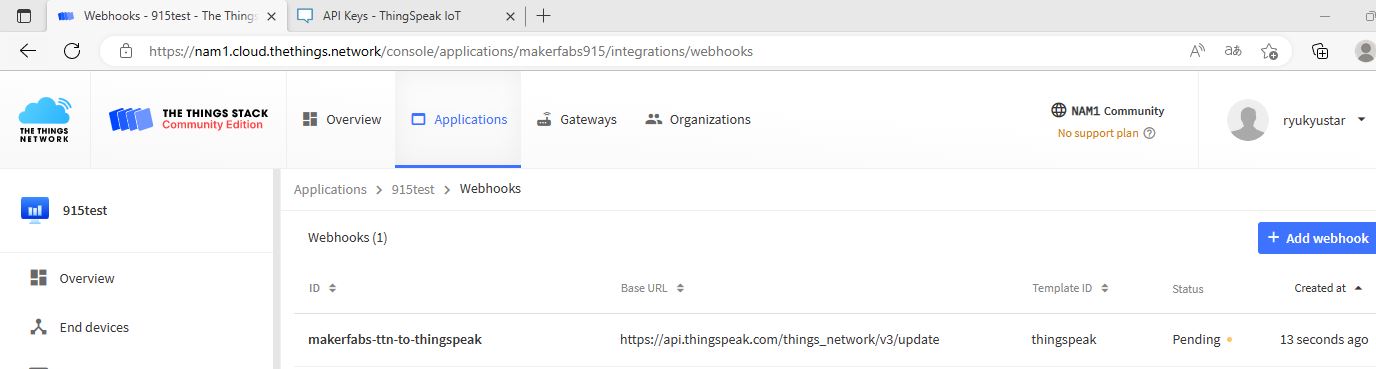
The ThingSpeak webhook has bulit.
3.3 end device Firmware Setting
Get the Makerfabs LoRaWAN moisture sensor Firmware Frame Here
Download the file (Firmware Frame/moisture_lorawan) and open it
In this frame, it not only deals the LoRaWAN protocol related but also other functions such as sleep mode setting, PWM generating, air temperature /humidity sensoring... users can apply or modify the setting by simply modifying a few codes in the firmware frame.
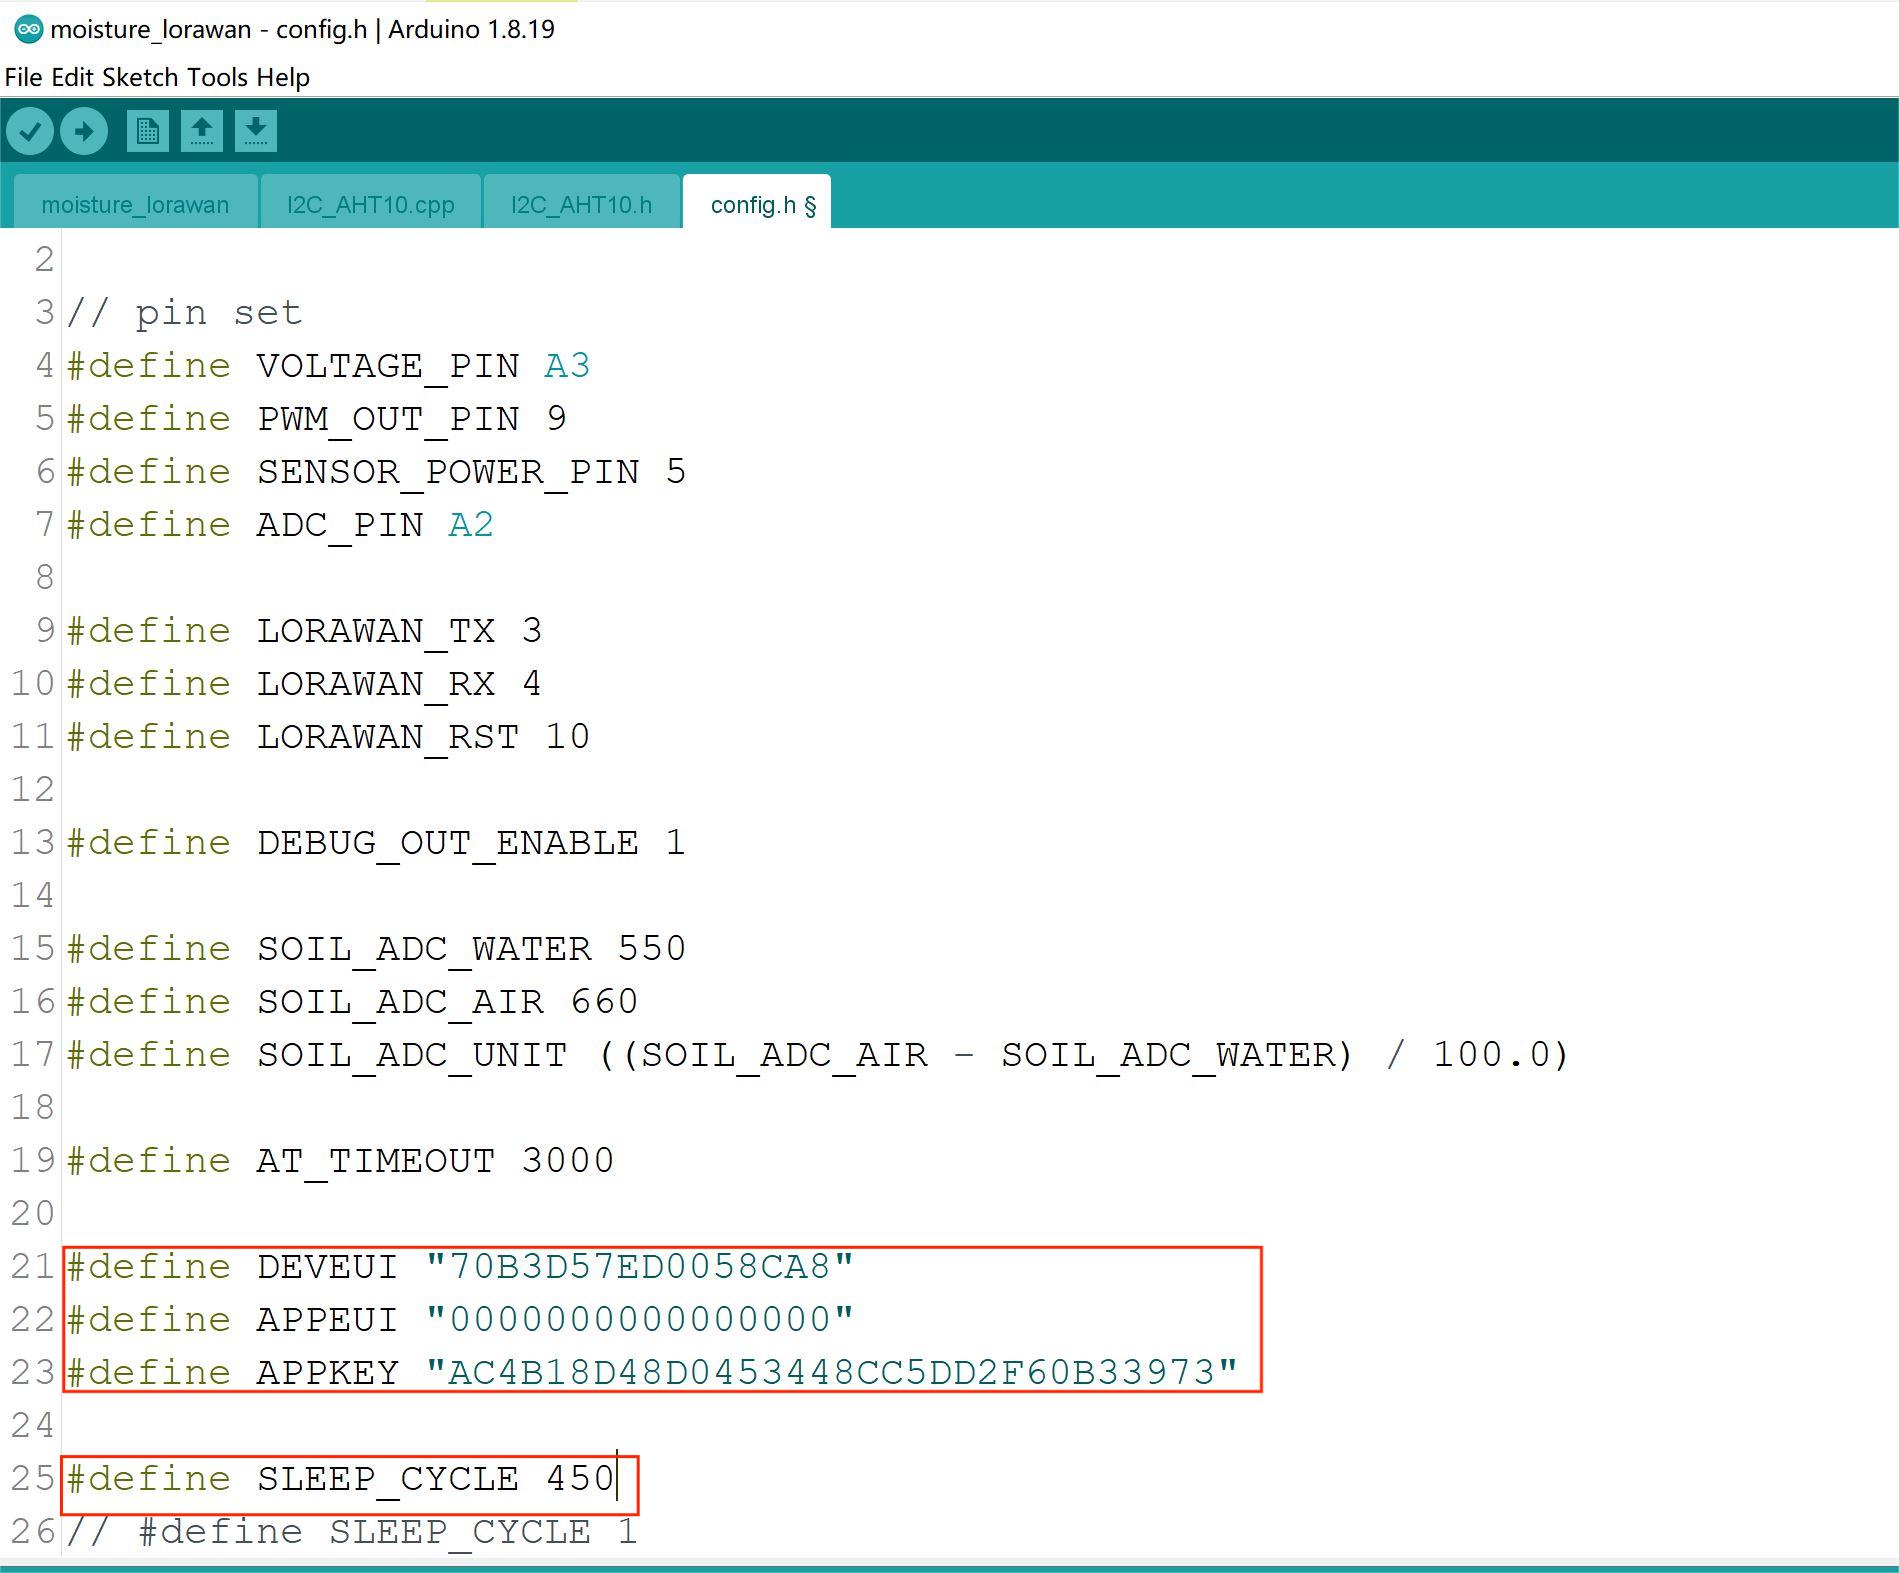
In the config.h, users must copy their Setting of DEVEUI,APPEUI,APPKEY here.
The SLEEP_CYCLE is a watch timer procedure. It allows the device to wake up periodically and send data. By the current default setting 450, it is about 60 minutes interval, that is, the controller Atmega328P wakes up every 60 minutes to initiate a LoRaWAN data reporting, with about 8s, then it enters sleeping mode again. Users can modify this setting, to balance the Data interval and module working life-time.
then, we can program the sensor via a UART2USB convertor, with Arduino IDE:
Connect the wire as follows
| Soil Moisture Sensor | cp2104-usb-to-serial-converter |
|---|---|
| Vcc | Vcc |
| GND | GND |
| TX | RX |
| RX | TX |
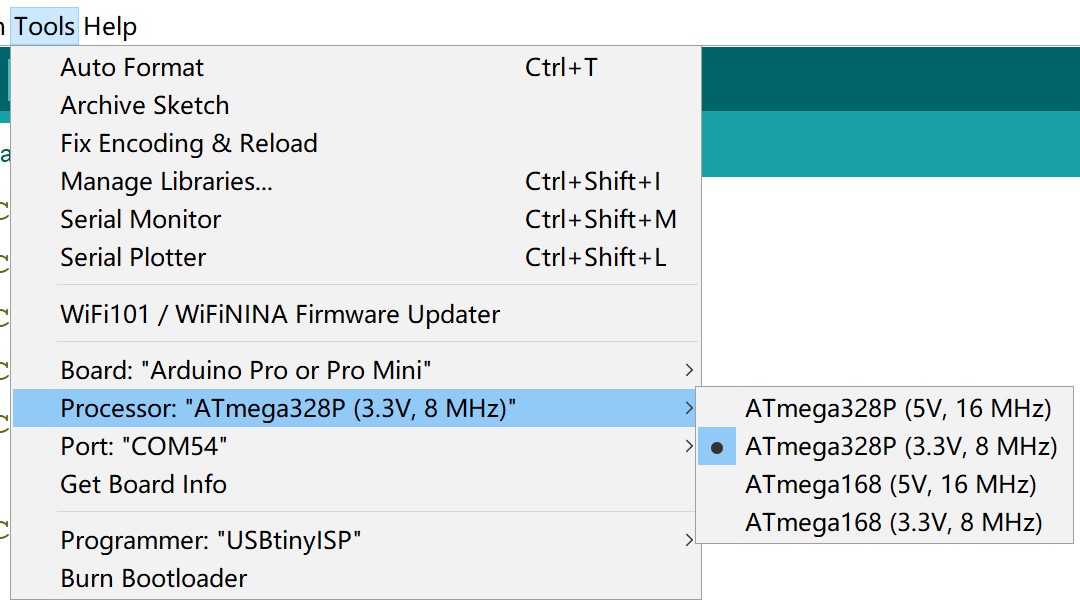
Select and set the parameter in the Tools menu, as in the picture:
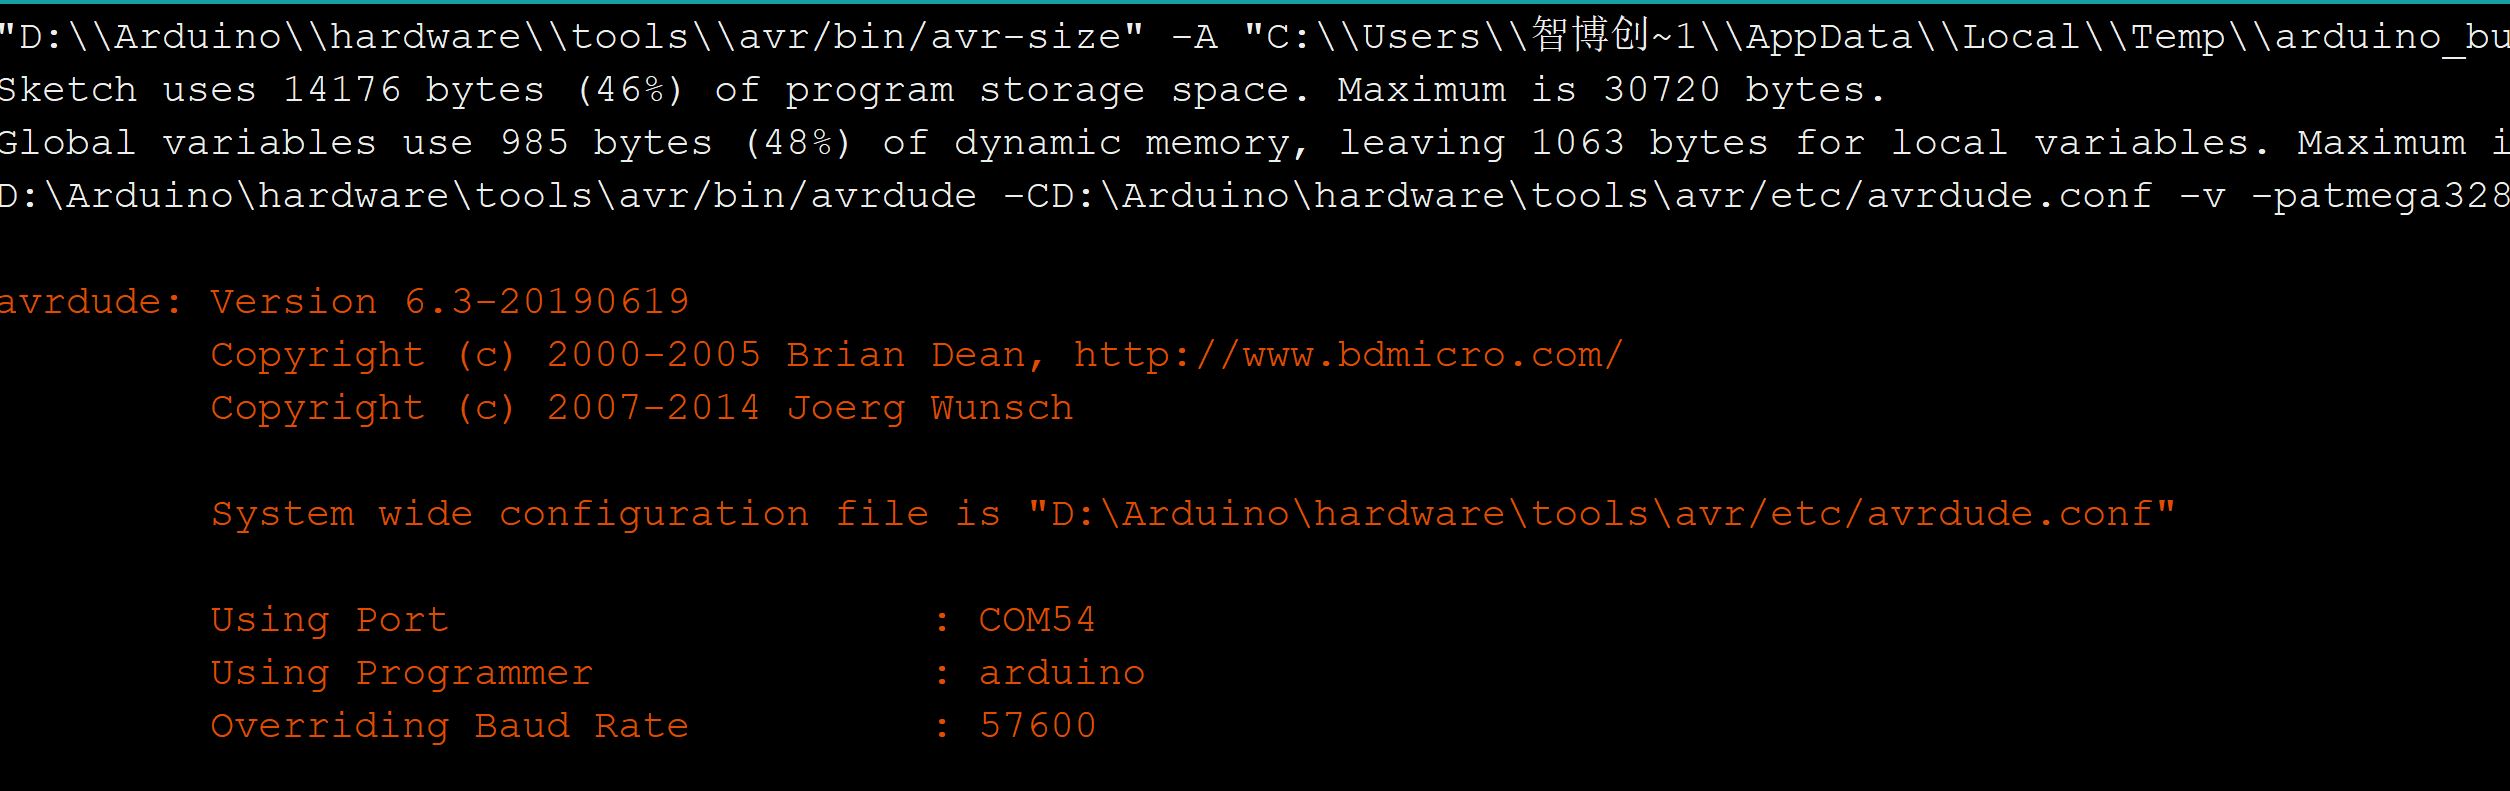
Note: Burn the program, press the RST button on the LoRaWAN Temperature/ Humidity/ Soil Moisture Sensor.
when the LoRaWAN Temperature/ Humidity/ Soil Moisture Sensor works properly, TTN will receive a byte stream of data, and it had been parsed.
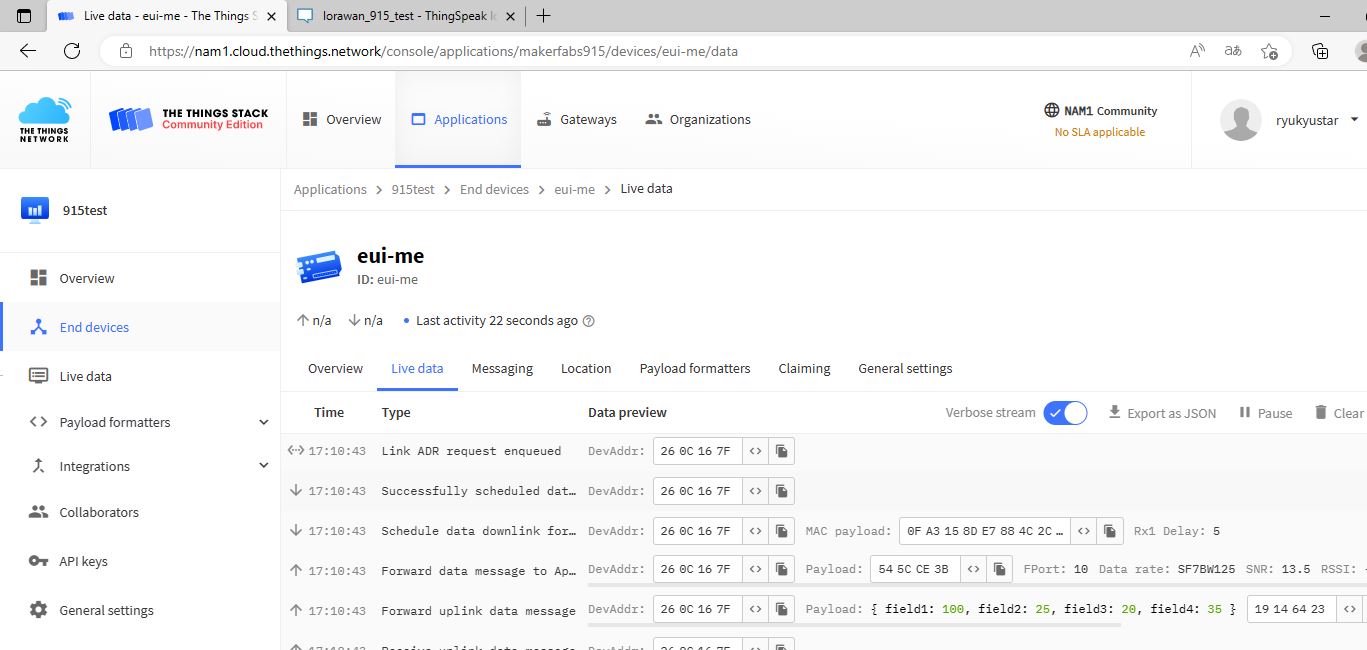
ThingSpeak also receives the data in display.
3.4 About Setting the 868MHz Gateway
With the 868MHz Gateway, Similar to the 915MHZ gateway setting, its network cluster needs to choose European servers, so that the signal received will be more stable.
In the TTN, users should choose the Europe1 clusters.
In the gateway setting, users should choose the Europe 863-870MHz of Frequency plan when setting.
For end device users also choose the Europe 863-870MHz of Frequency plan when setting.
4. FAQ
You can list your question here or contact techsupport@makerfabs.com for technology support. Detailed descriptions of your question will be helped to solve your question.