Maduino Zero SIM800C
1. Maduino Zero SIM800C
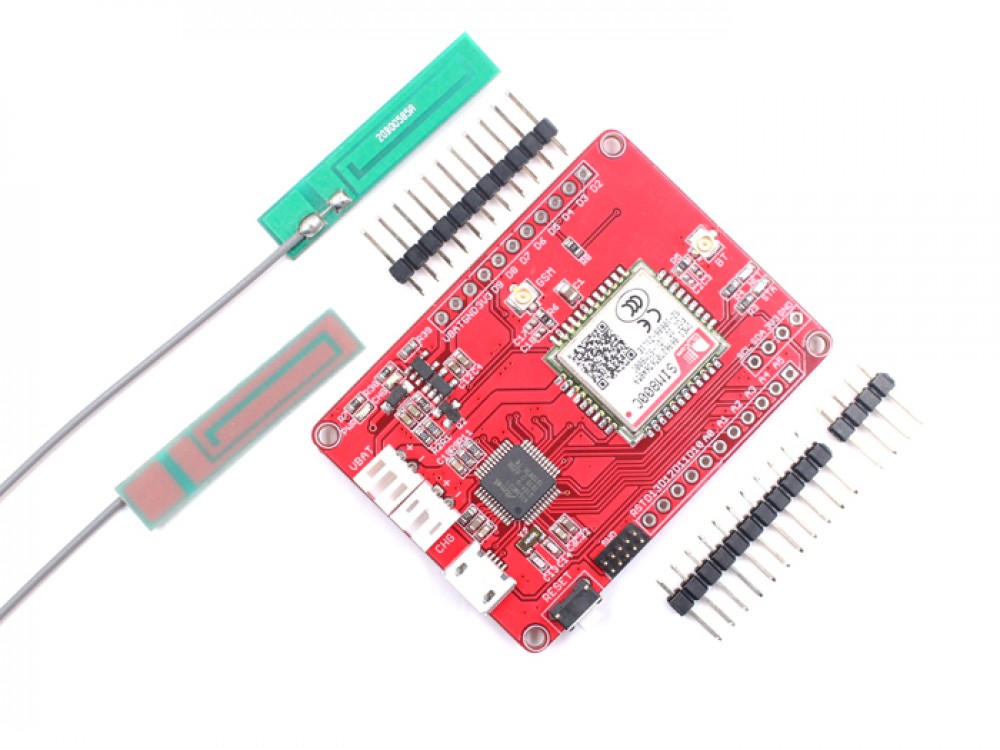
Maduino Zero SIM800C is a one-stop solution for IoT (Internet of Things) projects, it integrates a micro Controller SAMD21G18A-AU, GRRS/GSM module SIM800C, on-board power management, and storage, to make the Maduino Zero SIM800C ready for IoT projects such as smart-home, outdoor monitoring, shared bicycle, etc. The GRPS/GSM module A6 support quad-band 850/900/1800/1900MHz, which covers any GSM network, after inserting a SIM card, then you will able to use the SMS/GPRS service of Cellular connectivity. The Maduino Zero SIM800C is based on Arduino, users can program it with Arduino IDE, which is very easy and especially suited for the none-programmers. There are also detailed guides for users to learn how to create the first IoT project with Maduino Zero SIM800C board, with which the starters can learn the hardware and programming skills quickly.
Model:OAC800SIM
2. Features
- ATSAMD21G18, 32-Bit ARM Cortex M0+
- Powered by lithium battery 3.4-4.2V or USB(5V)
- SAMD21G18A: 32-bit ARM® Cortex®-M0 up to 48MHz, 256KB flash, 32KB SRAM, LQFP48
- Integrated Power Control System
- Support GPRS data traffic, the maximum data rate, download 85.6Kbps, upload 42.8Kbps
- Quad-band: 850/900/1800/1900Mz
- Interface: I2C/SPI/UART/ADC/DAC/I2S/38*GPIO
- Arduino Compatible
- Working Temperature: -40 ~ +85℃
- Default baud rate: 115200bps
- Size: 40*55mm
3. Usage
3.1 GPRS/GSM test
SIM800C is a GPRS/GSM Quad-band module, and the updated version support Bluetooth 3.0 EDR(some functions of SPP, OPP, HFP/HSP ), so The Maduino Zero SIM800C can be capable of the GPRS connectivity for Internet, to upload/download data with internet. With this board, we can use it for a data acquisition, remote control and a lot of IoT projects or smart home projects. Such as we want to know the temperature and humidity of home/office/storage cabinet/ or other places at any time, anywhere that has a network.
So, this tutorial is for the beginners to learn how to get temperature and humidity remotely by using Maduino Zero SIM800C with a detailed guide, it is for the starters to create a simple IOT project with a little time of learning.
Step 1: Set Up Arduino IDE
1.1.Follow the guide to setup Arduino IDE for Maduino Zero SIM800C.
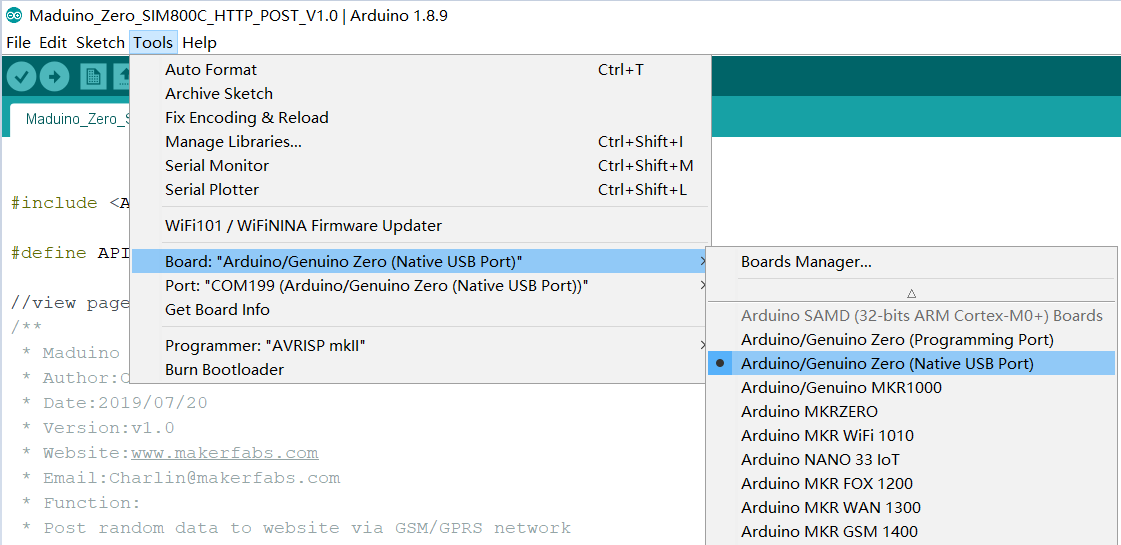
Select board -> Arduino/Genuino Zero(Native USB Port). And the correct Port.
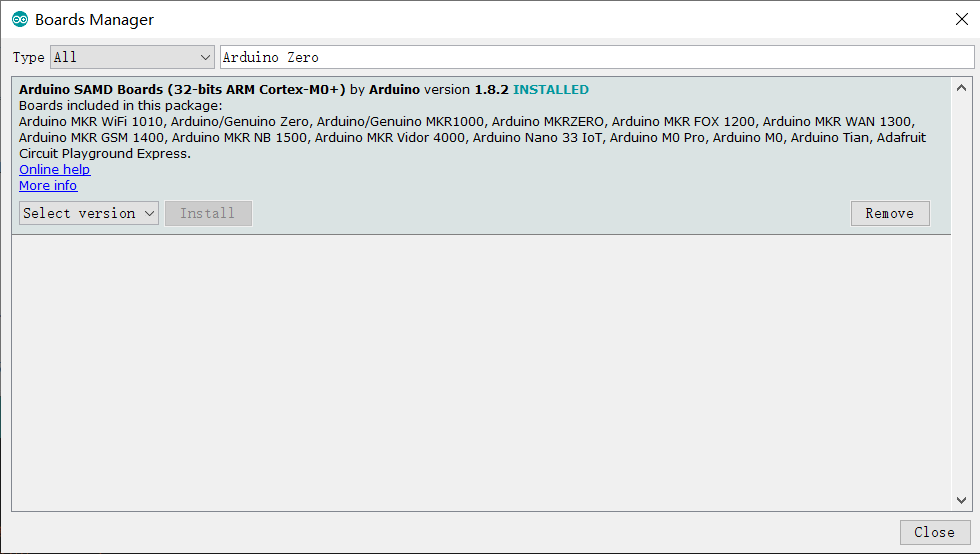
If you don't find it, you can click -> Boards Manager as the screen snap below. Nest search “Arduino zero” and install Arduino SAMD Boards(32-bit ARM Cortex-M0+).
1.2 install the dependent library
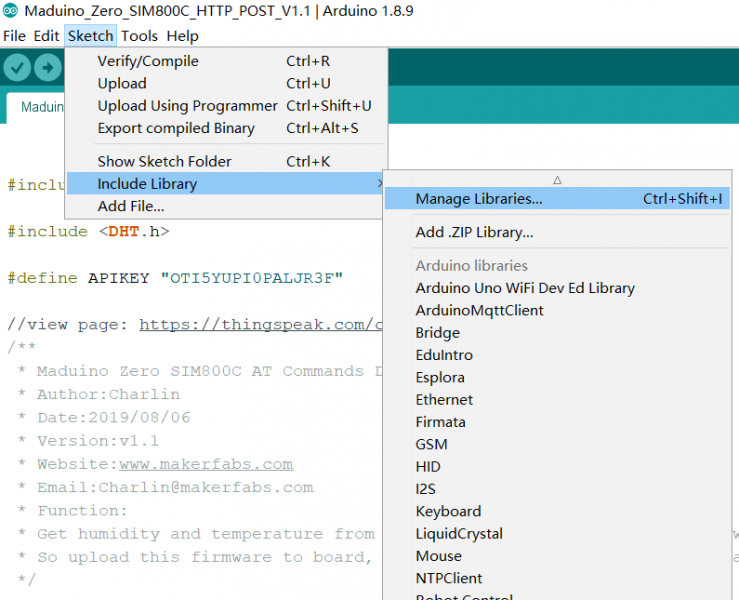
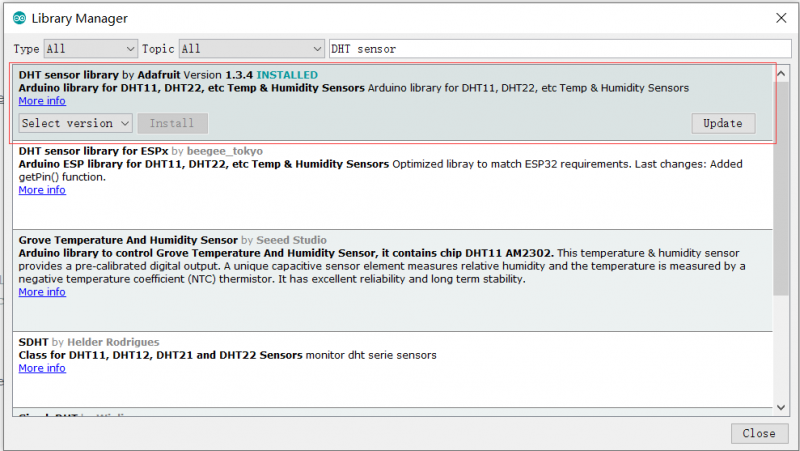
Click Sketh->Include Library->Manage Library… Nest search “DHT sensor library” to install “DHT sensor library by Adafruit” like the image below.
Step2: Hardware Connection 2.1 Insert a Micro SIM card
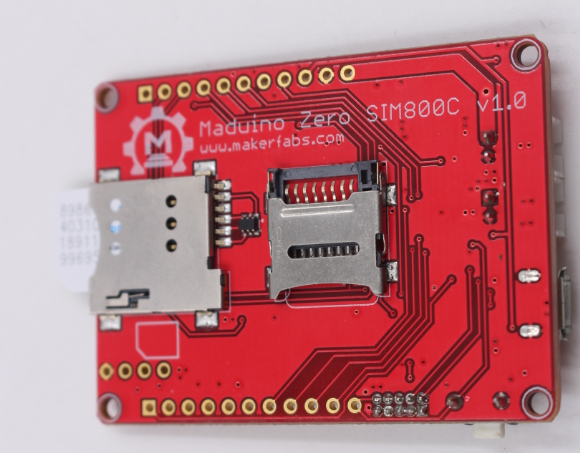
The Maduino Zero SIM800C board uses the micro SIM card that is widely used in Android phones, install the Micro SIM card to the holder as below picture.
Note that some fee may be needed for each SMS depending on your local GSM Operator, make sure that the SIM Card is active and enough money left for this application.
2.2 Connect the Sensor
First you need to find a DHT11 sensor or purchase one from here
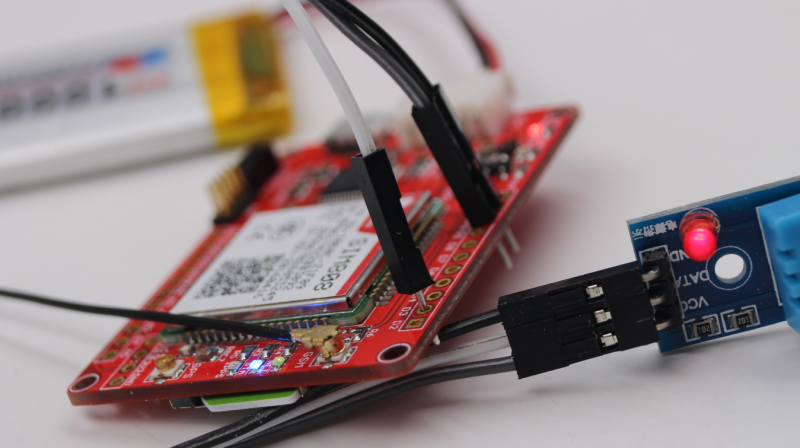
Sensor's GND -> Board's GND(Black line)
Sensor's DATA -> Board's D3(White line)
Sensor's Vcc -> Board's 3V(Grey line)
2.3 Connect the GSM Antenna and the 3.7V battery
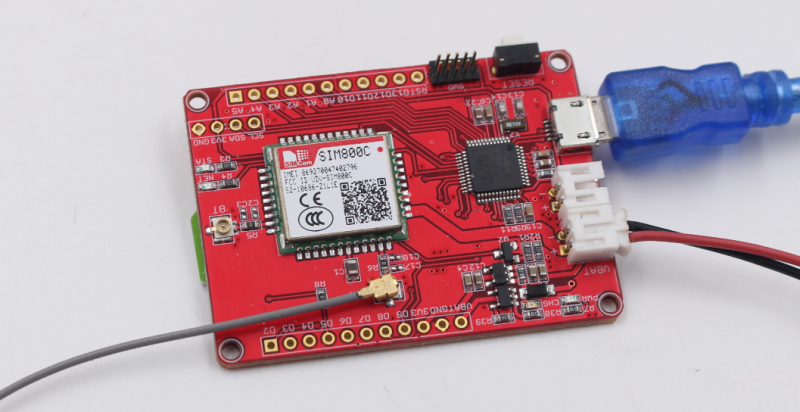
Note: We should ensure that the input voltage never drops below 3.0V even when current consumption rises to 2A in the transmit burst. That's the reason why we need a battery rather than just supplying power via micro USB cable.
Step3.Programming and Downloading
3.1 Sign up for an account at https://thingspeak.com/. If you already have one, sign in directly.
3.2 Click New Channel to create a new ThingSpeak channel.

3.3 Input name, Description, Select Field 1 and Field 2. Then save the channel on the bottom.
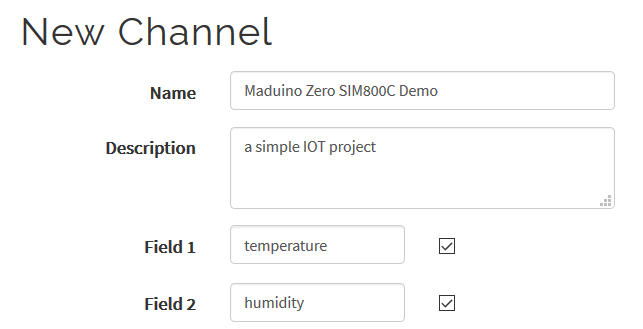
3.4 Copy the API Key, we will use it in the program
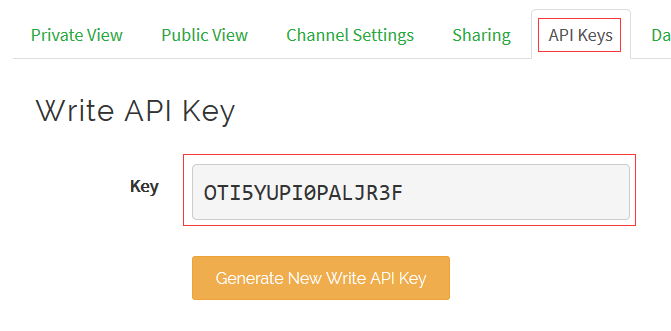
The Codes for this application is very simple, define the SIM800C Power control pins:
//define the power control pin of SIM808:
int POWER_KEY=9; //D9: power on/off
Connect to GPRS/GSM network
sendData("AT+CGATT=1", 1000, DEBUG);
Initialize HTTP Service
sendData("AT+HTTPINIT", 1000, DEBUG);
Set HTTP parameters value
sendData("AT+HTTPPARA=\"URL\",\"http://api.thingspeak.com/update?api_key=OTI5YUPI0PALJR3F&field1=25.6&field2=78.5\"", 1000, DEBUG);
POST the data that set in command "AT+HTTPPARA"
sendData("AT+HTTPACTION=1", 1000, DEBUG);//HTTP POST success if get responce: +HTTPACTION: 1,200,0
Download the POST Temperature&Humidity Demo to upload the firmware to Maduino Zero SIM808 GPS board
4.Test Result
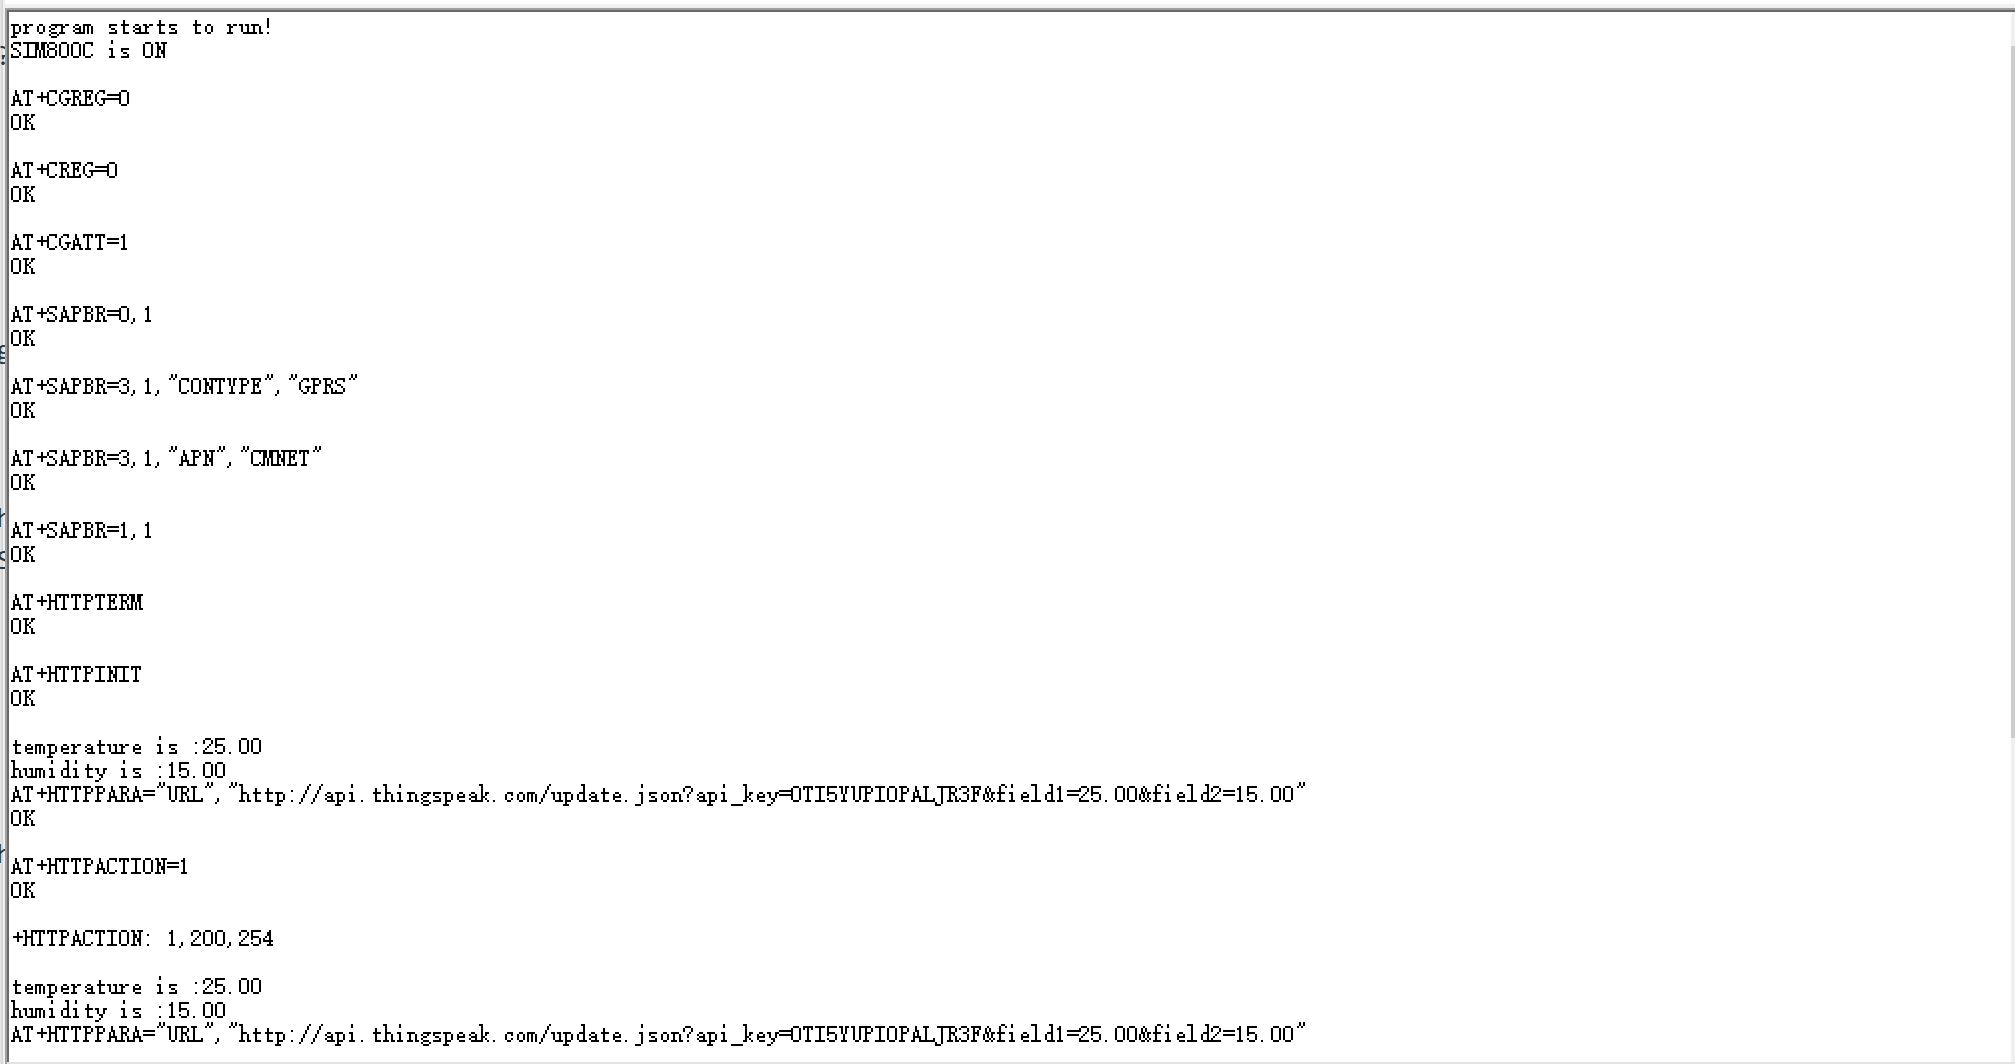
If the GPRS service accessible, the Maduino board post data to the site, open the Serial Tool we can see the logs as shown below:
Of course you can open the link: https://thingspeak.com/channels/825092 it will show the data:

Note: AT Command:
AT+SAPBR=0,1
AT+SAPBR=3,1,"CONTYPE","GPRS"
AT+SAPBR=3,1,"APN","CMNET"
AT+SAPBR=1,1
AT+HTTPTERM
AT+HTTPINIT
AT+HTTPPARA="URL","http://api.thingspeak.com/update?api_key=OTI5YUPI0PALJR3F&field1=22.6&field2=73.8"
AT+HTTPACTION=1
AT+HTTPREAD
AT+HTTPTERM //Terminal the HTTP
More details you can refer to the document SIM800 Series_AT Command Manual.pdf.
3.2 Cell ID Location test
You can use Maduino Zero SIM800C AT Commands Demo to send AT commands via Serial Monitor or other serial tools, such as we can use AT+CENG=3 and AT+CENG? to get MCC, MNC, LAC and CID.
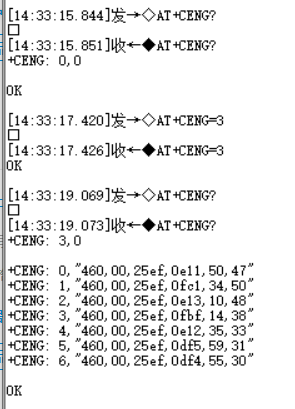
Then we can show a rough location via GSM Cell ID shown as below image.
https://cellidfinder.com/cells
4. FAQ
You can list your question here or contact techsupport@makerfabs.com for technology support. Detailed descriptions of your question will be helped to solve your question.
