MaESP ESP32 OLED
Introduction
MaESP ESP32 OLED can work on many platforms, such as Arduino/GCC, and Python. by using WiFi/Bluetooth to achieve the IoT project. As a basic controller, ESP32 has very rich learning materials. This development board is a great idea to learn how to develop the Internet of Things for the beginner.
Model:MAKT32

Features
- Wi-Fi Protocols: 802.11b/g/n(802.11n up to 150Mbps),A-MPDU and A-MSDU aggregation and 0.4us guard interval support
- Wi-Fi Frequency range: 2.402GHz - 2.483Ghz Bluetooth Protocols: Bluetooth v4.2 BR/EDR and BLE specification
- Bluetooth Radio: NZIF receiver with-97 dBm sensitivity, Class-1/class-2 and class-3 transmitter, AFH
- Bluetooth Audio: CVSD and SBC
- CPU: Two low-power Xtensa® 32-bit LX6, ESP32-D0WDQ6
- CPU clock frequency: 80MHz to 240MHz
- Module interface: SD card,UART,SPI,SDIO,I2C,LED PWM,Motor PWM,I2S,IR,pulse,GPIO,capacitive touch sensor,ADC,DAC
- On-chip sensor: Hall sensor
- On-chip Internal RAM: 520KB
- Integrated crystal: 40MHz crystal
- Integrated SPI flash: 4MB
- ESP32 Module: ESP32 WROOM(NO PSRAM), ESP32 WROVER (8MB PSRAM)
- Power supply: 5V, integrate 5V-to-3.3V LDO
- Operating current: Average 80 mA Minimum current delivered by power supply: 500 mA
- OLED: 1.3inch SSD1306/SSD1315
- Recommended operation temperature range: --40℃ ~ +85℃
- Board size: 70*32.6mm
- Moisture sensitivity level(MSL): Level 3
- Screen: SSD1306
Usage
Github:MaESP ESP32 OLED
Projects in Thonny
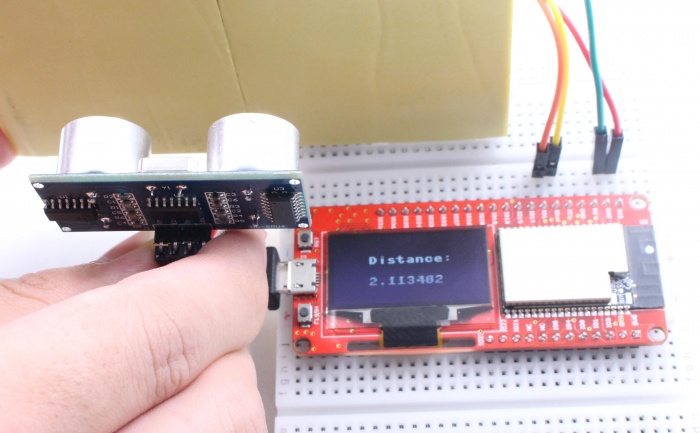
Ultrasonic Ranging
Note: MaESP ESP32 OLED can be developed using micropython, provided the corresponding firmware is required. You can download the micropython firmware for esp32 from the official website and burn it.
Sensor Connection
We use the HC-SR04 Module at:
https://www.makerfabs.com/hc-sr04-ultrasonic-range-measurement-module.html
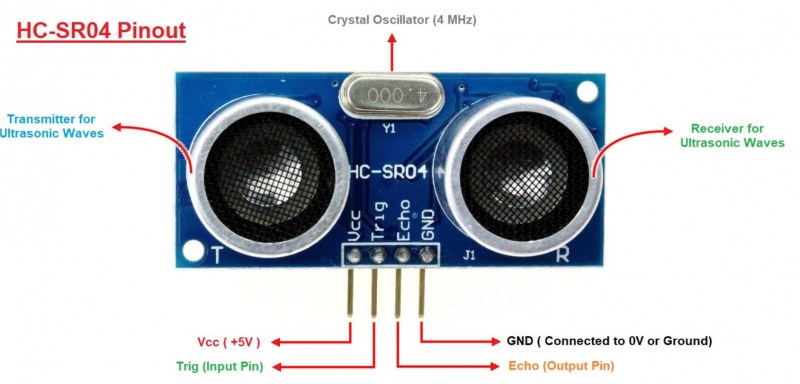
Connect the simple sensor to ESP32 boards as follows:
| HC-SR04 Pins | MaESP ESP32 Pins |
|---|---|
| VCC | 5V |
| Trig | IO13 |
| Echo | IO12 |
| GND | GND |
Connect MaESP ESP32 OLED to your computer through a USB cable.
How to use the Thonny
1.1Installing Thonny
- Click this link to download Thonny IDE for Windows: https://thonny.org/
1.2Connection
Connect MaESP ESP32 OLED to your computer through an USB cable, follow the steps:
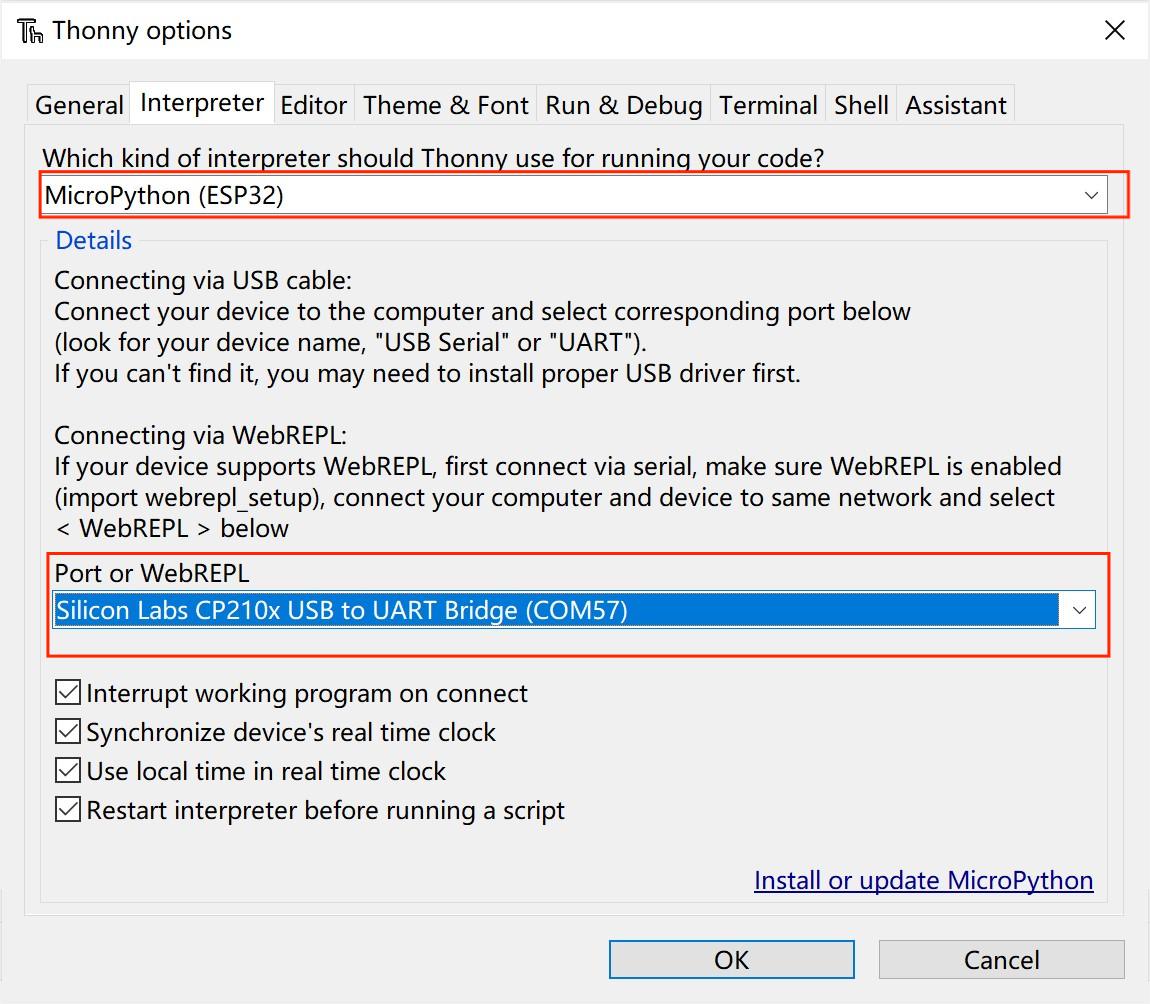
- Tools > Option>>interperter
Choose the interpreter and port:
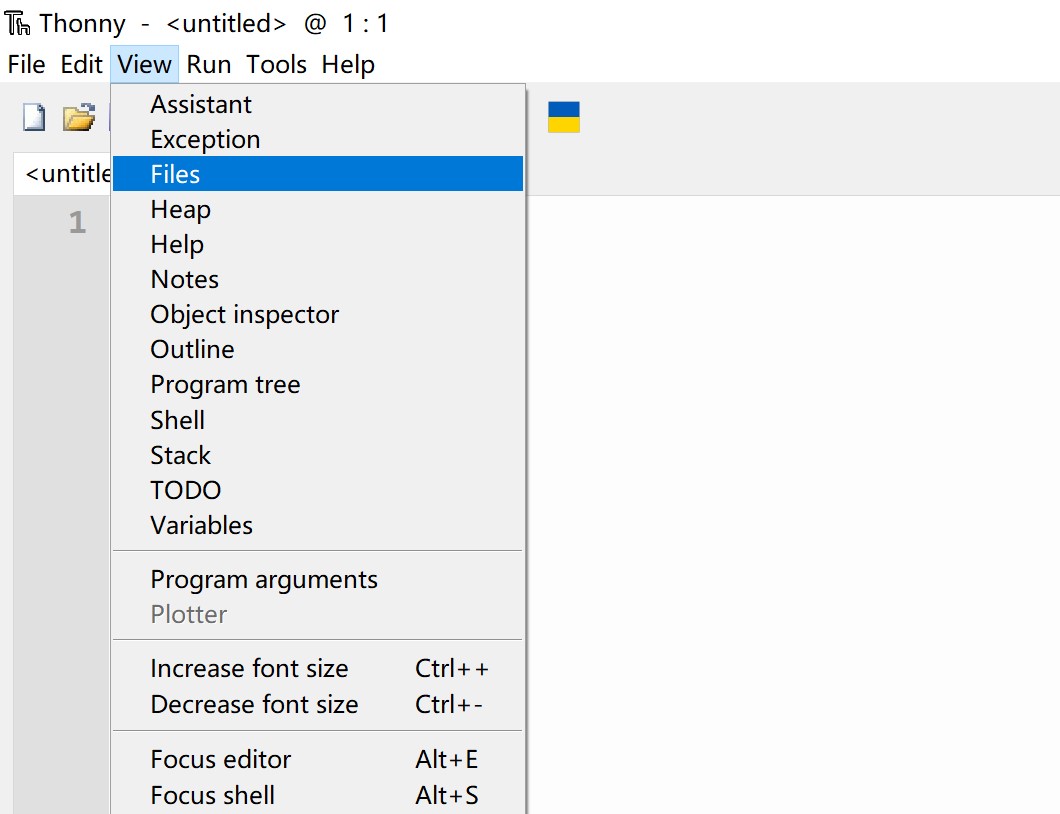
- Go to View > Files
- Go to the path where you downloaded the file, upload the code in MicroPython device
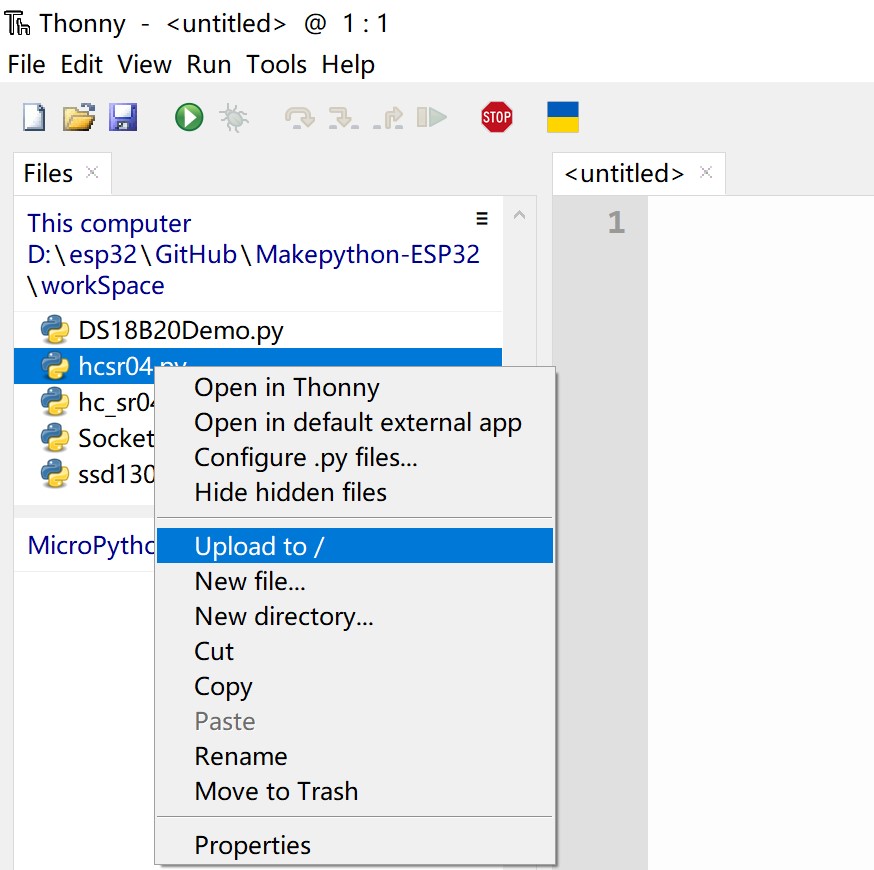
- Click the hc_sr04.py, and Press the Connect button to establish serial communication with your board.

Show:

Projects in Arduino
MaESP ESP32 OLED also can develop in Arduino IDE, based on C/C++. You should add the ESP32 SDK in Arduino, and use the Corresponding development firmware
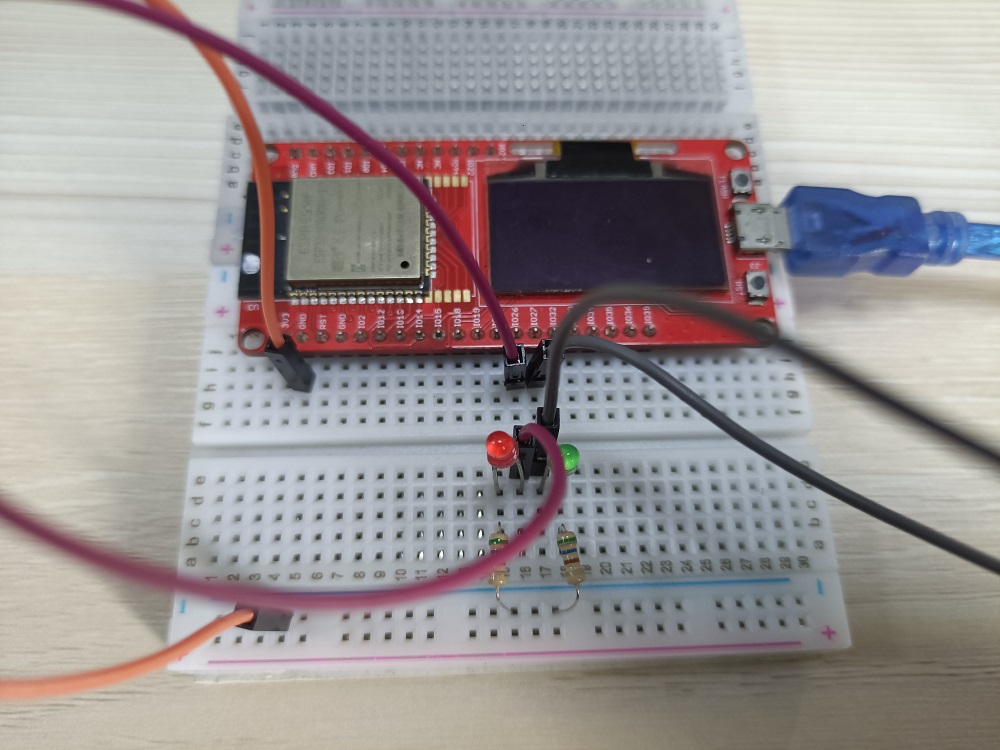
Web Server Control LED
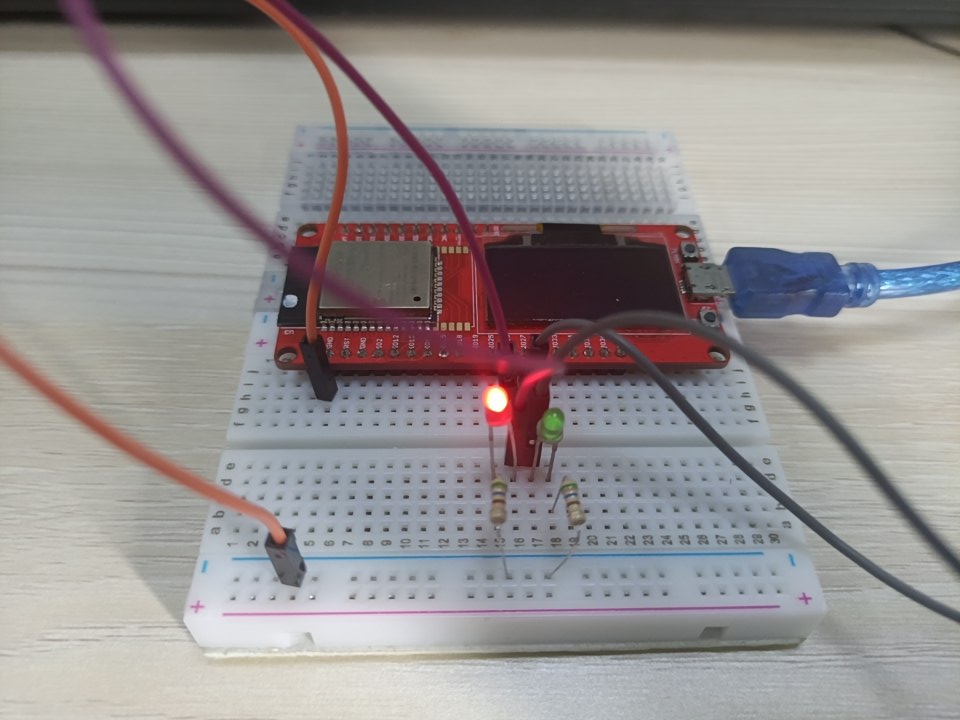
1.Connect LED
Connect the long LED pin to the end of the 330R resistor, the other end of the resistance is connected to 3.3v, the short pin of the LED lamp is connected to the IO27/IO26 of ESP32. As follows:
2.Connect WiFi
-
Open the GitHub. Click to download the MaESP ESP32 Arduino control in the example file.
-
Open the file and modify the 'SSID' and 'PASSWORD' to local WIFI and password:
SSID = "Makerfabs"     #Modify here with SSID
PASSWORD = "20160704"  #Modify here with PWD
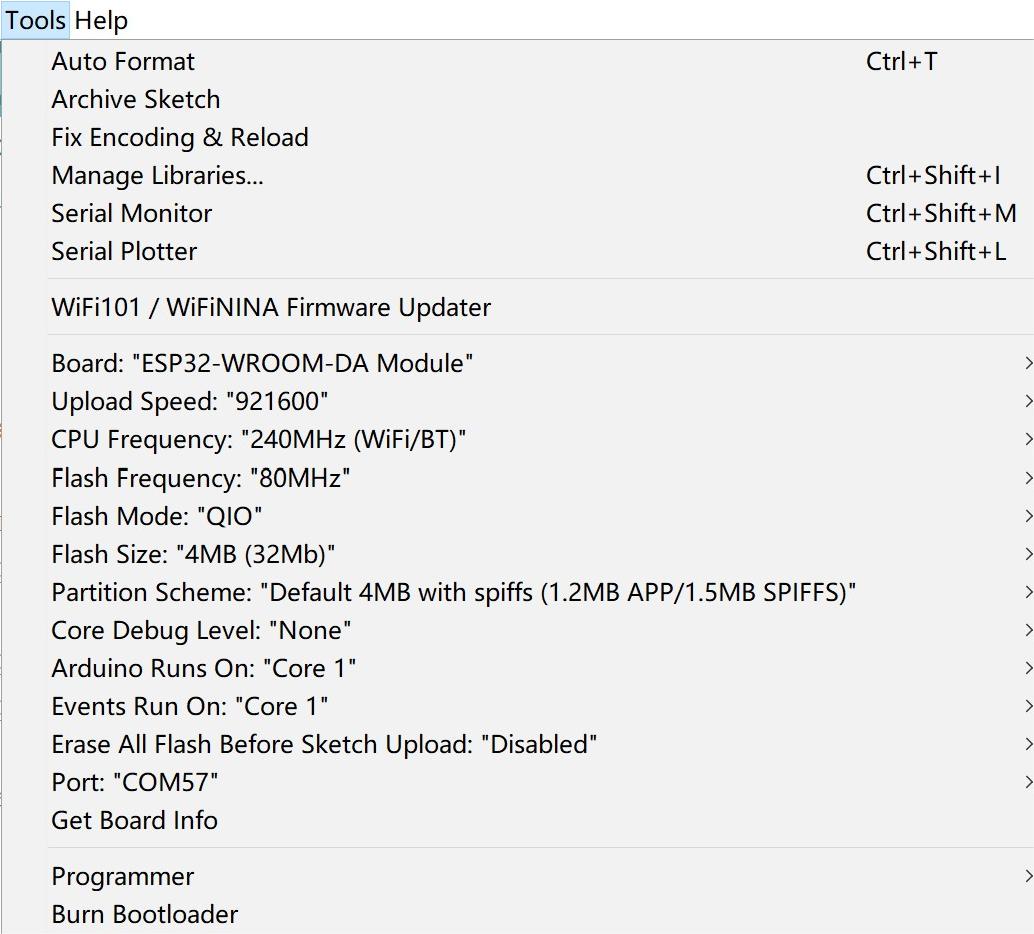
- Select and set the parameter in the Tools menu, as the picture:
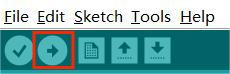
- After verifying and unloading the code, the new client build-up, copy the IP address.
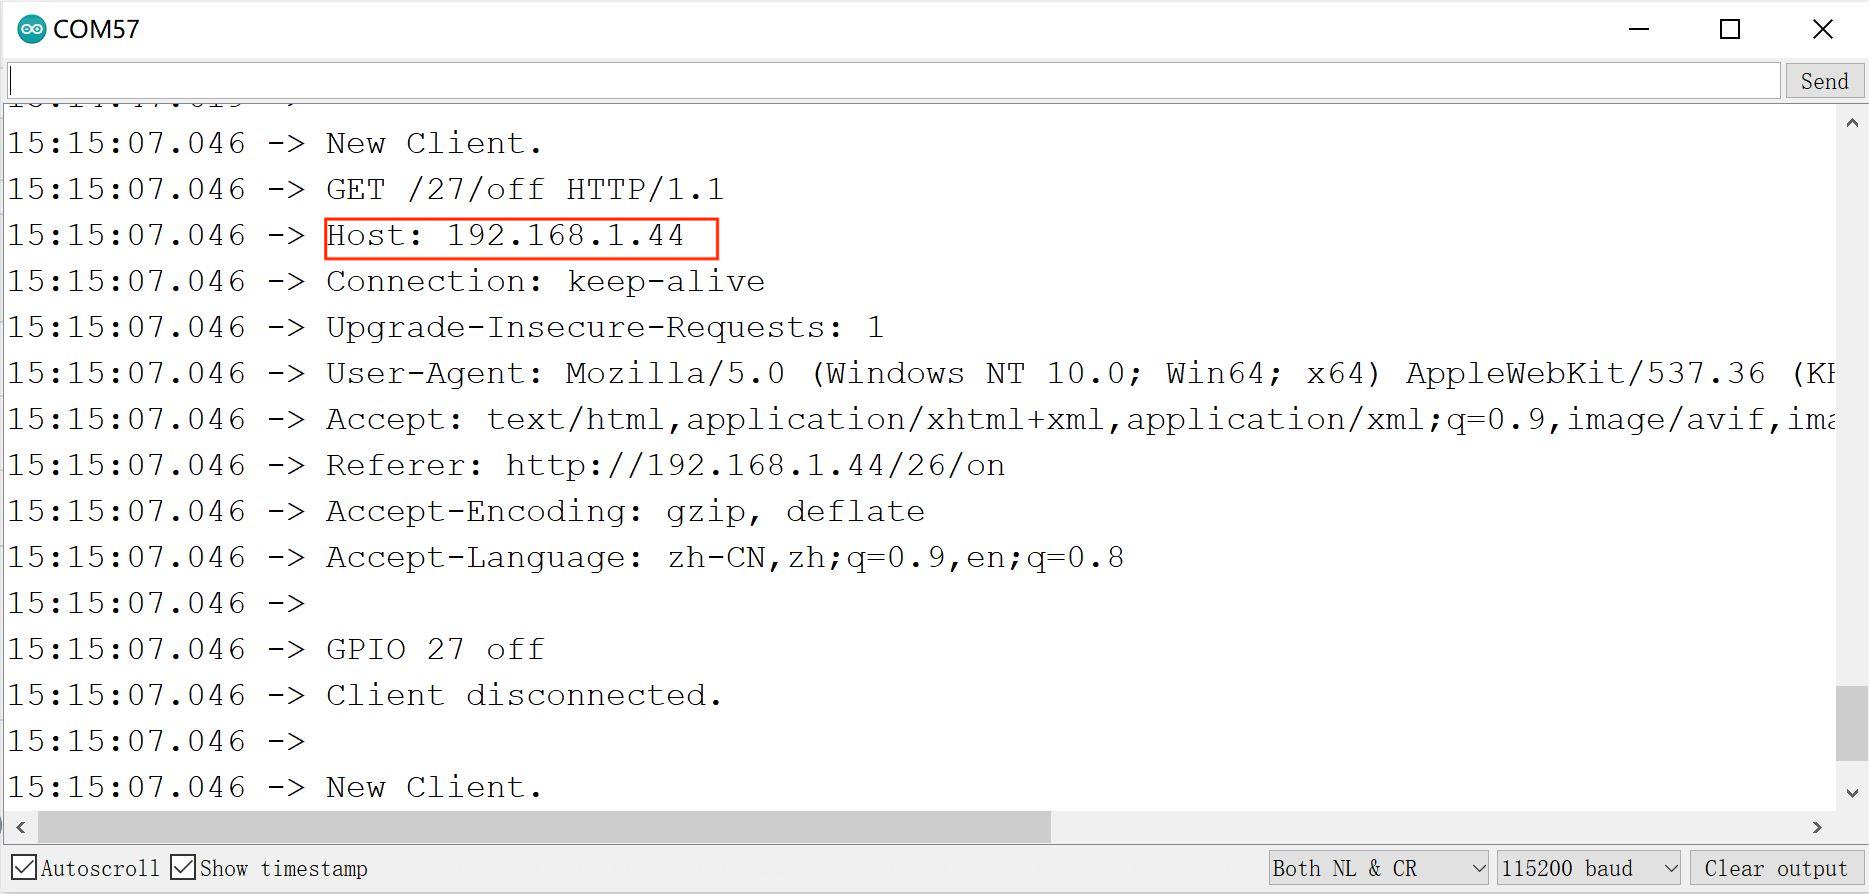
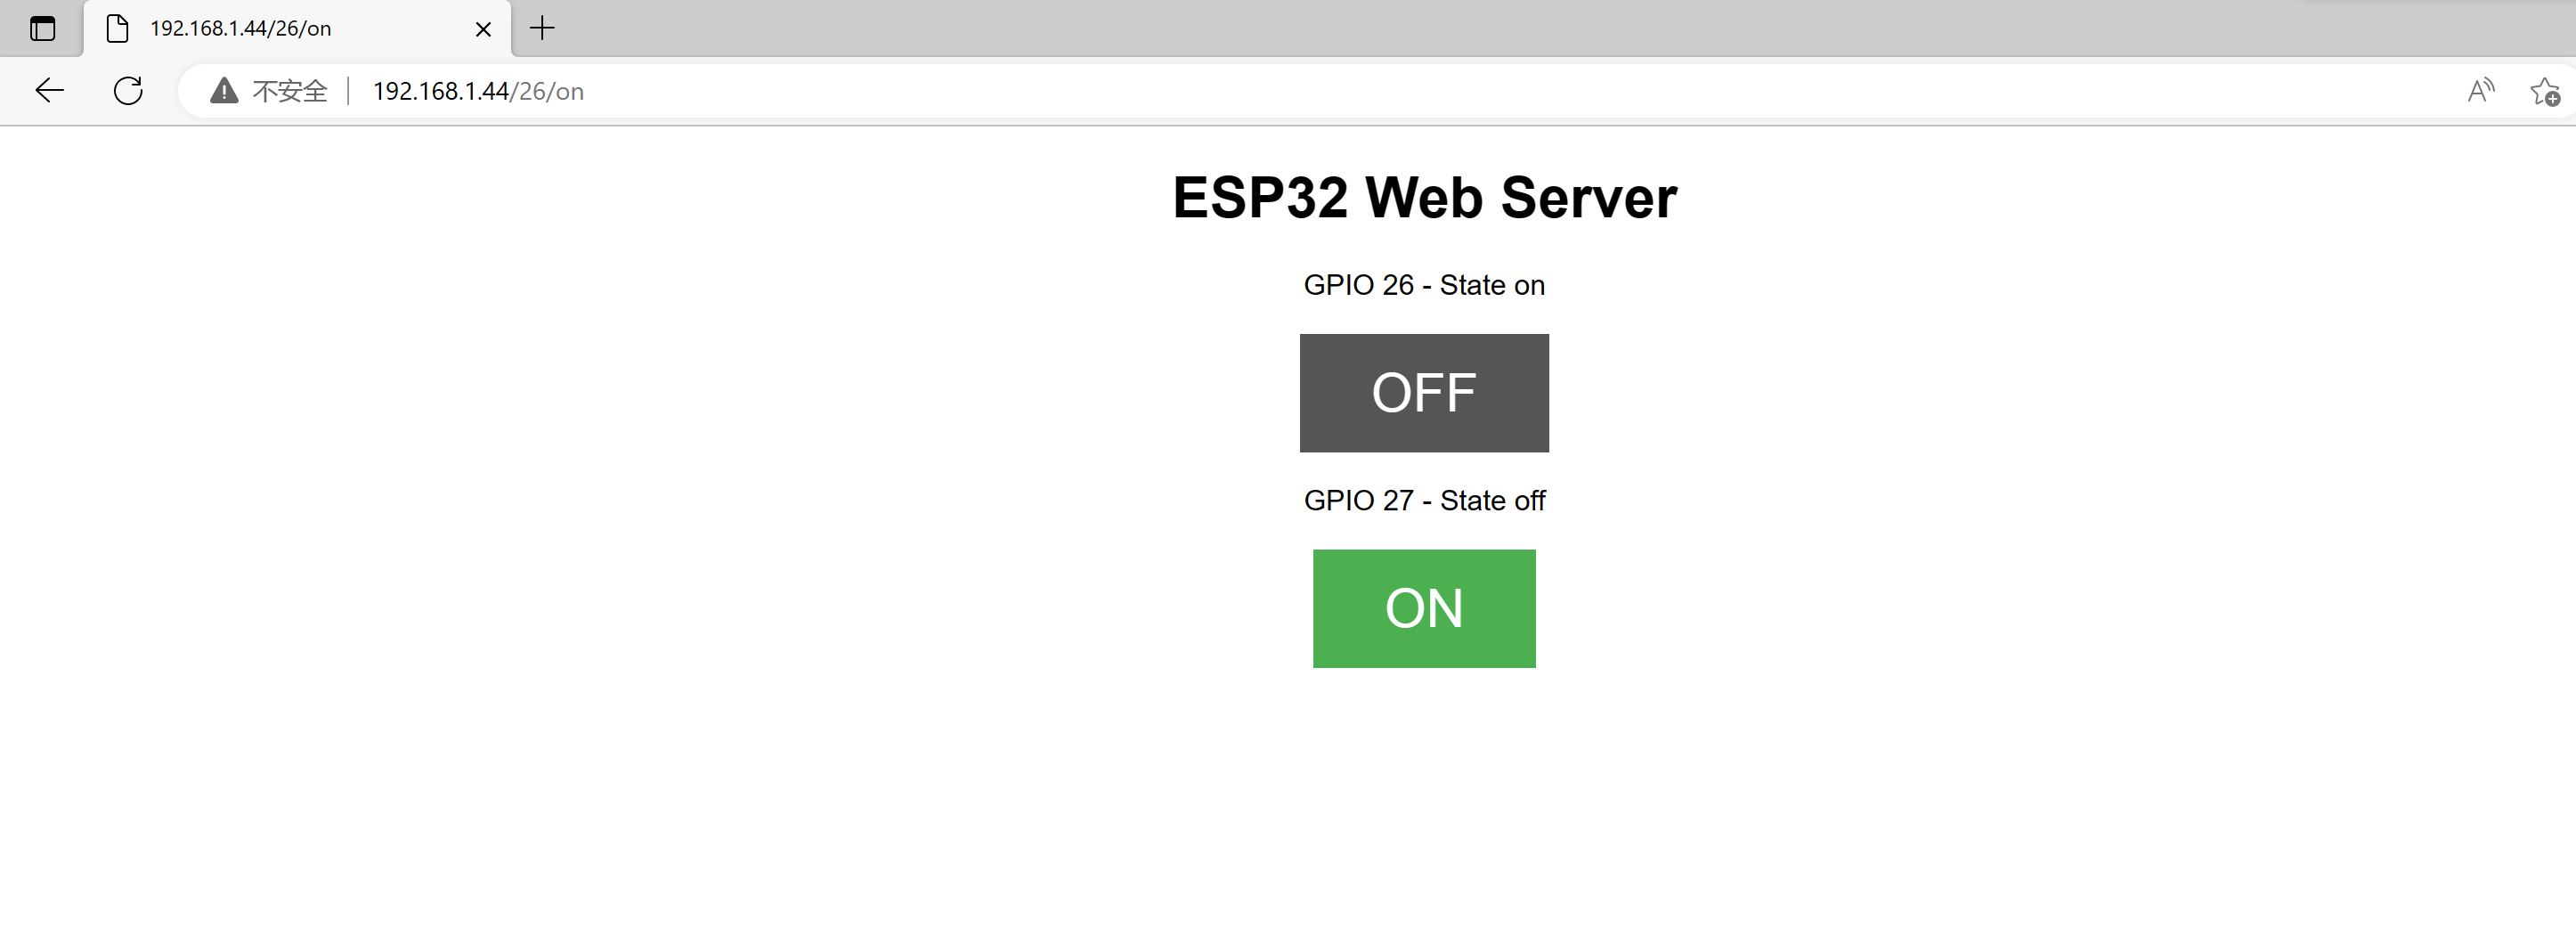
- Open the browser and enter the IP address. You can see the page as follows.
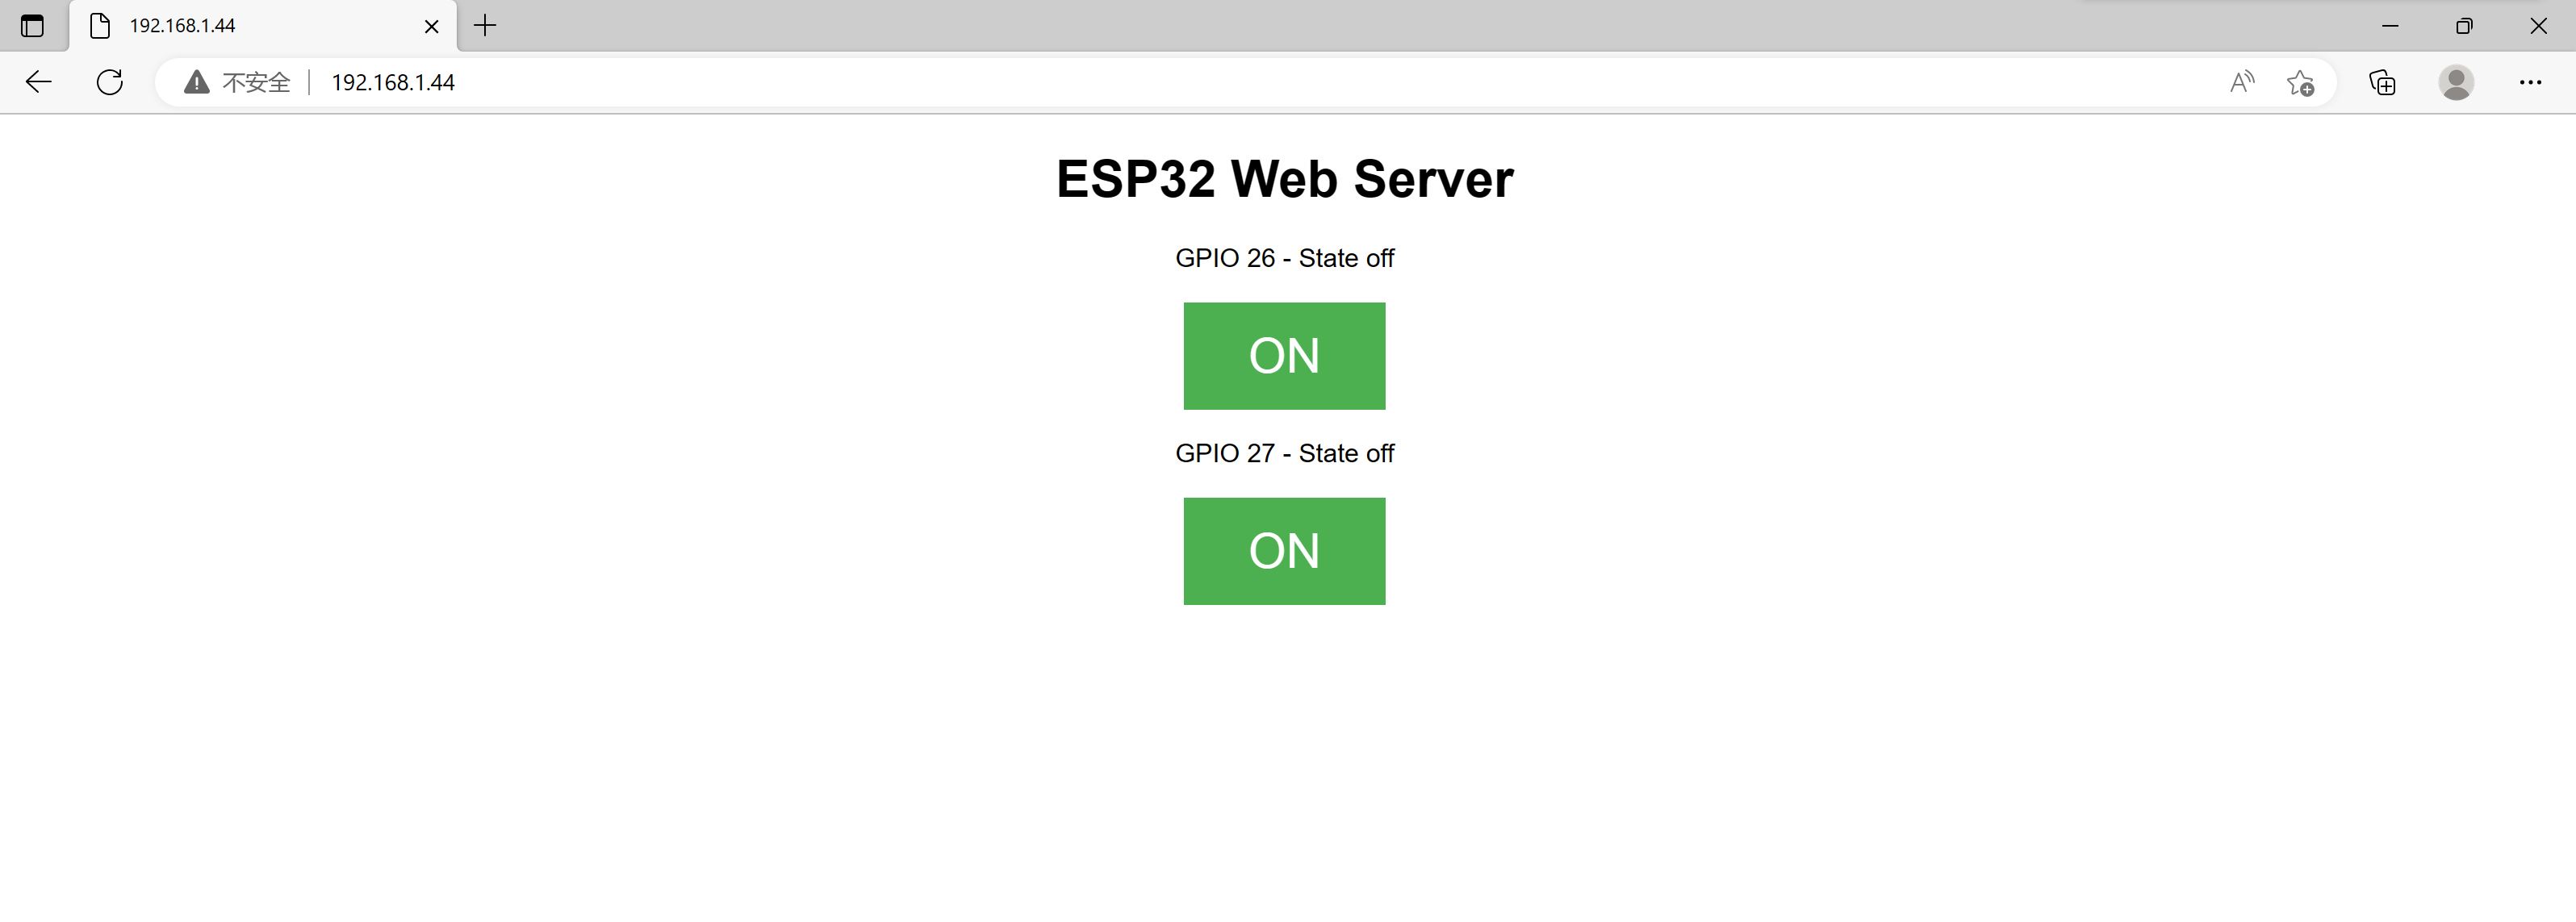
- Users can now turn the led on and off by clicking on/off.
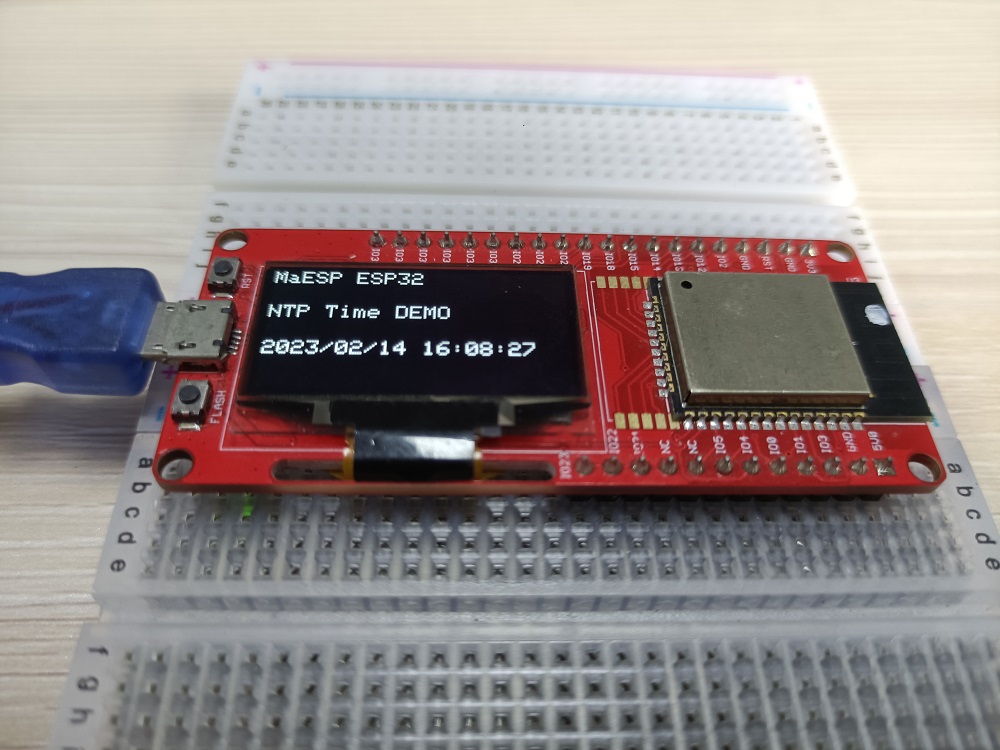
NTP Demo
NTP(Network time protocol), which is a protocol used to synchronize computer time. It allows a computer to synchronize its servers or clock sources (such as quartz clocks, GPS, etc.). This demo can display the real-time time on the screen.
-
Open the GitHub. Click to download the example file of MaESP ESP32 Arduino OLED.
-
Open the file and modify the 'SSID' and 'PASSWORD' to local WIF and password:
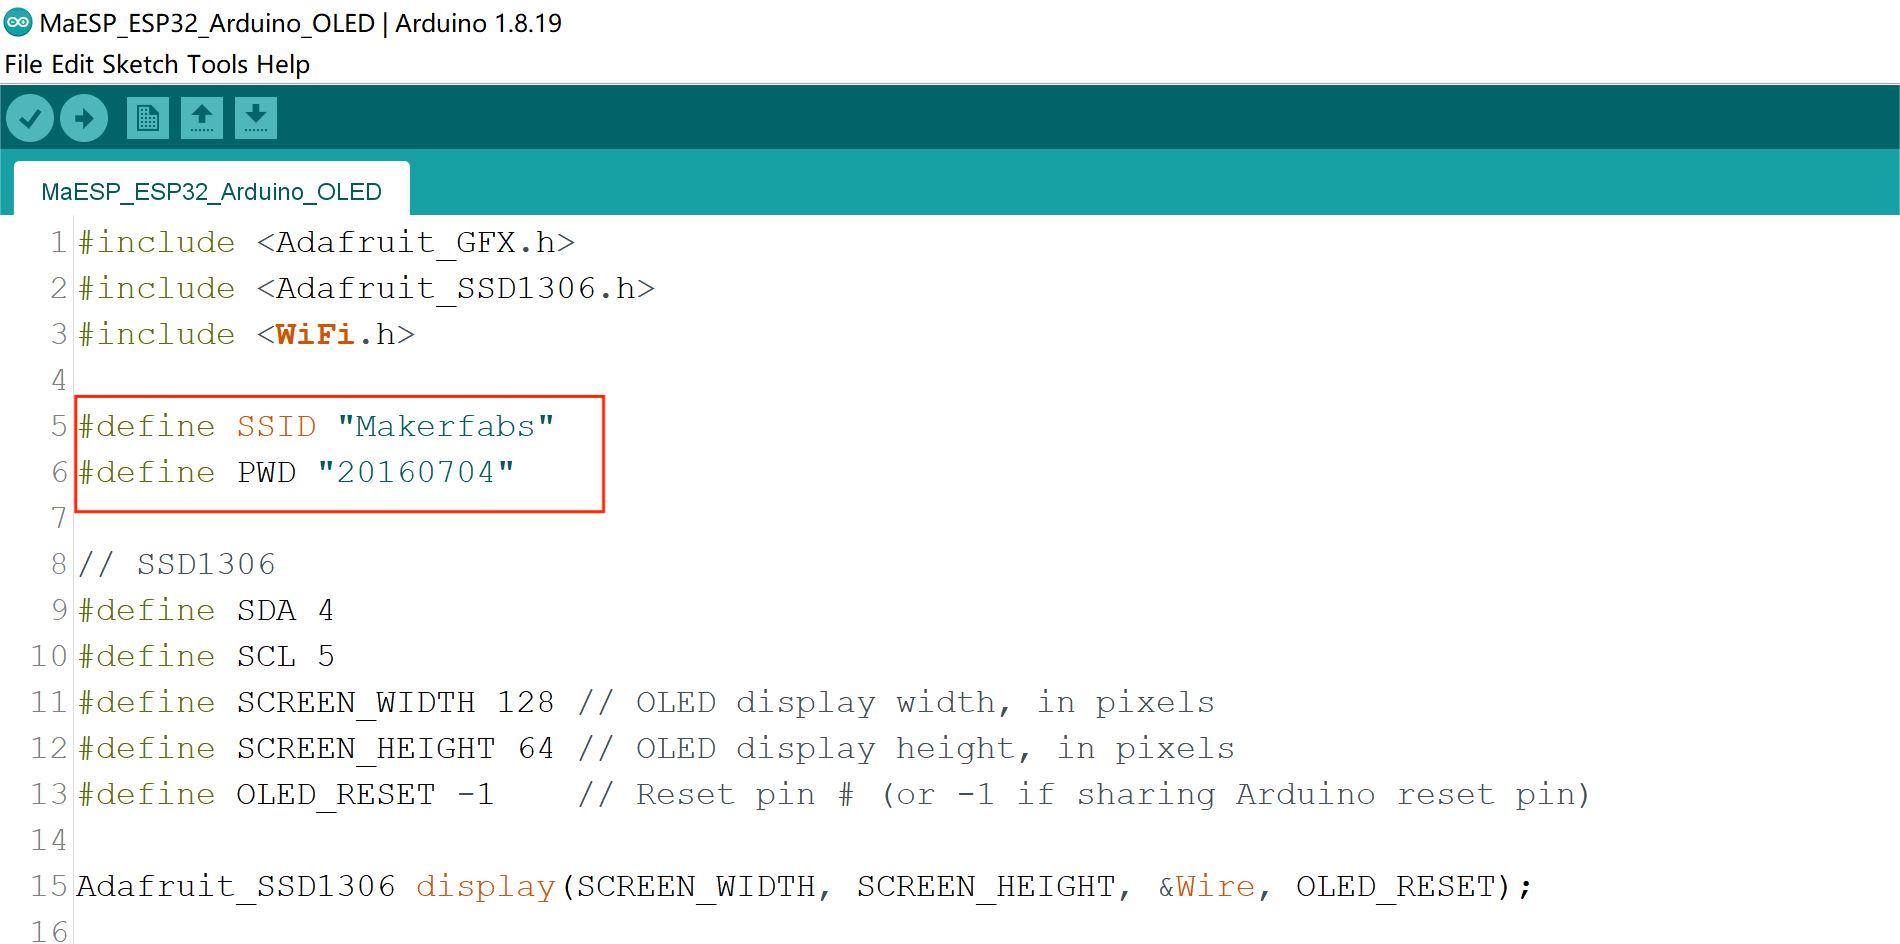
- Verify and upload the sketch., show the demo as follows.
FAQ
You can list your question here or contact techsupport@makerfabs.com for technology support. Detailed descriptions of your question will be helped to solve your question.