Pico W Primer Kit
About the product
Introduce
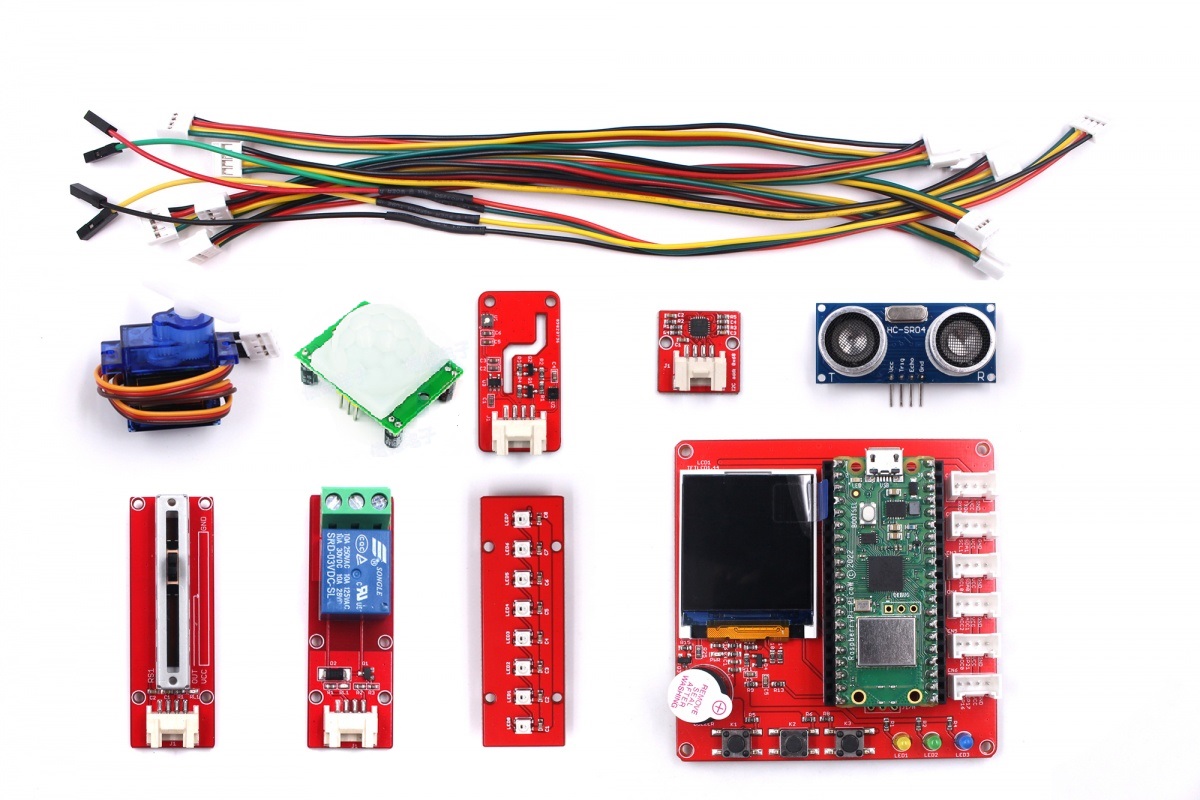
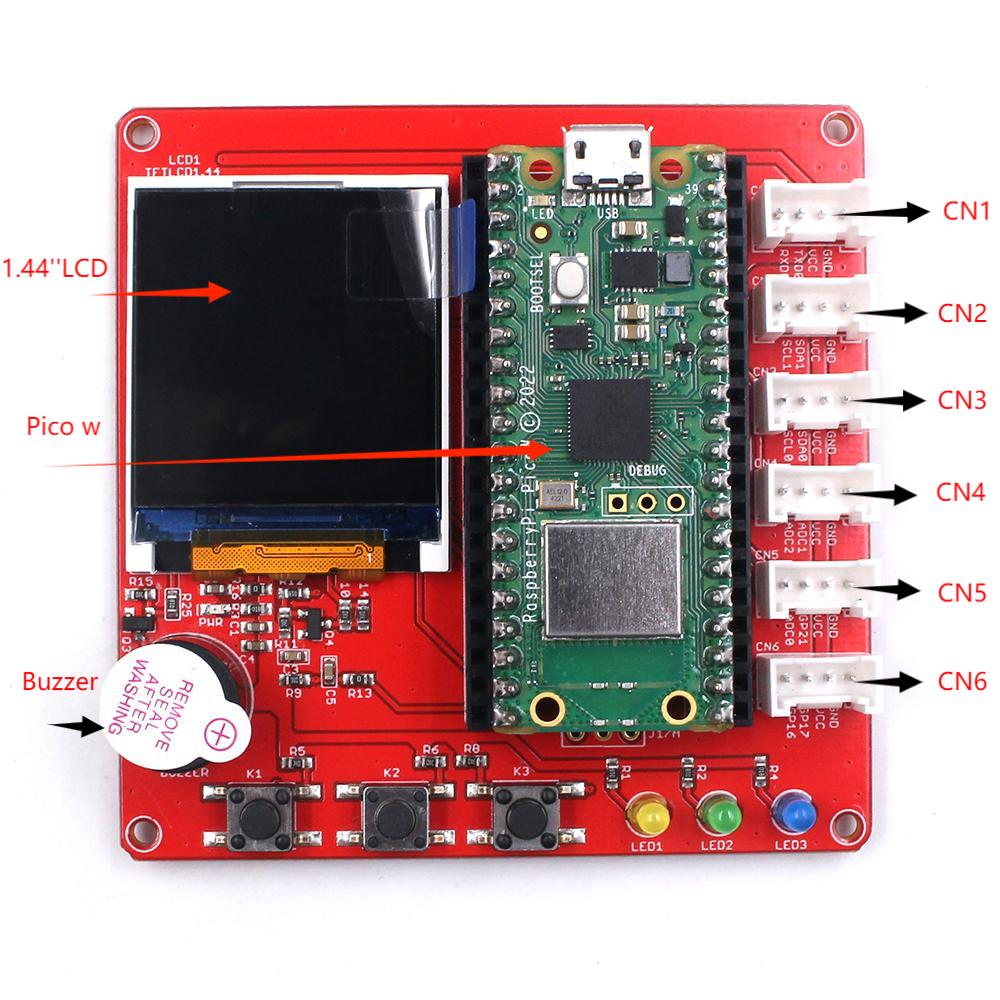
This kit is designed for MicroPython learning with raspberry pi Pico W. The kit includes the main board and some modules of the Mabee series ( Servo, Slide potentiometer, PIR sensor, CO2 sensor, Relay, MPU6050, Ultrasonic Ranging, ws2812). The mainboard base on the Pico W and LCD display, features three buttons, three LEDs and a buzzer. It also provides six interfaces to connect the peripheral modules.
Model:RAPICOWSTPK
Features
- Raspberry Pi Pico W: RP2040 microcontroller chip
- 1.44inch TFT LCD, with ST7735 driver
- 3* button input
- 3*LED output
- 1*Active buzzer
- 6*interface expansion (UART/GPIO/I2C/ADC)
- 8*Mabee series module
- Power by Micro USB
- Increase the wireless Wi-Fi function in the base on Pico
Diagram and interface
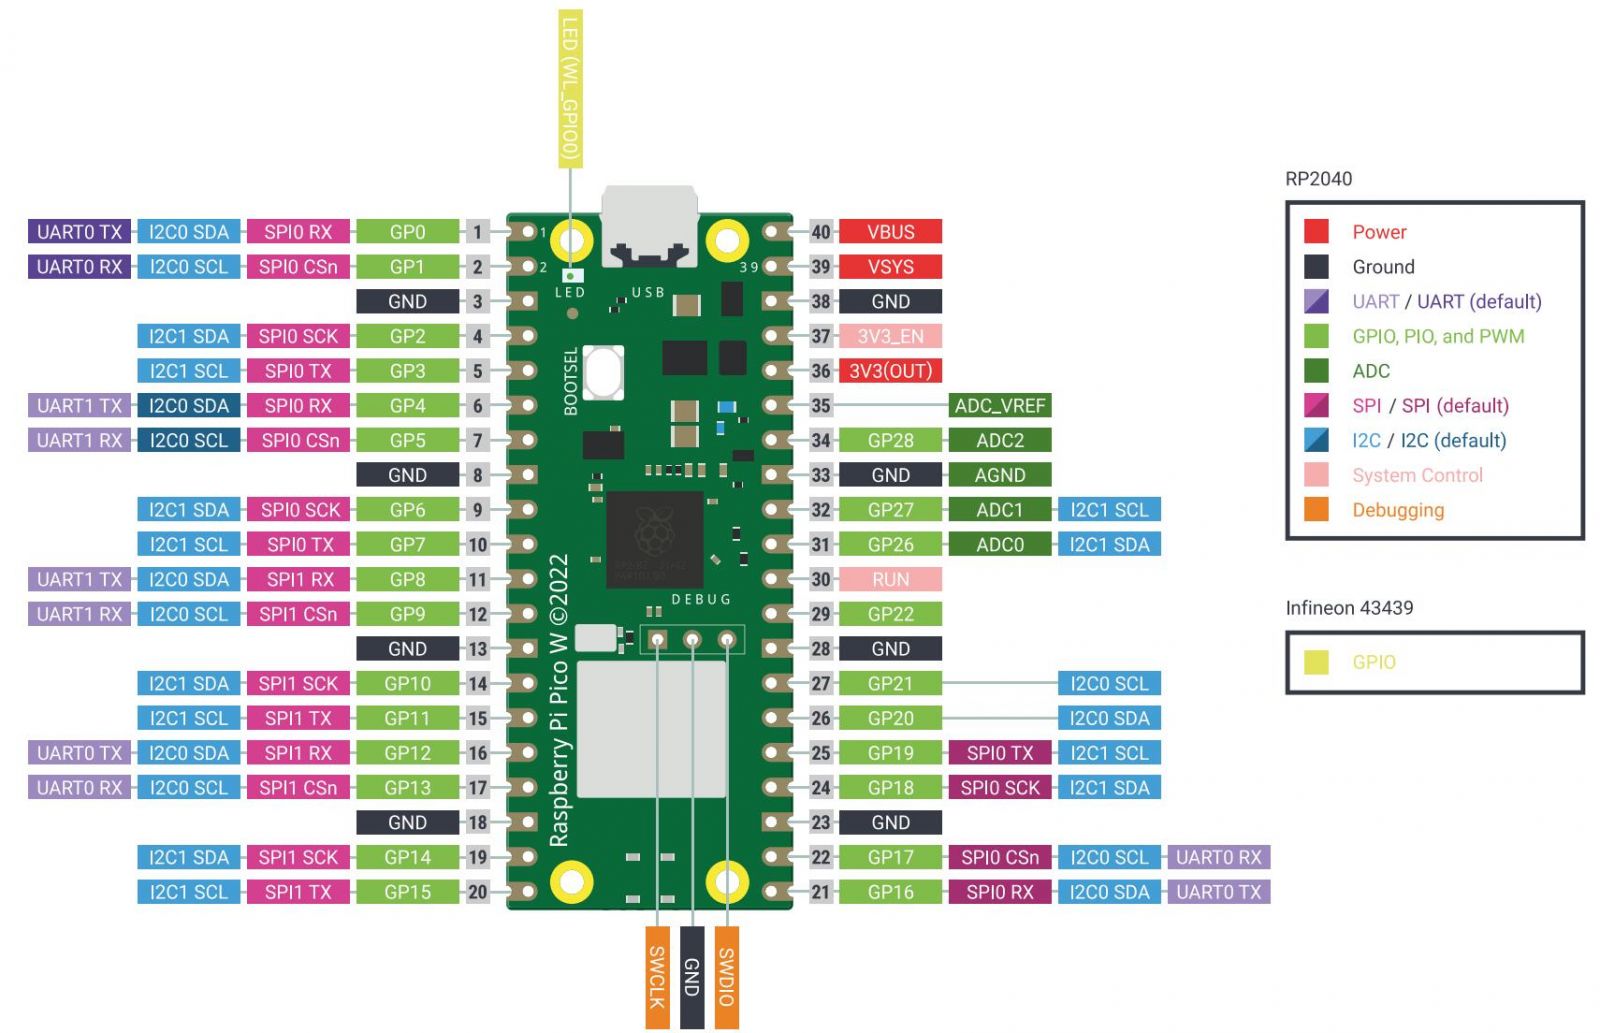
| Interface | 1 | 2 | 3 | 4 |
|---|---|---|---|---|
| CN1 | GP1 | GP0 | VCC | GND |
| CN2 | GP7 | GP6 | VCC | GND |
| CN3 | GP9 | GP8 | VCC | GND |
| CN4 | GP28 | GP27 | VCC | GND |
| CN5 | GP26 | GP21 | VCC | GND |
| CN6 | GP16 | GP17 | VCC | GND |
| BUTTON | GPIO |
|---|---|
| K1 | GP2 |
| K2 | GP3 |
| K3 | GP22 |
| LED | GPIO |
|---|---|
| LED1 | GP18 |
| LED2 | GP19 |
| LED3 | GP20 |
| Active buzzer | GP4 |
|---|---|
Preparation
- Install Thonny IDE. Open Thonny IDE, go to Tools->Options->Interpreter, select "MicroPython".

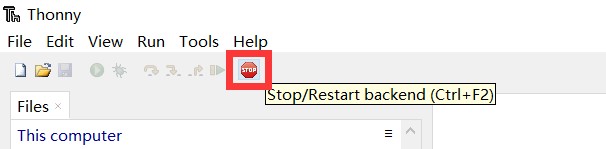
- Connect Pico W to PC, click "stop" to connect it.
-
Obtain the all demo code from the Github
-
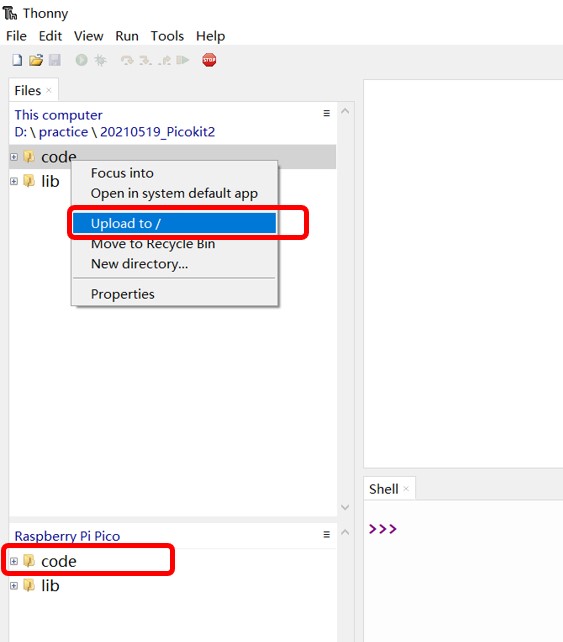
Upload all code and libraries to Pico W.
    Copy ST7735.py and sysfont.py to /lib

    Copy test_display.py to /code

    Run test_display.py
Button and LED
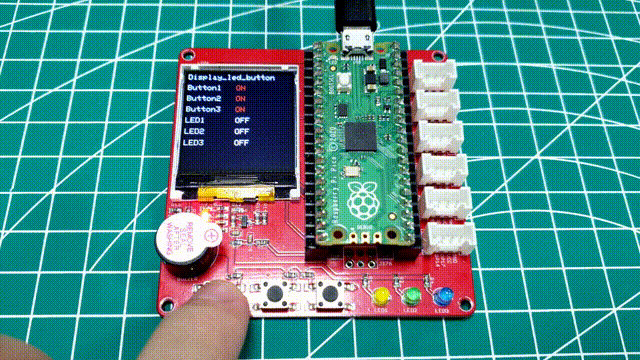
- Open the code "Project-1-display_led_button.py" in Thonny.
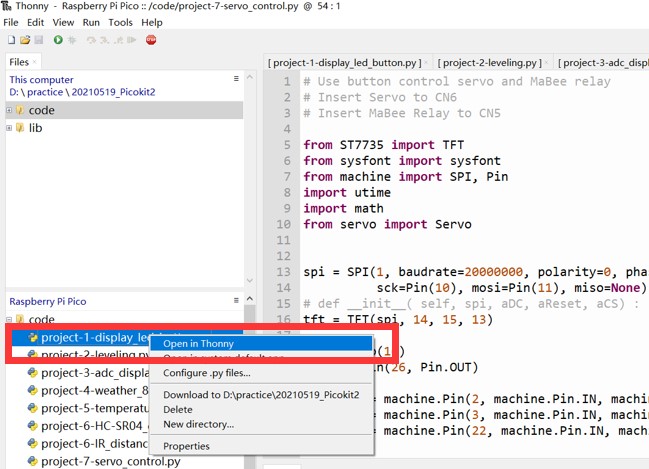
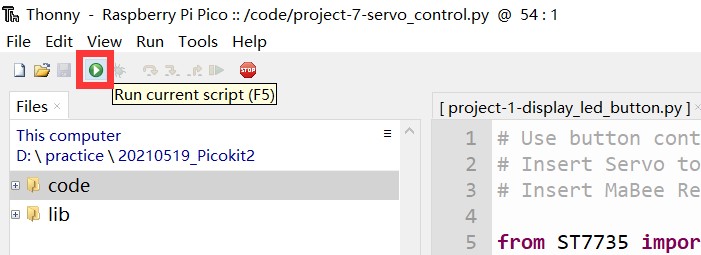
- Click button "RUN" to run this script.
- Press the K1 button to control the LED1 turning on/off.
- Press the K2 button to control the LED2 turning on/off.
- Press the K3 button to control the LED3 turning on/off.
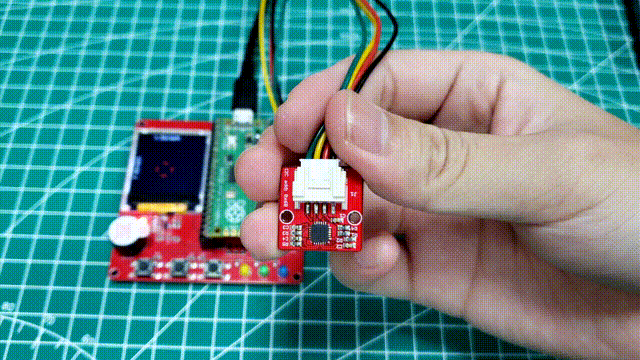
MPU6050 Demo
- Click "stop" to reset the program.
- Connect the Mabee_IMU MPU6050 module to the CN3 port.
- Open the code "Project-2-leveling.py" in Thonny.
- Click button "RUN" to run this script.
- Rotate the MPU6050 module at will, and the circle displayed on the screen will change position.
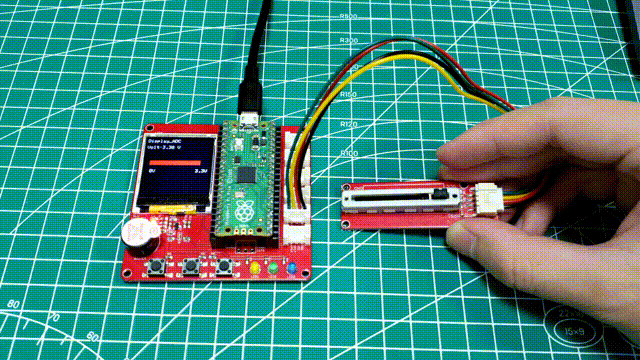
ADC Value
- Click "stop" to reset the program.
- Connect the Mabee_Slide potentiometer module to the CN5 port.
- Open the code "Project-3-adc_display.py" in Thonny.
- Click button "RUN" to run this script.
- Slide the paddle of the potentiometer, and the voltage value displayed on the screen will change.
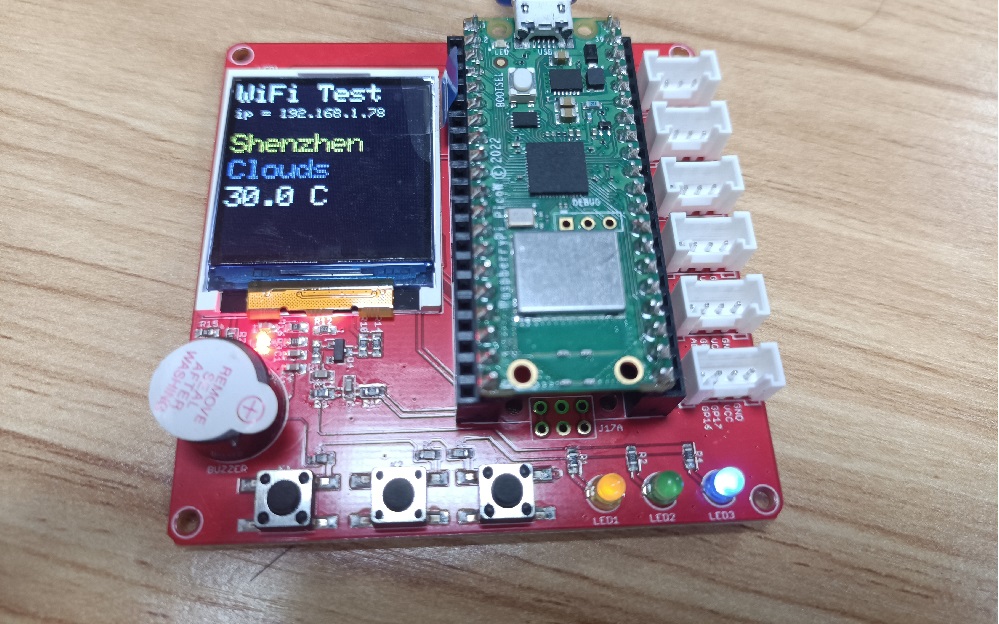
Get Weather via WiFi
- Click "stop" to reset the program.
- Due to the pico w built-in WiFi function, so you needn't connect any module.
- Open the code "Project-9-weather.py" in Thonny.
- Modify your Wi-Fi ssid and password in the code.
- Click button "RUN" to run this script.
- Wait a minute and the Shenzhen weather will be displayed on the LCD.
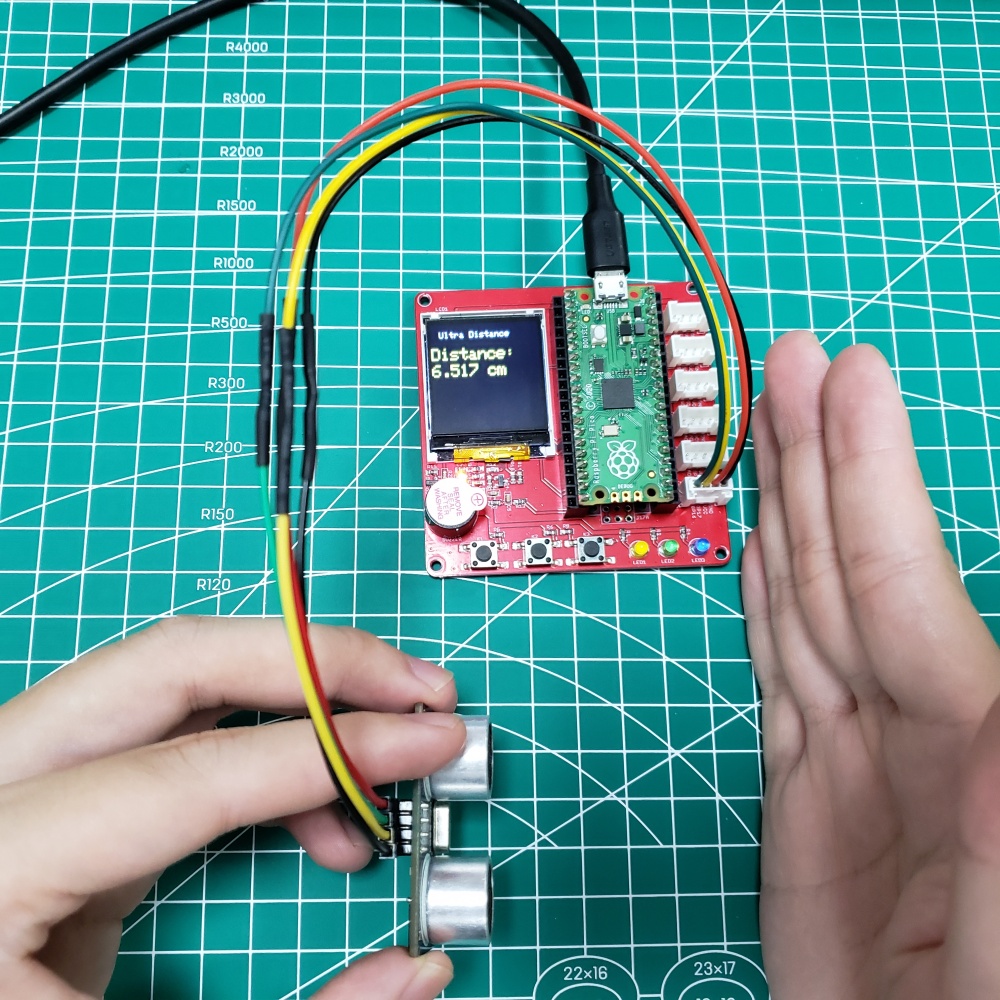
Ultrasonic Ranging
- Click "stop" to reset the program.
- Connect the Mabee_Ultrasonic Ranging module to the CN6 port.
- Open the code "Project-6-HC-SR04_distance.py" in Thonny.
- Click button "RUN" to run this script.
- The Ranging value will be displayed on the LCD.
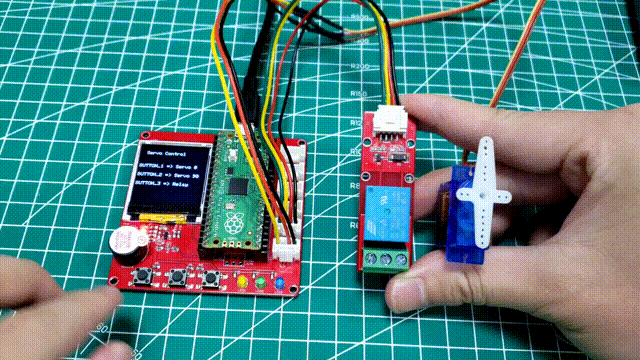
Control Servo and Relay
- Click "stop" to reset the program.
- Connect the Mabee_Delay module to the CN5 port.
- Connect the Mabee_Servo SG90 module to the CN6 port.
- Open the code "Project-7-HC-servo_control.py" in Thonny.
- Click button "RUN" to run this script.
- Click the K1 button to drive the Servo to O level.
- Click the K2 button to drive the Servo to 9O level.
- Click the K3 button to control the relay on/off.
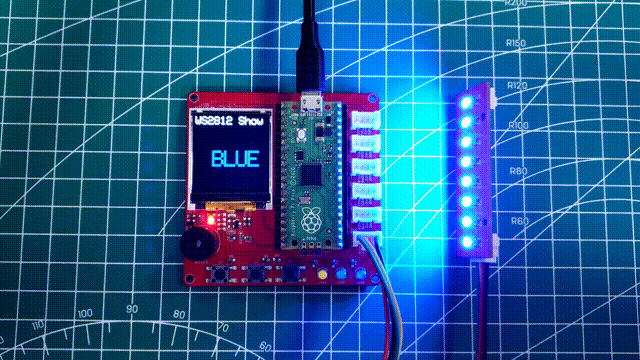
WS2812 Demo
- Click "stop" to reset the program.
- Connect the Mabee_WS2812 module to the CN6 port.
- Open the code "Project-8-ws2812.py" in Thonny.
- Click button "RUN" to run this script.
- The leds will light on and turn different colors circularly.
Mabee CO2 Demo
Mabee C02 can be used to measure the TVOC and eCO2, and use the measured temperature and humidity value to calibrate and ensure the VOA/eCO2 testing accurate and reliable. then we can query the measured value in other local devices Such as mobile phones, computers, etc.
- Click "stop" to reset the program.
- Connect the Mabee_CO2 sensor module to the CN3 port.
- Open the code "Project-10-CO2.py" in Thonny.
- Modify your Wi-Fi ssid and password in the code.
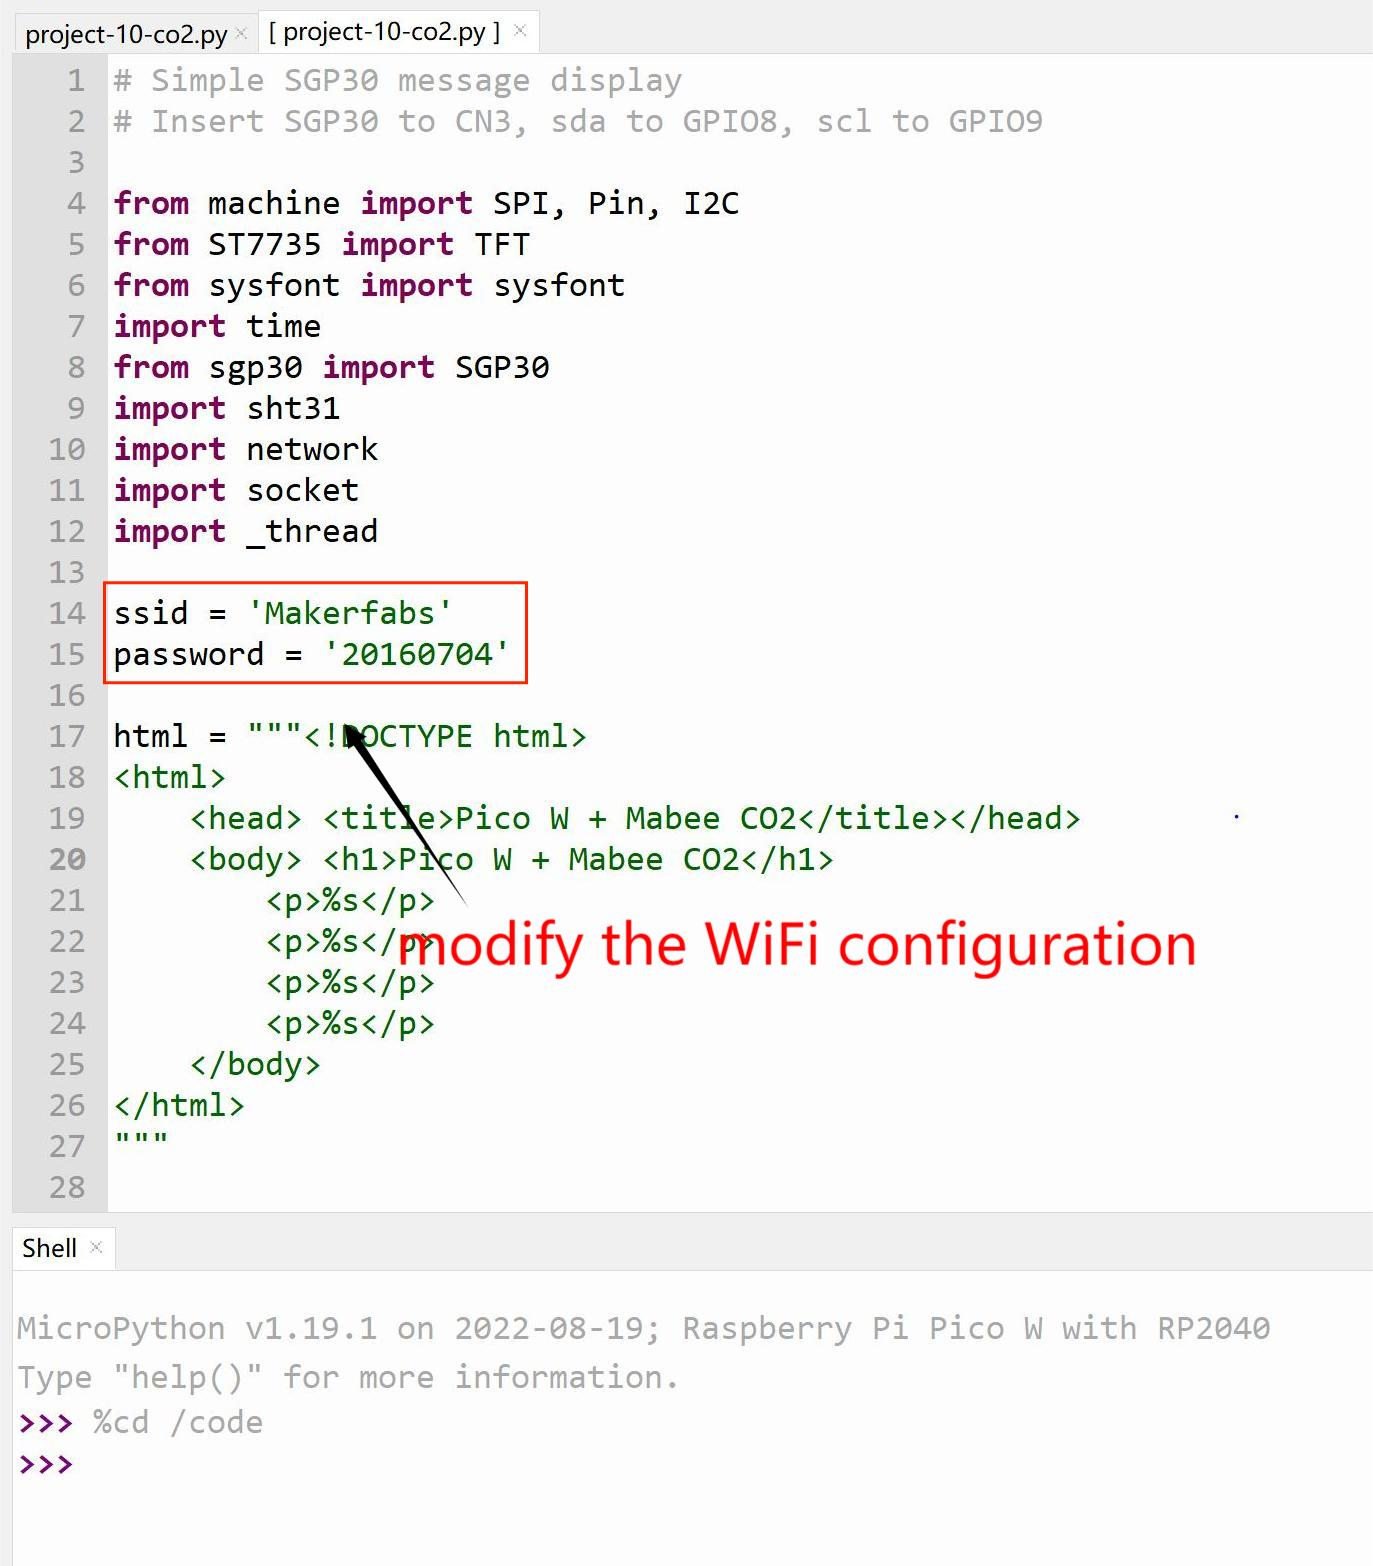
- Click button "RUN" to run this script.
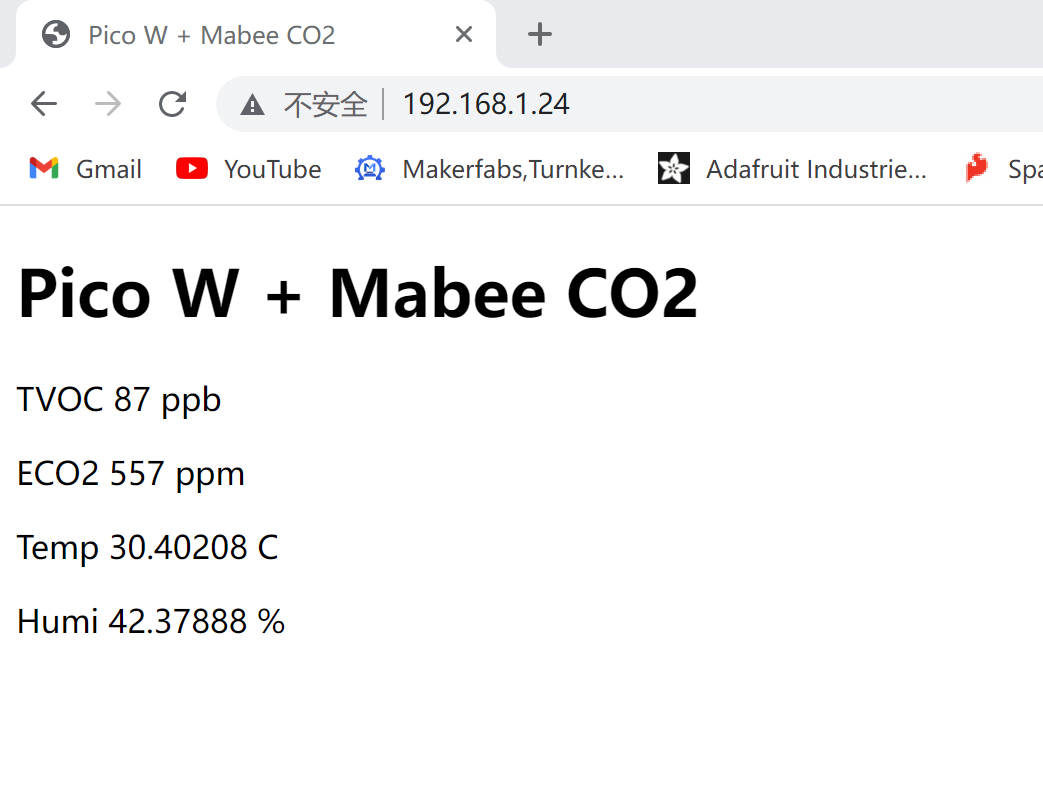
- The webserver IP address and the CO2 concentration measured will be displayed on the LCD.
- You must link to the same Wi-Fi with the Pico w, which will put them on the same Local area network (LAN)
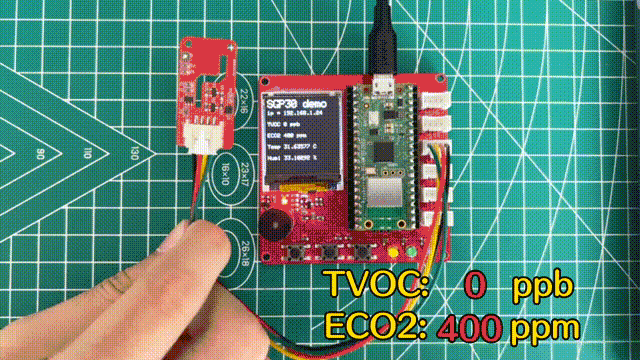
- After entering the IP address in the browser, the measurement results can be displayed on the web page.
Thingspeak Demo
Thingspeak is a IoT analytics platform. We can use the development board and its Peripheral equipment for collecting data and upload to the cloud. in this way, We can use this platform to make Visualization of data. At the same time, we can monitor these data on the internet.
- Click "stop" to reset the program.
- Due to the Pico w built-in Wi-Fi function, so you needn't connect any module.
- Open the code "Project-11-thingspeak.py" in Thonny.
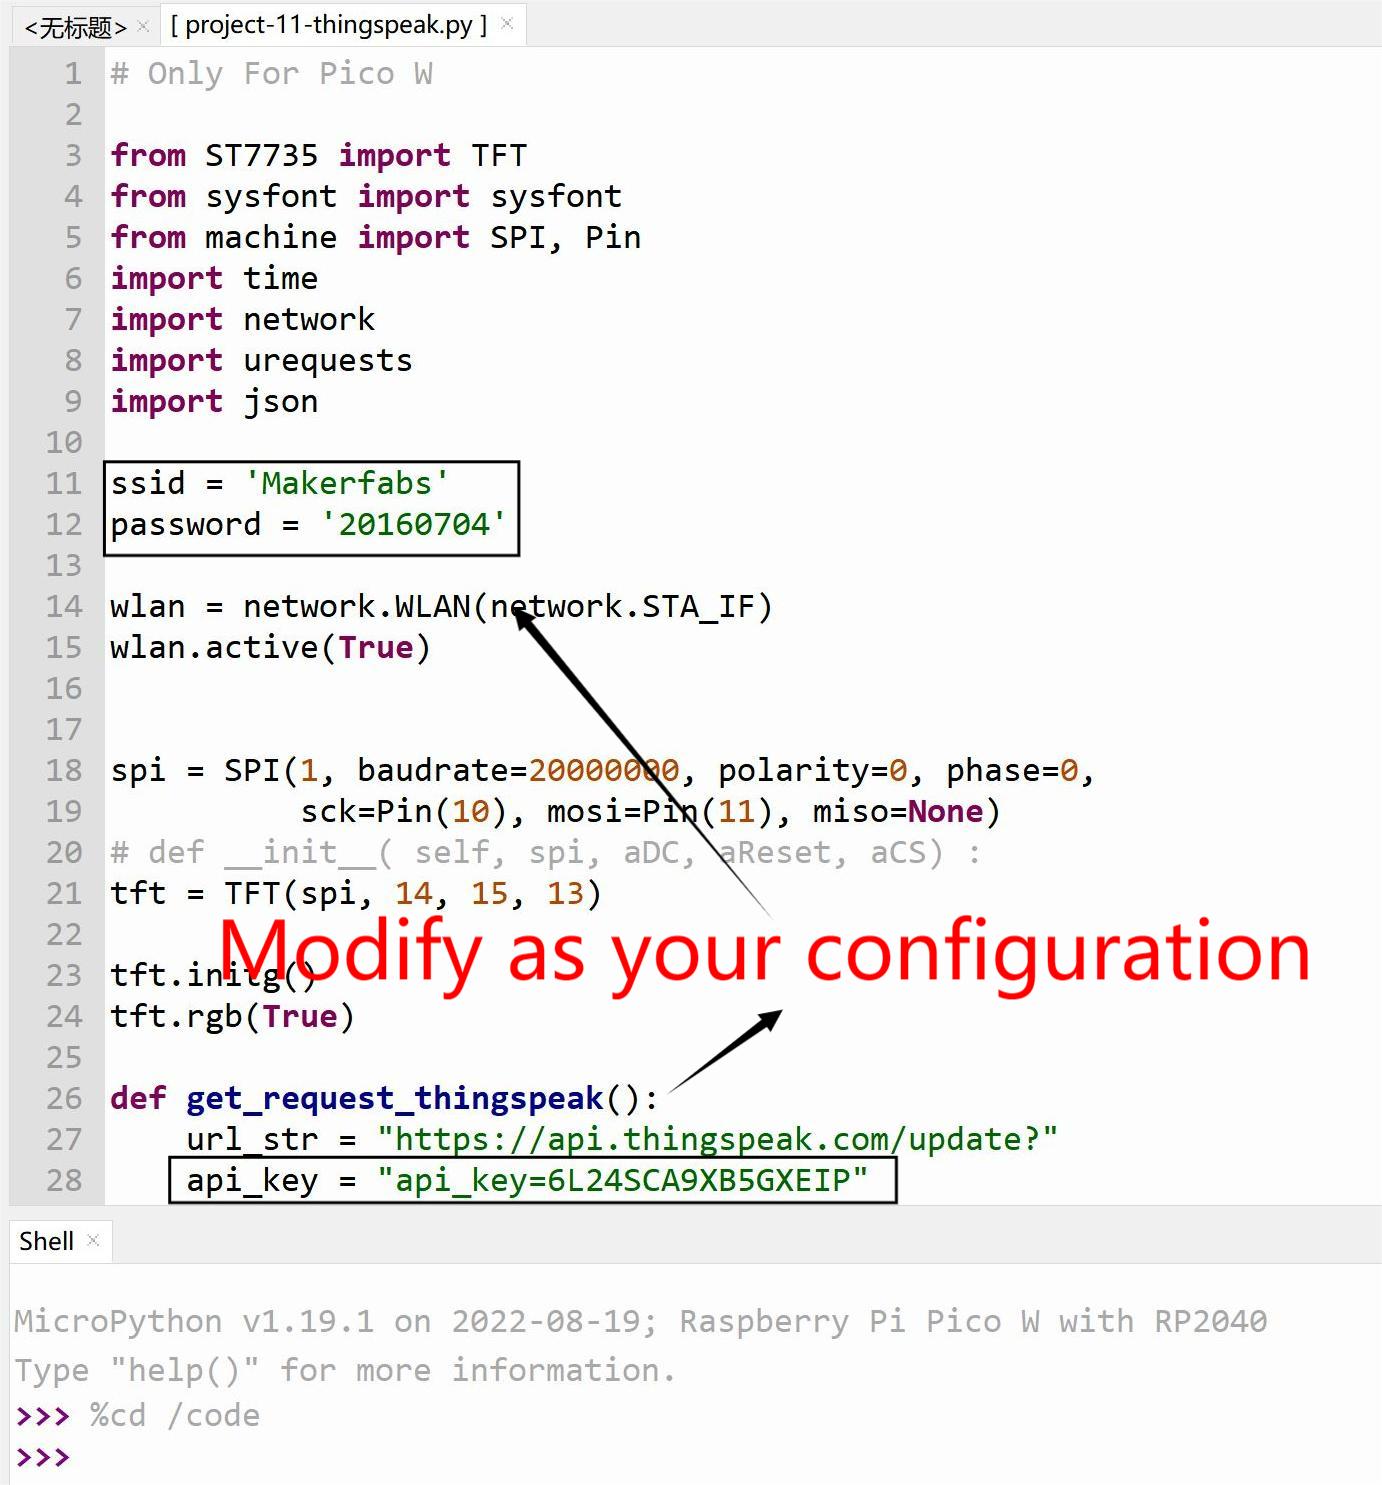
- Modify your Wi-Fi ssid, password and thingspeak API key in the code.
- Click button "RUN" to run this script.
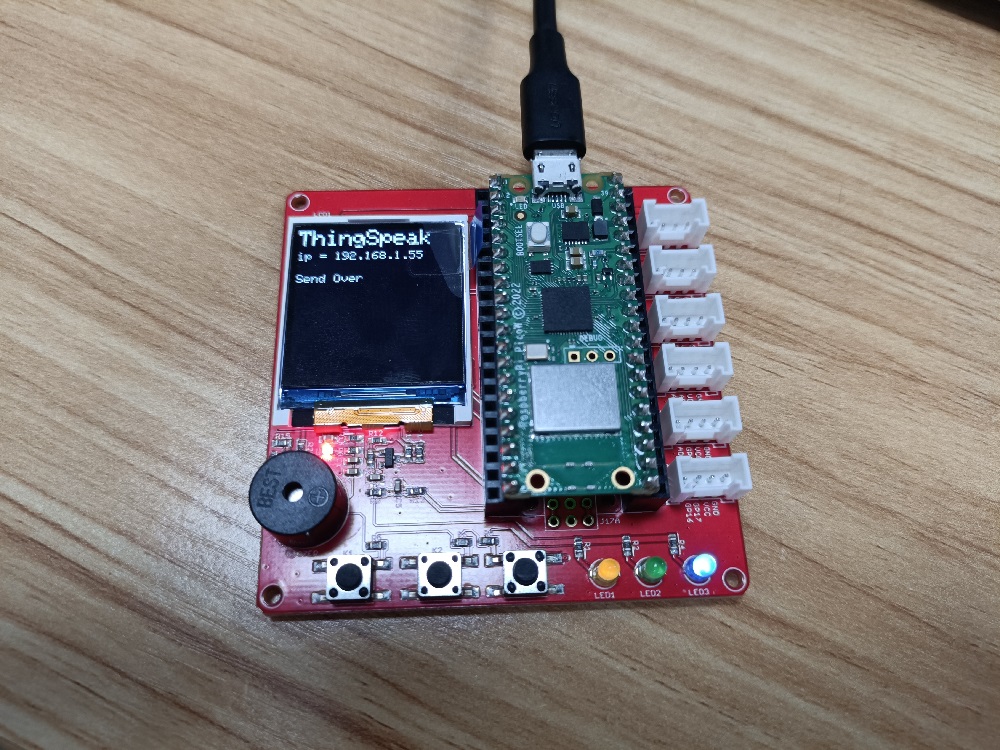
- Wait a minute and IP address will be displayed on the LCD.
- Click https://thingspeak.com/channels/1889504, You can see the result as follow.

Note: Click http://wiki.makerfabs.com/ESP8266_WiFi_Shield.html#iot-project, and it will teach you how to apply for a new thingspeak account.
PIR detection demo
PIR sensor Module: HC-SR501.
| Sensor | CN6 |
|---|---|
| Sensor's GND | CN6's GND |
| Sensor's DATA | CN6's GPIO16 |
| Sensor's VCC | CN6's VCC |
- Click "stop" to reset the program.
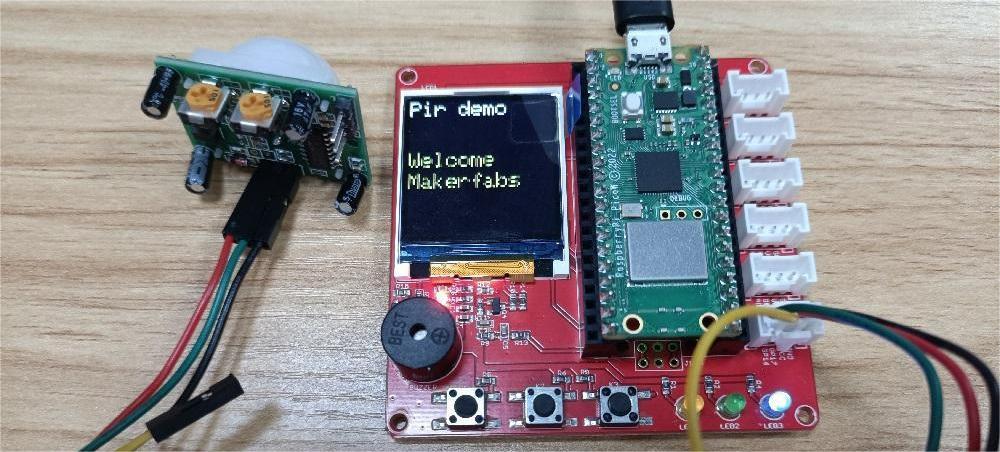
- Connect the PIR detection sensor module to the CN6 port, signal pin to GPIO16.
- Open the code "Project-12-pir_dectection.py" in Thonny.
- Wait a minute. when the sensor detected human moving, the buzzer will alarm, and "welcome Makerfabs" will be displayed on the LCD.
NOTE: The PIR sensor can use the potentiometer to change its sensitivity.
FAQ
You can list your question here or contact techsupport@makerfabs.com for technology support. Detailed descriptions of your question will be helped to solve your question.