SenseLora Soil Moisture
1. Introduction
This LoRa Soil Moisture detects the soil moisture status and transmit the data via LoRa P2P to LoRa Receiver( on your room desk), so user can monitor the field status or have them recorded for long-term analyze, or via LoRa 4G gateway to server for cloud monitoring.
Model:SLSM003
2. Features
- ESP32-S3 WROOM module onboard with the WiFi and Bluetooth.
- Detection of soil moisture.
- Arduino Compatible: You can play it with Arduino IDE.
- Onboard LoRa module (433Mhz or 868Mhz or 915Mhz)
- Completely sealed.
- Dustproof waterproof level:IP68.
- Power by 3.7V battery.
- On board MPTT battery charger by solar panel.
3. Modify ID and time interval
The default ID is SoilM01 and the time interval is 1 hour, if you don't need to change it, please skip this step.
Install the battery, switch on the toggle switch and press the button within 3 seconds to enter wifi mode.
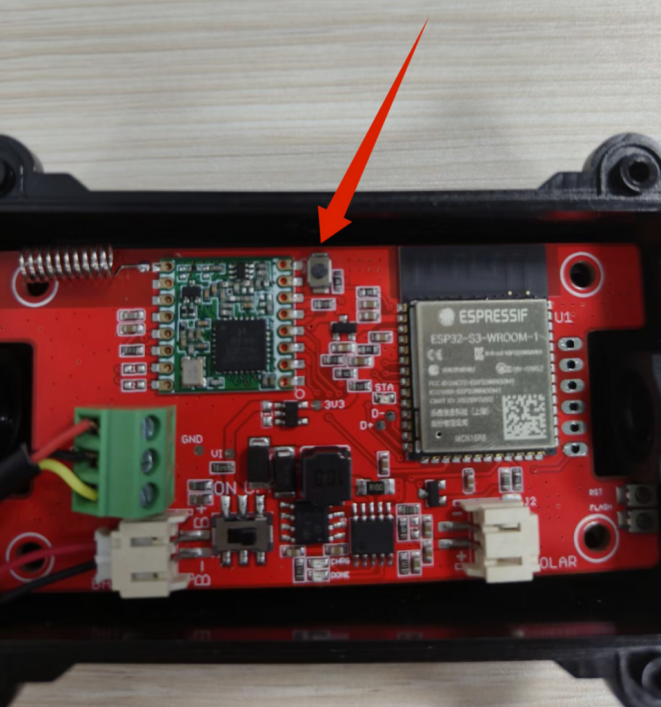
Turn on your phone's wireless network Settings to view WiFi hotspots.
Select the following network “makerfabs-XXXXXXXX ” and enter the password “12345678.
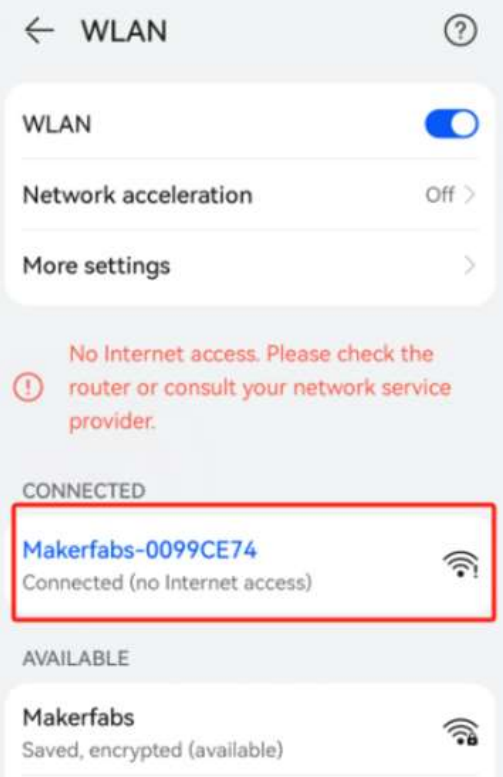
After the phone is connected to the WiFi of the product, type “192.168.4.1” in the URL bar of the browser.
Enter the any name of the product and the interval time in the box.
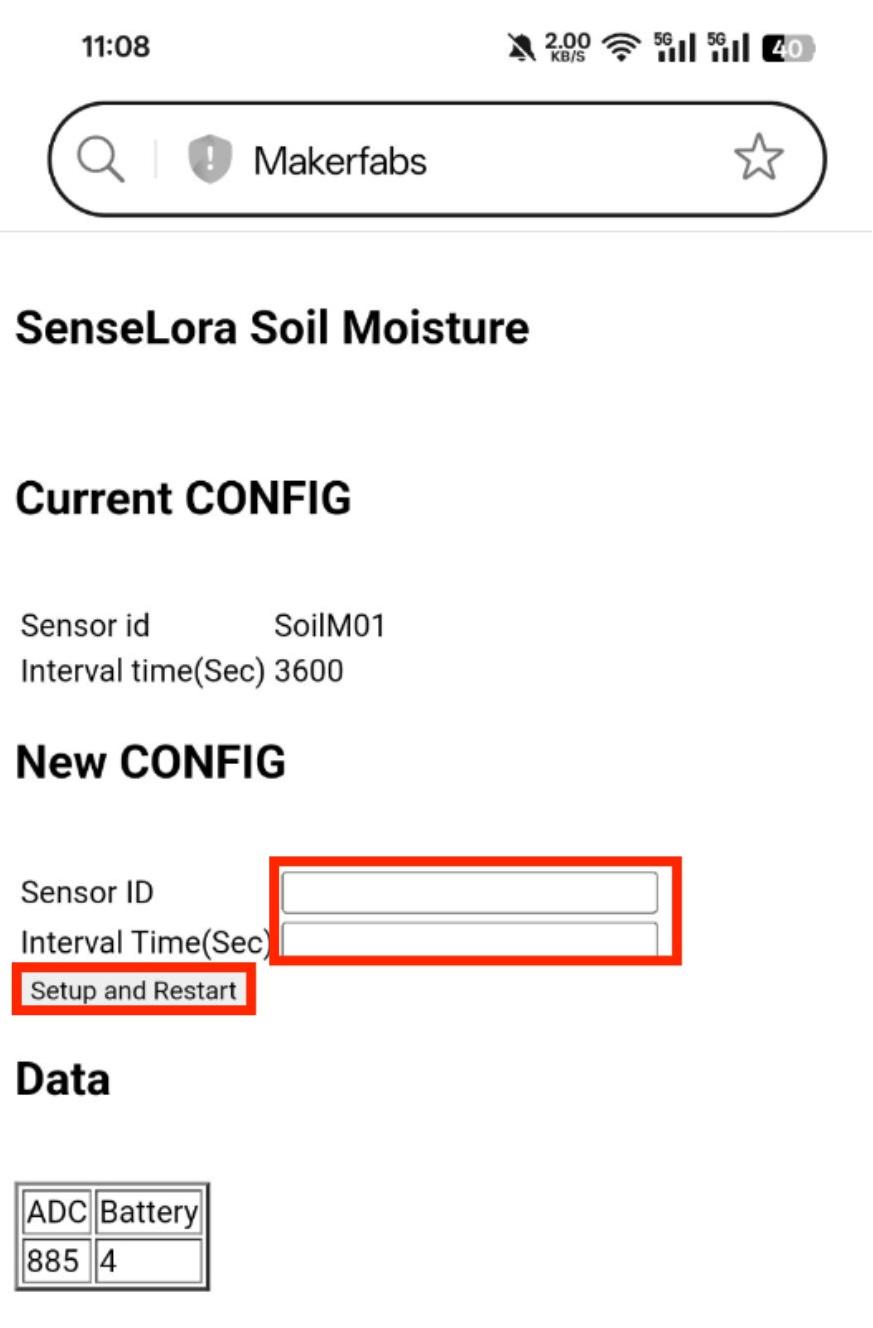
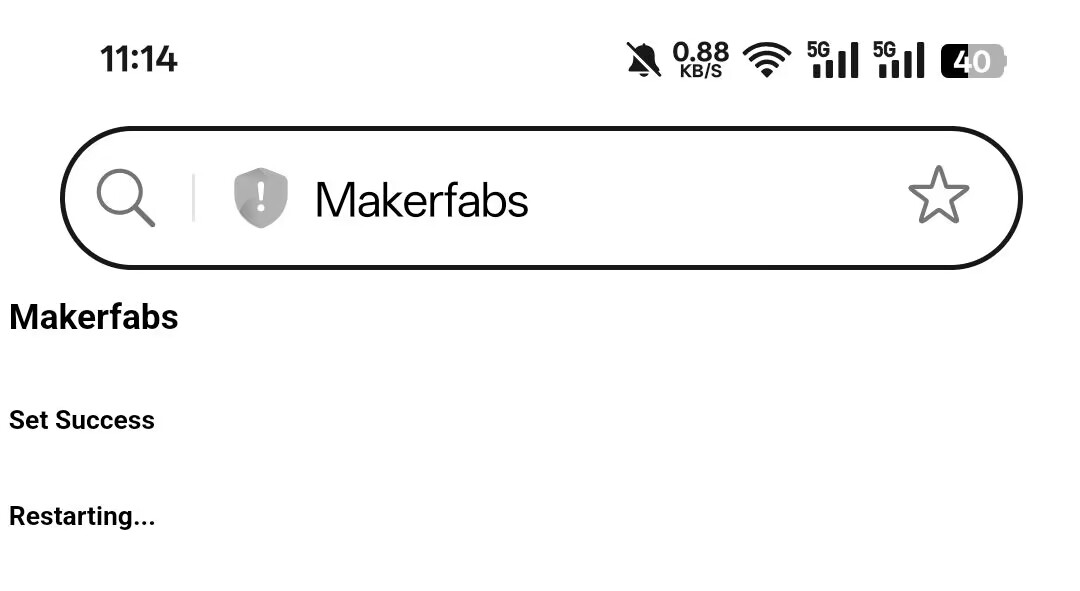
Click Setup and Restart, Then the page prompts that the setting is successful. Product start work.
4. Usage with LoRa Receiver
Both SenseLora Soil Moisture and LoRa Receiver are ready to use as soon as they arrive. So once you have deployed your soil monitor and switched on the power supply, you can power up the receiver, for example, by plugging it into your PC and receiving data.
The received realtime data can be displayed real time on the PC , and also on the screen of the product, while the backup is saved to the SD card.
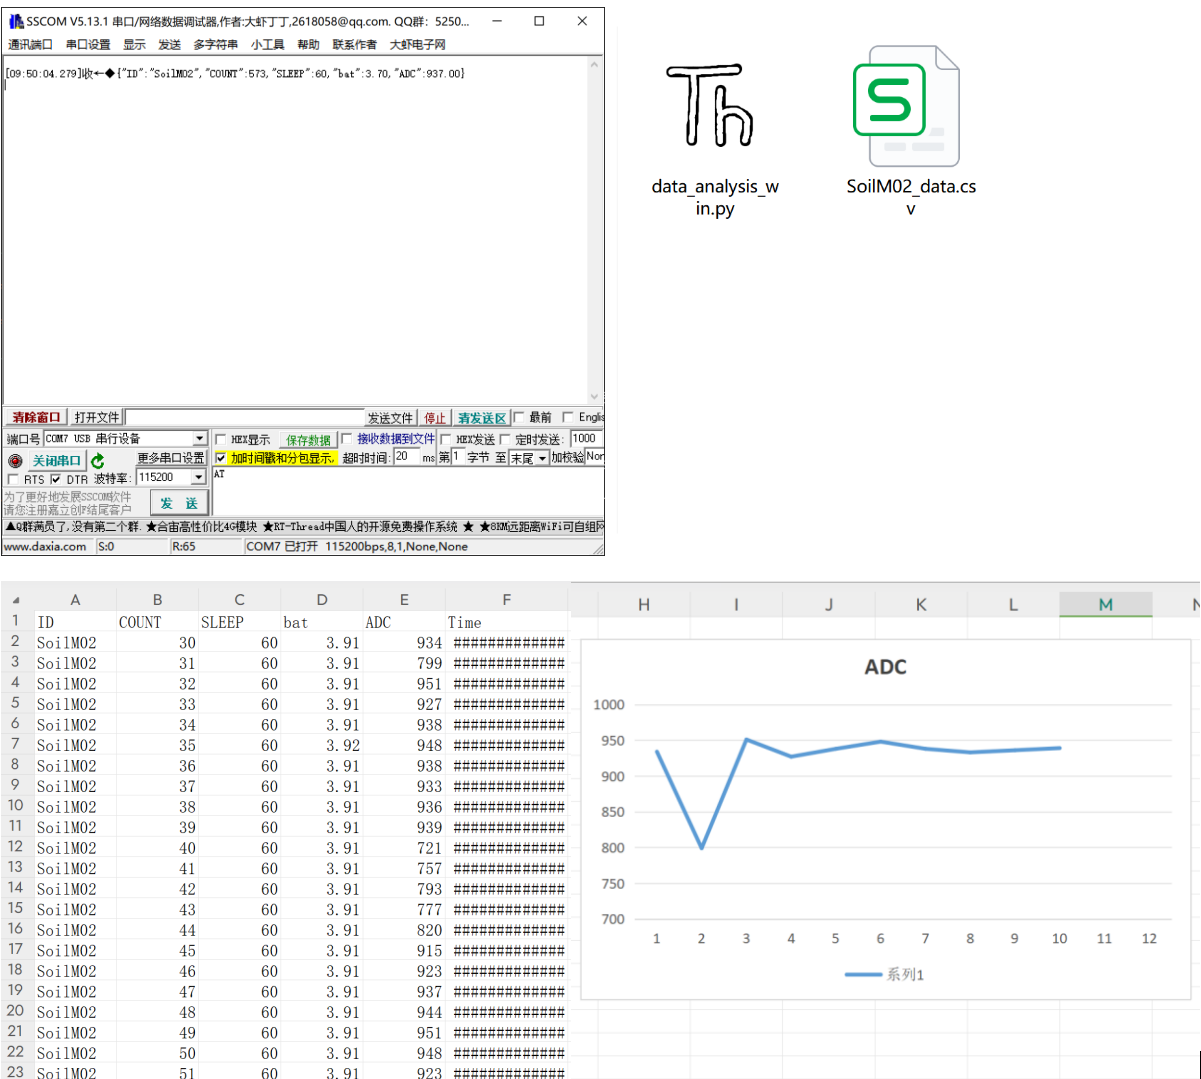
User can also view the sensor data received through the serial port of the computer, and can also analyze the data saved in EXCEL.
For details on the use of “LoRa Receiver”, you can check the manual.
5. Usage with 4G Gateway
5.1 Transmit data to Datacake
5.1.1 Datacake Setting
-
Login datacake or Create Account.
-
Click “Add Device”.

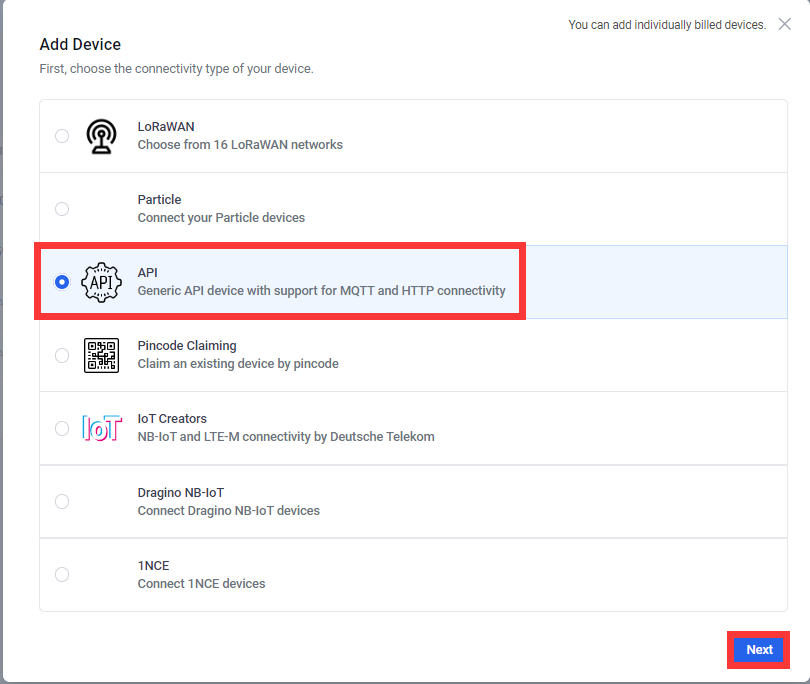
- Select API and click “Next”.
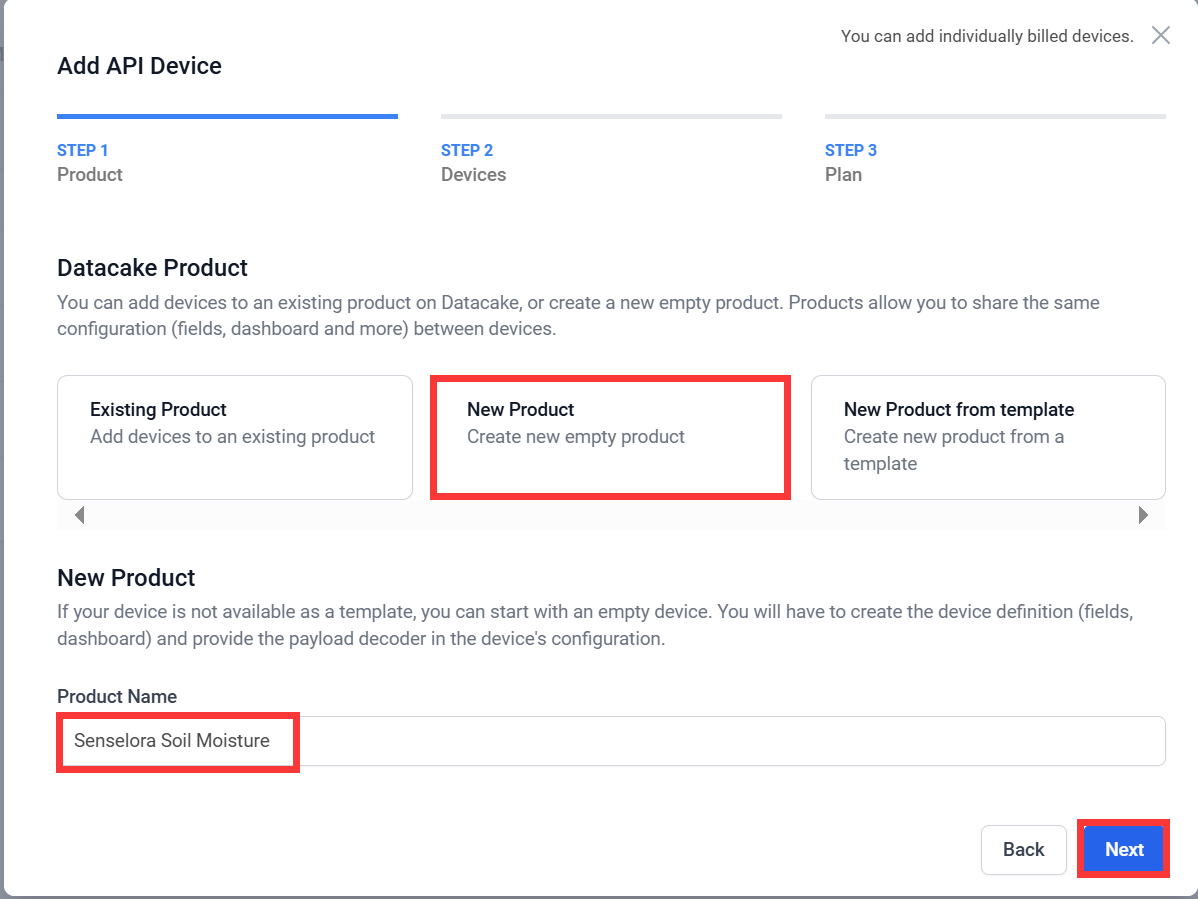
- Select a Product based on your needs, take "Create new empty product" as an example.
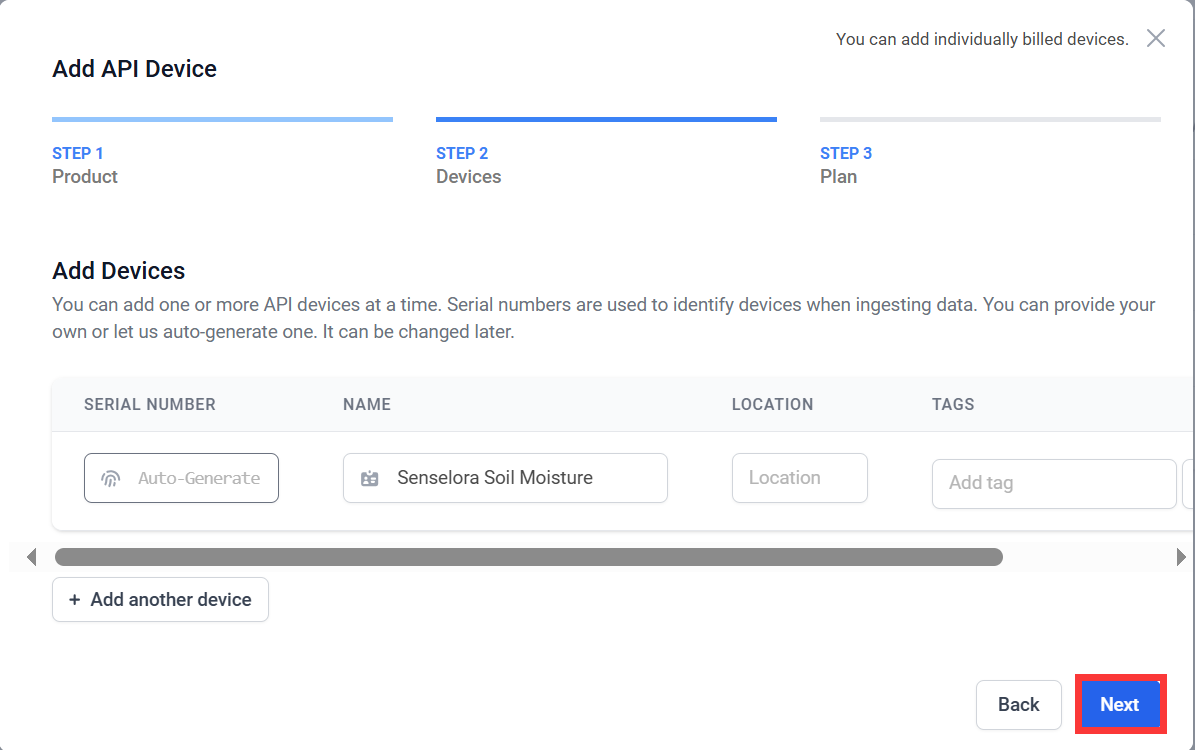
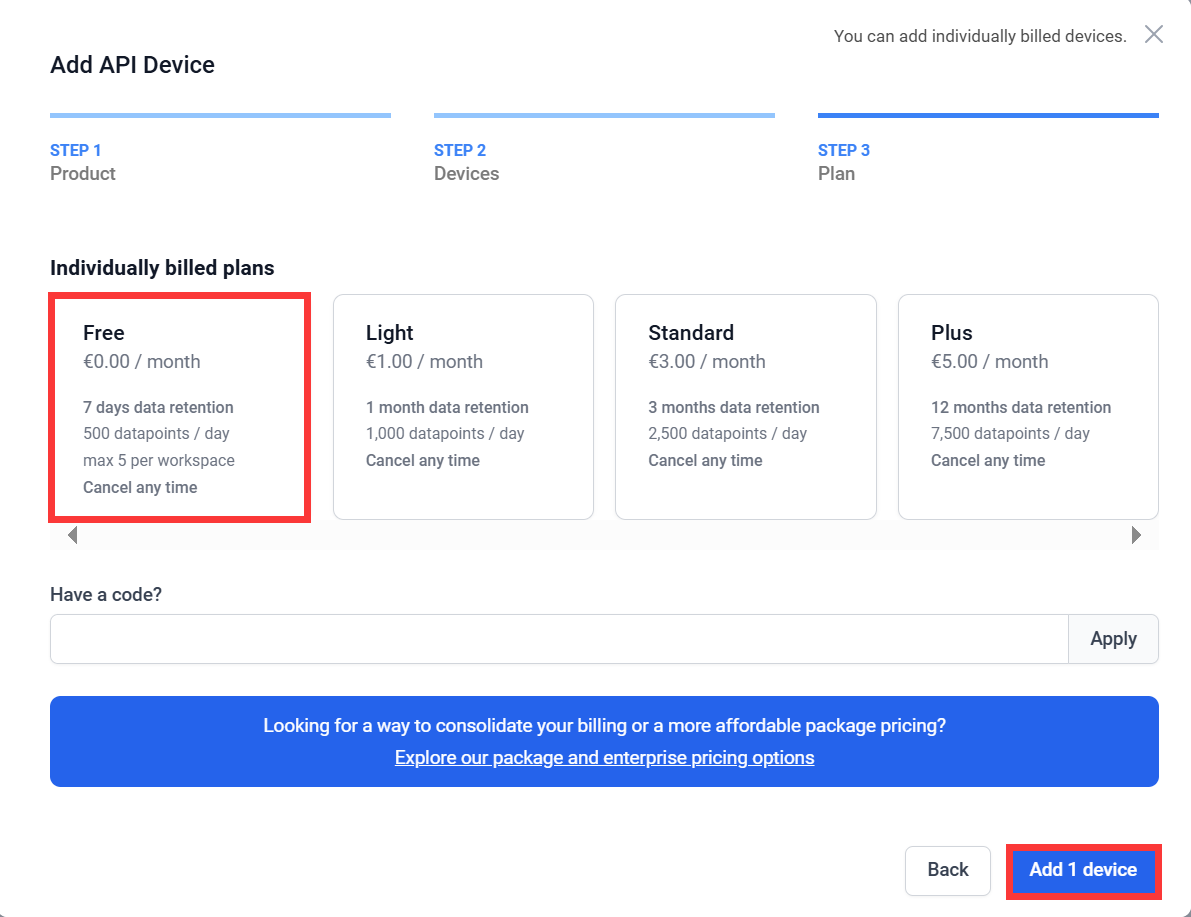
- Leave the default in “Add API Device” and click “Next”.
- Choose the type according to your needs, and click “Add 1 device”.
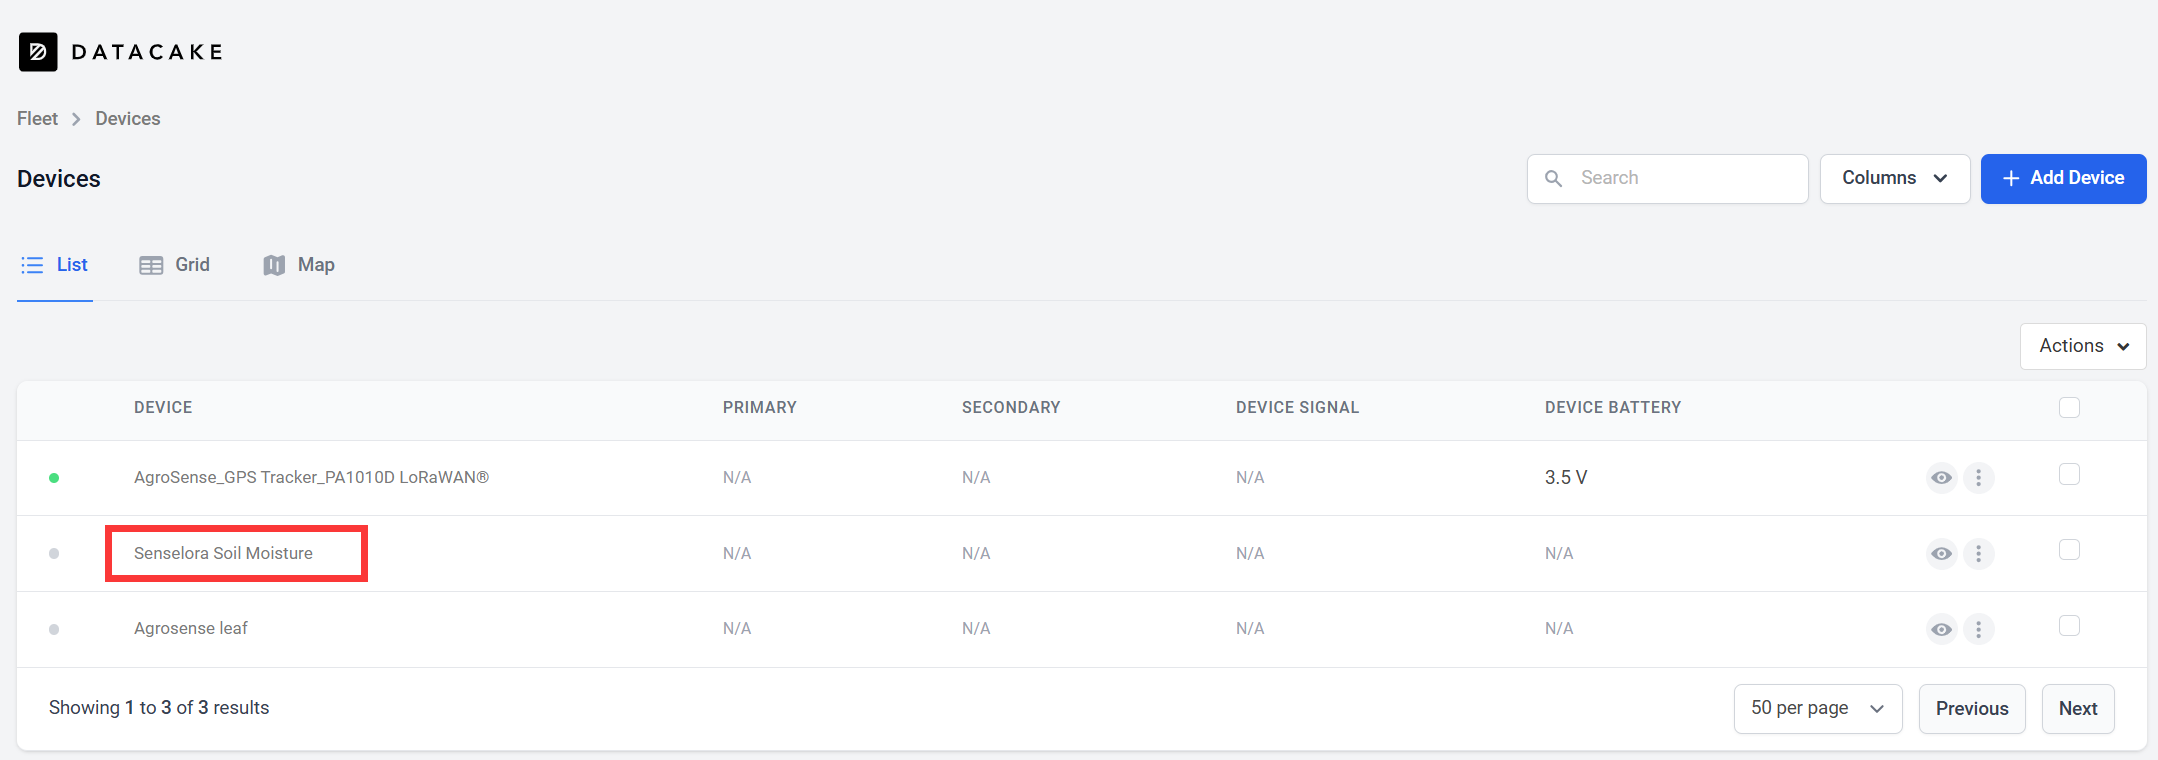
- Click to go to the device you just added.
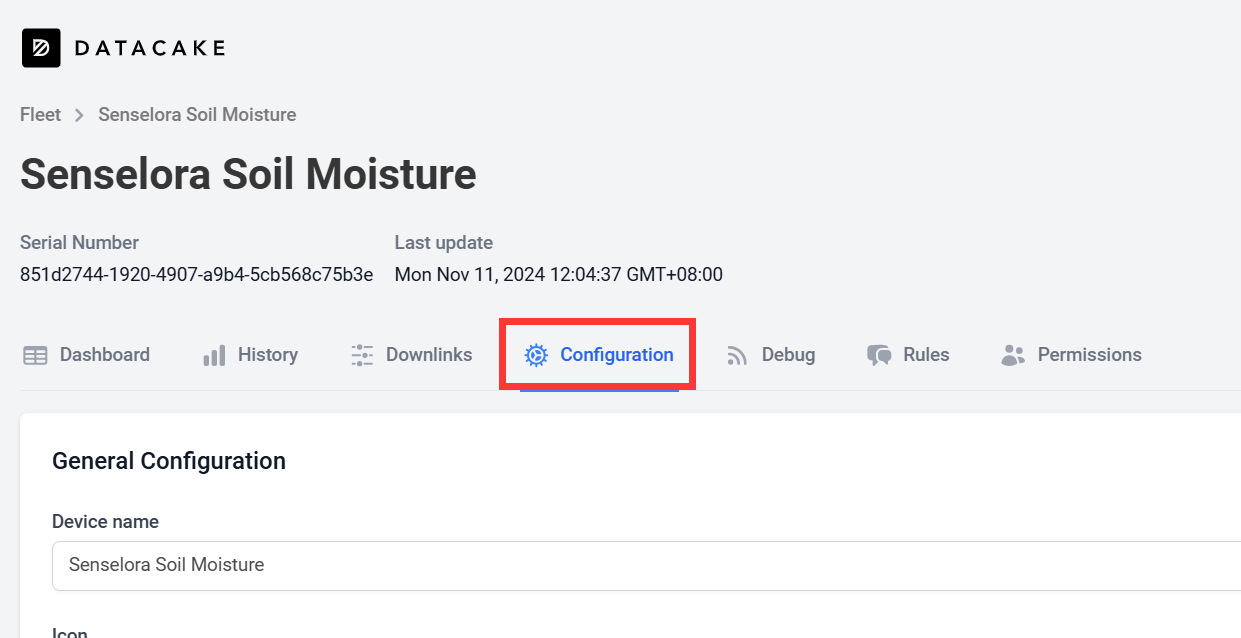
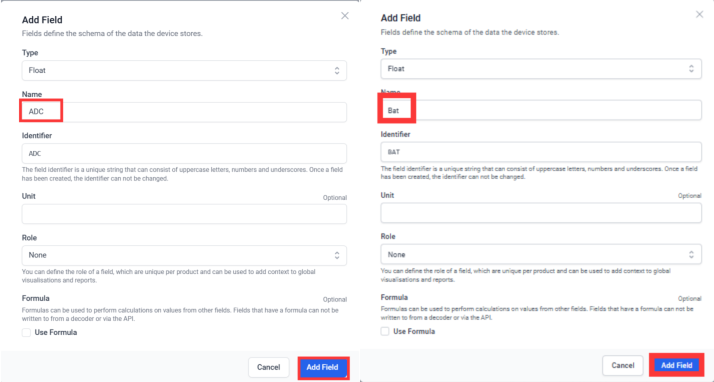
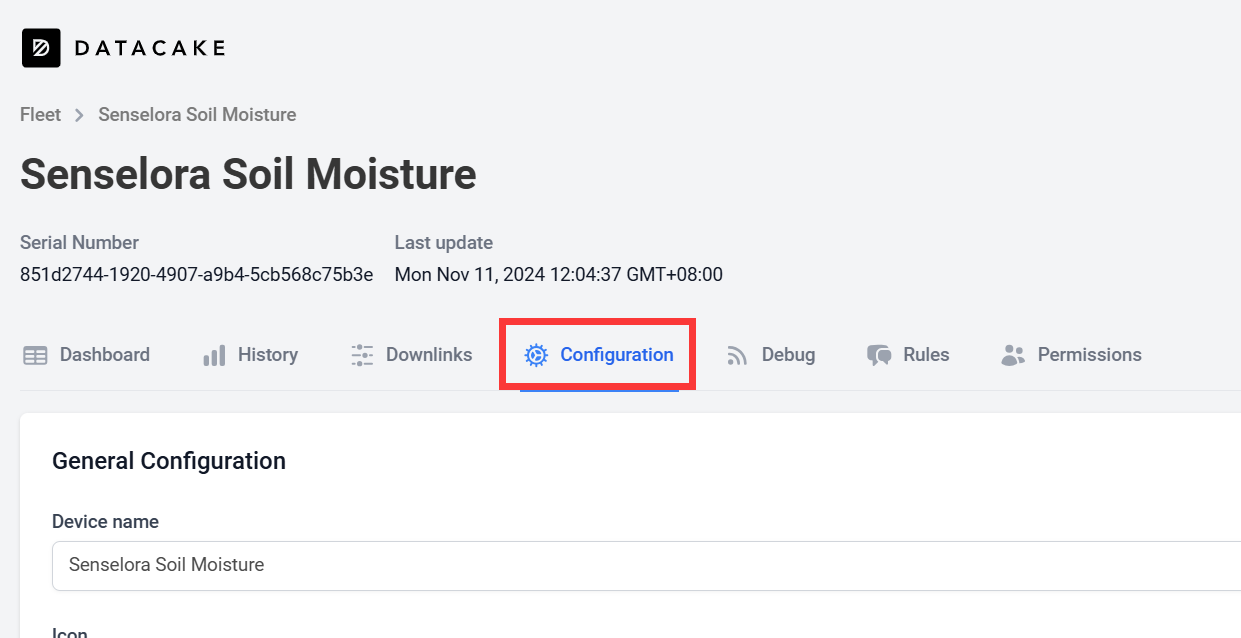
- Click “Configuration”, follow the steps to add a field.

-
To get a better look at the data, we can add widget.
-
Click “Dashboard-->switch-->+ Add Widget”.

- Select “Value” and set Title, Field and presentation form as well as the interval color.
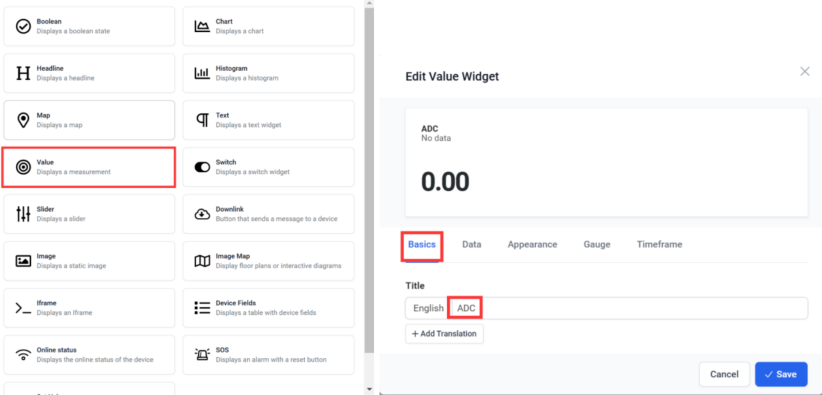
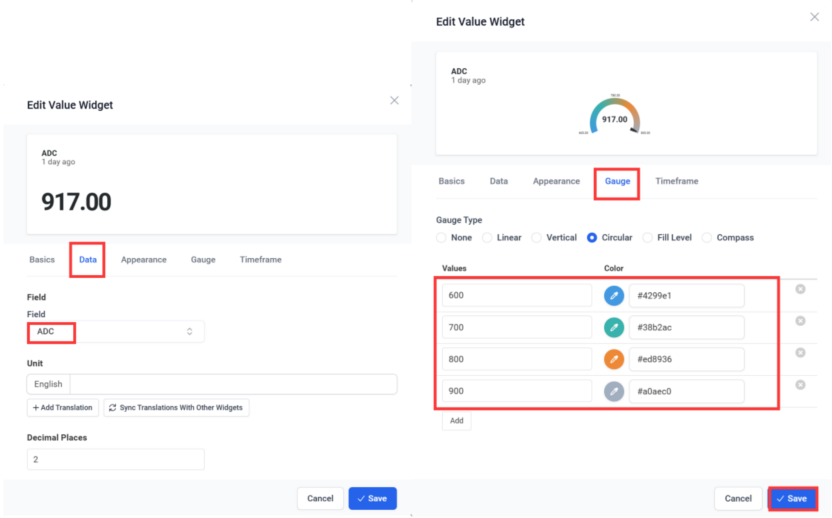
- Select “Value” and set Title, Field and presentation form as well as the interval color.
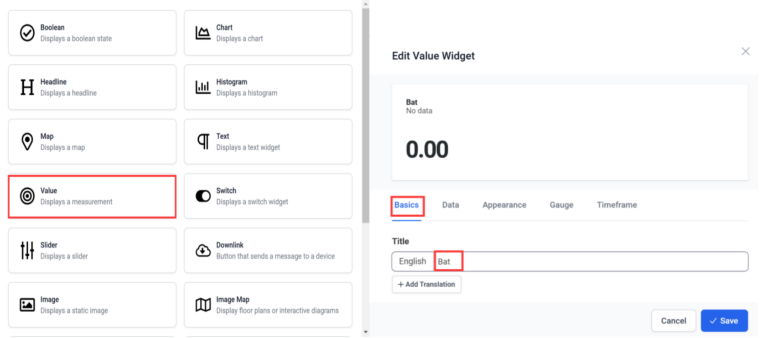
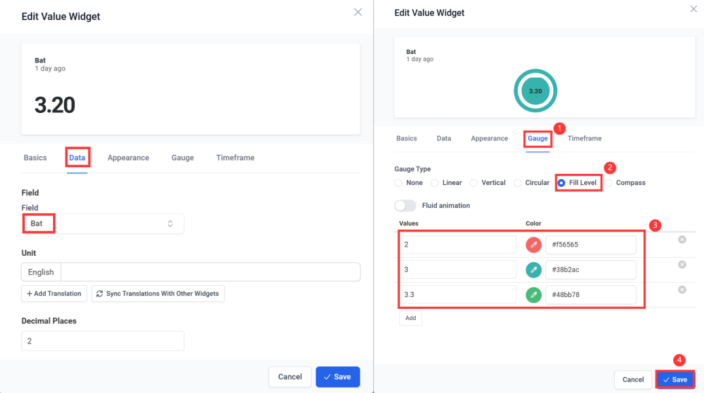
- Select Chart and set Title, Field, Kind, Line Thickness and click “save”.
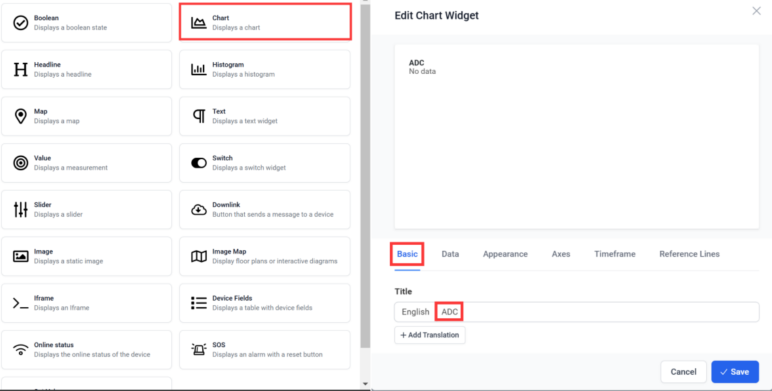
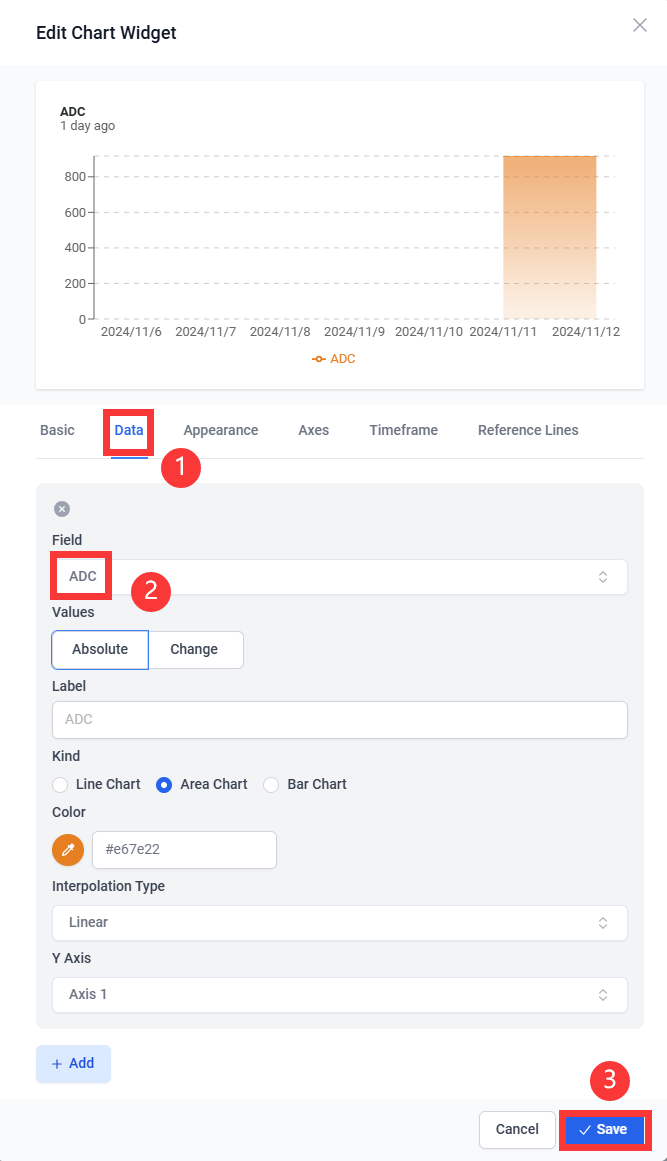
- Click the switch to save.

5.1.2 Arduino
While the Senselora soil Moisture is a ready-to-use product and the 4G gateway requires us to program it to work.Please follow the steps below to complete the upload of the 4G gateway code.
- Open the Send_data_to_datacake by Arduino.
Install "RadioLib" and "ArduinoJson" library.
- Select "Tools-->Manage Libraries..."
- Search "RadioLib", select Version 4.6.0 and click Install.
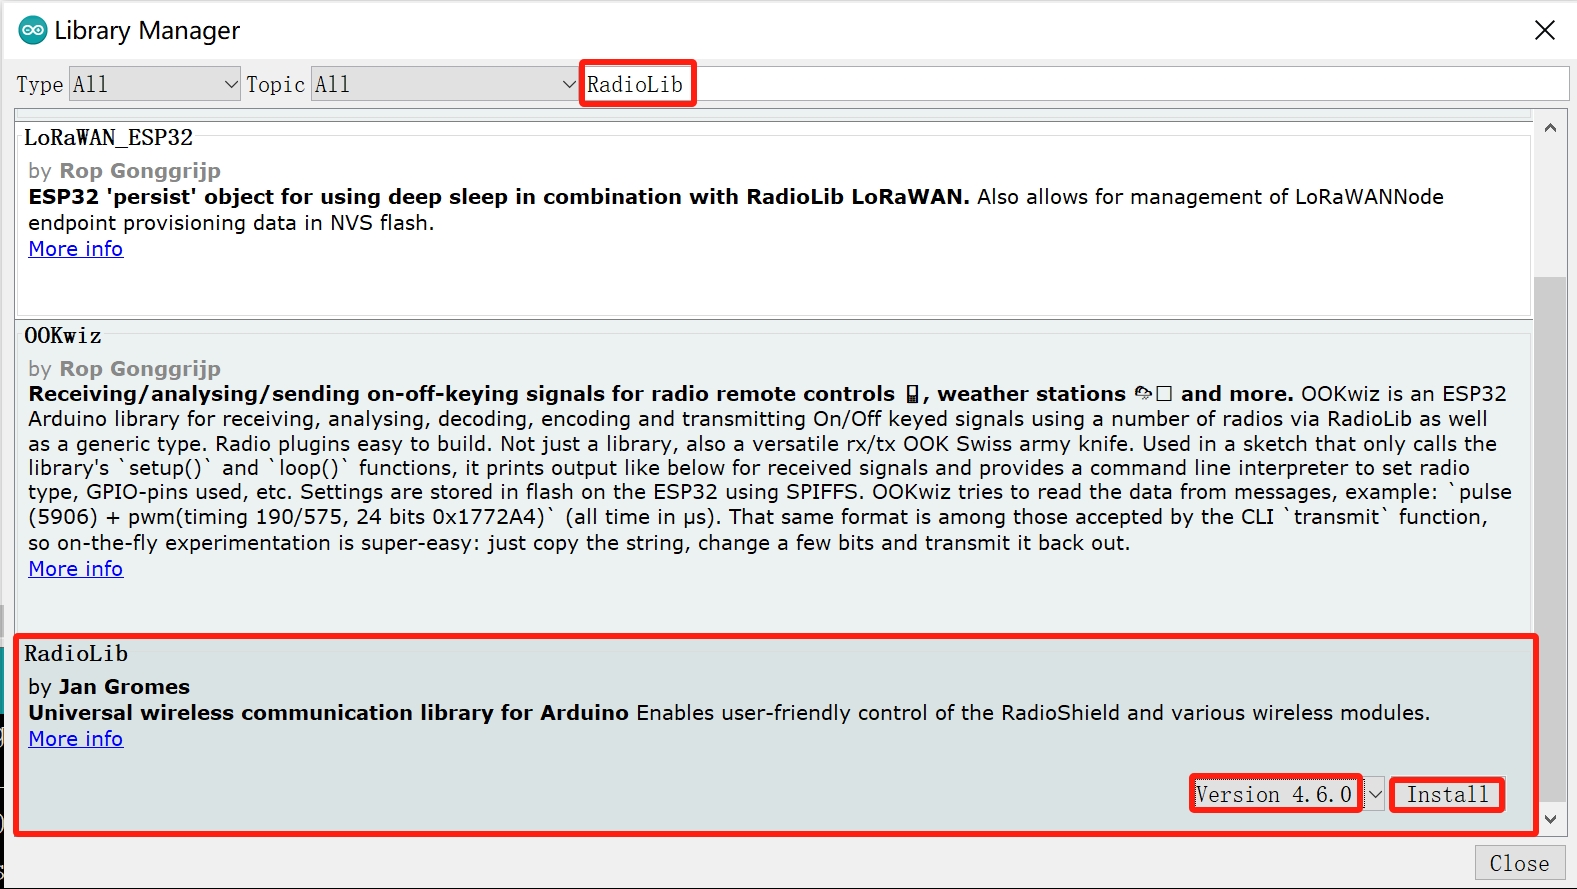
Note: It is recommended to use version 4.6.0, using the latest version may cause compilation failure.
- Search "ArduinoJson" and click Install.
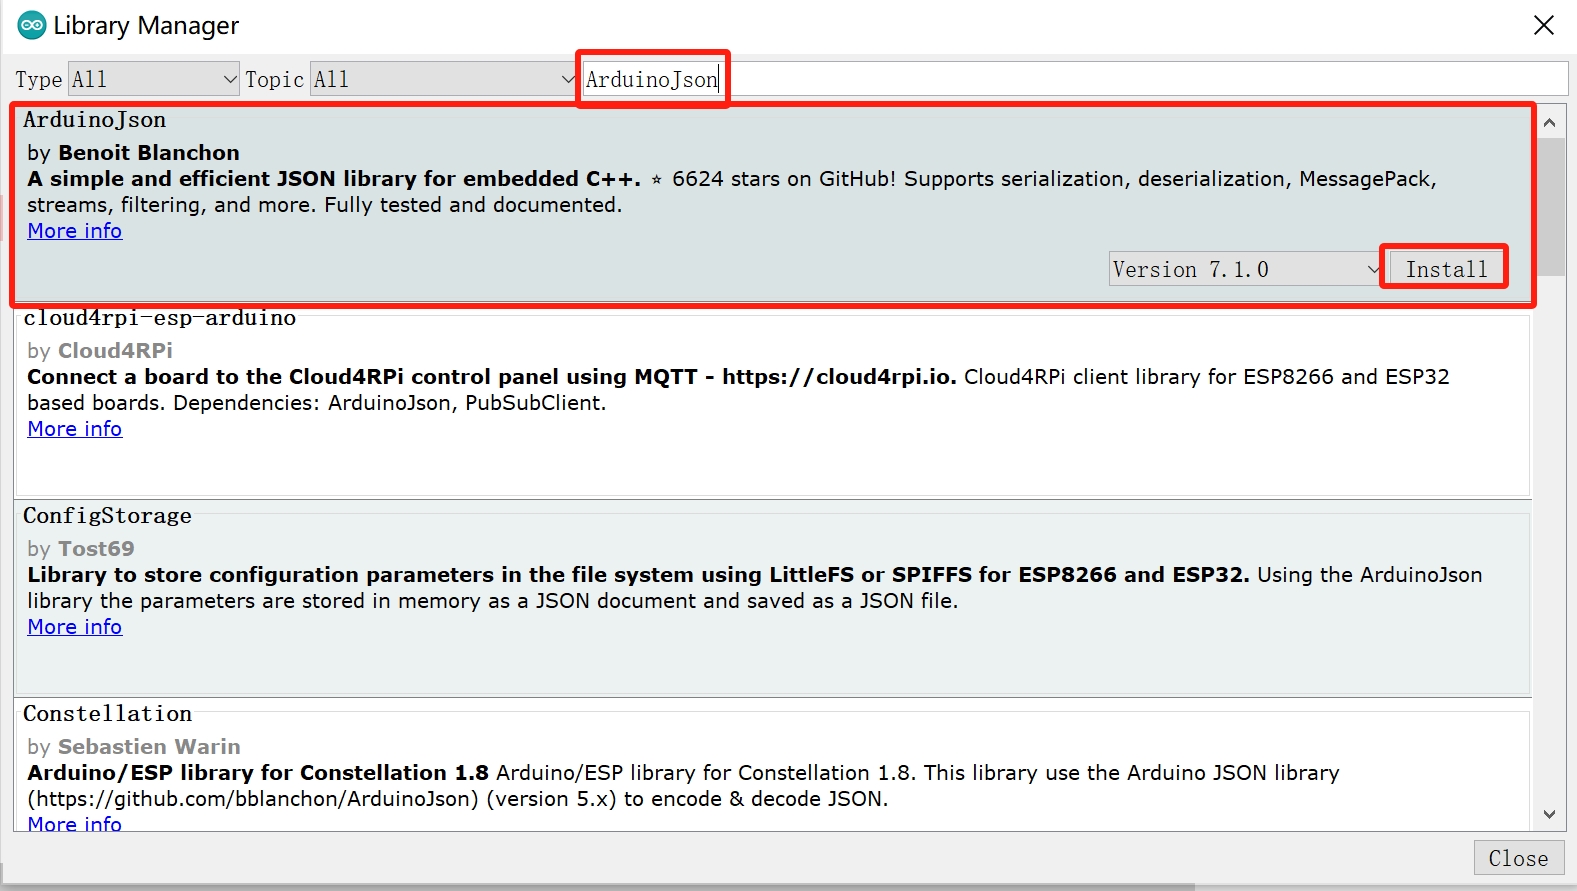
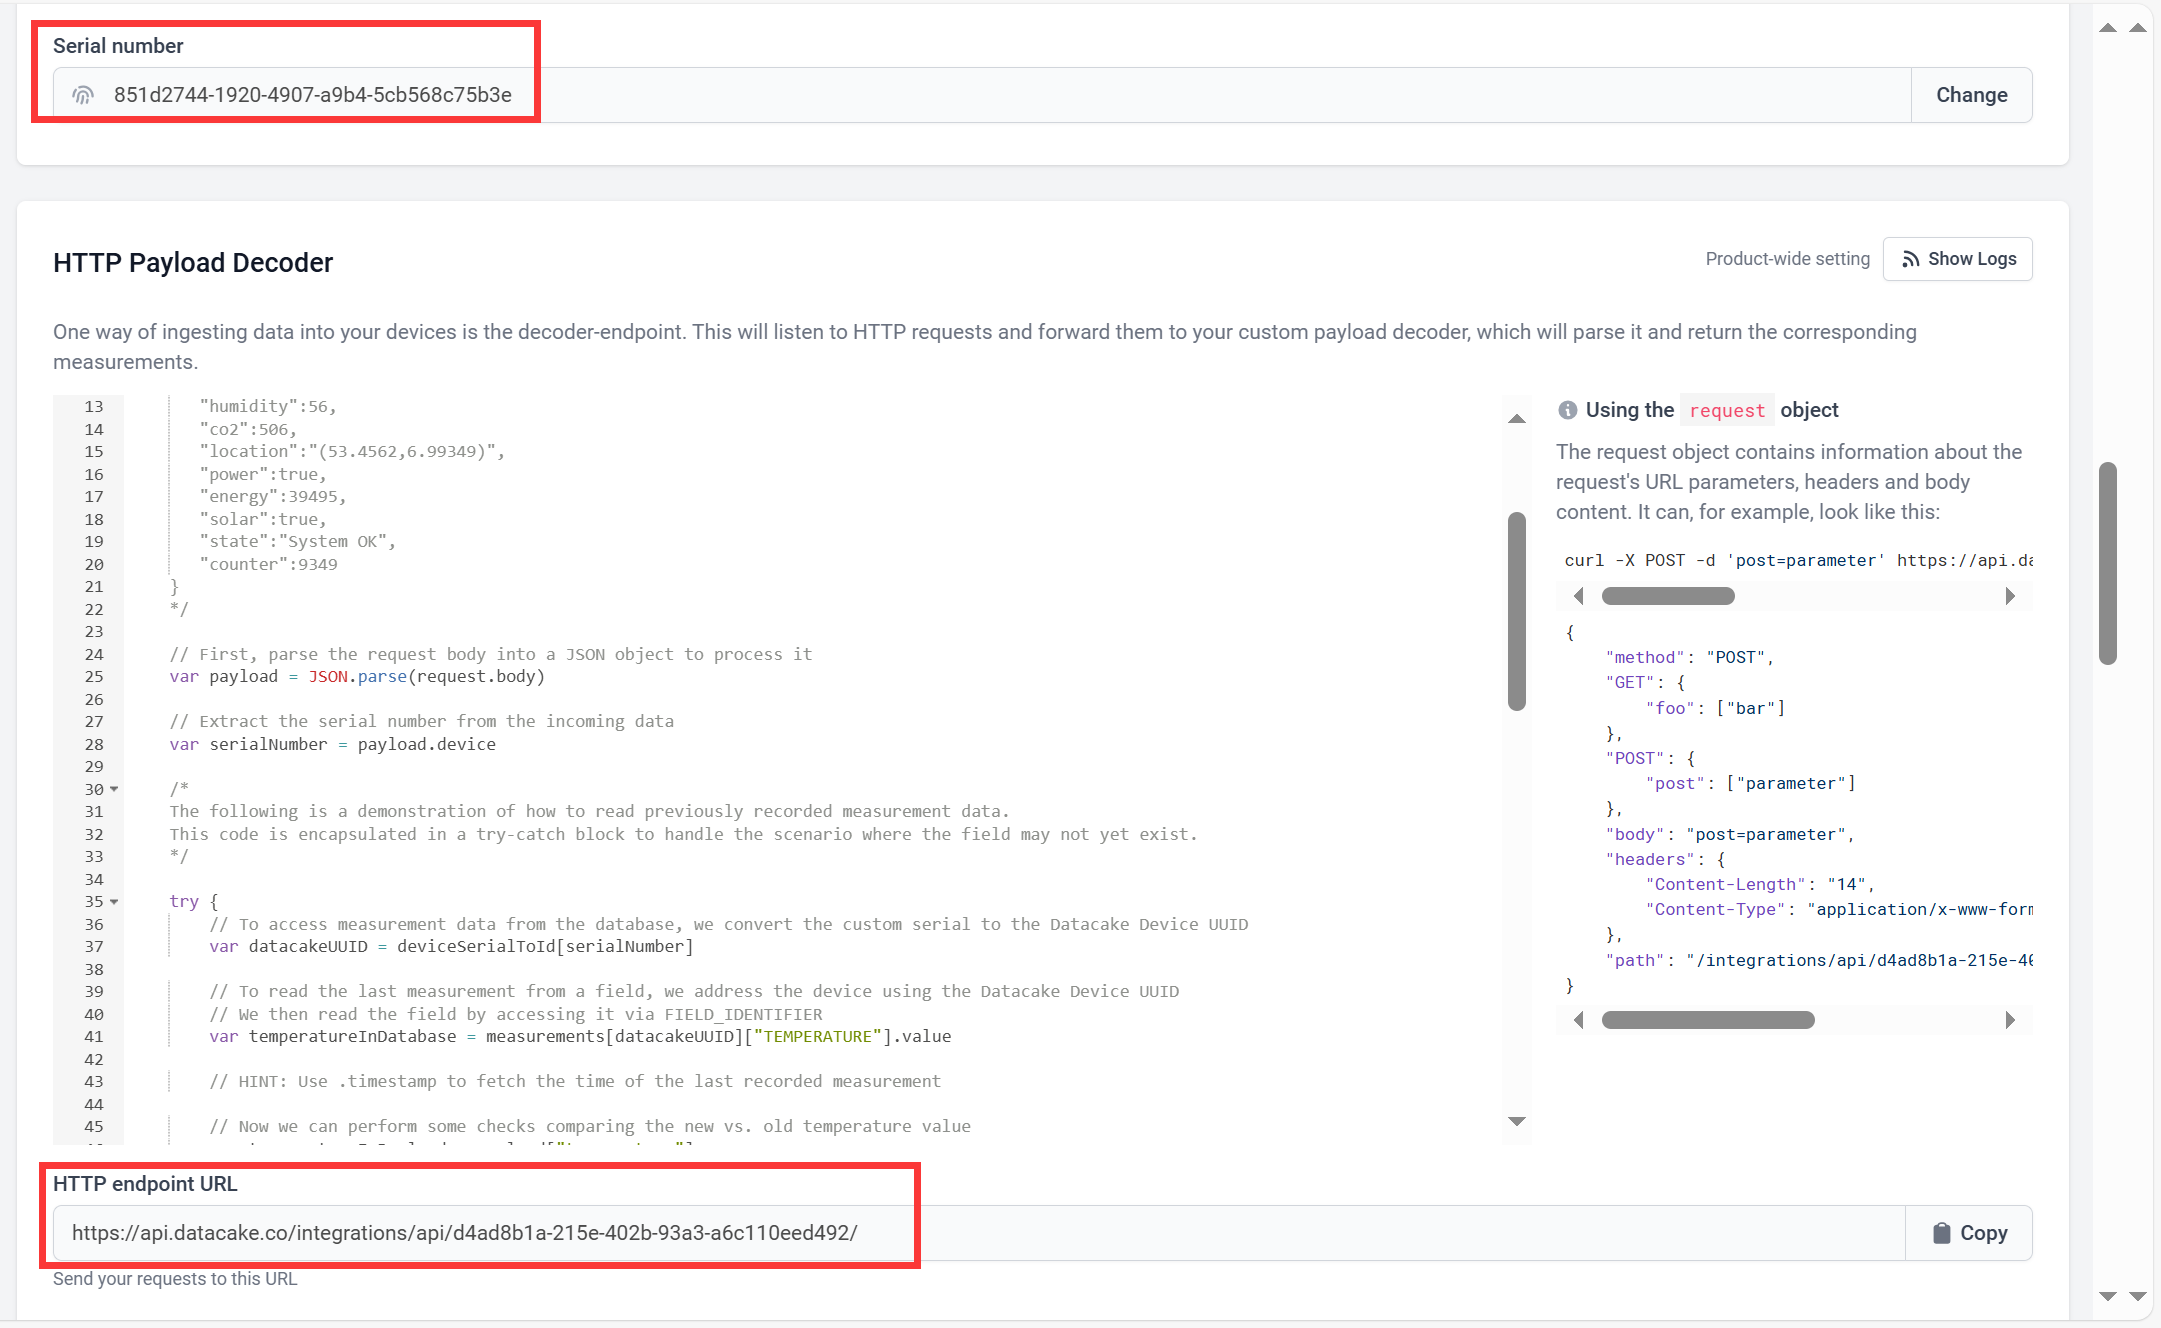
- Go back to datacake, click “Configuration”, copy the “Serial number” and “HTTP endpoint URL” into the code respectively.


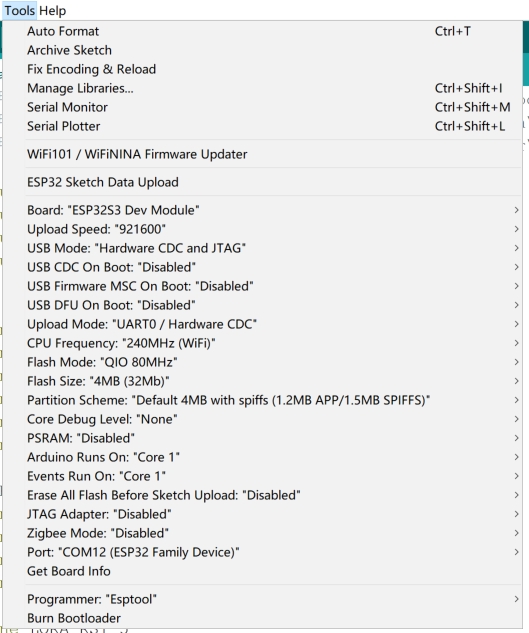
- Plug the SIM card into the Senselora 4G gateway. Turning on the switch and use Type-C USB cable to connect the board and PC, and select the development board "ESP32S3 Dev Module" and the port and upload the code.
5.1.3 Result
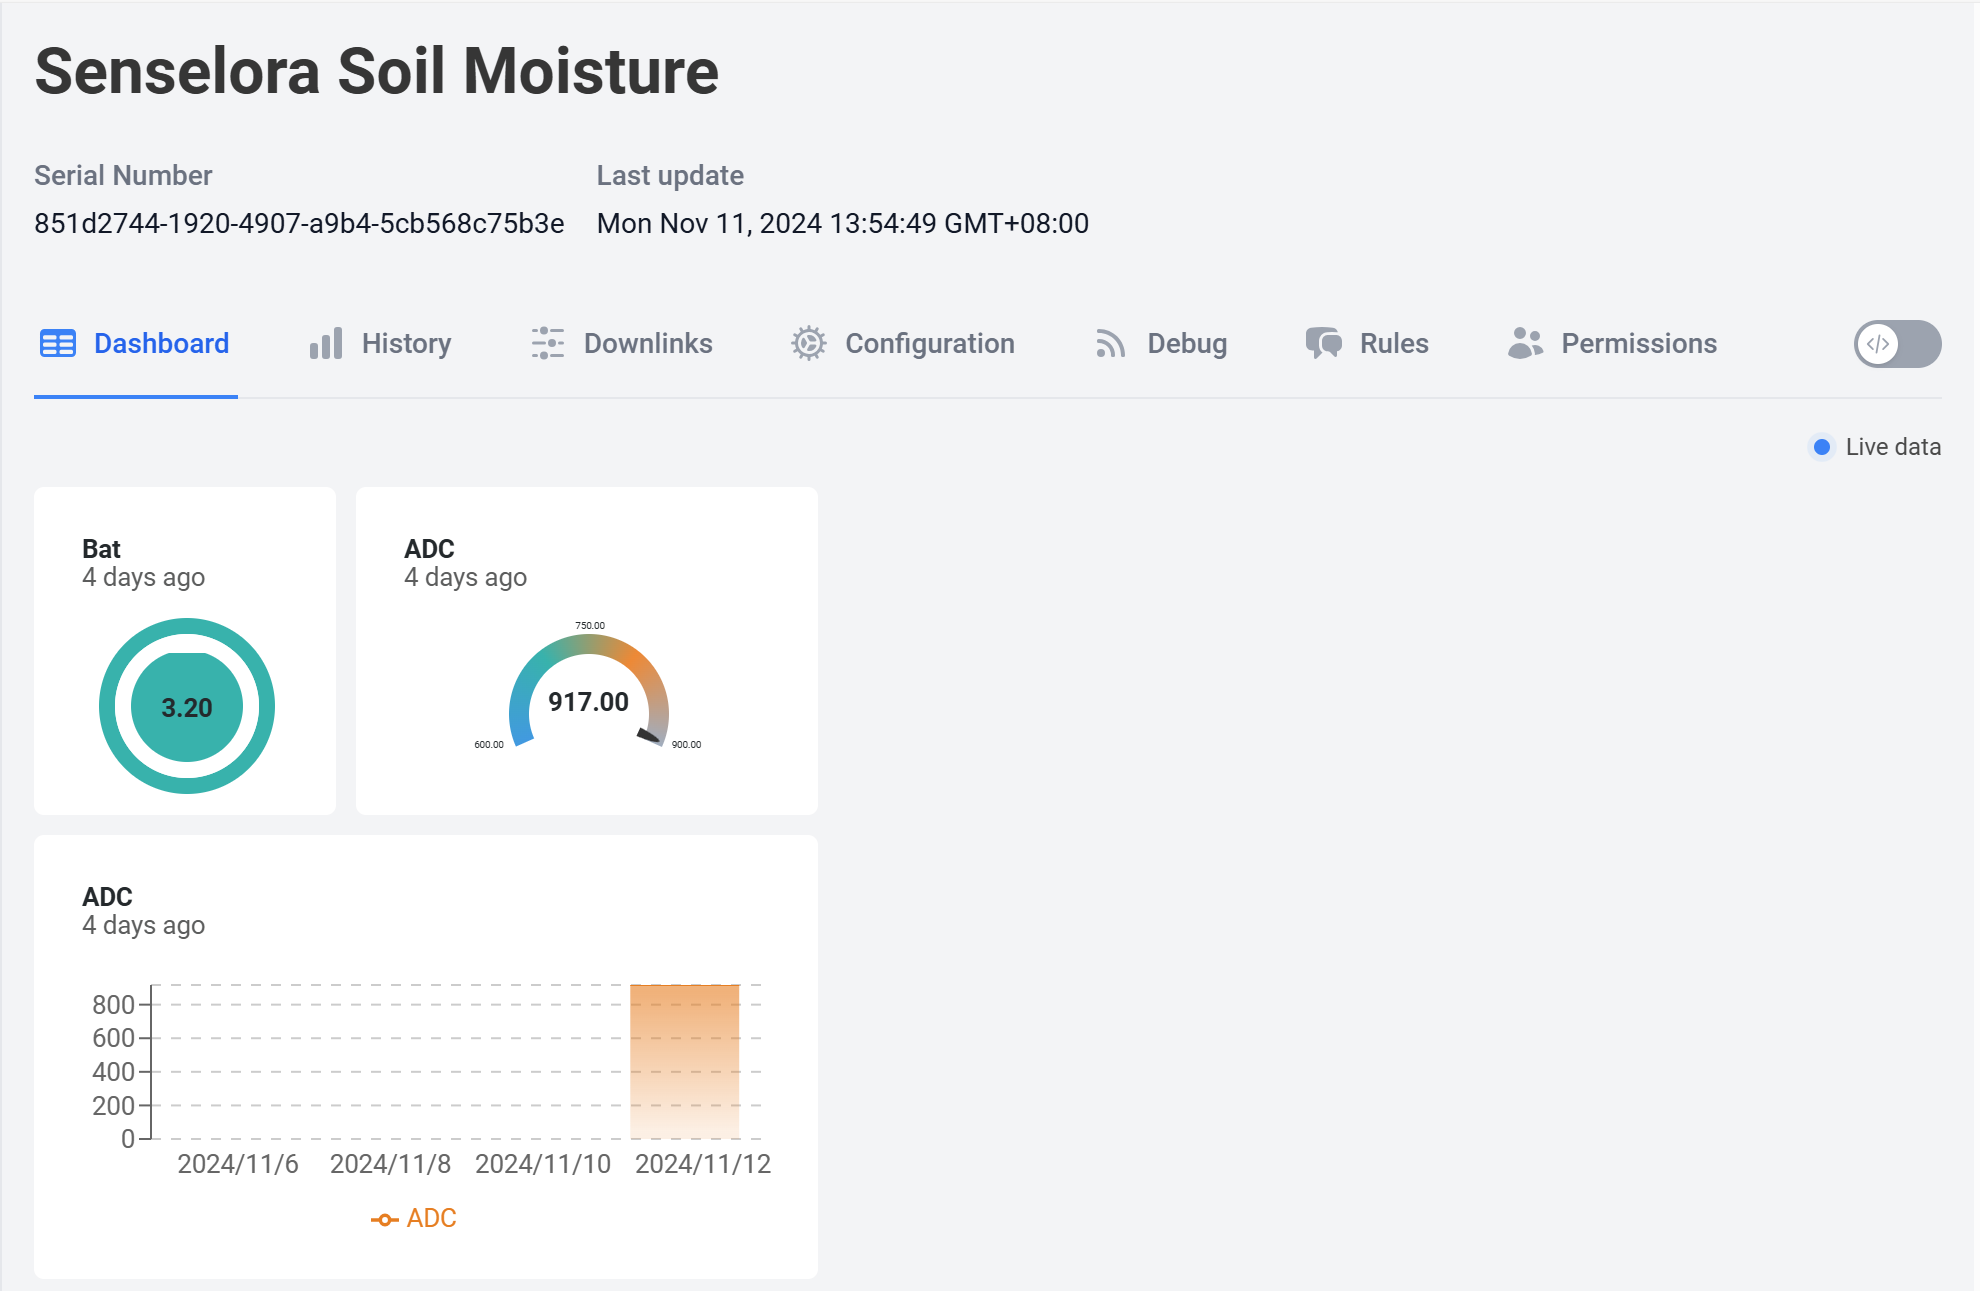
- Power on the SenseLora Soil Moisture.
- Press the Senselora 4G gateway reset button and wait a few minutes to receive a message in Datacake.
5.2 Transmit data to Thingspeak
5.2.1 Thingspeak Setting
To transmit the data to your Thingspeak channel, it has to create a new channel and get the APIKEY information. Then replace the APIKEY in the code with yours.
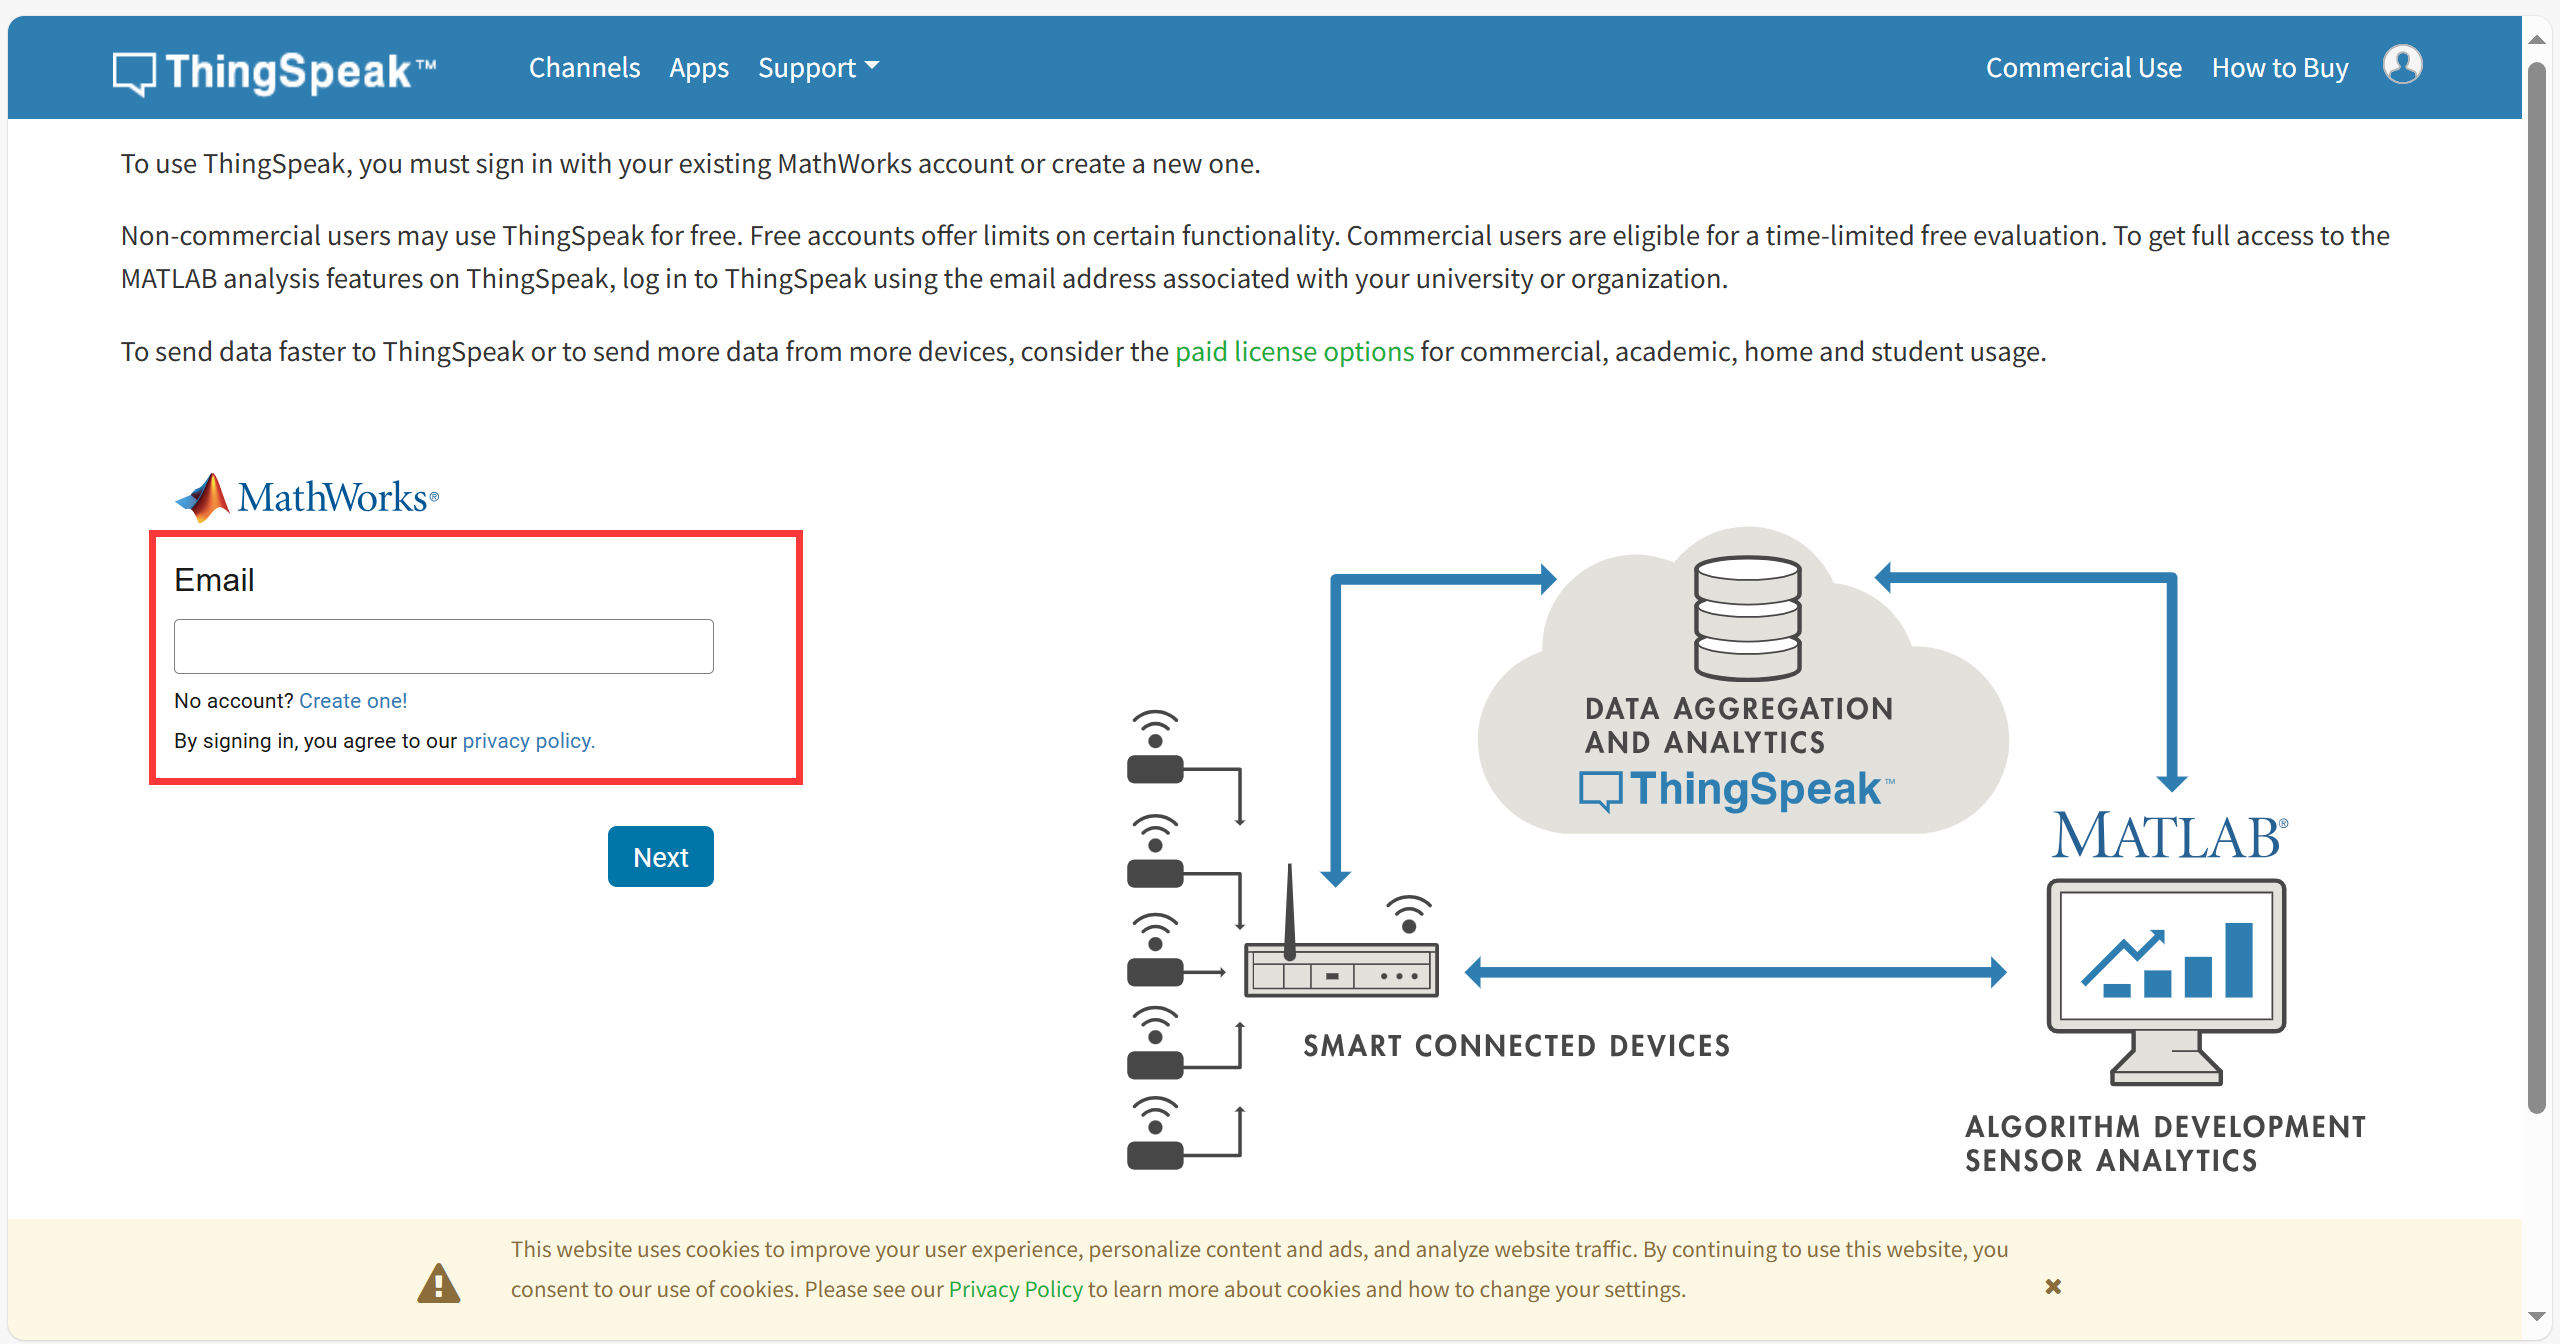
- sign in or sign up for ThingSpeak
If you already have an account, log in and enter the password, otherwise click Create one to register.
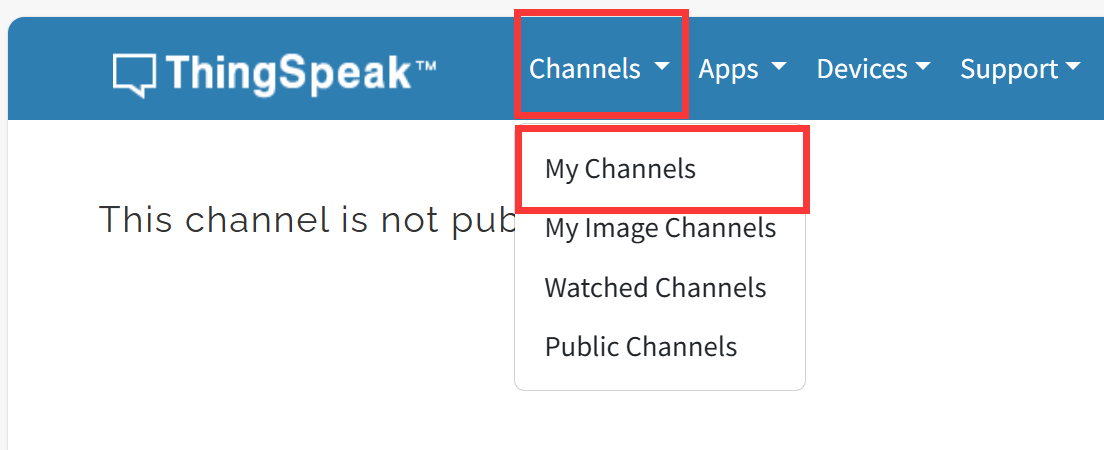
- Create new channel
Select "Channel --> My Channels".
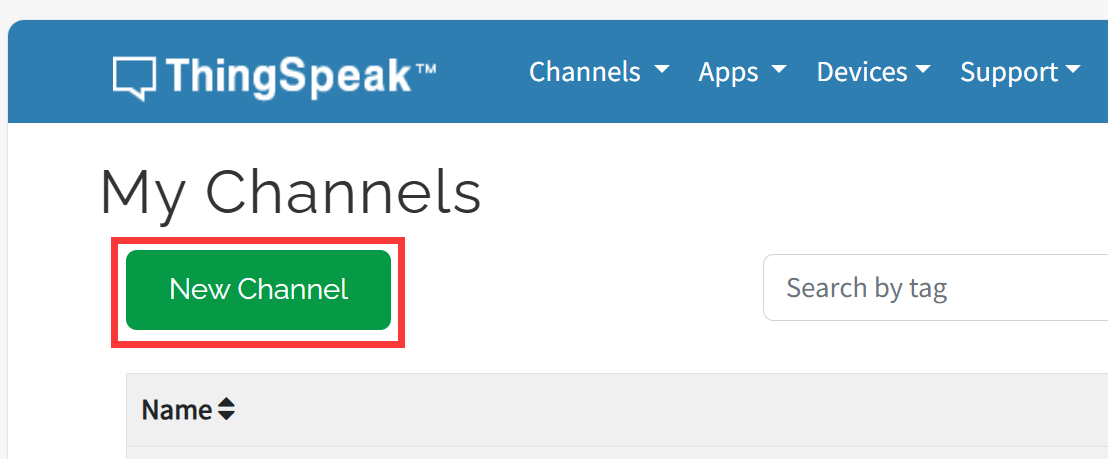
click "New Channel".
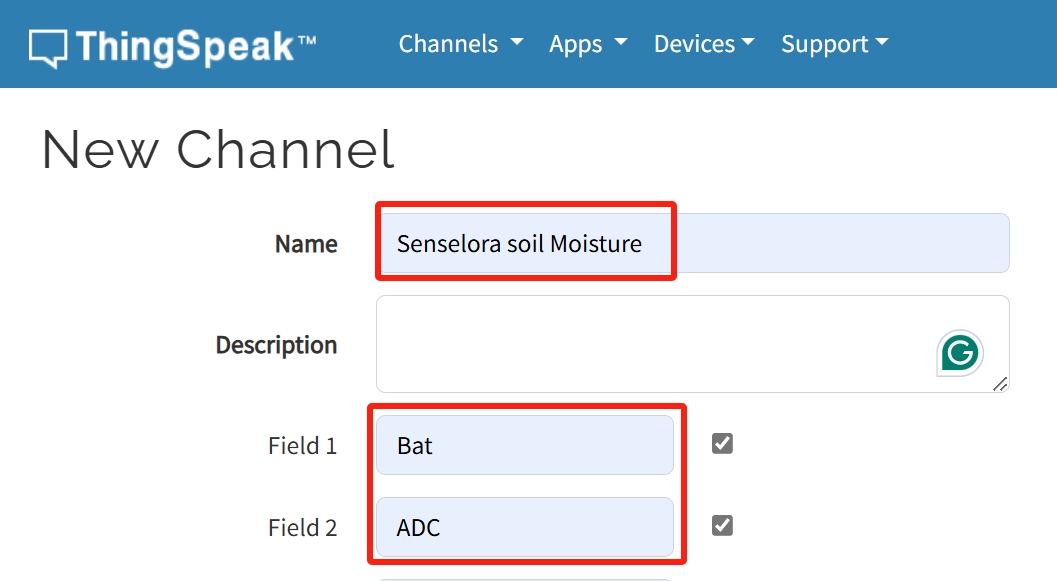
Write the name and field information and click Save Channel to create successfully.
5.2.2 Arduino
While the SenseLora Soil Moisture is a ready-to-use product and the 4G gateway requires us to program it to work. Please follow the steps below to complete the upload of the 4G gateway code.
1.Open the send_data_to_thingspeak by Arduino IDE.
2.Install "RadioLib" and "ArduinoJson" library.
-
Select "Tools-->Manage Libraries..."
-
Search "RadioLib", select Version 4.6.0 and click Install.
Note: It is recommended to use version 4.6.0, using the latest version may cause compilation failure.
- Search "ArduinoJson" and click Install.
3.Change the APIKEY.
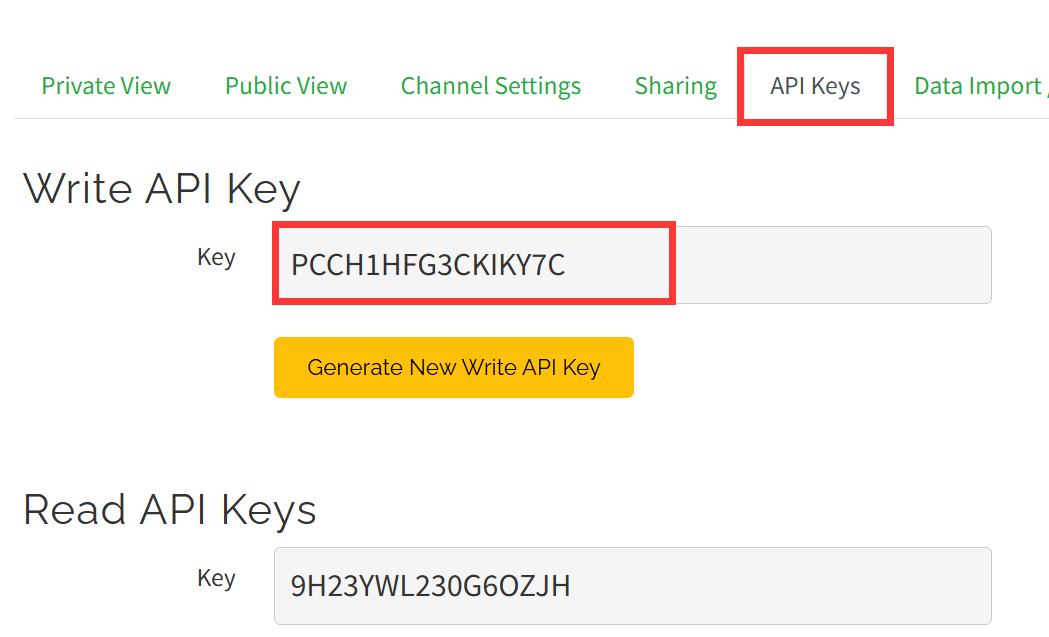
In order to view the data in your own channel, you need to modify the APIKEY in the code.
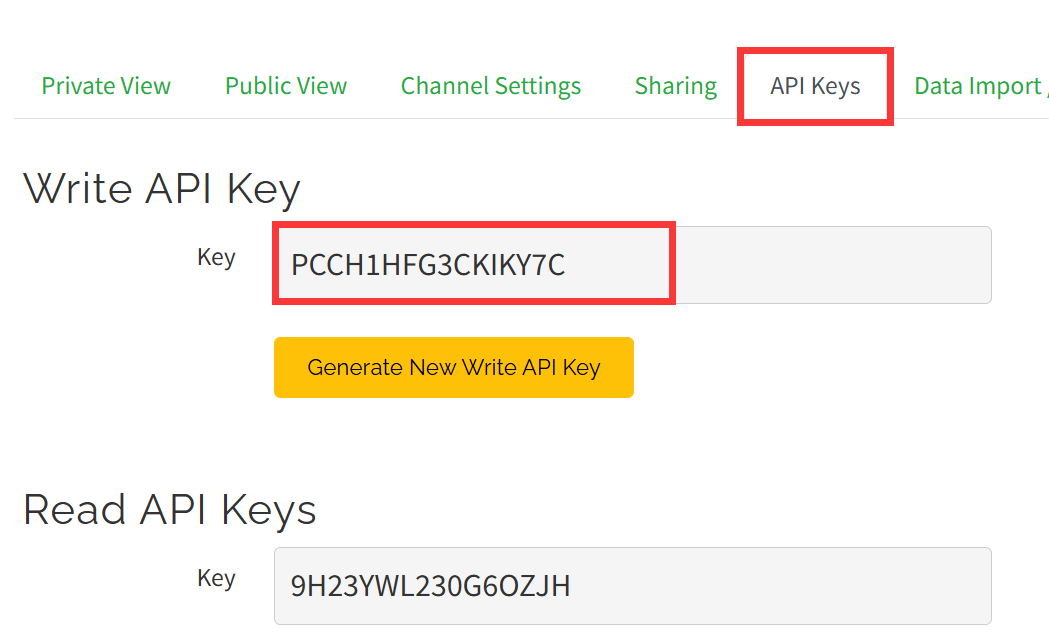
- Click the "API Keys" and copy you Key.
- Modify the APIKEY in the code.
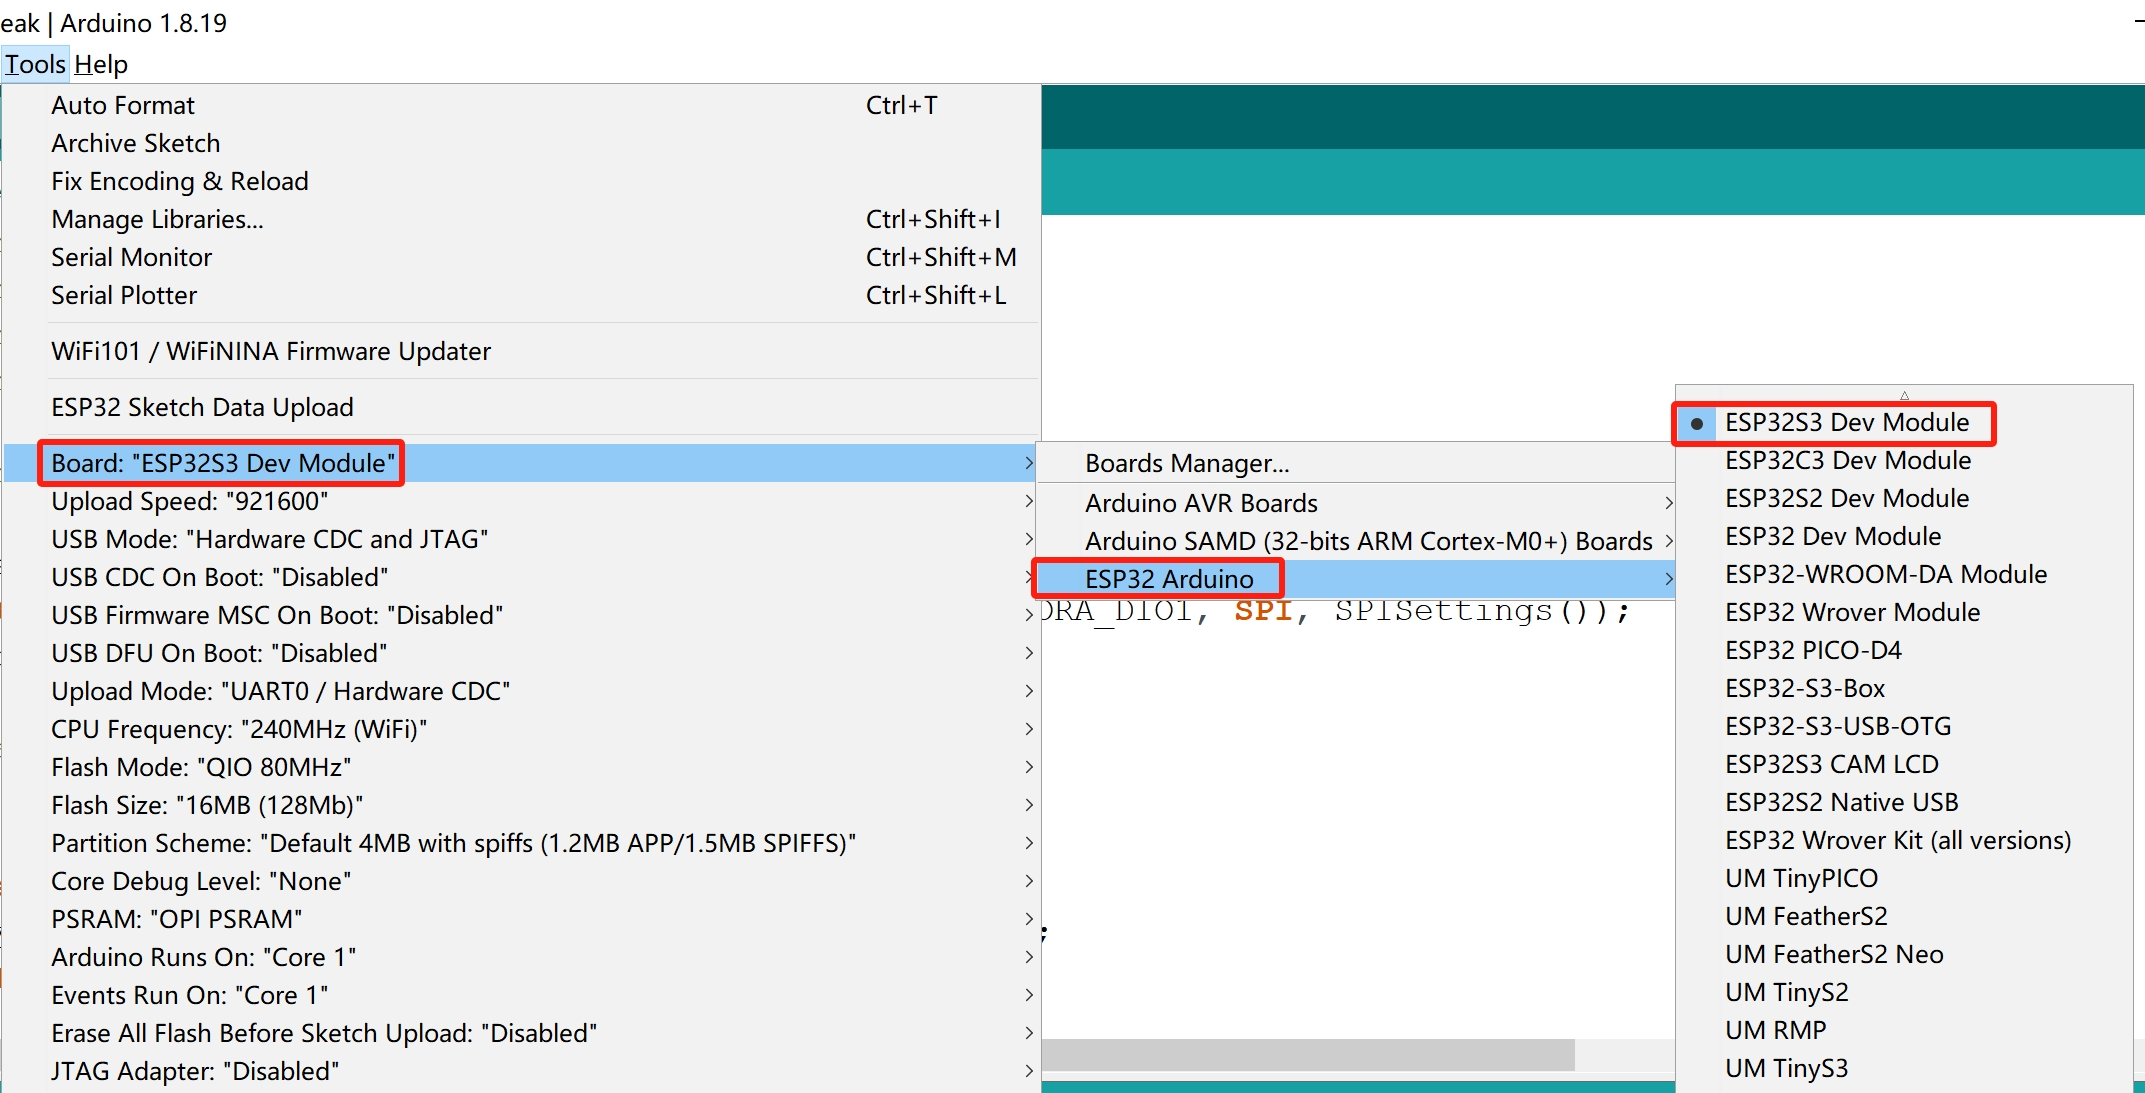
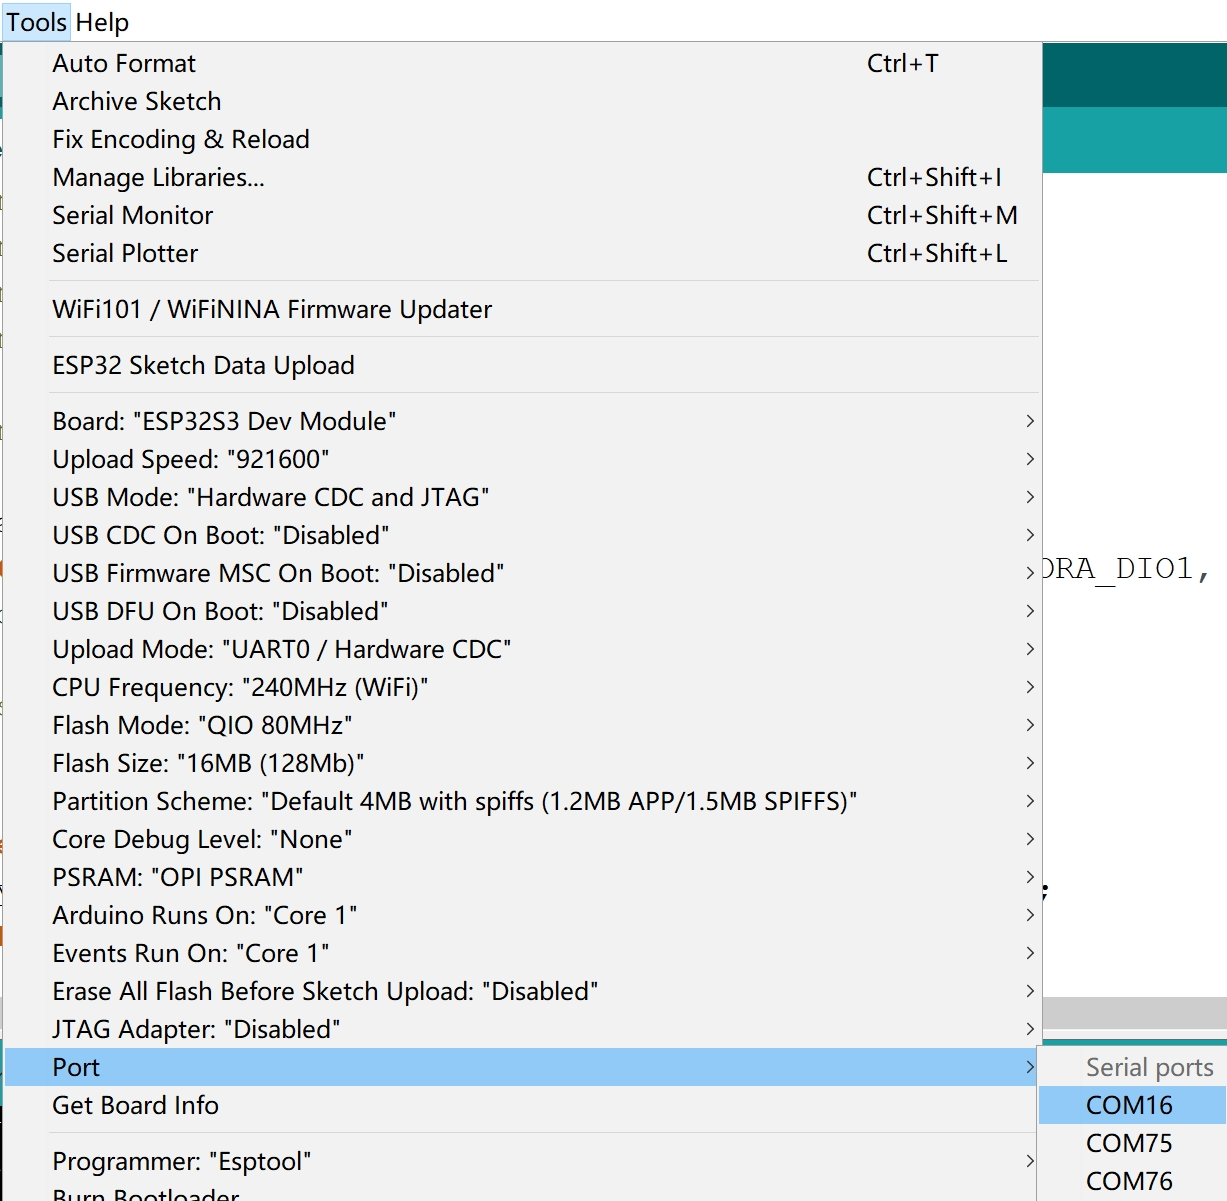
4.Use Type-C USB cable to connect the board and PC, and select the development board "ESP32S3 Dev Module" and the port.
- Select "Tools > board:"xxx" > ESP32 Arduino > ESP32S3 Dev Module".
- Select "Tools > Port", Select the port number of the board.
5.Verify the code and upload.
- Click this icon to upload to the board.

5.2.3 Result
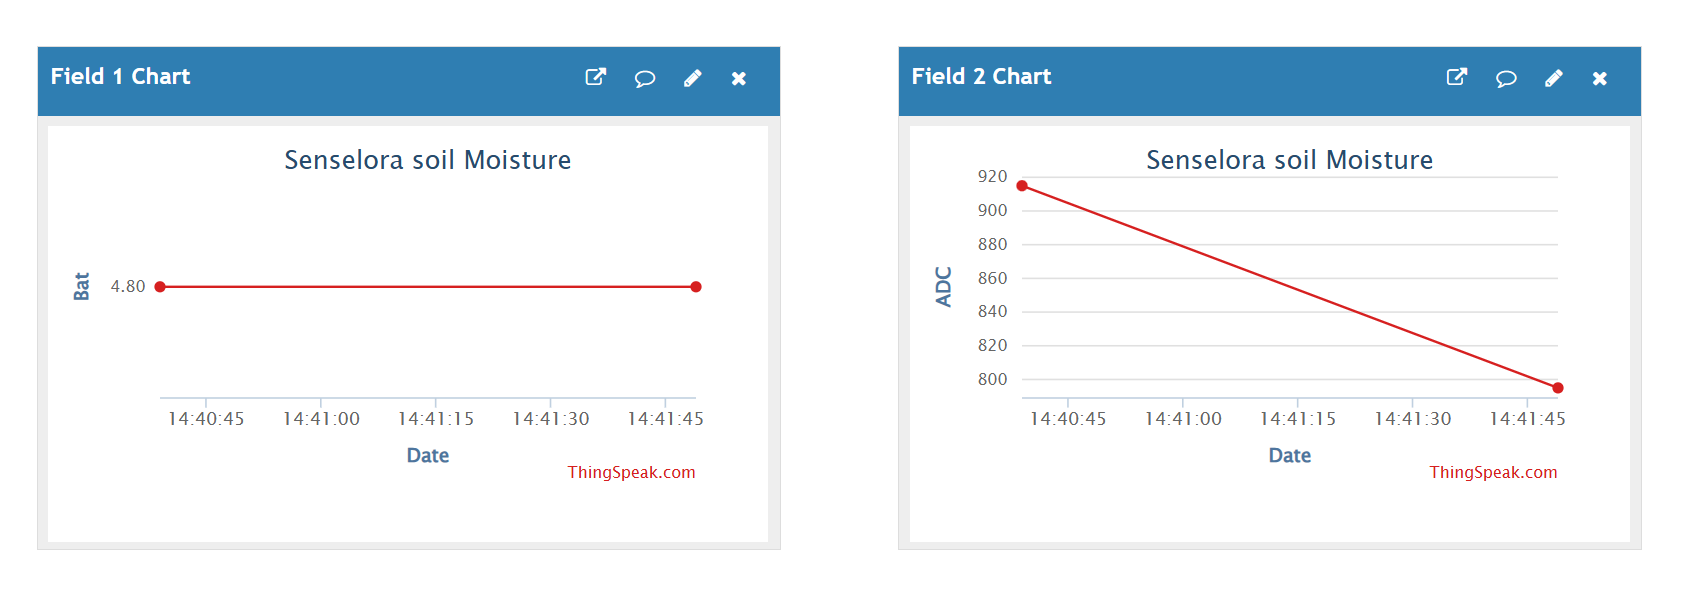
Once the download is complete, power on the SenseLora Soil, press the reset button every time and wait about 1 minute to receive a message in Thingspeak.
6. FAQ
You can list your question here or contact techsupport@makerfabs.com for technology support. Detailed descriptions of your question will be helped to solve your question.
Q1: This is a ready-to-use product, can I modify my own programme?
A1: Can be programmed by yourself using the USB2UART CH340K.