UWB positioning development with python
Introduction
This module integrates MCU and all RF circuits, antennas, power management and clock circuits. The module can be quickly configured and used by AT command. The latest UWB module that solves multiple anchors& tags mutual conflicts, supports max 8 Anchors + 64 tags in application, to create a multi-anchor multi-tag positioning system, and supports antenna delay settings for tags and anchors In this article, I'll introduce how to use UWB positioning in two ways.
Model: MAUWBCA1
Arduino IDE preparations
1. Install the Arduino IDE V1.8.10/V1.8.19.
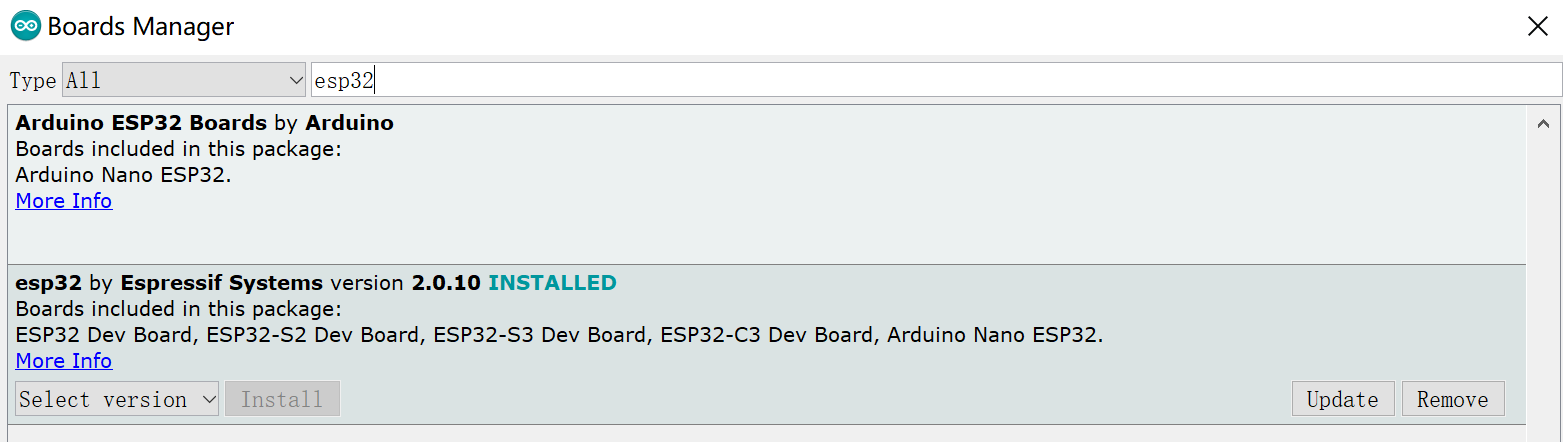
2. Install the ESP32 board package. All projects are based on the ESP32 development board, guaranteeing higher compatibility and stability. If you haven't installed the ESP32 Board SDK yet, follow the steps in this guide to get started quickly.
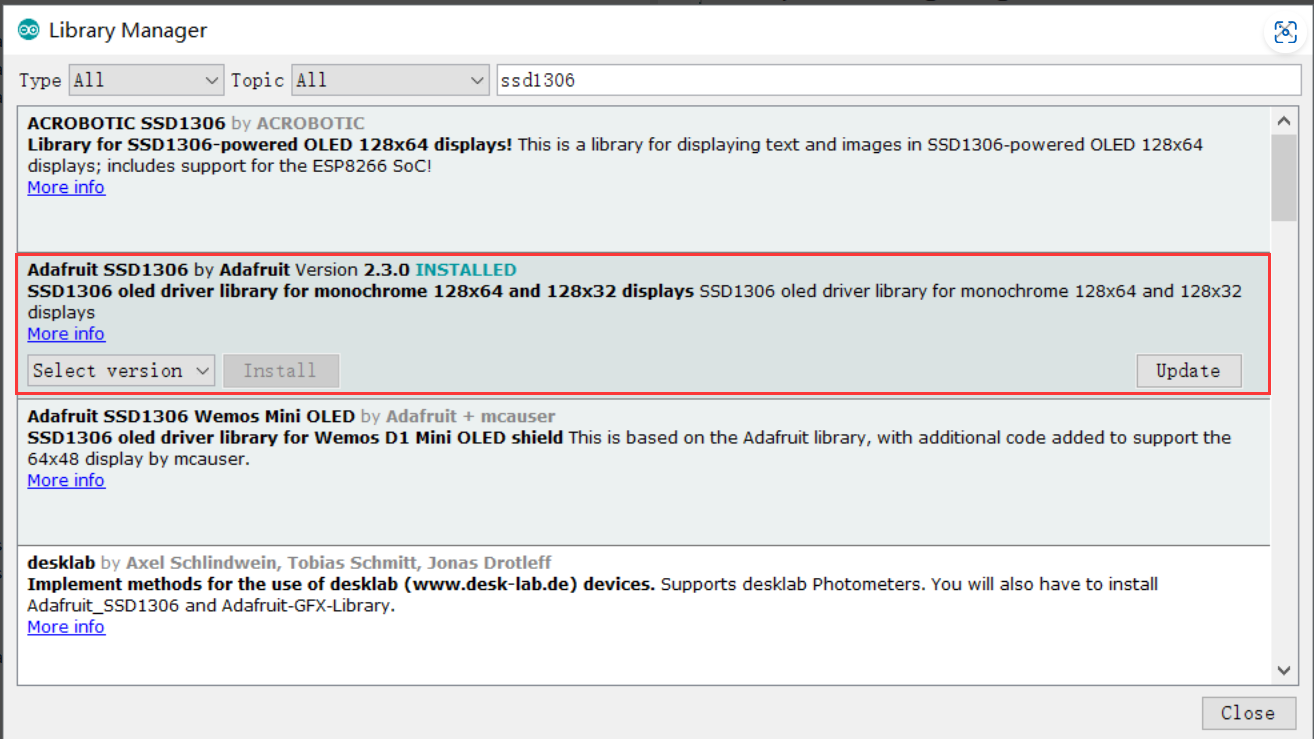
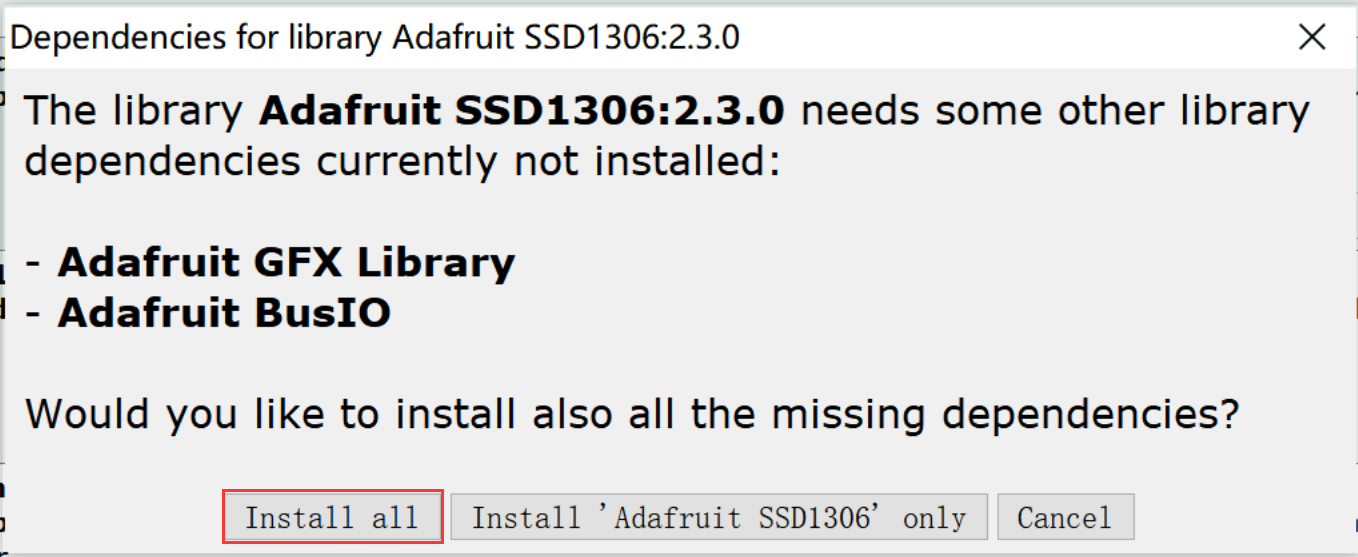
3. Install "Adafruit_SSD1306" library(Version 2.3.0) Arduino has its own library manager, and for some authenticated third-party libraries, it can be searched in the library manager. Click install. Common libraries such as SSD1306.
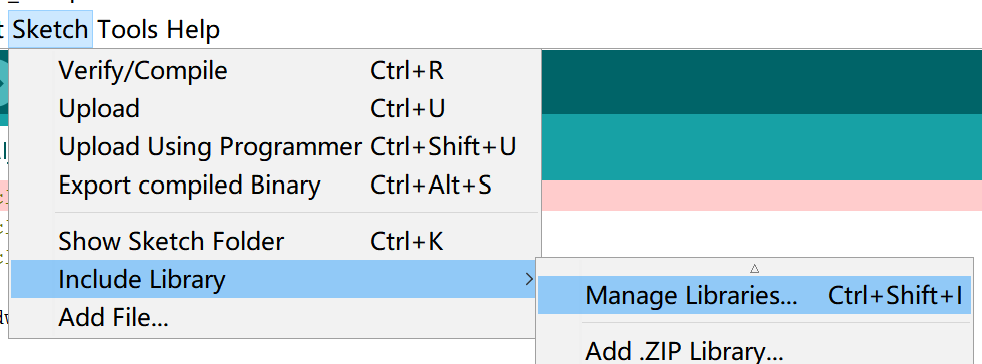
- Select "Sketch > Include Library > Manage Libraries", and search libraries that you need.
- If the following page appears, click"Install all"
UWB module configuration
configure Anchor0
-
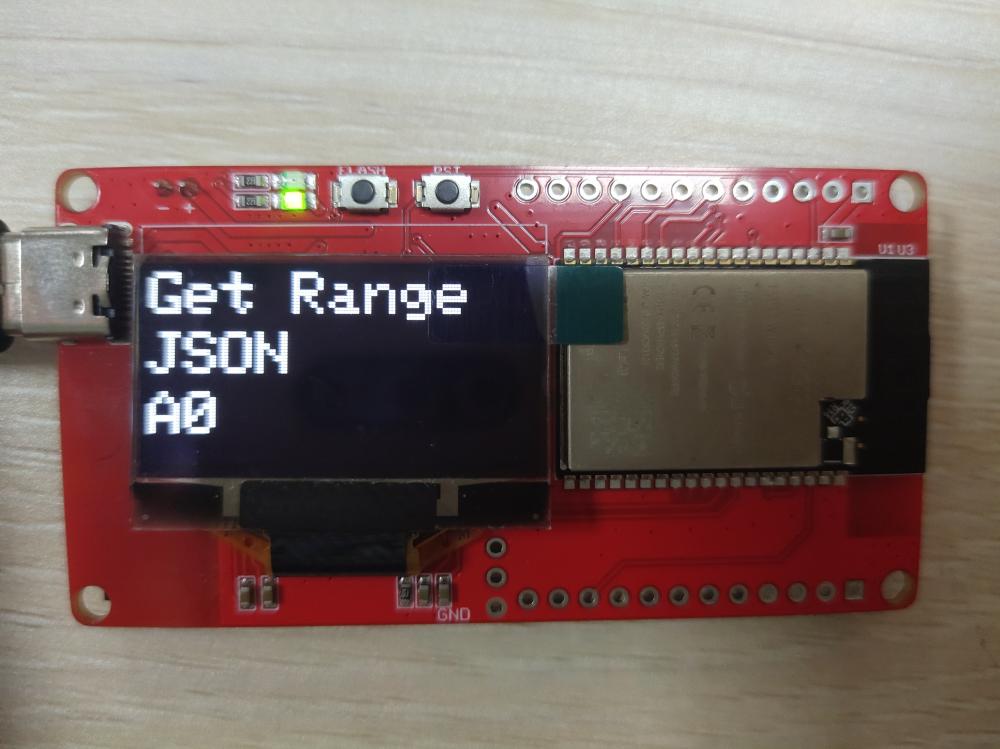
Open the get_range.ino by Arduino IDE. This program parses the AT instructions into JSON format and uploads them through the serial port.
-
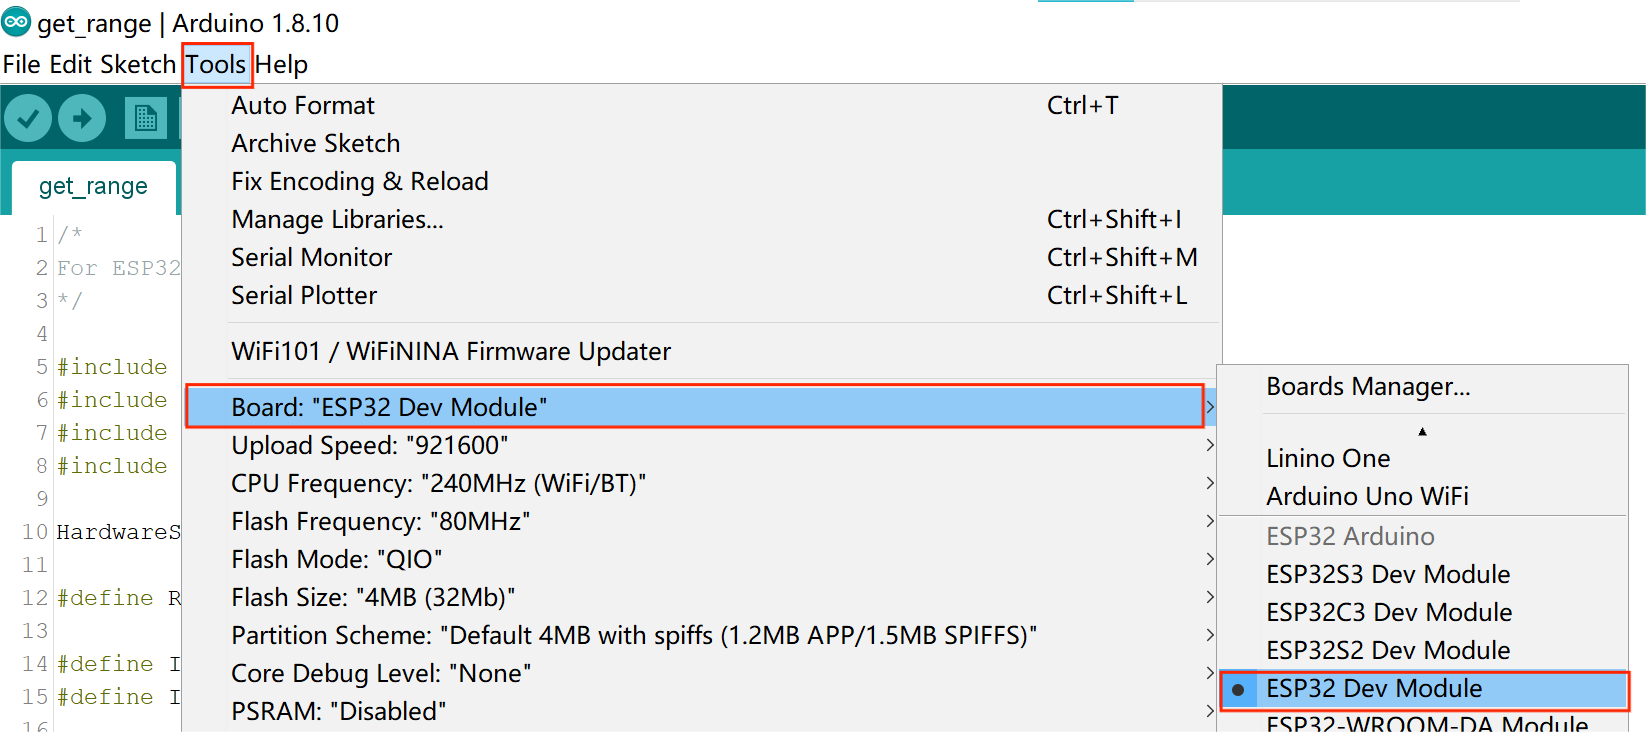
Use Type-C USB cable to connect the board and PC, and select the development board "ESP32 Dev Module" and the port.
- Verify the code and upload.
Configure other devices
-
Open the esp32_at_t0.ino by Arduino IDE.
-
Use Type-C USB cable to connect the board and PC, and select the development board "ESP32 Dev Module" and the port.
-
Change module settings
#define UWB_INDEX 0  //Device ID(Anchor 0-7,Tag 0-31)

#define TAG
// #define ANCHOR    //Device Role(Tag or Anchor)

#define FREQ_850K
// #define FREQ_6800K    //Equipment communication rate(850K or 6800k)
- Verify the code and upload.
Note configure at least three Anchors for positioning.
How to use UWB positioning with python
Use UWB positioning with python exe file
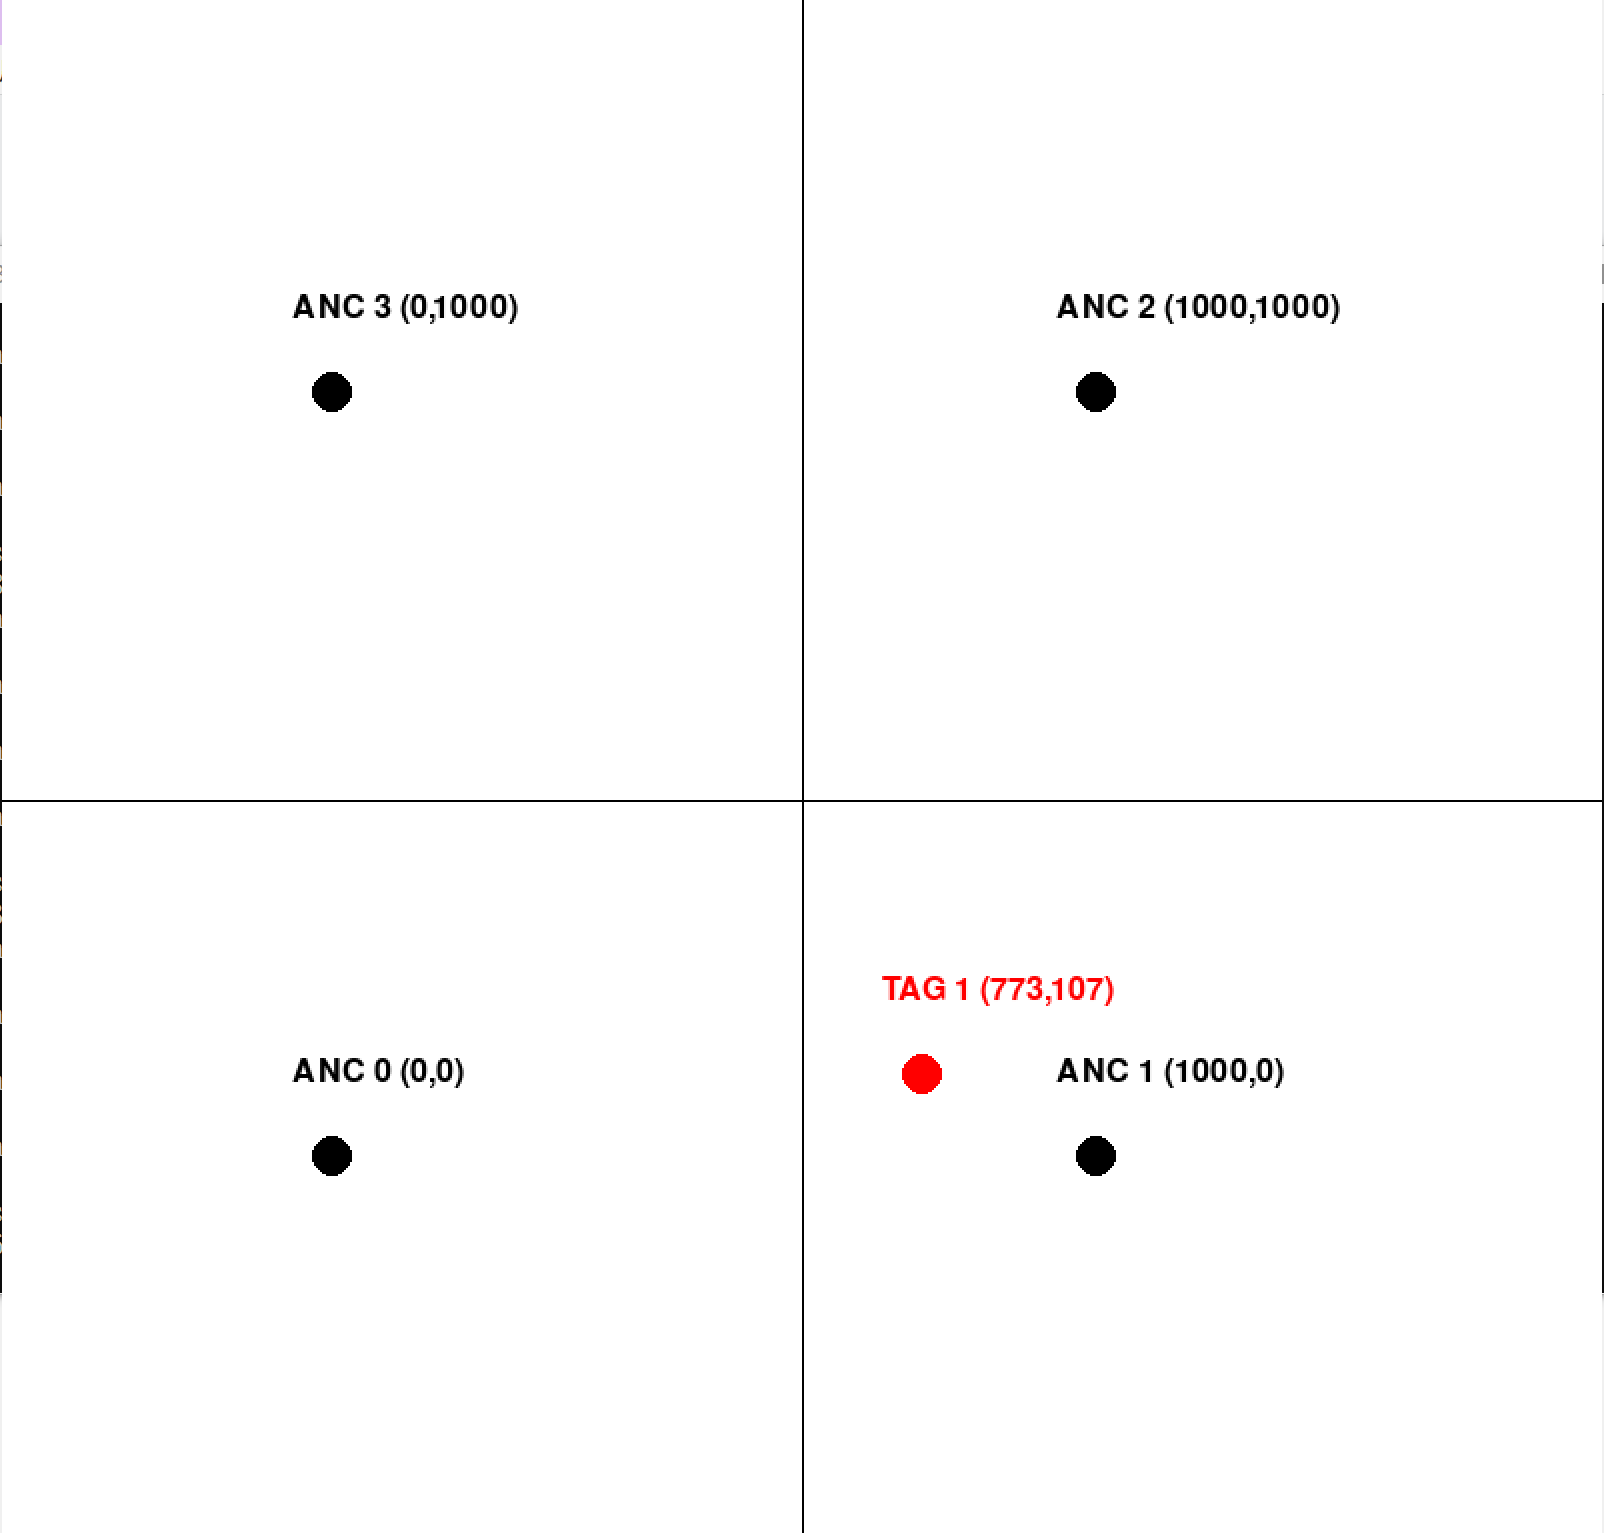
This routine is for testing purposes only and is fixed to four anchor points with a 10 square metre test area and cannot be changed.
-
Use Type-C USB cable to connect the A0 and PC.
-
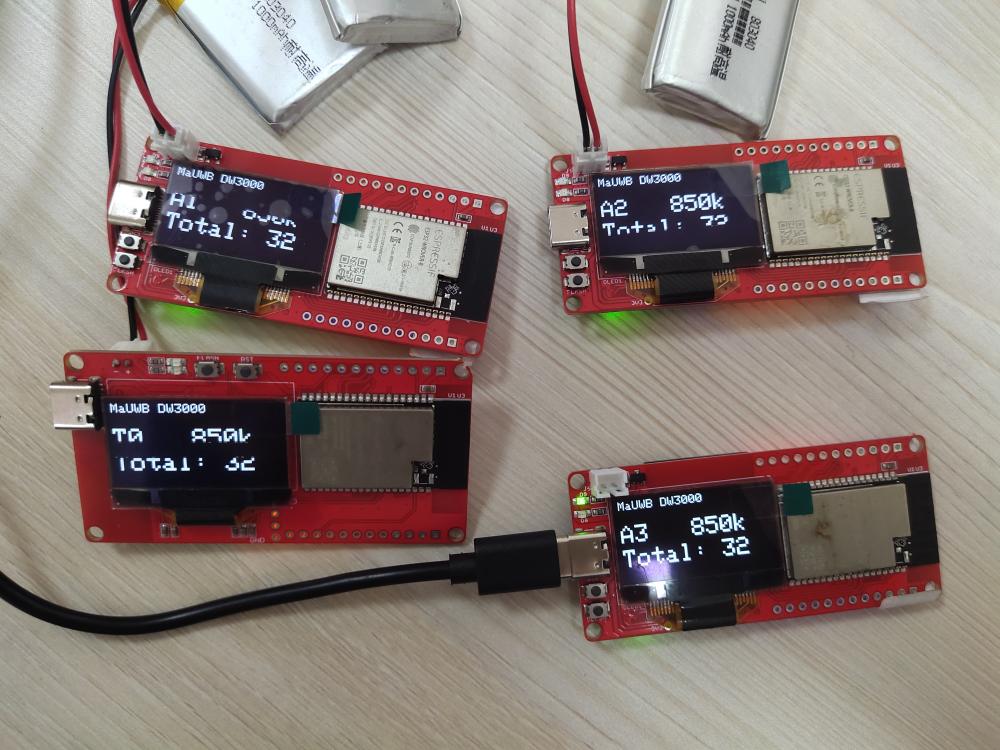
Power other devices with 3.7V lithium batteries,and adjust the positions of A1, A2 and A3 so that they form a square of 10 metres with A0.
-
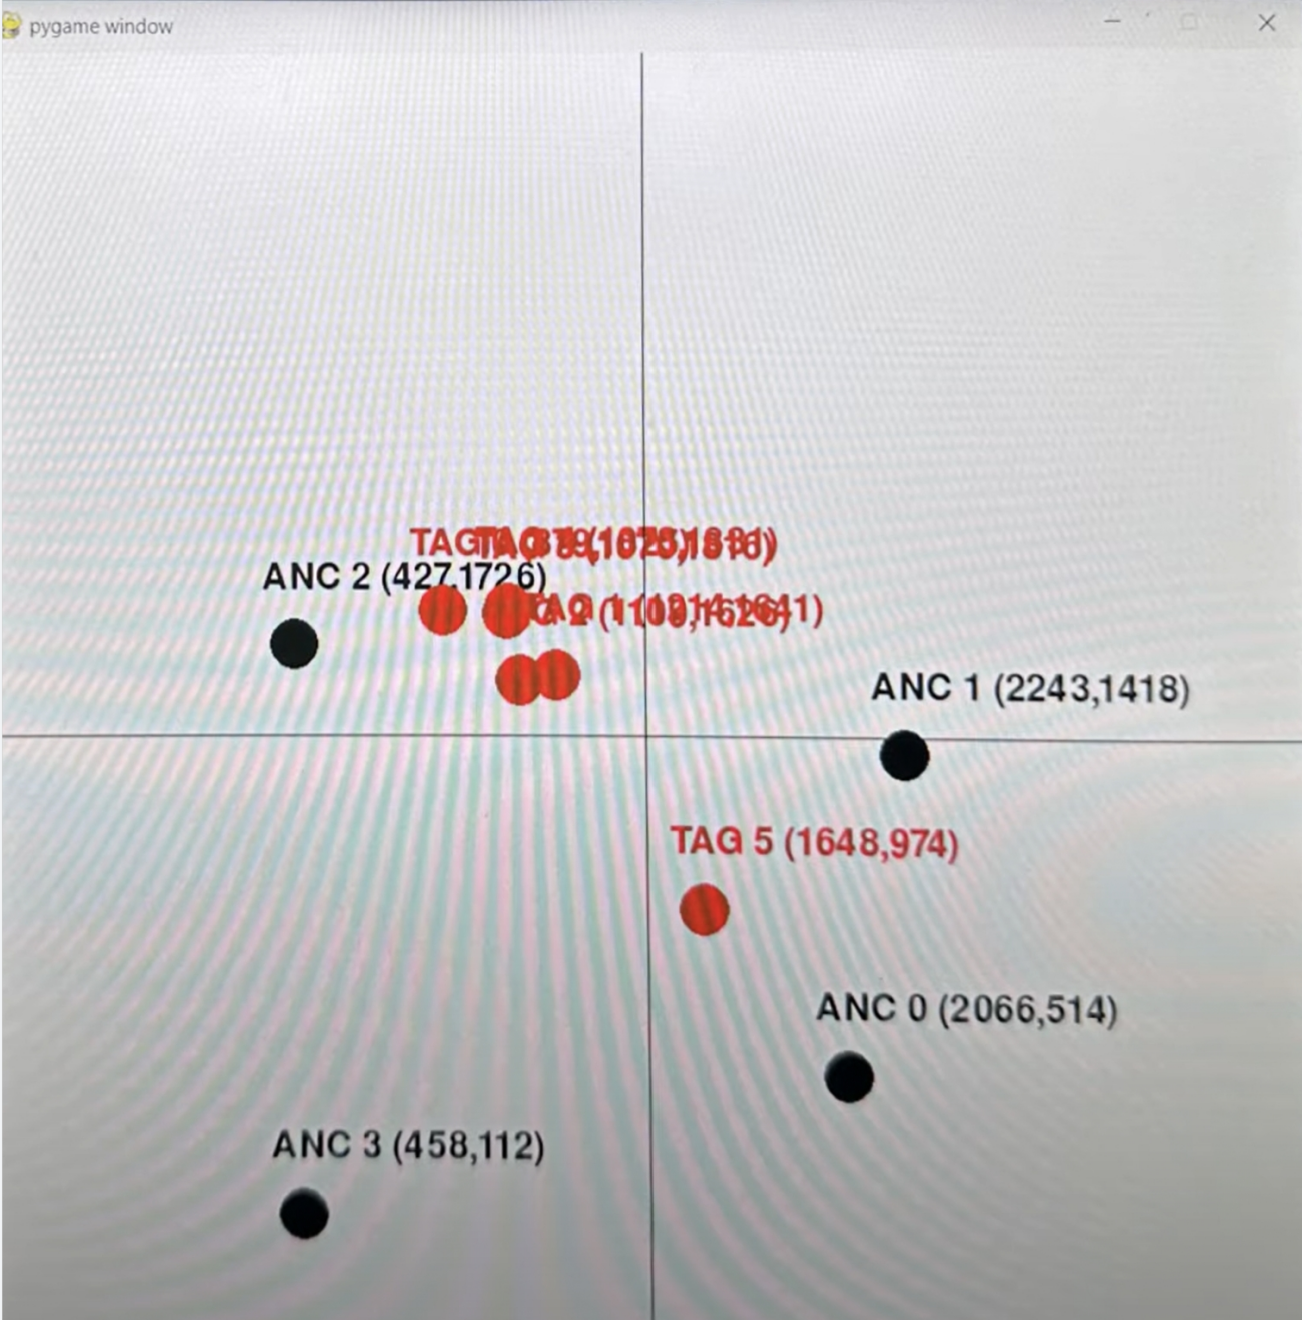
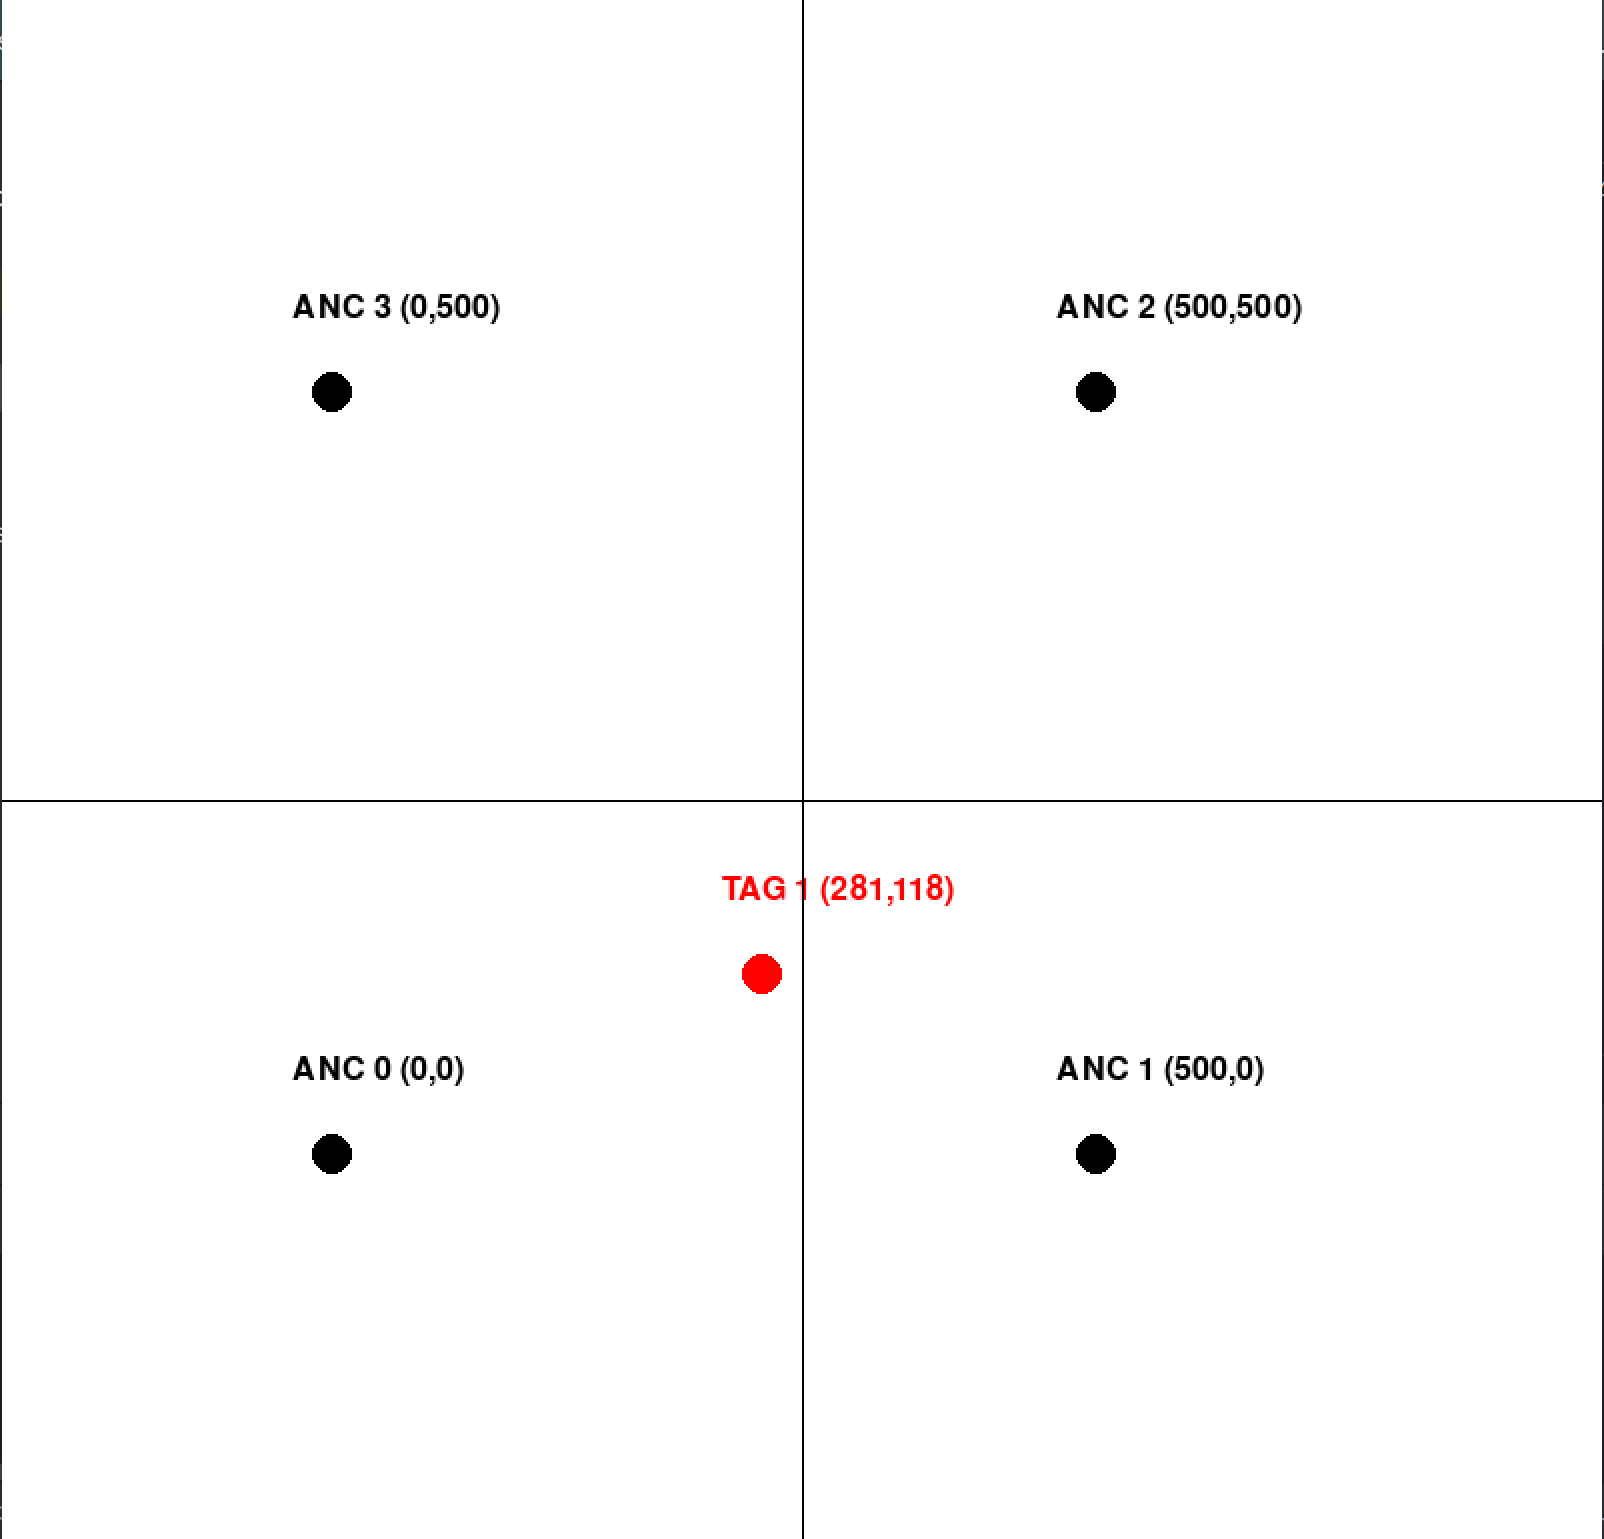
Open position.exe, and you can see the red dots on the canvas move according to your position.
Use UWB positioning with Python environment
If you want to develop further or change the positioning range, you can use the python environment to change the code
-
Install python3, select a version that is stable and compatible with your computer's configuration to install.
-
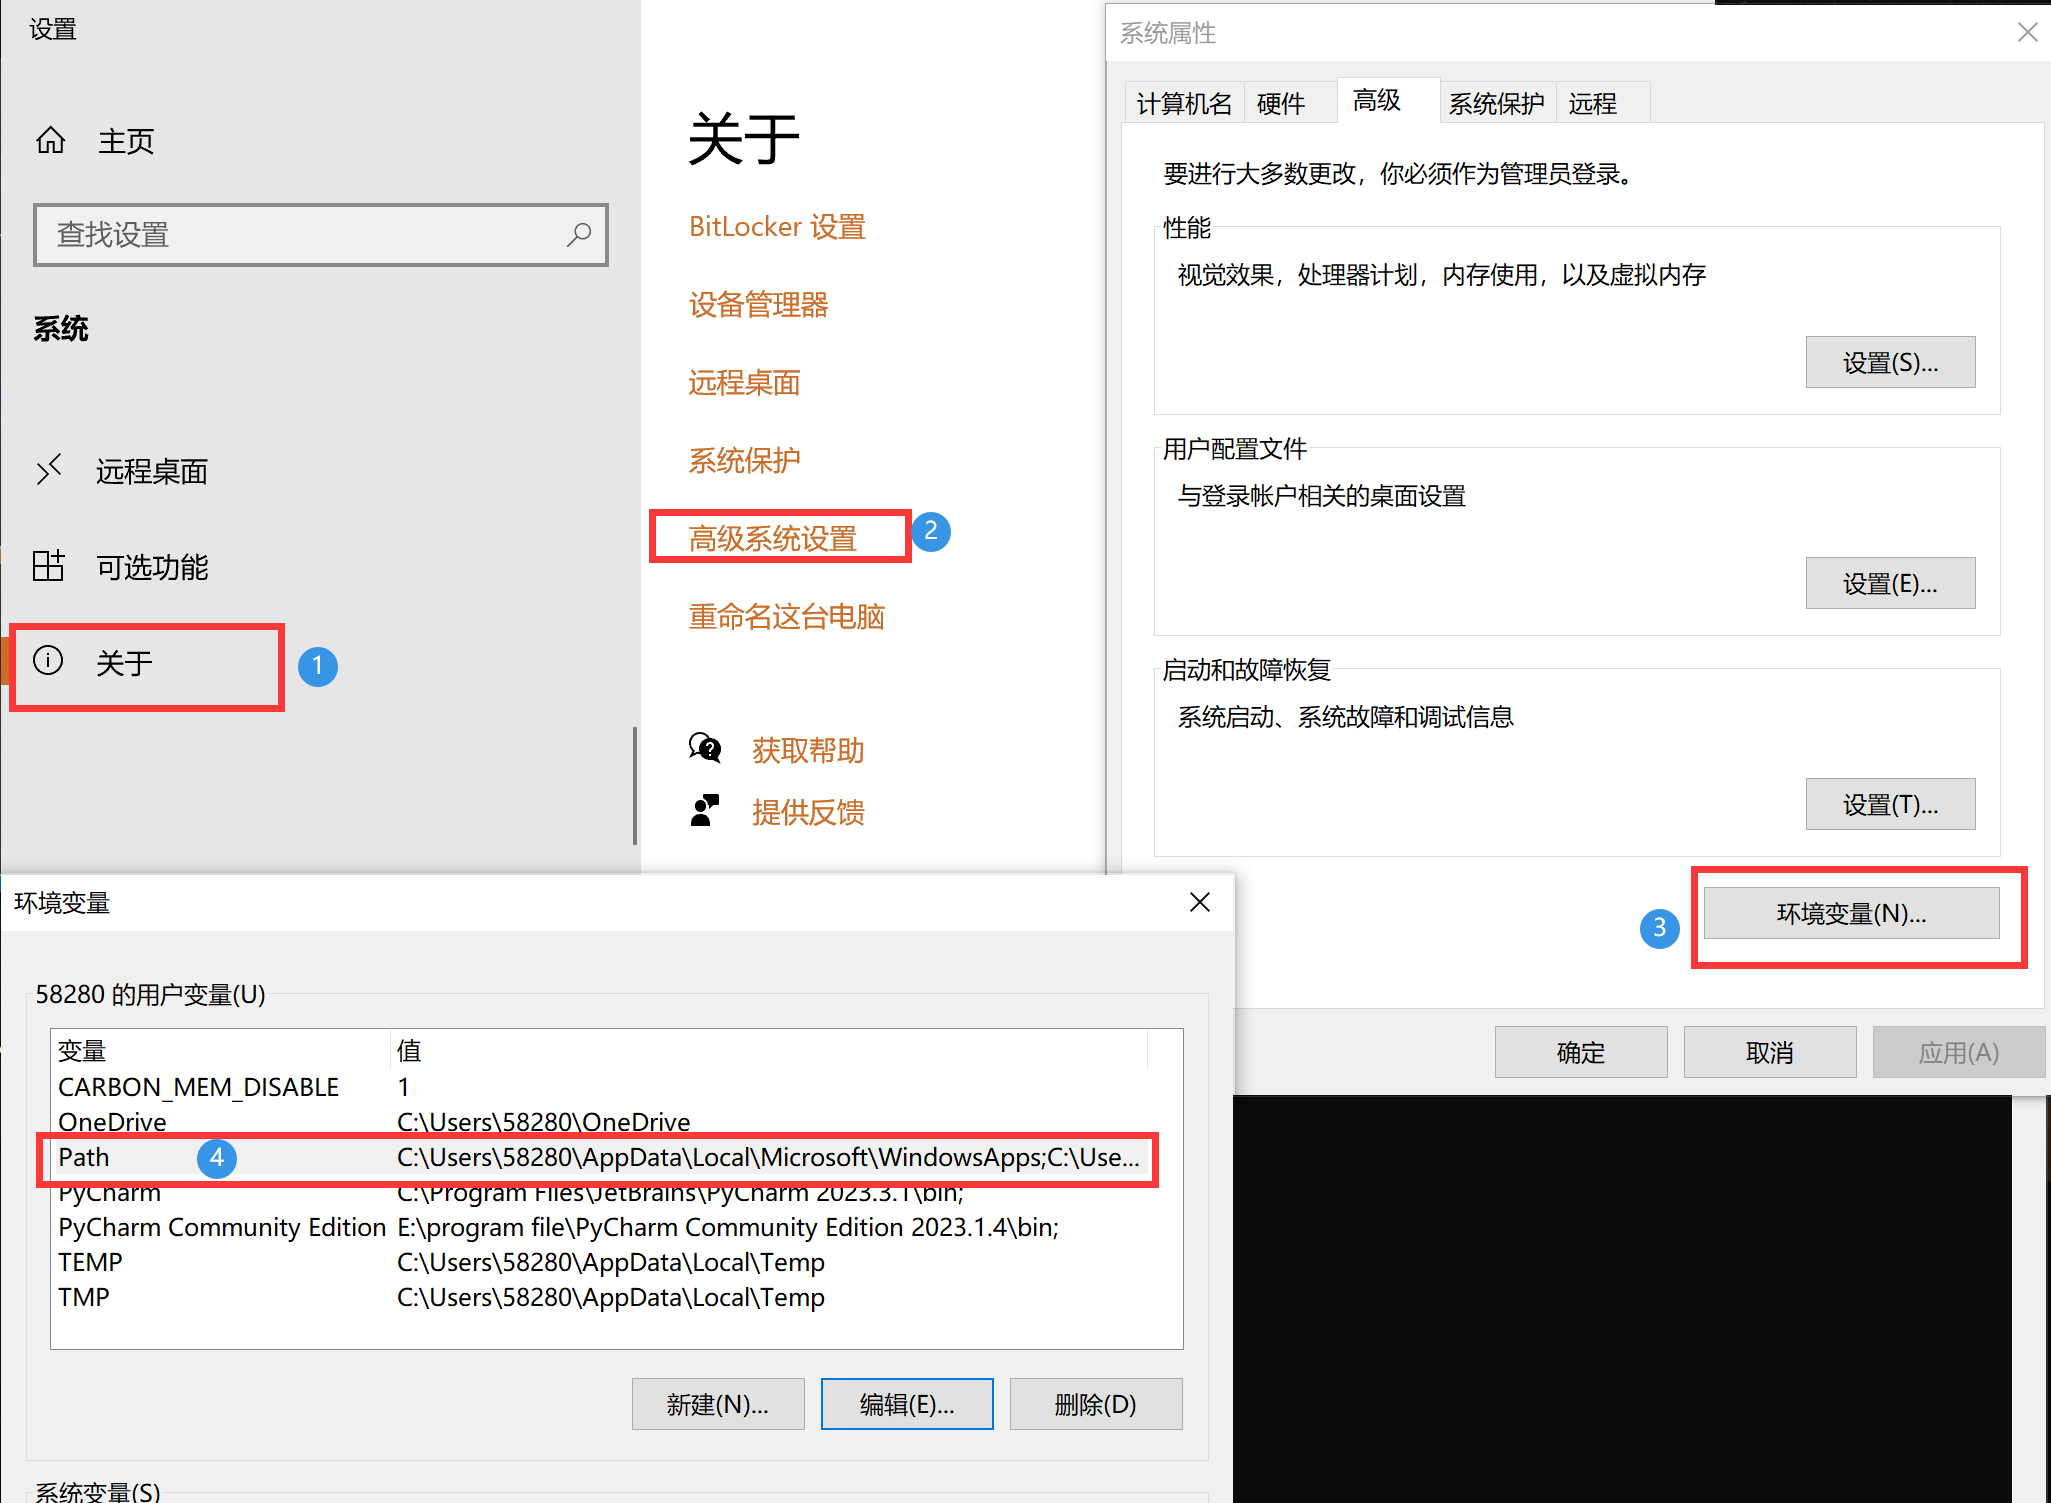
Check if Python3 is available, open the command prompt and enter: python, it will give the following information.

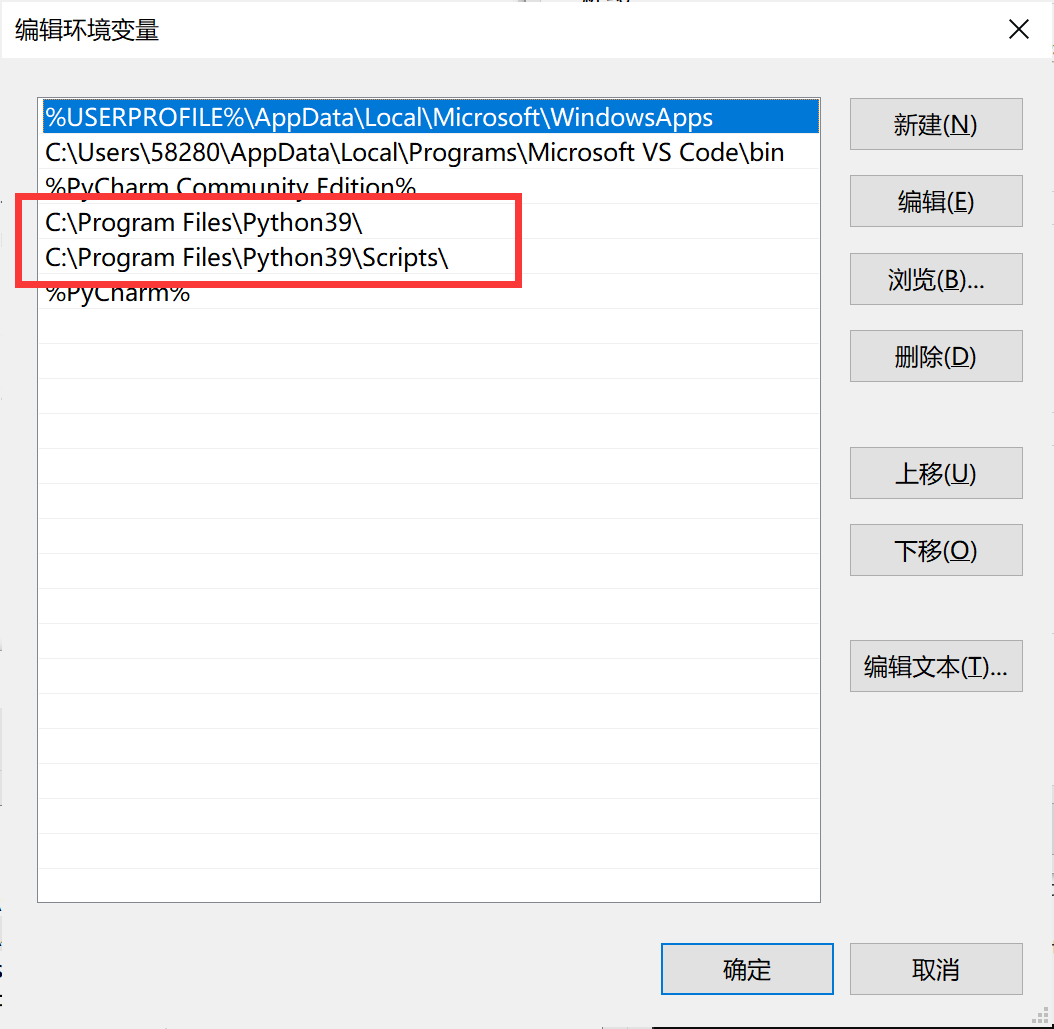
- If not, then you need to set your environment variables, copy the python software installation path in "Path".
-
Install pycharm, select a version that is compatible with your computer's configuration and your python version to install.
-
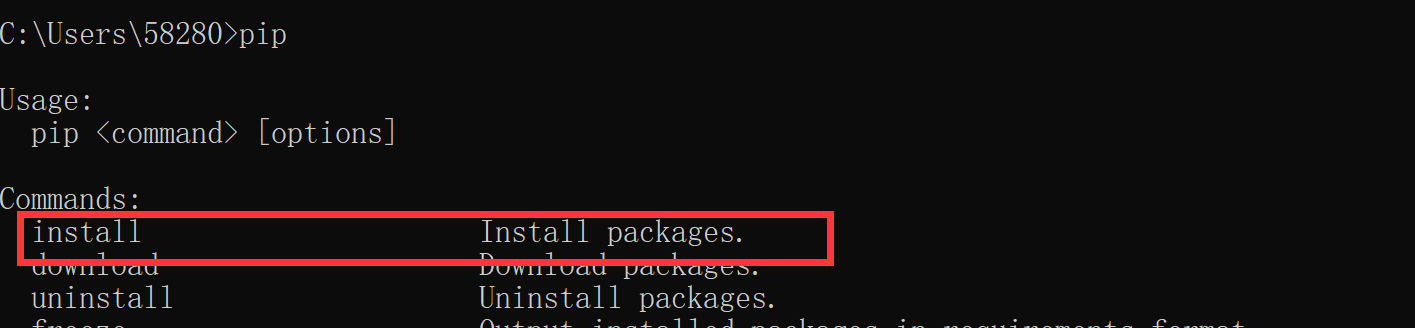
Install Python packages
You can open the command prompt and enter: pip install [package name], like pip install numpy.

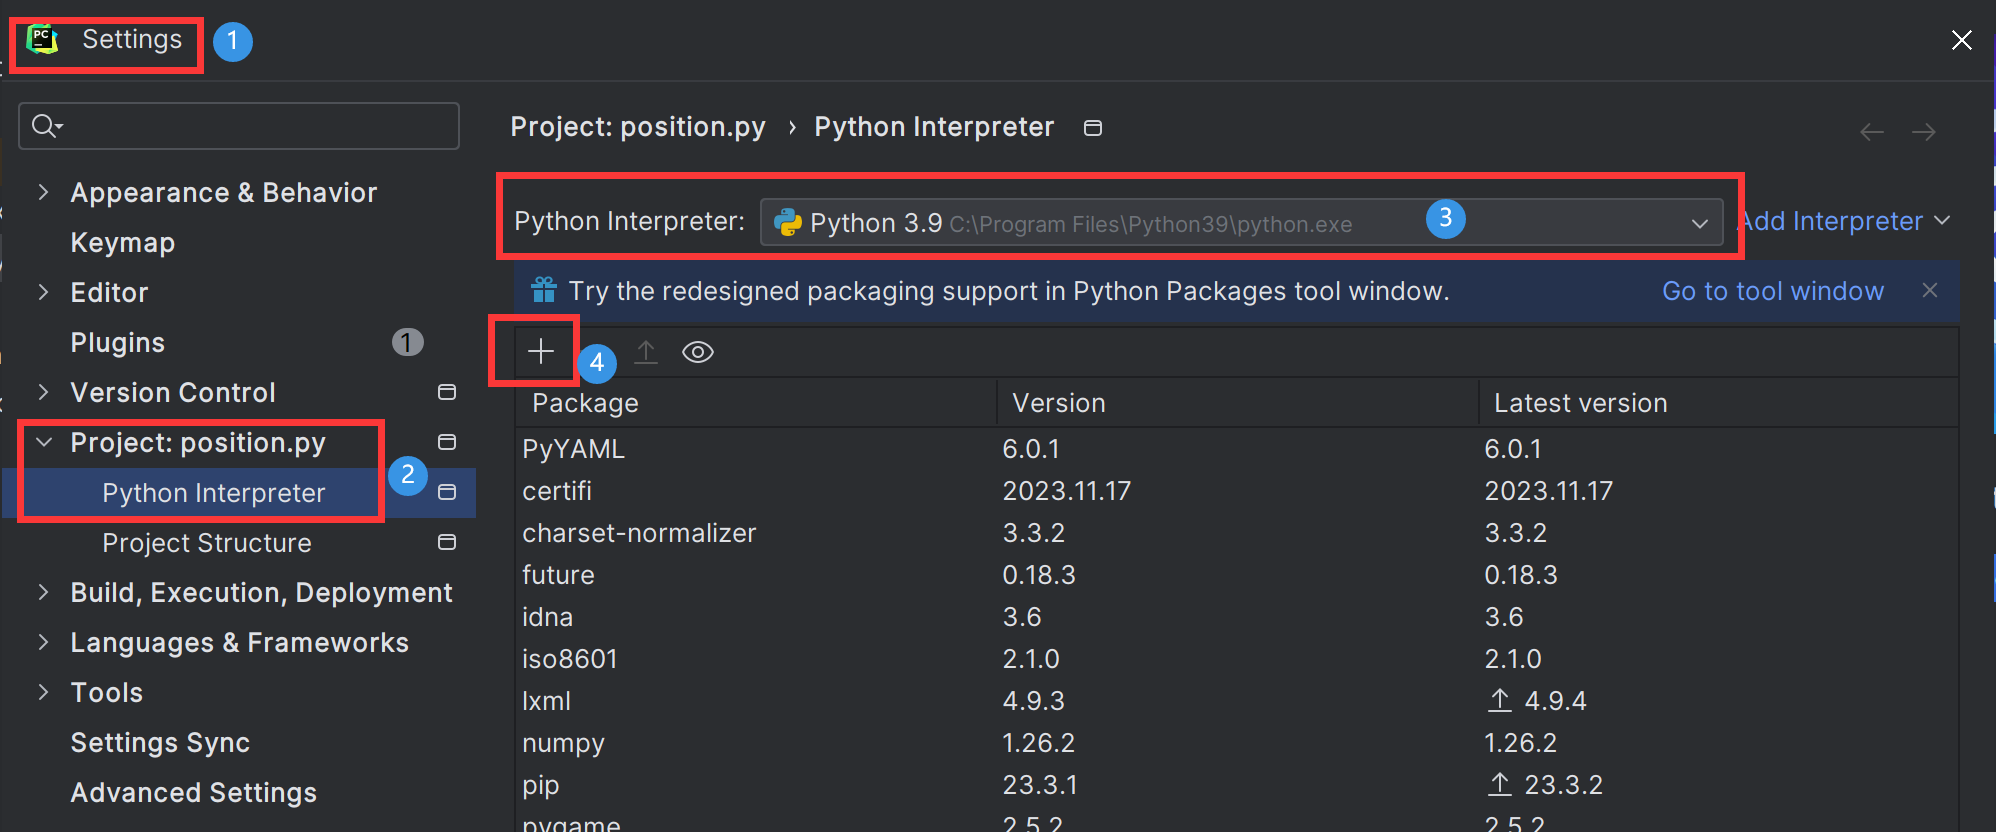
Or, you can install it using pycharm.

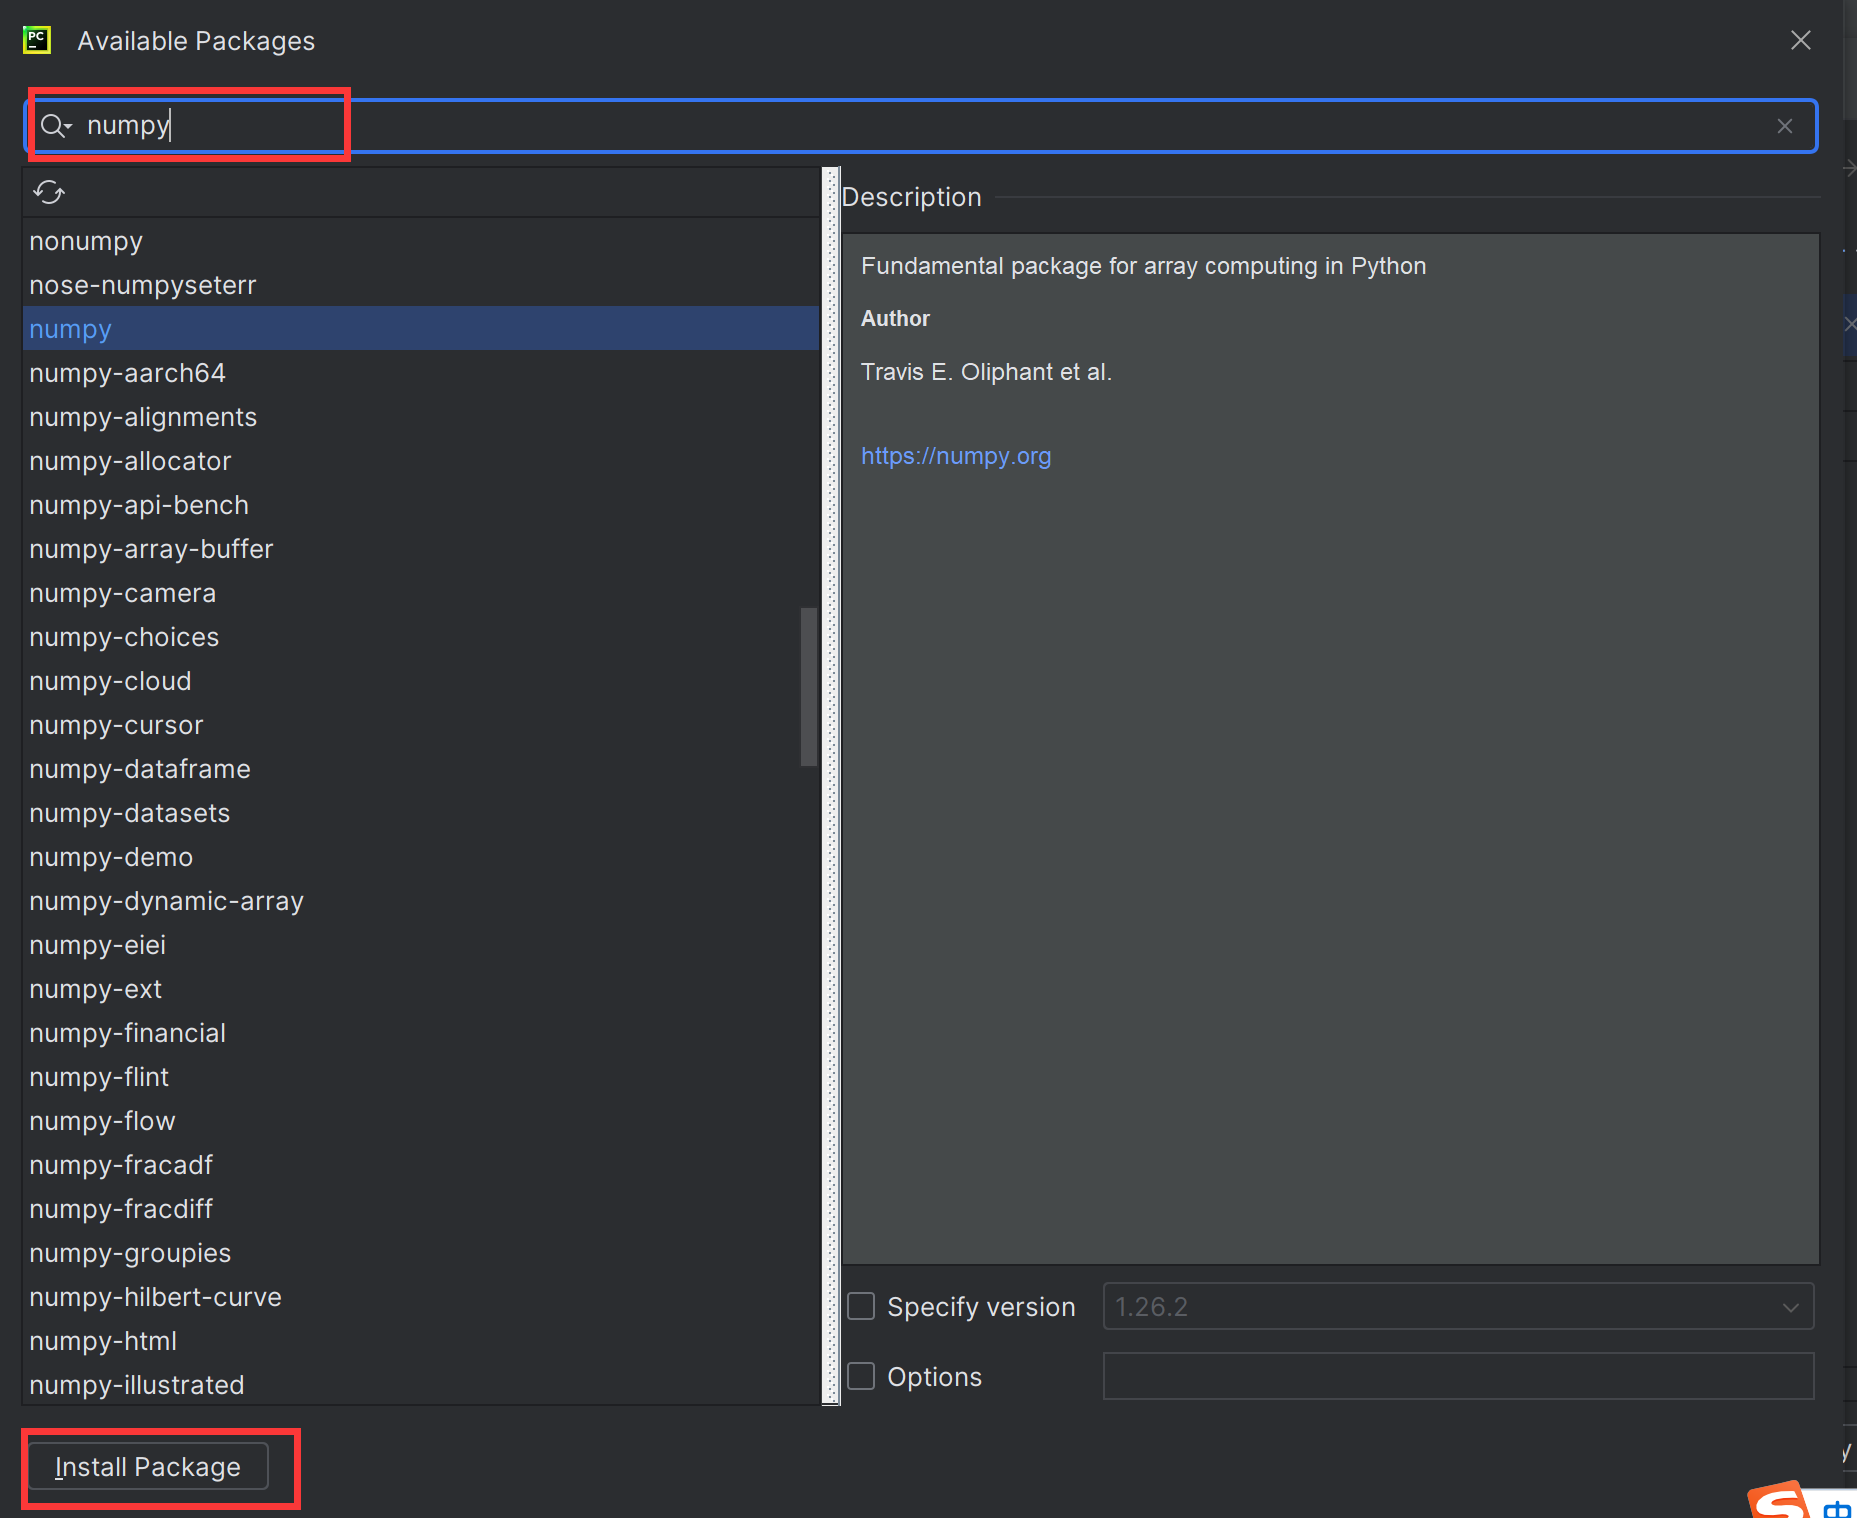
The list of packages you need to install:
pygame
pyserial
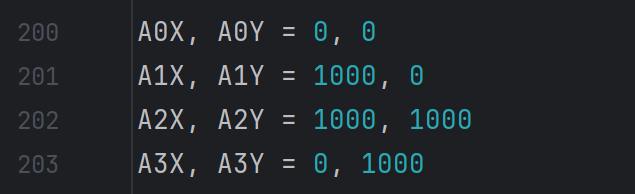
- Open position.py, and changing the positioning range
You can change the positioning range by modifying the A0, A1, A2, A3 pixel coordinates(unit cm).
-
Use Type-C USB cable to connect the A0 and PC. Power other devices with 3.7V lithium batteries, and adjust the positions of A1, A2 and A3 so that they can adapt to pixel coordinates.
-
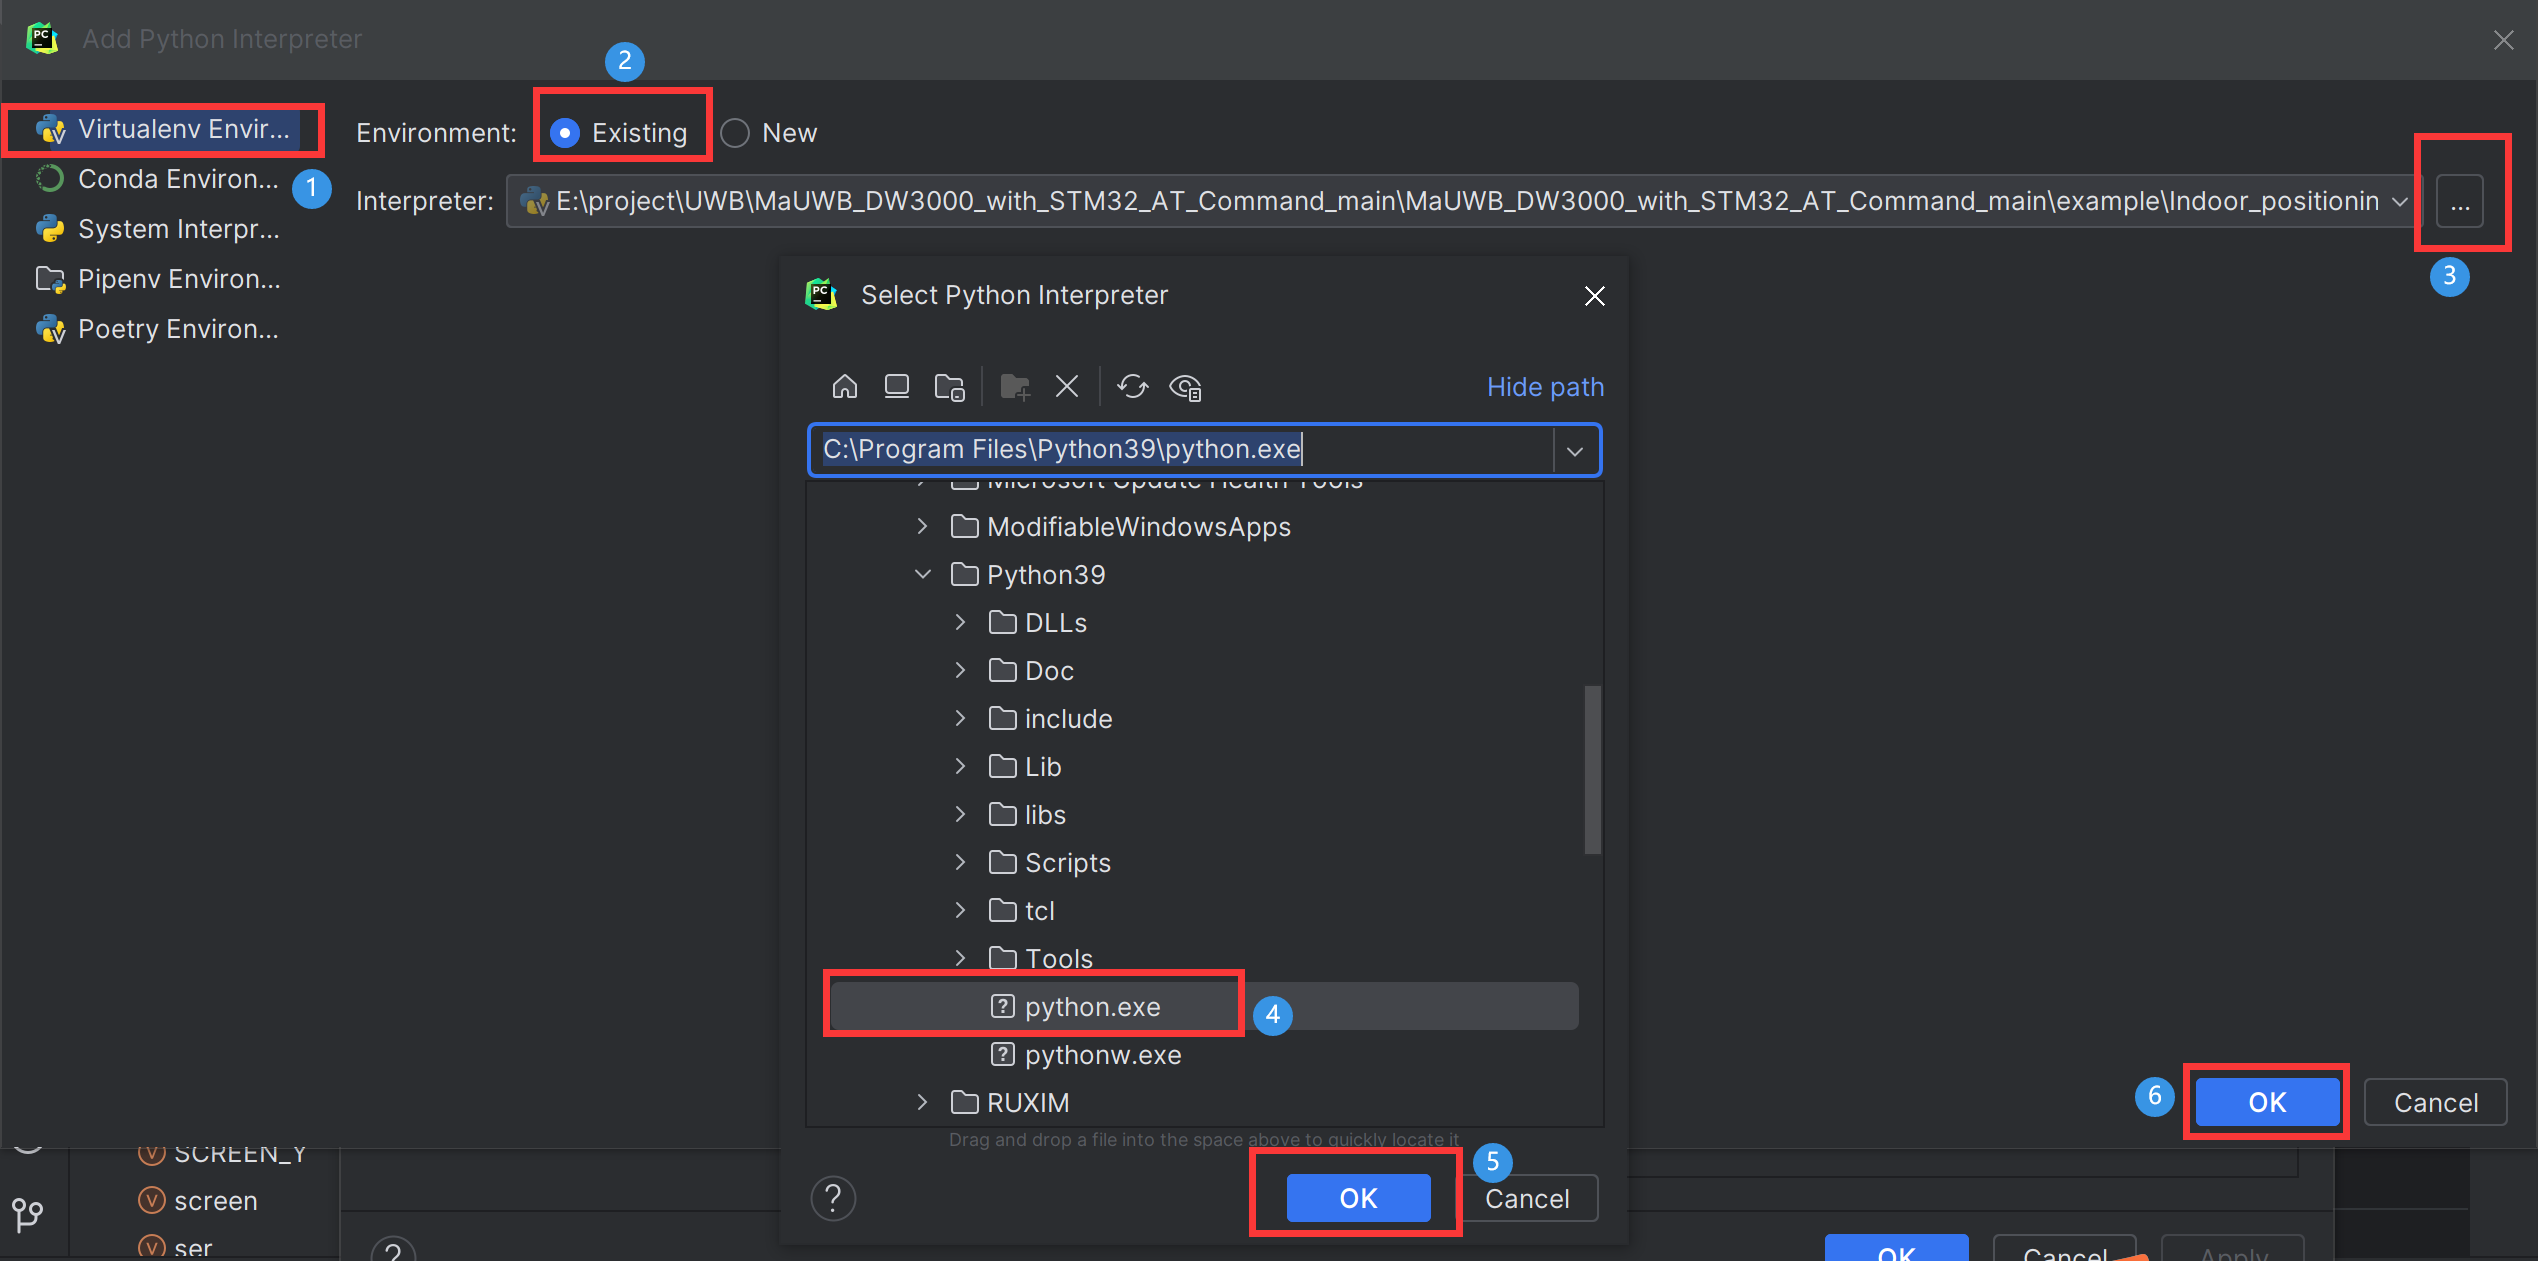
Choose the python interpreter, enter the address of your python software.

- Run the project, and you can see the red dots on the canvas move according to your position.

FAQ
You can list your question here or contact techsupport@makerfabs.com for technology support. Detailed descriptions of your question will be helped to solve your question.