Maduino Zero LoRaWAN Node(2.0)
1. Introduce
LoRa (short term for long range) is a spread spectrum modulation technique derived from chirp spread spectrum (CSS) technology. LoRaWAN is the network system architecture and communication protocol specification for LoRa, developed by the LoRa Alliance. LoRaWAN is a Media Access Control (MAC) layer protocol that enables LoRa in wider applications. The LoRa Alliance defines the networking layer and the system architecture for the network.
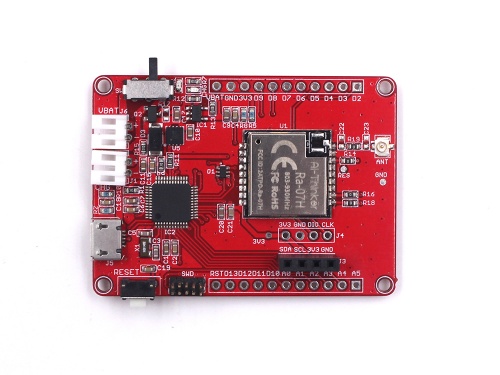
Maduino Zero LoRaWan is a solution based on ATSAMD21G18 MCU and LoRaWAN module Ra-08H(Ra-07H EOL). The LoRaWAN module Ra-08H is based on the ASR6601 chip, it integrated the LoRa radio transceiver, LoRa modem, and 32-bit RISC MCU, to support LoRa modulation mode and (G) FSK modulation mode. Maduino LoRaWan acts as a LoRaWAN node to transmit/receive the local data to the network by connecting LoRaWAN Gateway. With this module, users are easy to prototype LoRaWAN projects easily in a few hours.
Maduino LoRaWan is compatible with Arduino and basic demos communicating with TTN are provided. Note that for LoRaWAN communication, a LoRaWAN router is needed.
Model: OPHMALORA
2. Features
- ATSAMD21G18, 32-Bit ARM Cortex M0+
- Interface: I2C /18*GPIO
- Arduino Compatible.
- Support LoRaWAN protocol.
- Operate frequency:868MHz
- Minimum receiving sensitivity:-137dBm
- Max Transmit power: +21dBm
- Power by USB or battery
- Support Micro SD Card
- Operating temperature:-40℃ ~ 85℃
- Default Baud rate: 9600(08H) 115200(07H)
3. Preparation before using
Note: Due to 07H module has been discontinued, Maduino Zero LoRaWAN Node has been upgraded to the v2.0 version and the code has been updated in GitHub.
- Main Branches and 07H Branches
3.1 Hardware
- !!!Note The LoRaWAN node does not transmit the data to TTN by LoRaWAN without the LoRaWAN gateway router which has been set as TTN gateway.
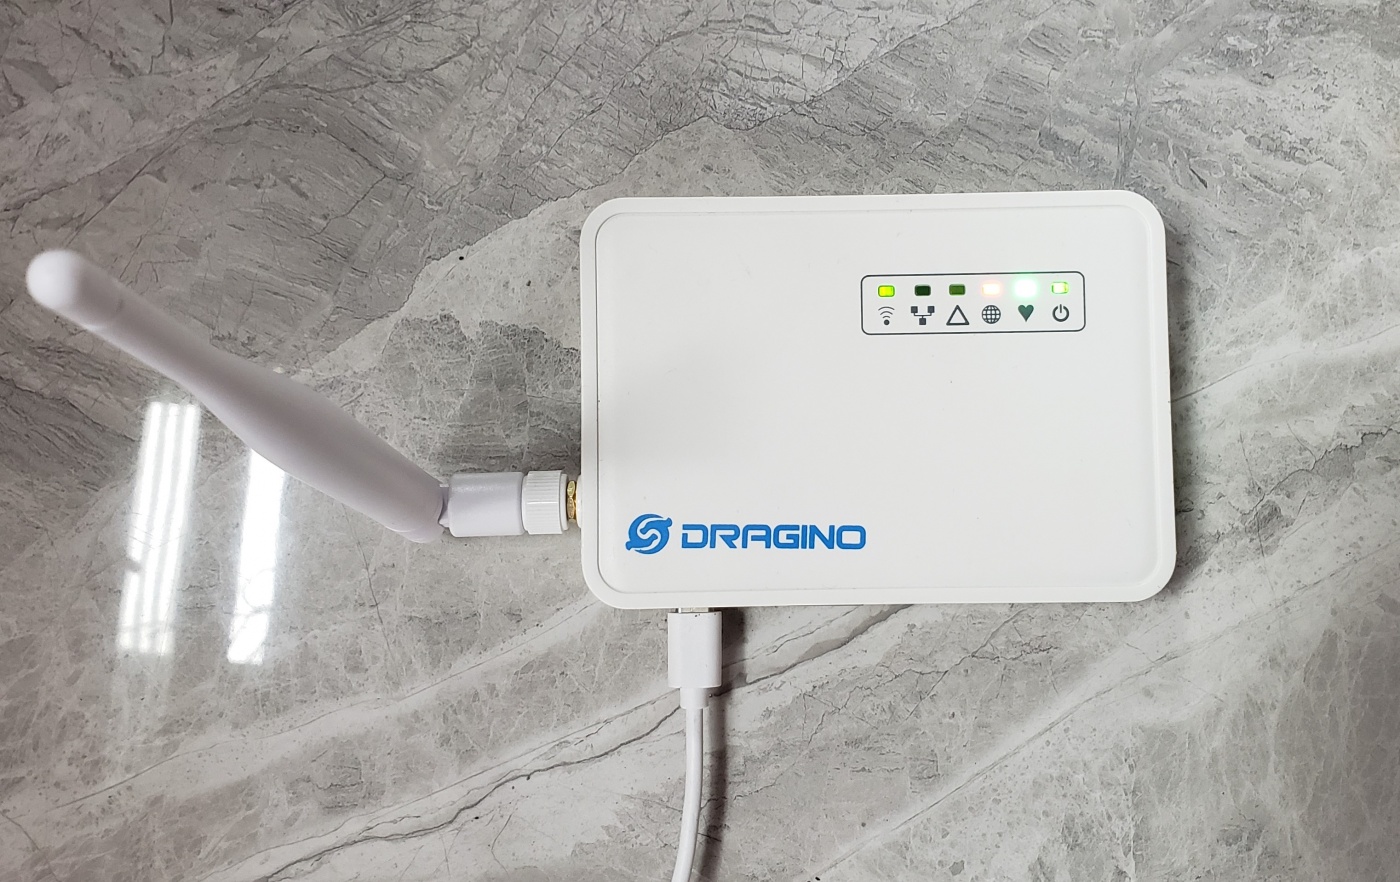
1.The LoRaWAN gateway router used in the demo is a Dragino LIG16 one.
2.Configure the router as a TTN Gateway follow the user manual of the LIG16 Gateway #Recources.
3.Configure the frequency you need.
- Please plug the LoRa antenna into the board.
3.2 Software
- Install Arduino IDE for programming.
4. Transmit data to TTN
- Overview
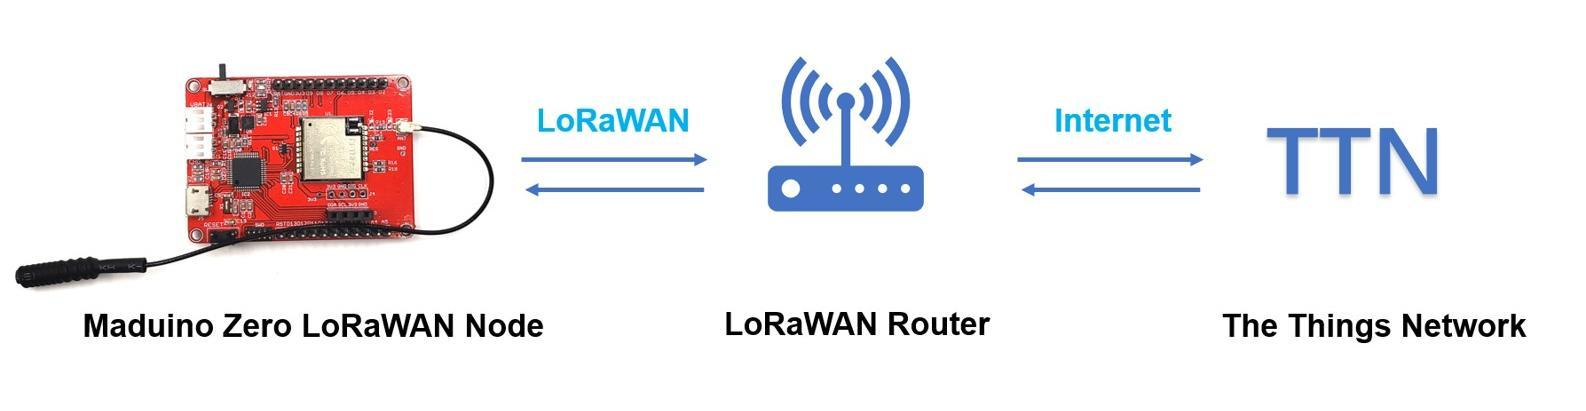
1.This demo uses Maduino Zero LoRaWAN node to collect the DHT11 module reading and transmit these reading to TTN with the LoRaWAN.
2.Diagram
- TTN Application
1.The Things Network(TTN) is a global community building an open-source and decentralized LoRaWAN network.
2.For transmitting the data to TTN(The Things Network), It is necessary to learn the using of TTN in advance, such as how to set an application, etc. After setting your application of TTN, there are three parameters to be important: Device EUI, APP Key, APP EUI.
3.Enter the TTN website: https://console.thethingsnetwork.org/, and log in your account.
4.Go to the console, select a cluster to start adding devices. (I choose the EU)
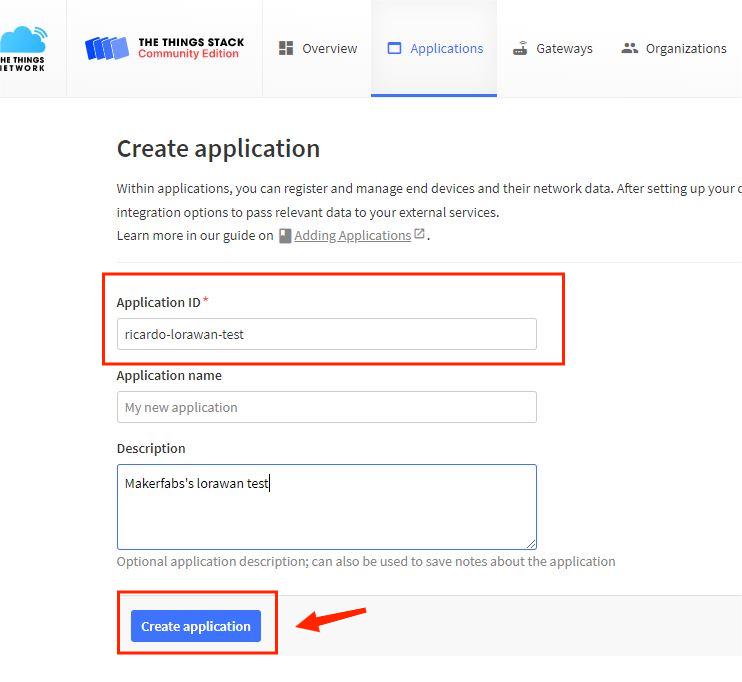
5.Select Application on the page and add a new application.
6.Fill in the application ID and other information, then create it.
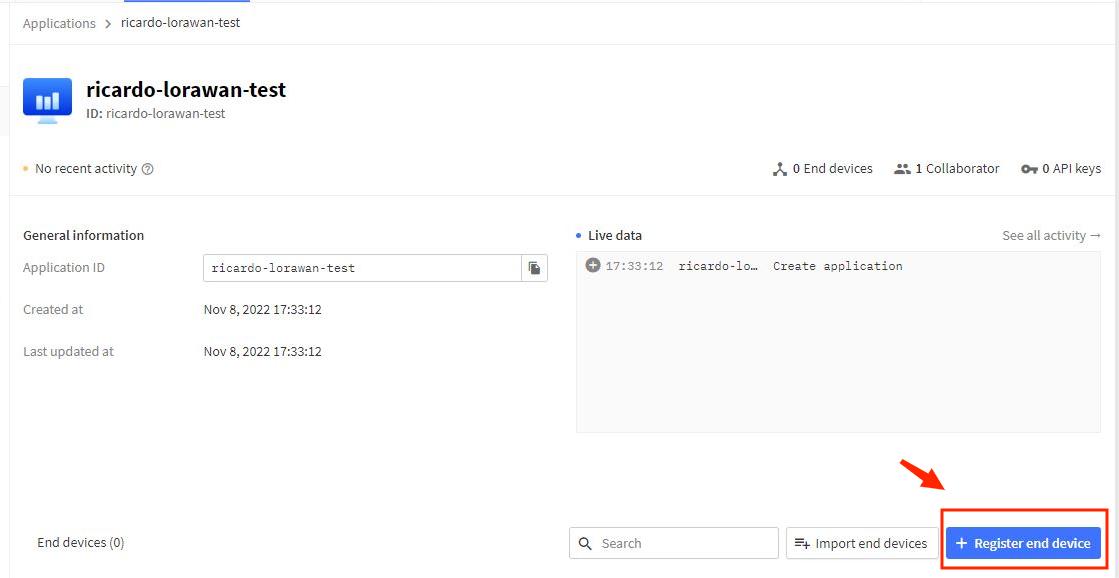
7.Add an End device
8.Configure the end device. , select the manually to choose the active mode to OTAA and LoRaWAN version.
aWAN_Node_ttn_config3.JPG](https://www.makerfabs.com/image/wiki_image/2022-11-08_18_54_37_0.JPG)
9.When you click "confirm", then follow the reminders to type in the parameters.

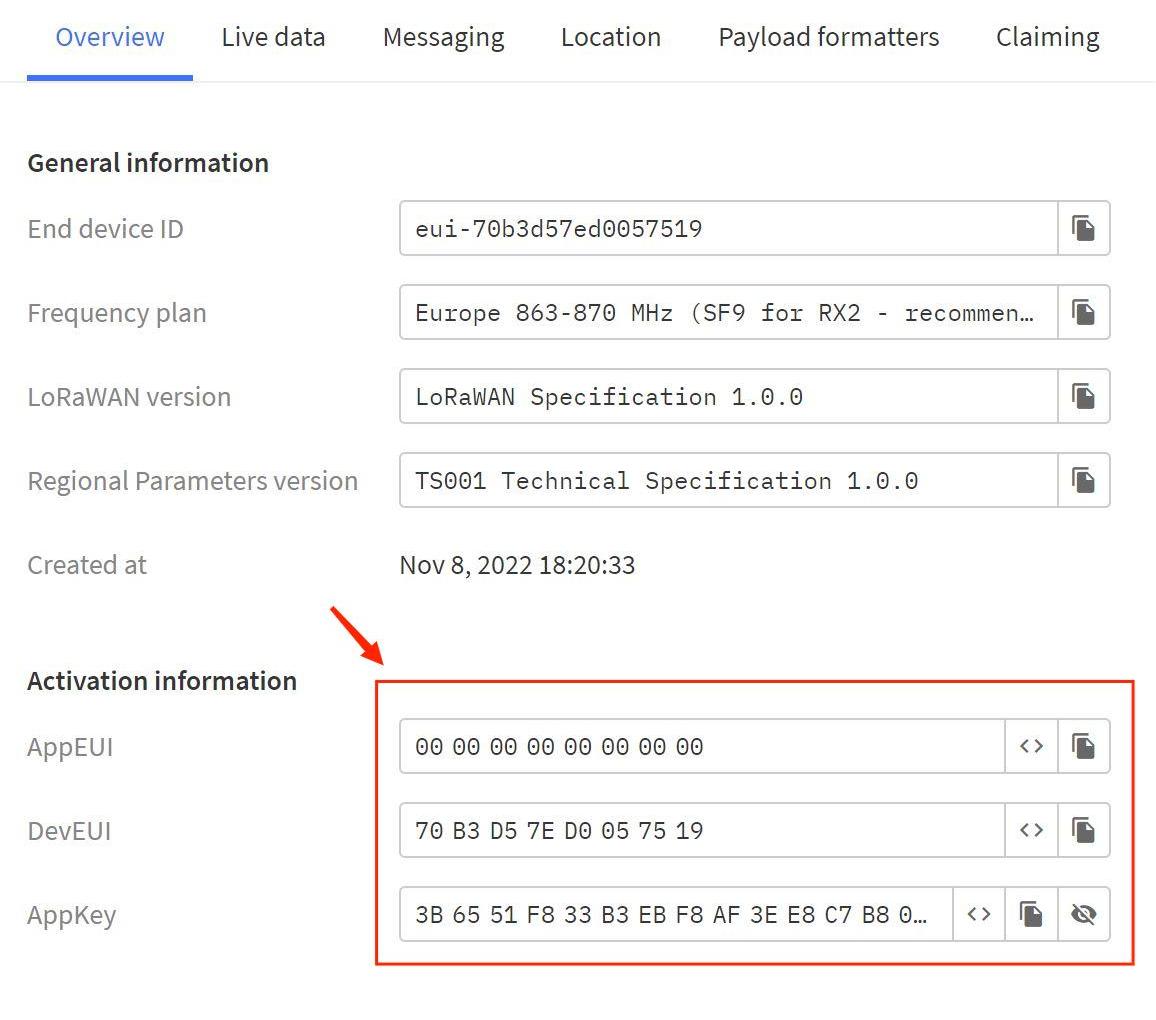
10.In the Device of the Application, three parameters had to be put into the code that we can see.
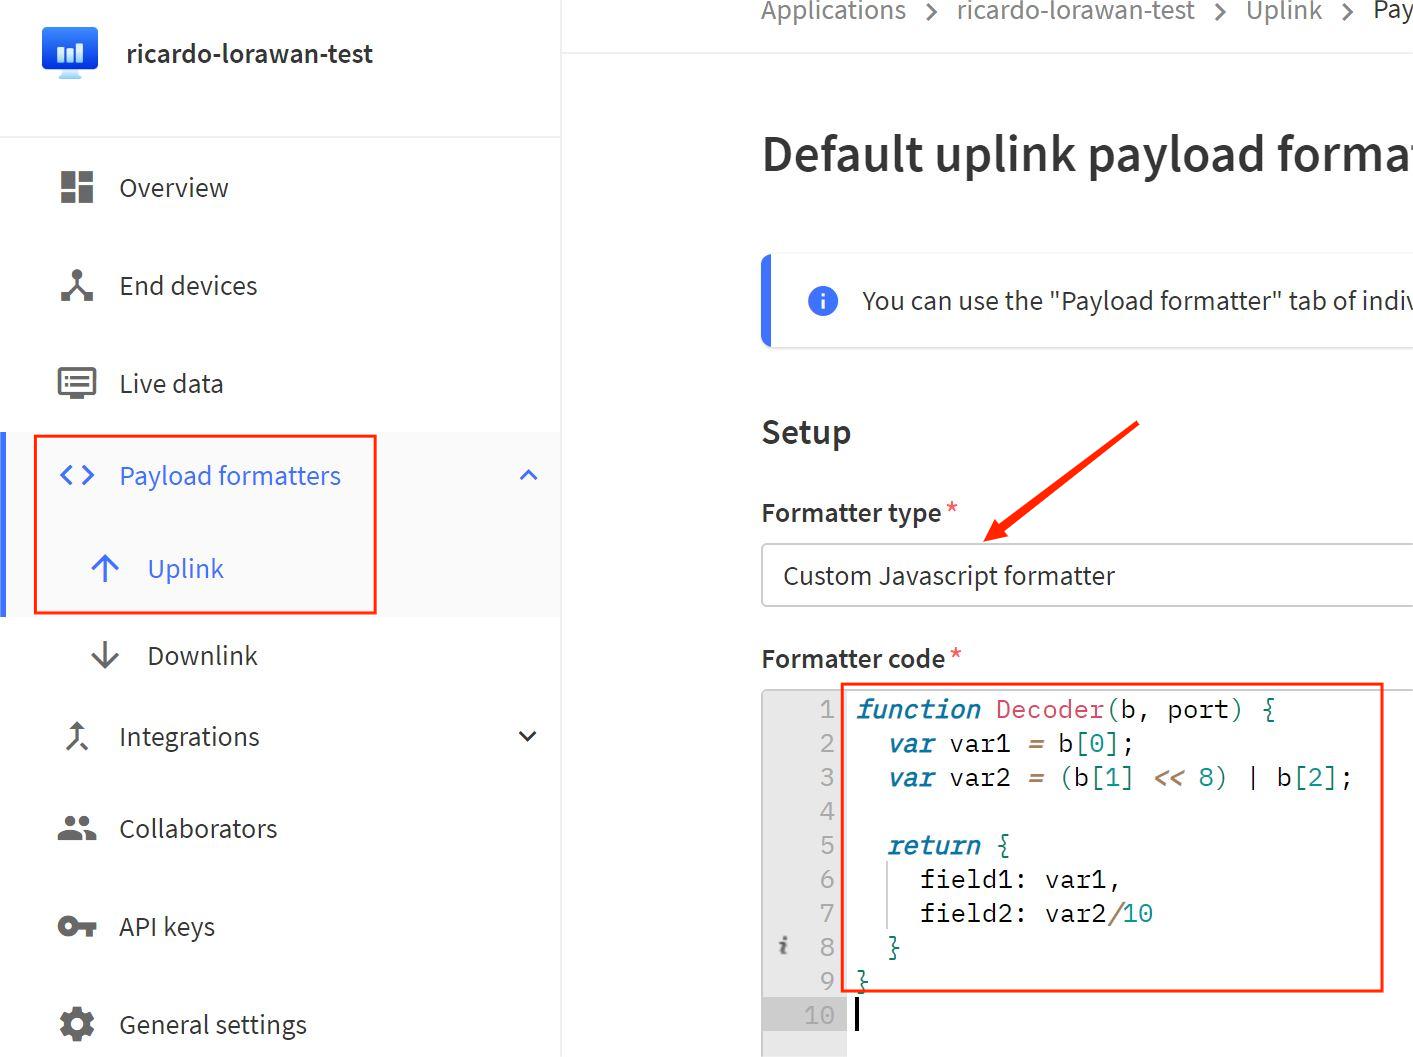
11.On the device page, it is necessary to set the payload formatters for decode the payload LoRaWAN node transmitted. Choose the Uplink and select the Javascript. Type in the following code and save.
function Decoder(b, port) {
  var var1 = b[0];
  var var2 = (b[1] << 8) | b[2];

  return {
    field1: var1,
    field2: var2/10
  }
}
12.The TTN application setting is finished.
- LoRaWAN Gateway
1.Configure the LoRaWAN router to TTN gateway, and set the operating frequency of LoRa.
2.Power it and put it aside.
- Maduino Zero LoRaWAN Node
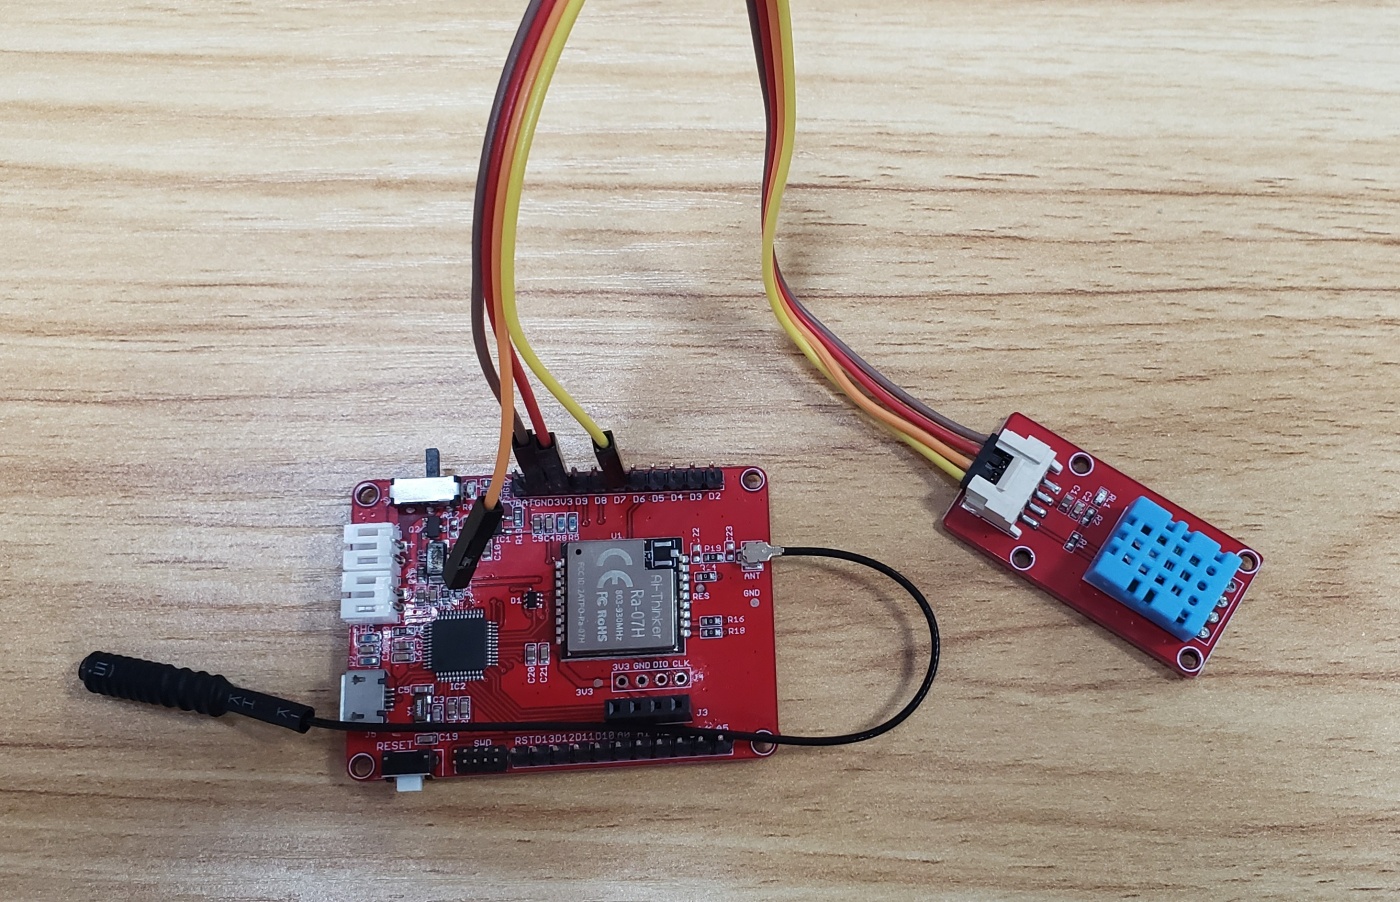
1.Follow the below list to connect the DHT11 module to Maduino Zero LoRaWAN Node.
| LoRaWAN Node | DHT11 |
|---|---|
| 3V3 | VCC |
| GND | GND |
| D7 | DATA |
2.Open the code obtained from Github with Arduino IDE.
3.Select the development board("Arduino Zero") and port.
4.Replace the three parameters(Device EUI, APP Key, APP EUI) to yours in the code.

5.Verify and loading it.
6.Tips: Below some AT commands used in the code.
AT+CDEVEUI=XXXXXX  Set the device EUI to XXXXXX
AT+CAPPEUI=XXXXXX  Set the APP EUI to XXXXXX
AT+CAPPKEY=XXXXXX  Set the APP KEY to XXXXXX
AT+CJOINMODE=0     "0" means to set the JOIN mode (the way of connecting the LoRaWAN)to OTAA.
AT+CJOIN=1,0,10,1  First "1" means to enable the JOIN, "0" means to turn off the auto-connect, "10" means the circle is 10S, "1" means sending one time.
AT+DTRX=1,2,5,XXXXX  "XXXX" is the string transmitted.
Note: When the LoRaWAN module work in OTAA mode, the operation frequency will be automatically set to the same frequency as the matching router, if your router frequency is 868Mhz, the module will work in 868Mhz that the LoRaWAN module support.
- Result
1.Wait for a minute, you can view something received in TTN.
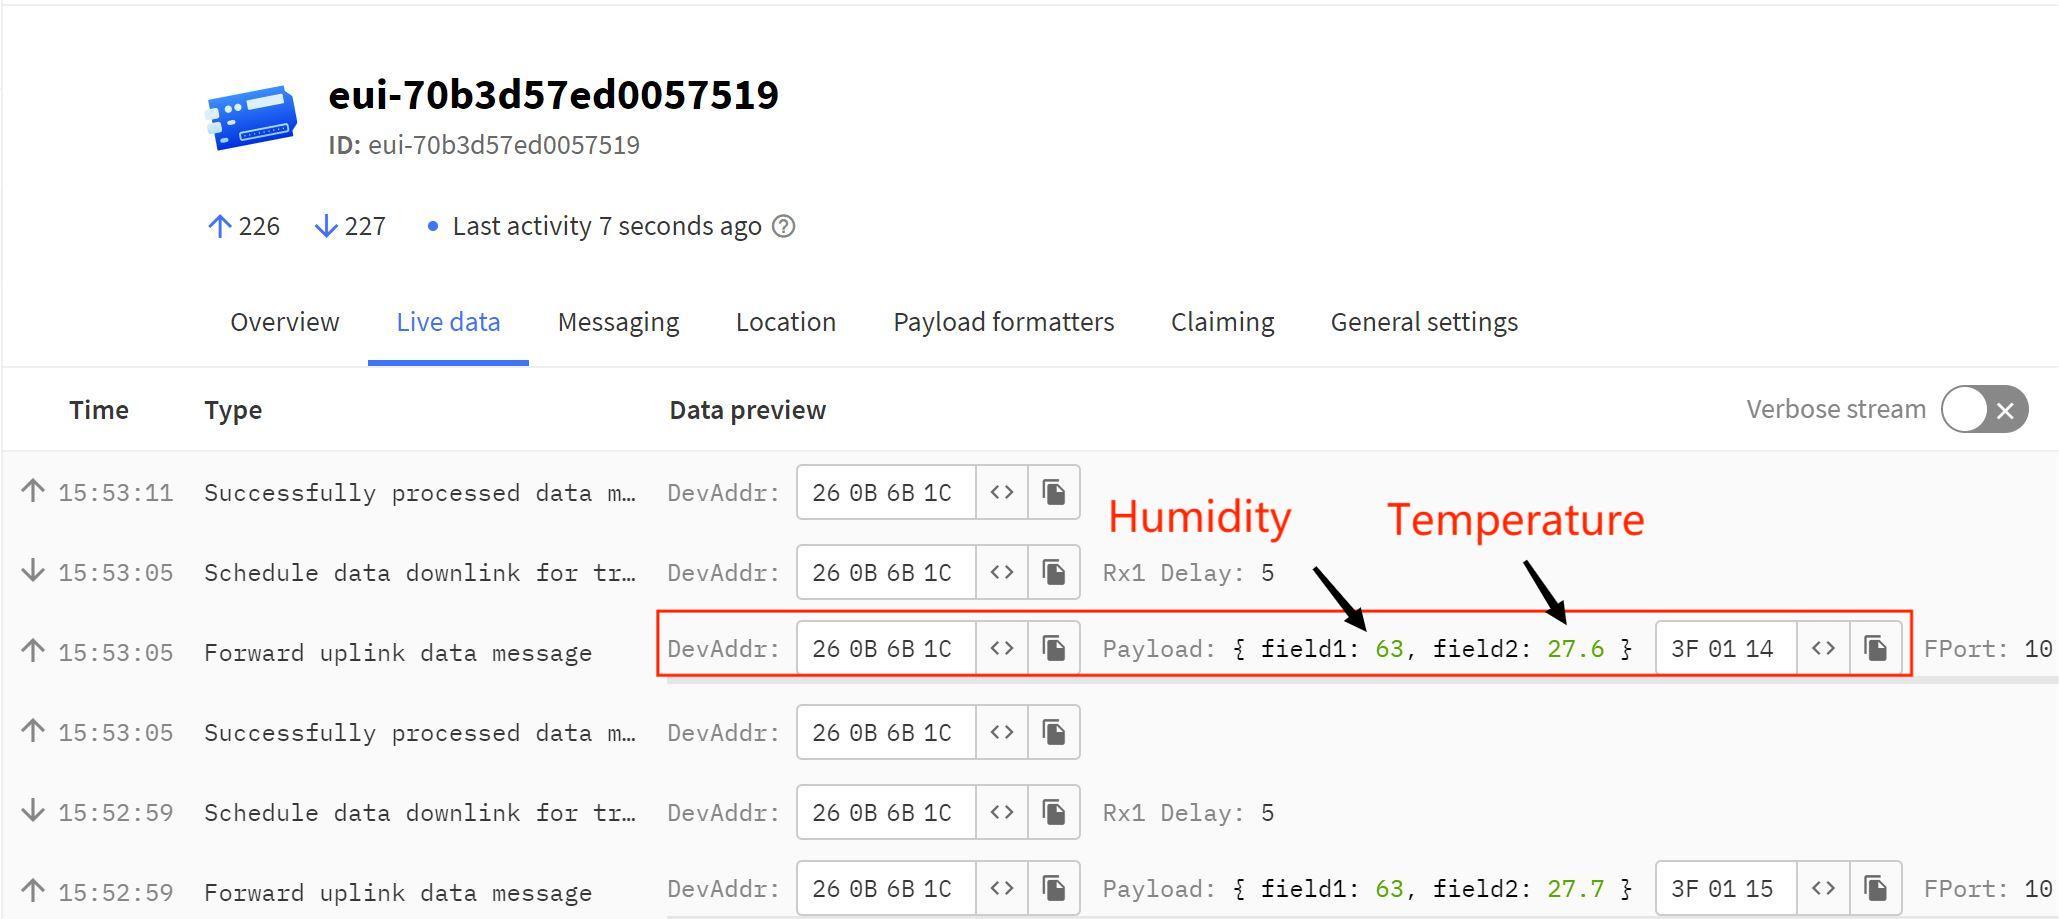
2.As the picture, the original payload is 3F0114, the date after format decoded is 63 and 27.6, which means the temperature is 27.6 ℃ and humidity is 63%.
5. SD card test
1.Plug SD card into the slot onboard, and upload the code (lorawan_test_SD.ino) to the board.
2.Reset the board to execute the code, check the serial monitor of Arduino IDE that it would print something.
3.Pull out the SD card, check the SD card whether it has the test.txt file by PC.
6. F&Q
You can list your question here or contact techsupport@makerfabs.com for technology support. Detailed descriptions of your question will be helped to solve your question.