Maduino LoRa Radio
1. Introduction
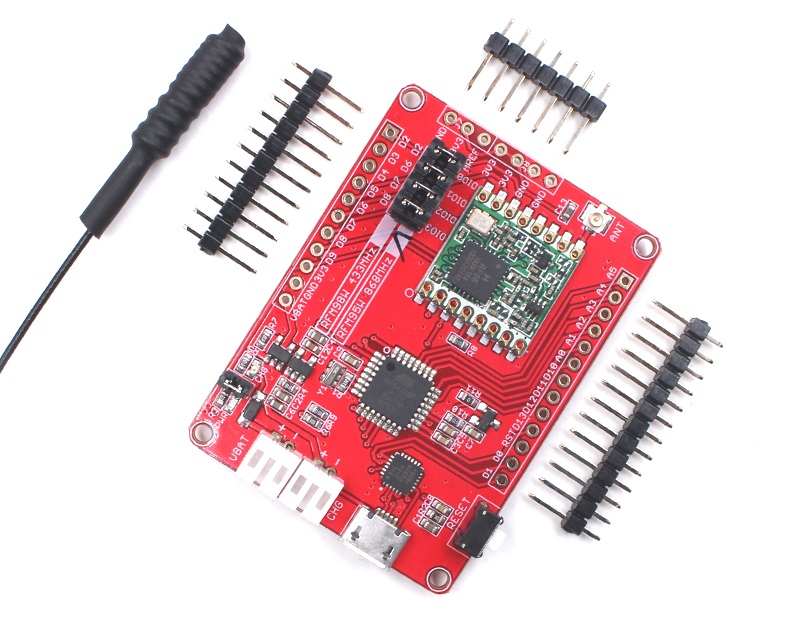
Maduino Lora Radio is an IoT (Internet of things) Solution based on Atmel's Atmega328P MCU and Lora module. It can be a real project for IoT projects(especially long-range, low power application ) such as smart farmer, smart warehouse, smart community, etc.
The Maduino Lora Radio based on the Arduino, users can program it with Arduino IDE, which is very easy especially suit for the none-programmers. There are also a guide for users to learn how to create the first IoT project with this board, with which the starters can learn the hardware and programming skill quickly. This guide helps you with the basic usage of Maduino Lora Radio.
Model:OAC915MLR
- Classic ATMEL AVR 8-bit Atmega328P
- USB-to-Serial: CP2104
- Powered by lithium battery(3.4-4.2V) or Micro USB cable
- Digital I/O Pins: 14
- Analog Input Pins: 6
- Flash Memory: 32KBytes of which 2KBytes used by bootloader
- RAM: 2KBytes
- EEPROM: 1Kbytes
- Clock Speed: 8 MHz
- Interface: I2C/SPI/UART/ADC/
- Arduino Compatible: You can play it with Arduino IDE
- Working Temperature: -20 ~ +85℃
- Default baud rate: 9600bps
- Size: 40*55mm
2. Interface Function
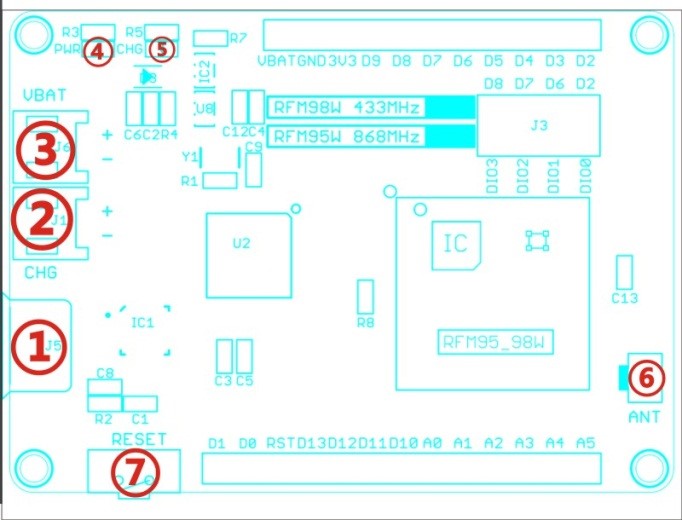
①Micro USB: USB to serial communication and supply power
②CHG: 5V power input, can connect the solar panel to charge the lipo battery
③VBAT: 3.7V Lipo battery connector
④PWR: Power indicate
⑤CHG: Charge indicate
⑥ANT: Lora Antenna
⑦RESET: Reset button for ATMega328P
3. Usage
Warning: Don’t operate anything when the board supplied on (That is, plug or unplug the Antenna or Sensor, in case of short-circuiting that may burn the IC down.)
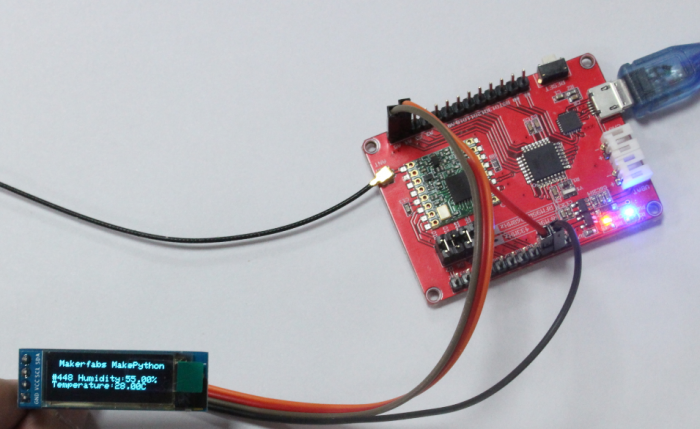
We will use one of Maduino Lora Radio board transmit temperature and humidity via Lora radio, and another Maduino Lora Radio shows the things on OLED Screen after received the message.
Prepares:
| Item | Quantity |
|---|---|
| Maduino Lora Radio | 2 |
| Lora Radio Antenna | 2 |
| Micro USB cable | 2 |
| Dupont Line | 7 |
| DHT11 Sensor | 2 |
| 128*32 OLED Display Screen | 1 |
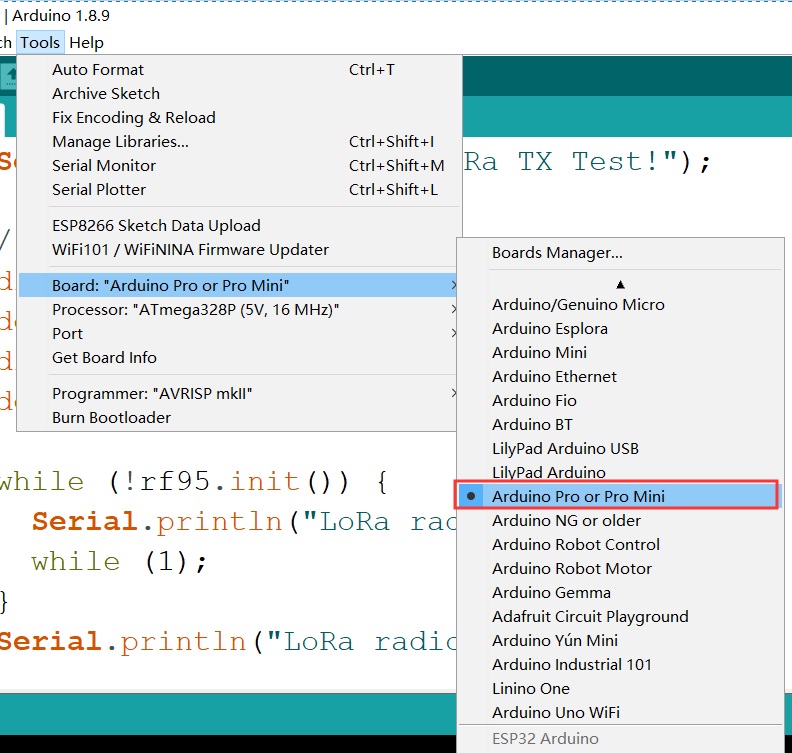
1.Open Arduino IDE, select Arduino Pro or Pro Mini in Boards
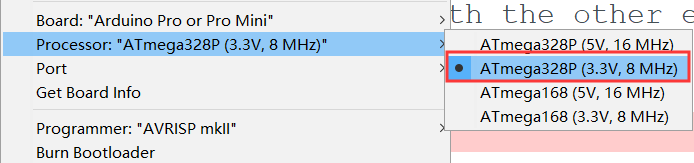
2.Select Atmega328P(3.3V,8MHz) in Processor and correct Port
3.Download the RadioHead file, click Add. ZIP.Library, select RadioHead.
4. Lara Radio Transmitter Programming:
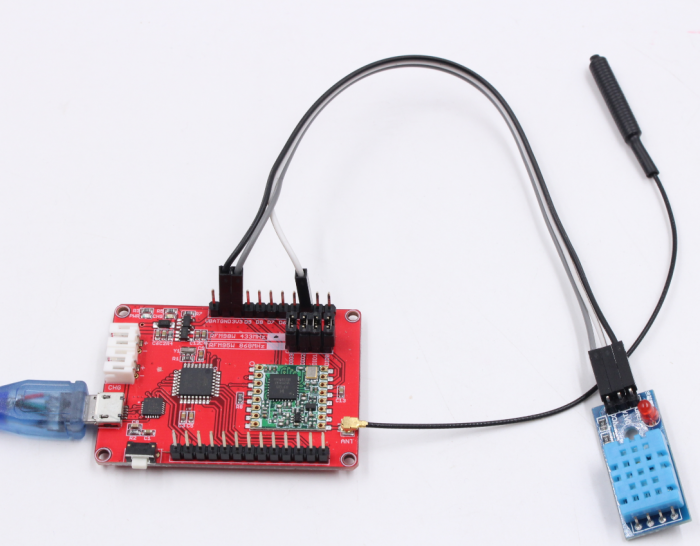
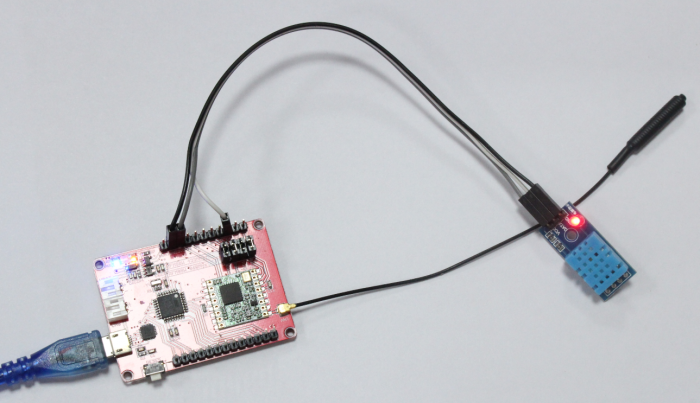
Connect the Maduino Lora board to DHT11 Sensor as:
| Maduino Lora Radio | Maduino Lora Radio |
|---|---|
| 3V3 | VCC(Grey Wire) |
| D4 | DATA(White Wire) |
| GND | GND(Black Wire) |
Plug Lora Radio Antenna and Micro USB Cable
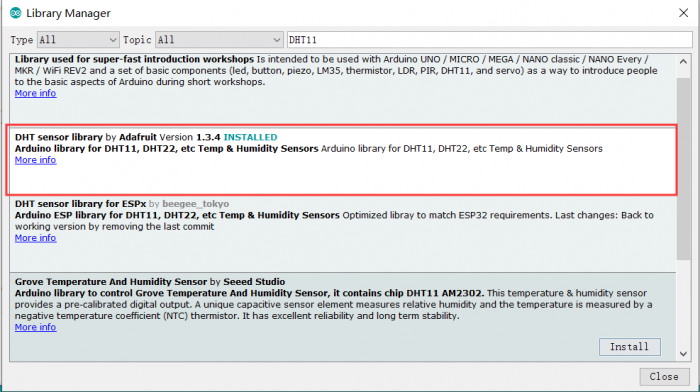
Install DHT sensor library in Library Manager. If you had installed it, go to the next step.
Open Program TransmitterDHT11.ino
- If your board is Maduino Lora Radio 868Mhz, Modify the macro
#define RF95_FREQ 868.0 from #define RF95_FREQ 433.0

Click the Verify button to compile it.
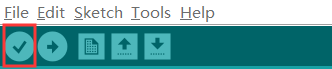
If there are no errors, it will show done compiling.

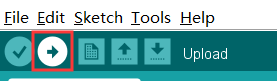
Click Upload button to upload firmware to the Maduino Lora Radio board.
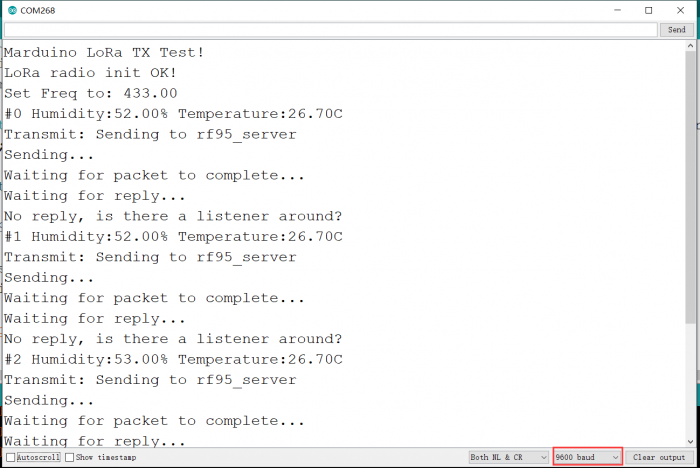
If it runs okay, open Serial Monitor we can see something like this:
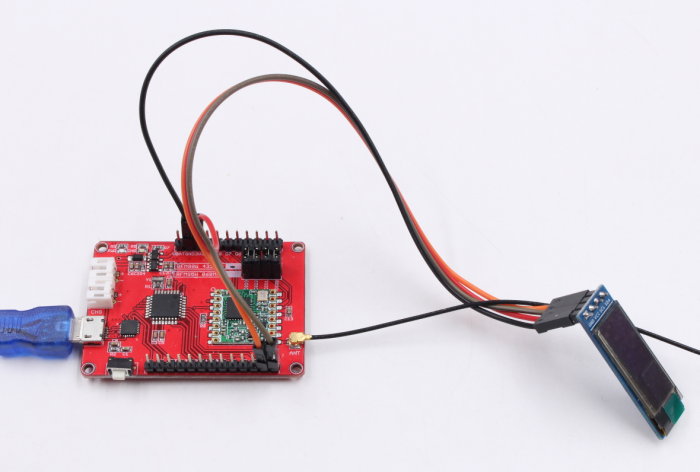
5.Lora Radio Receiver Programming
- Connector an OLED to Maduino Lora board as:
| Maduino Lora Radio | OLED |
|---|---|
| A4 | SDA |
| A5 | SCL |
| 3V3 | VCC |
| GND | GND |
Plug Lora Radio Antenna and Micro USB Cable.
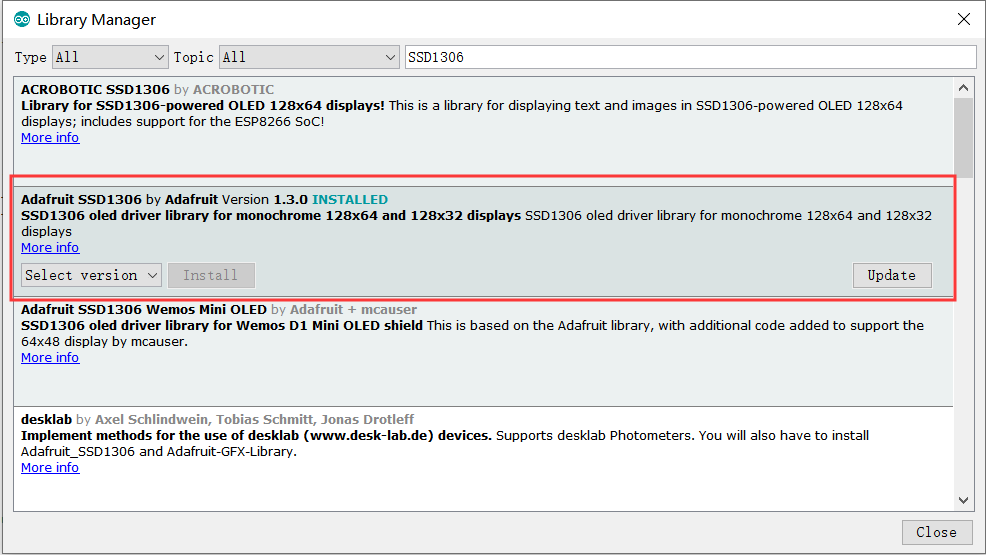
Install SSD1306 library in Library Manager. If you had installed it, go to next step.
Open the program ReceiverOLED.ino
- If your board is Maduino Lora Radio 868Mhz, Modify the micro
#define RF95_FREQ 868.0 from #define RF95_FREQ 433.0

Click Verify button to compile it.

If there no errors, it will show done compiling.

Click Upload button to upload firmware to the Maduino Lora Radio board.

6. Result
The Transmitter will detect the humidity& Temperature and send the testing result via Lora 433/868Mhz frequency. And the receiver will receive the result and show them in the OLED. The max wireless transmission distance could be, as Makerfabs measure, up to 2km.
4. FAQ
You can list your question here or contact with techsupport@makerfabs.com for technology support. A detailed descriptions of your question will be helped to solve your question.
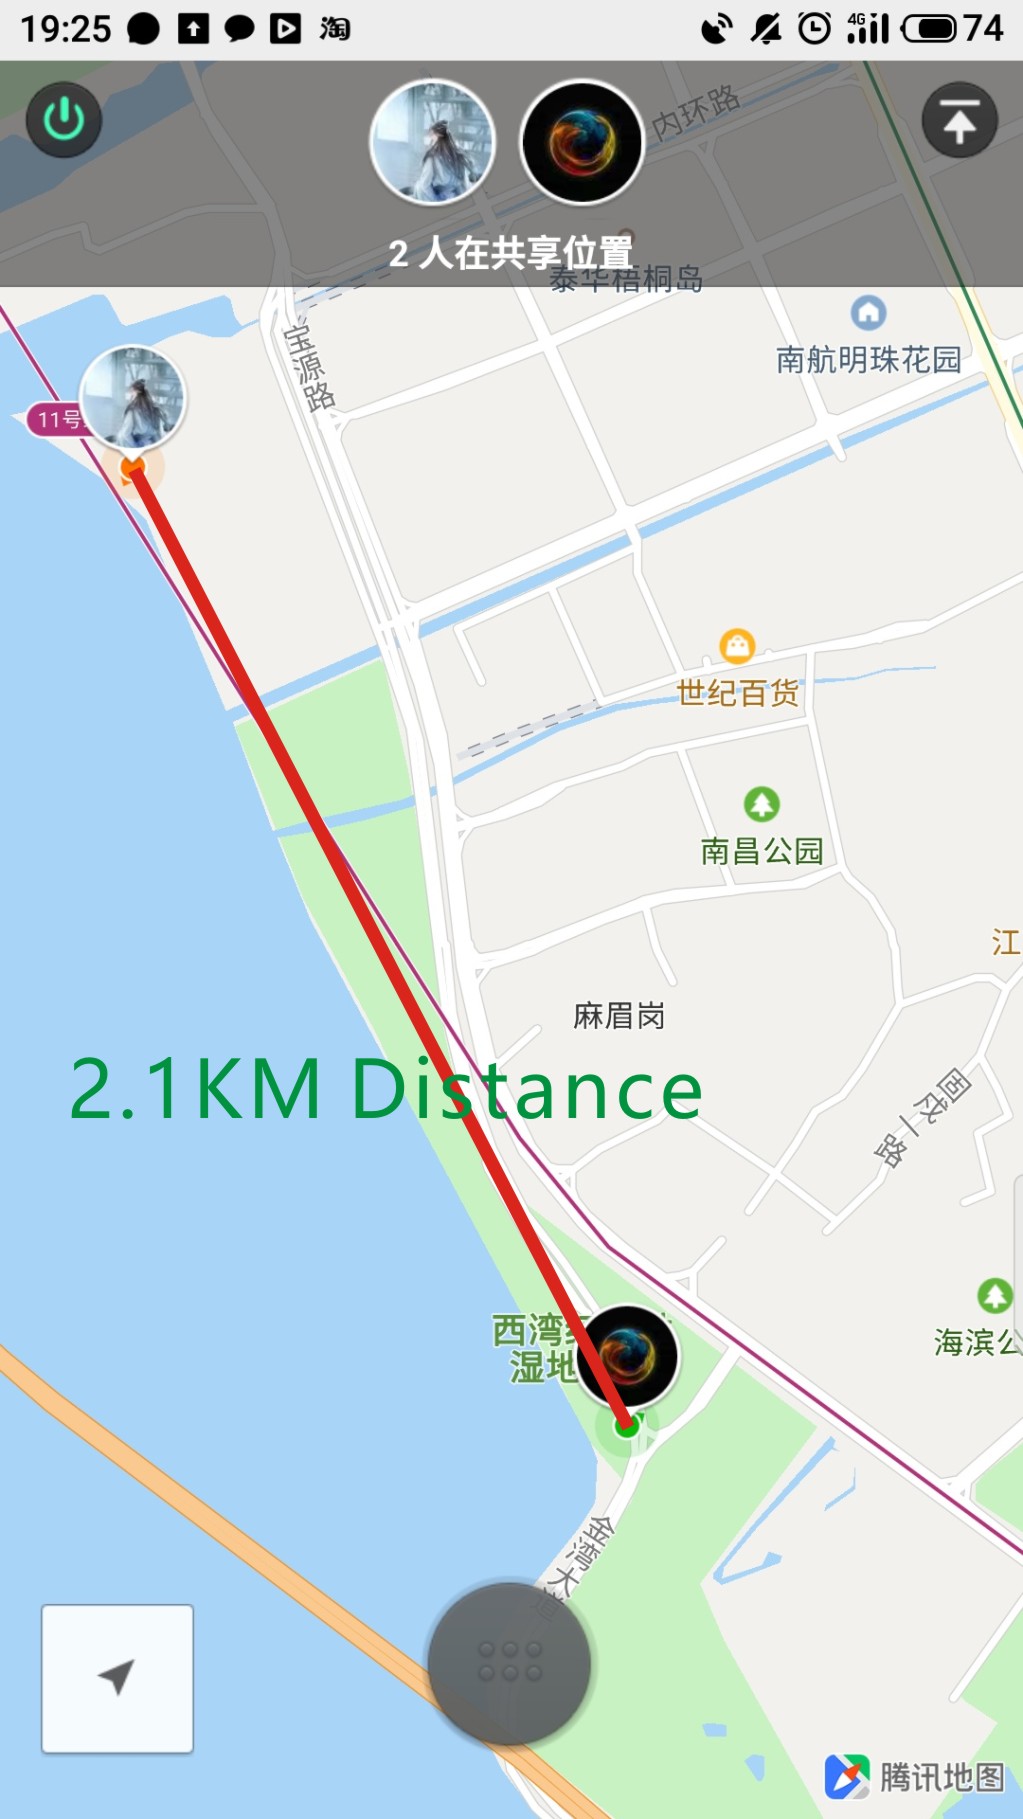
The rang test blog:https://www.makerfabs.cc/article/maduino-lora-range-testing.html
We test it 2.1Km(the rssi -104dbm) when we get the end of the coastline, If the sensitivity can be reach to -148 dBm as descripted in datasheet, the rang may be much longer than we tested.
Some changes we made as follows:
1.Open the Arduino Library after you install Radio Head Library.
Note: It often located in C:\Users\username\Documents\Arduino\libraries\RadioHead
2.Modify the codes like below in RH_RF95.cpp
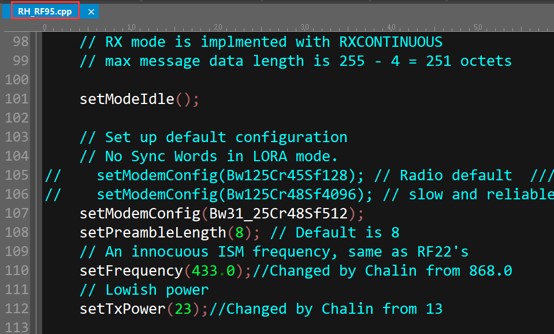
Change the Frequency according to your board. The tested Maduino Lora Radio board is 433MHz Frequency.