How to use AC Dimmer for Home Assistant
This document provides detailed instructions on how to connect the AC_DIMMER device to your deployed Home Assistant environment.
1. Prerequisites
Hardware:
- A Raspberry Pi with a successfully installed Docker environment, including Home Assistant and ESPHome.
- An AC_DIMMER device.
- A USB-C cable.
Software:
- An SSH client (e.g., PuTTY, Termius, or your system's built-in terminal).
- A modern web browser (Chrome or Edge recommended).
- ESPHome Version: This tutorial is based on
2025.7.xor newer.
2. Preparation of Raspberry Pi
At first, we need a device equipped with Home Assistant system, and which we choose is DIY with Raspberry Pi.
Please follow the steps below to complete the Raspberry Pi configuration
- Step1: Install Raspberry Pi OS
- Step2: Install Docker on Raspberry Pi
- Step3: Install Home Assistant and ESPHome with Docker
3. Creat a new AC Dimmer device in ESPHome
1.In a web browser, access the ESPHome web interface, usually located at your-raspberry-pi-ip:6052.
2.On the main page, click the NEW DEVICE button.

3.In the pop-up dialog, enter a name for the new device (e.g., TEST) and click NEXT.
Note: The first time you create a device with ESPHome, you will be prompted to enter your Wi-Fi SSID and password for network connectivity.

4.Click SKIP THIS STEP.

5.On the device type selection screen,choose ESP32.

6.Click SKIP to complete the creation process.

7.After completing these steps, you will see a new device card on the ESPHome main page.

8.Upload the common_components folder provided by Makerfabs to your Raspberry Pi.
9.Use the scp command to upload the folder to the ESPHome configuration mapping directory.
Tip: Please adjust the mapping directory according to your actual setup.
# Example command: Transfer the local common_components folder to the Raspberry Pi
scp -r <path_to_local_common_components_folder> <your_username>@<your_raspberry_pi_ip>:<remote_path>
10.After the upload is successful, please verify that your directory structure is as follows:
/home/pi/docker/esphome/config/
├── test.yaml
├── common_components/
│   └── arduino_dimmer/
│       ├── arduino_dimmer.h
│       ├── output.py
│       └── __init__.py
└── ... (other configuration files)
11.Below the device card, click the EDIT button to modify the device's YAML configuration file.

-
Overwrite or merge all the configuration content from dimmer.yaml into your own device's YAML file.
-
Click SAVE in the top right corner, then click INSTALL.
12.In the installation options, select Manual download.

13.The system will begin compiling the firmware online. Once successful, select the Factory format option, and the browser will automatically download the binary firmware file (.bin format) for the initial flashing.

4. Flashing
1.Connect the ESP device to your computer using a USB-C cable.
2.In your browser, go to the ESPHome Web Flasher online tool.

3.Click CONNECT, and in the pop-up dialog, select the COM port corresponding to your device and connect.

4.Click INSTALL, select the binary firmware file downloaded in the previous step, and click INSTALL again to begin flashing.

5.After a successful flash, return to the ESPHome main page and click the LOGS button below the device card.
In the log window that appears, you will see the IP address assigned to the device. Please record this IP address, as it will be needed for the Home Assistant integration.
6.Go back to the ESPHome page in Home Assistant and click EDIT on your device.
7.Find the api section and copy the encryption key.
5. Adding the Device to Home Assistant
1.In your browser, access your Home Assistant instance, usually located at your-raspberry-pi-ip:8123.
2.Home Assistant may automatically discover the new device. If it appears under "Discovered," click CONFIGURE. If not, continue to the next step.

3.Click ADD INTEGRATION in the bottom right corner.
4.Search for and select ESPHome.
5.Enter the IP address of your weather station and paste the encryption key you copied when prompted and click SUBMIT.

6.Your device should now be successfully added.
8. Hardware
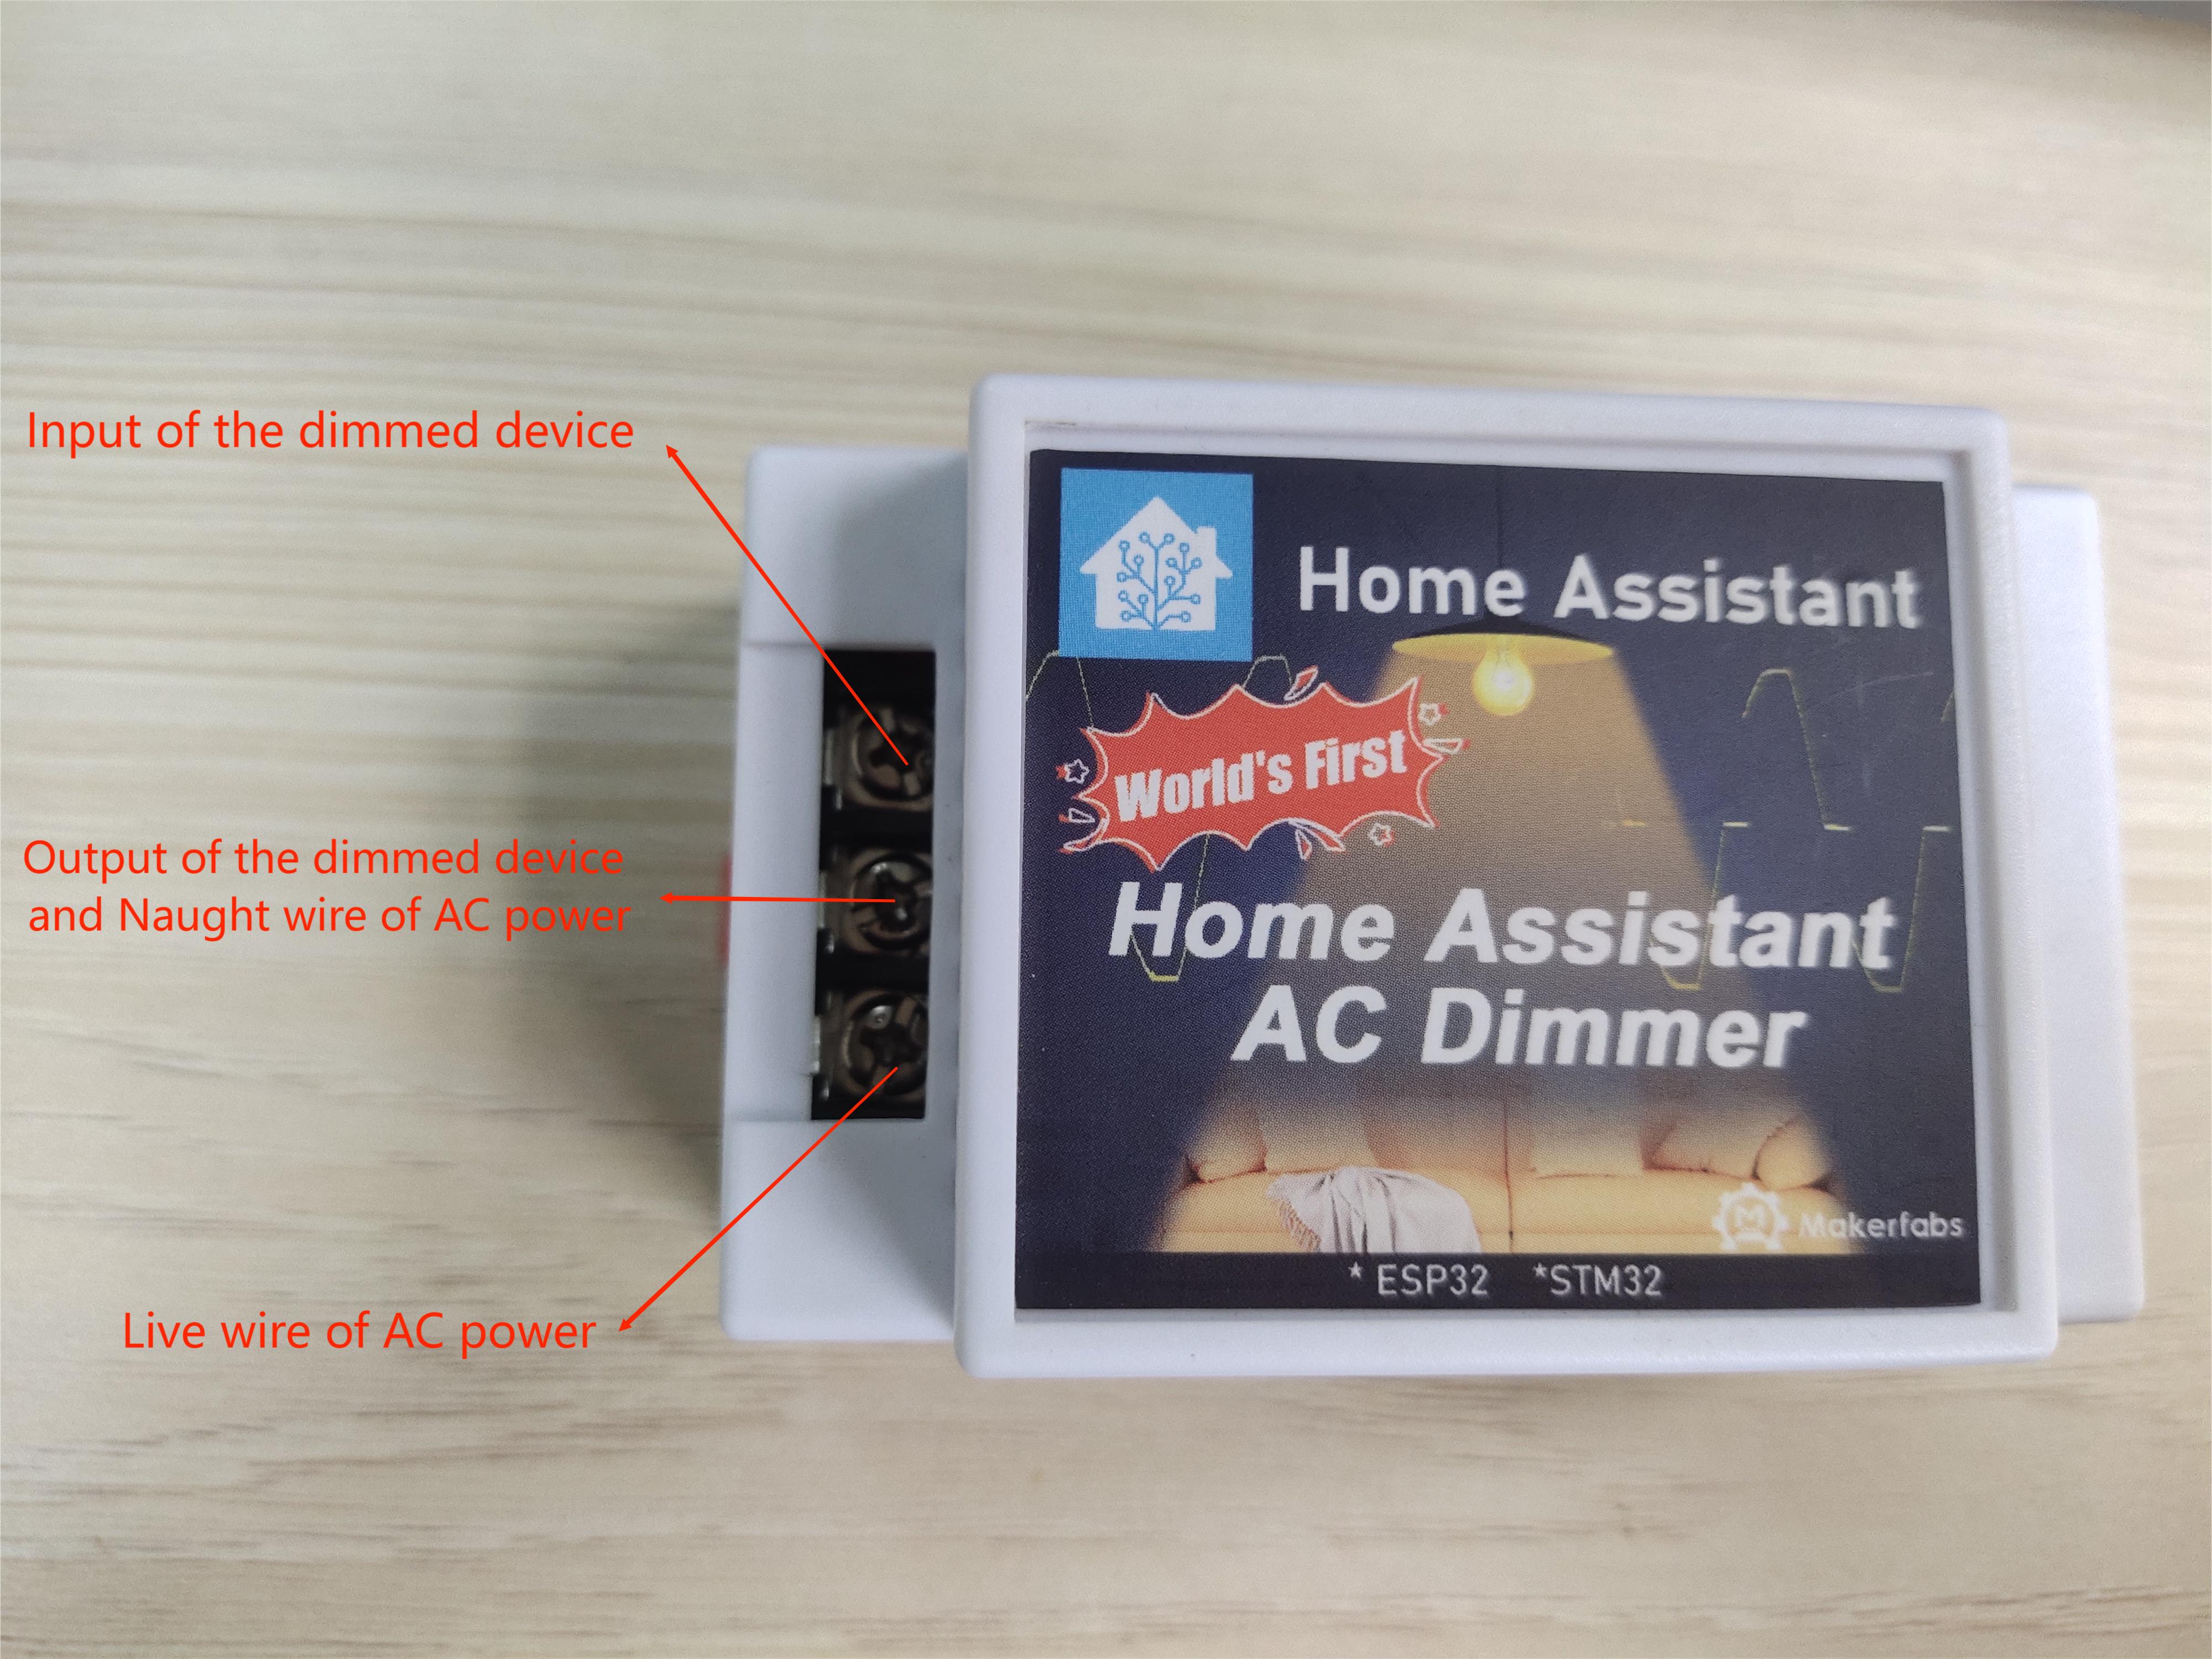 Note, the HA AC Dimmer does not work with LEDs, we recommend using incandescent lamps or devices that use AC power and do not have an internal voltage regulator.
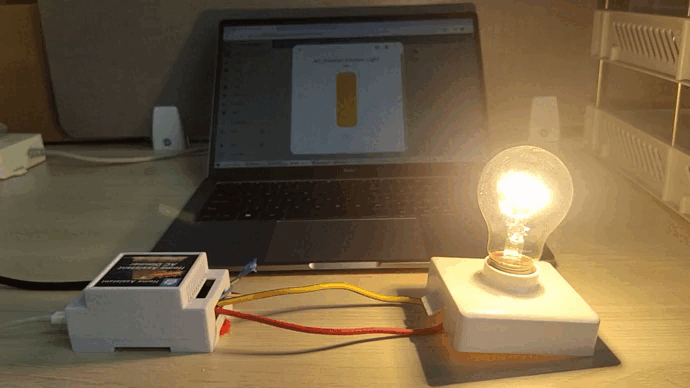
9. Result
10. FAQ
You can list your question here or contact techsupport@makerfabs.com for technology support. Detailed descriptions of your question will be helped to solve your question.