ESPWatch
Introduction
This ESPWatch starter Kit is for the beginners to learn how to create an ESP watch with detailed guide, it is for the starters to dive into the electronic world, with 1~2 hours’ learning, a non-electronic starter can create this ESP watch, to enjoy the joy of creating something by oneself.
The ESPWatch is based on ESP12 WIFI module, it gets the date/ time and the weather forecasting in few days from Internet server, and can also remote control the local instruments, such as Relay/LED/Fan. With this learning, you will learn the basic skill of components soldering/Arduino Programming/WIFI usage/Basic HTTP protocol, the first& easy step to get into the electronic/programming world.
There we also prepared simple case/watchband, so that you can get it works on your wrist within few minutes.
Model:DIYKIT1
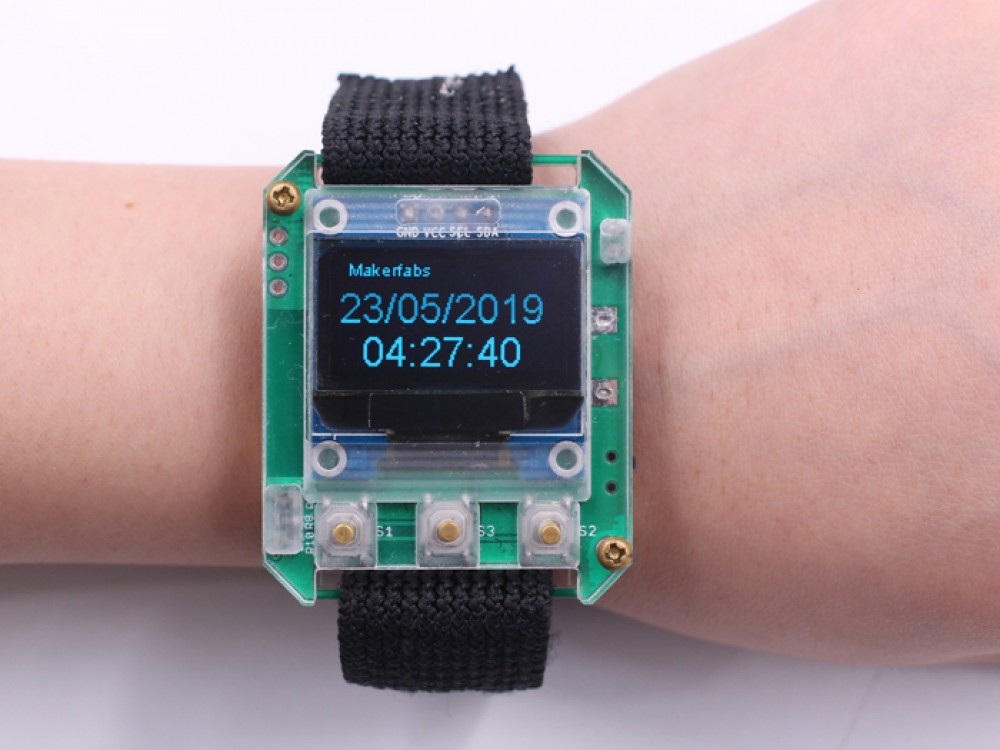
It can be an Internet Watch, with real Date&Time:
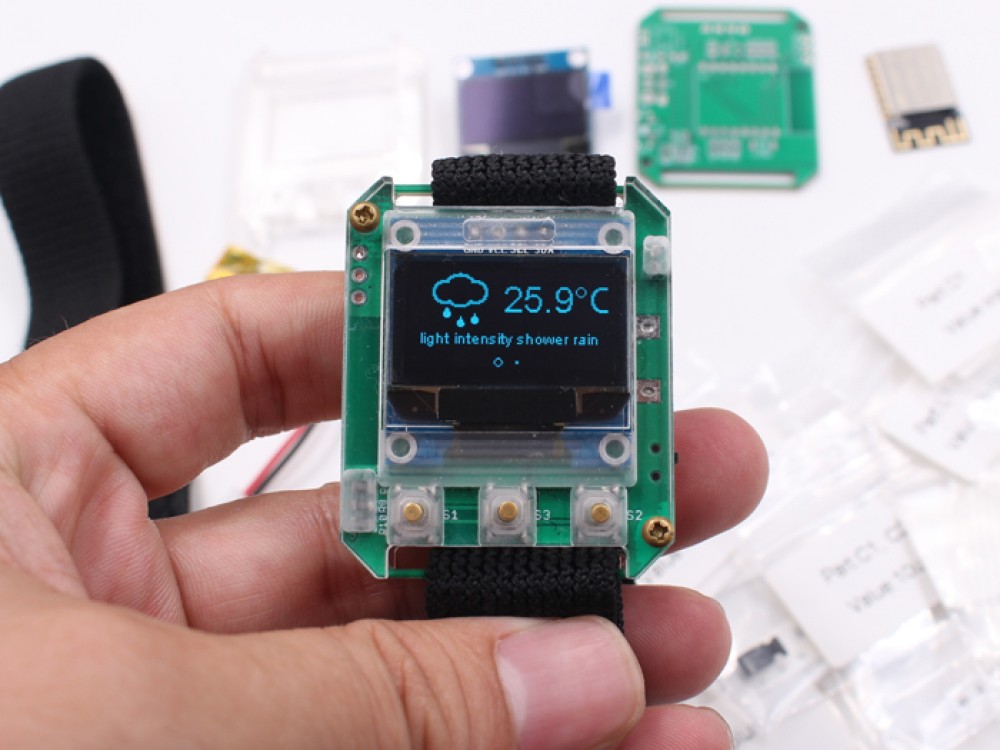
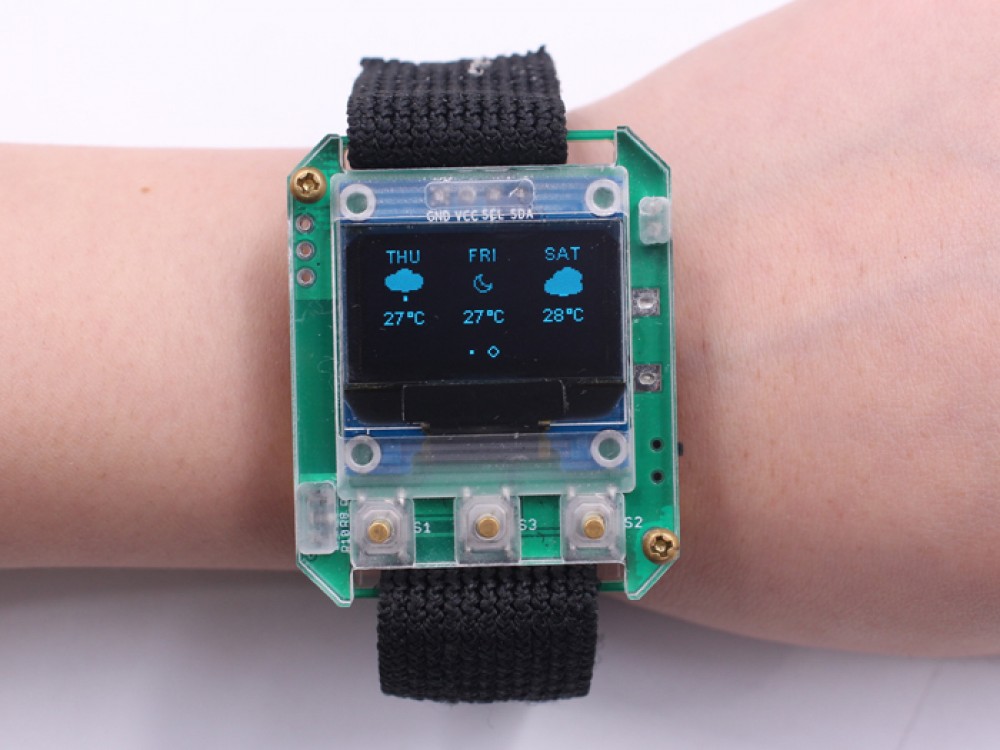
And also a weather forecasting:
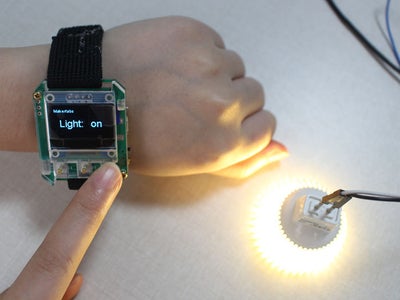
And can be also a remote controller:
Noted: This is a DIY kit, you will need to soldering by yourself.
There the detailed solder guide at : https://www.youtube.com/watch?v=gcKN0VuYRUo&feature=youtu.be
Features
- Kits with detailed guide for learners
- Video for learning
- Based on Arduino IDE/ESP
- Real time watch + weather forecasting + Remote control
- Open hardware+ Open software
- For ages 12+
Package List
- 1 x DIY ESPWatch Components Kit
- 1 x Mechanic case
- 1 x Watchband
- 1 x PL2303 USB2UART Programmer
DIY ESPWatch Guide
DIY ESPWatch Guide
1.Hardware Assembly The ESPWatch is a kit for customer assembling, users should first solder all the components. A soldering iron and some Tin wires are needed.
There the detailed soldering guide on youtube: https://www.youtube.com/watch?v=gcKN0VuYRUo
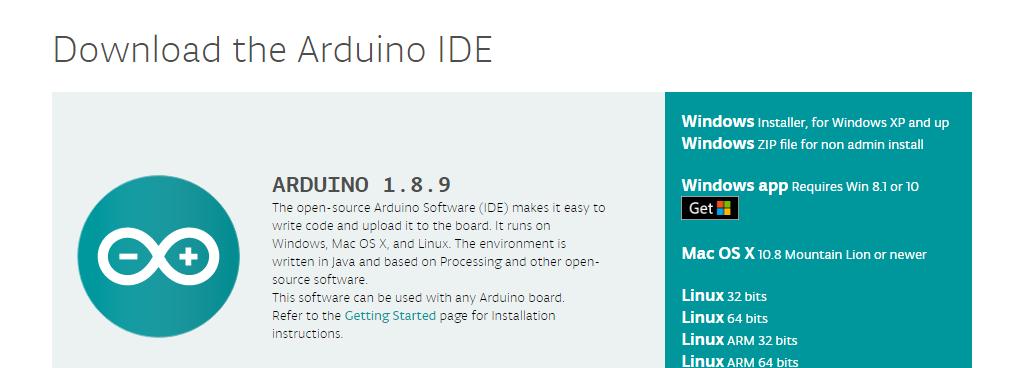
2.Setup Arduino IDE
The ESPWatch is based on the Arduino IDE, if there is no Arduino IDE in your Computer, please download the latest Arduino IDE at:
https://www.arduino.cc/en/Main/Software
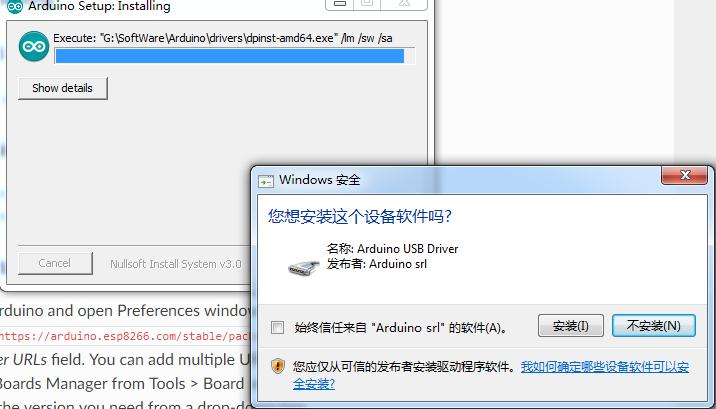
Install the IDE and all the related drivers:
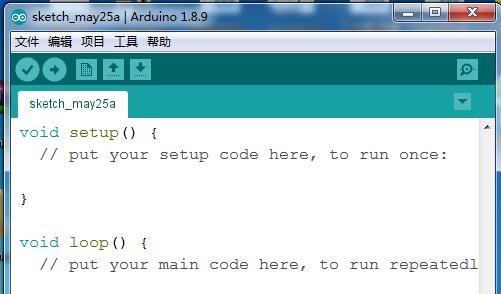
Start the IDE, there would be a simple sketch by default:
3.Add the ESP8266 core into Arduino IDE
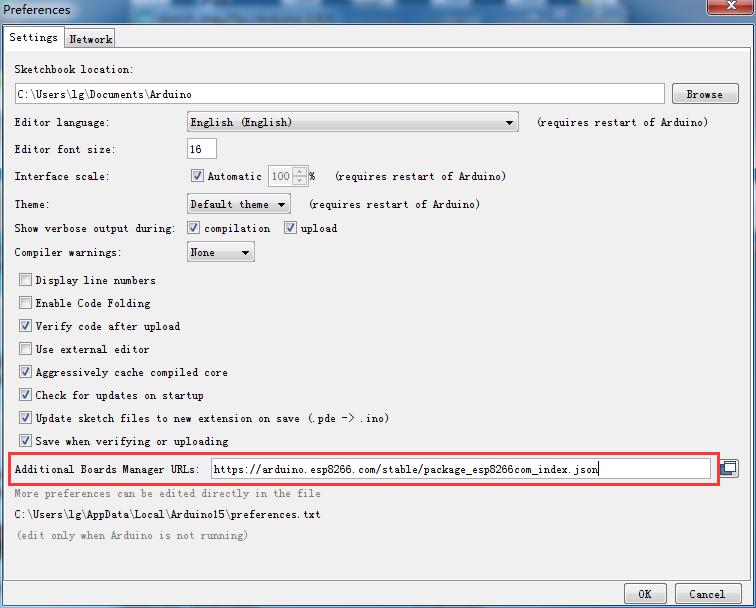
Start Arduino and open the Preferences window, and enter https://arduino.esp8266.com/stable/package_esp8266com_index.json into Additional Board Manager URLs, and click OK.
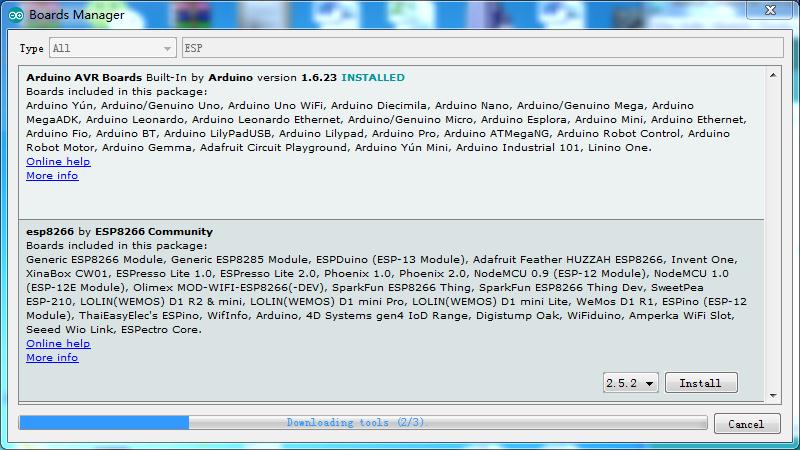
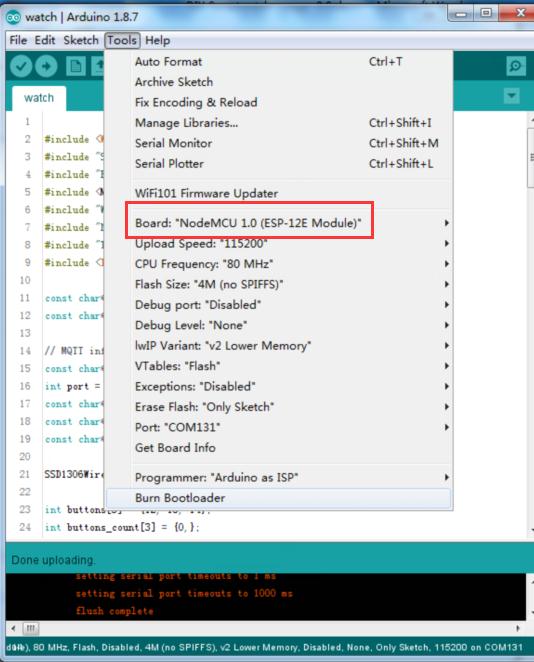
And then you should find the ESP8266 in the Arduino IDE: Tools->board-> boards manager, let’s install it by click the “install”:
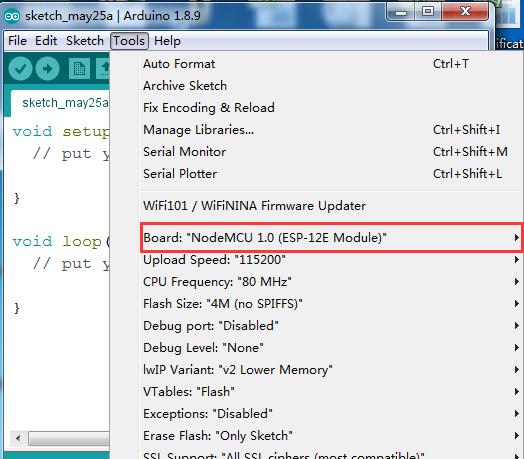
After the installing, you can find the NodeMCU 1.0(ESP12E module) platform at Tools-> Board Menu:
4.Install related library
There at least these libraries need to be installed:
- Ntpclient library
- Arduino-mqtt: https://github.com/256dpi/arduino-mqtt
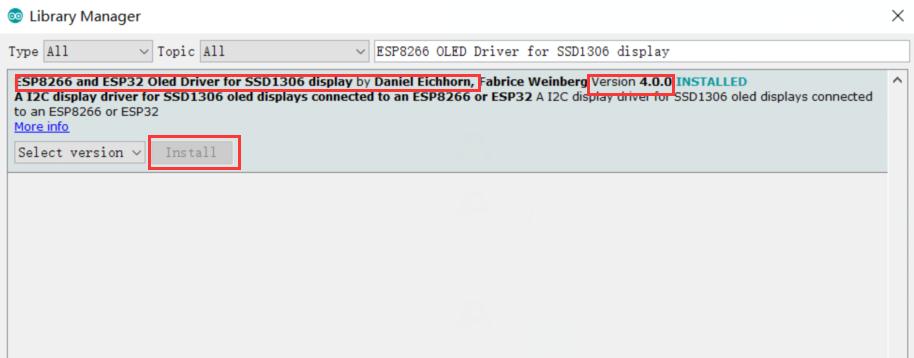
- Thingpulse ESP8266 OLED SSD1306: https://github.com/ThingPulse/esp8266-oled-ssd1306
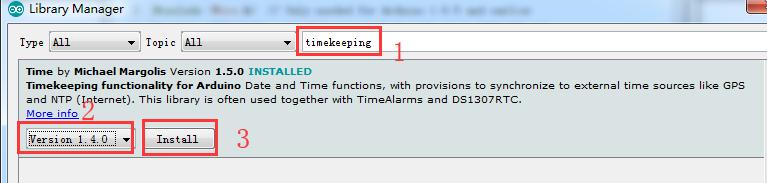
- TimeLib: https://github.com/PaulStoffregen/Time
- ESP8266 Weather Station
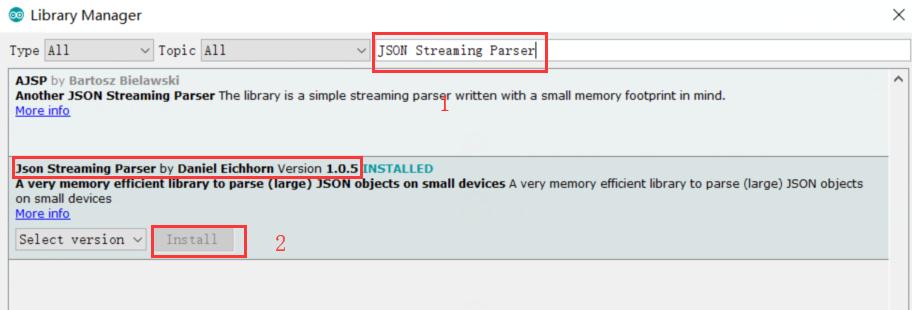
- JSON Streaming Parser by Daniel Eichhorn
We can search "ntpclient","lwmqtt", " ESP8266 OLED Driver for SSD1306 display", "timekeeping", “ESP8266 Weather Station”, ”JSON Streaming Parser” to find these libraries in library manager, and install them.
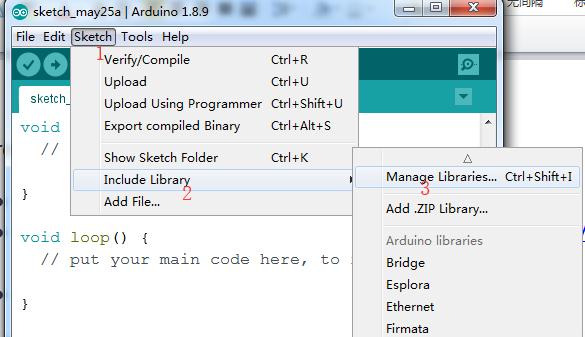
Open the sketch->include library->manage libraries
Search all libraries, and install them all:


5.MQTT register for Time
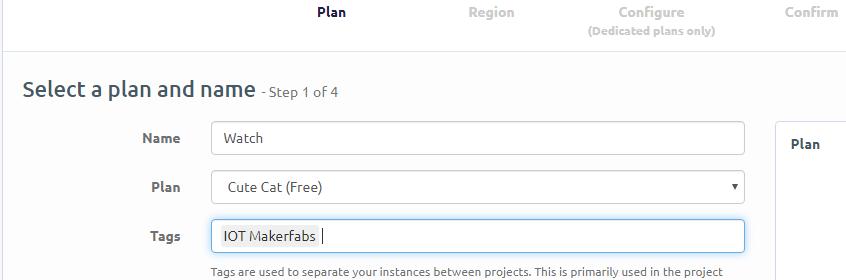
1.Log-in the cloudMQTT(if no, you need to register an Account)
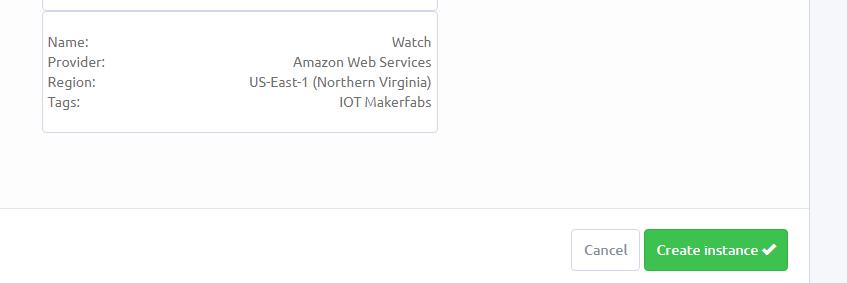
2.And Create a new instance:
Step_1:
Step_2:
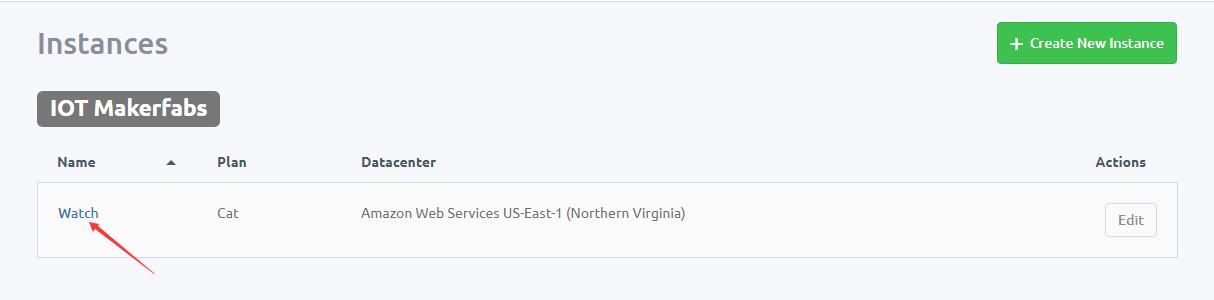
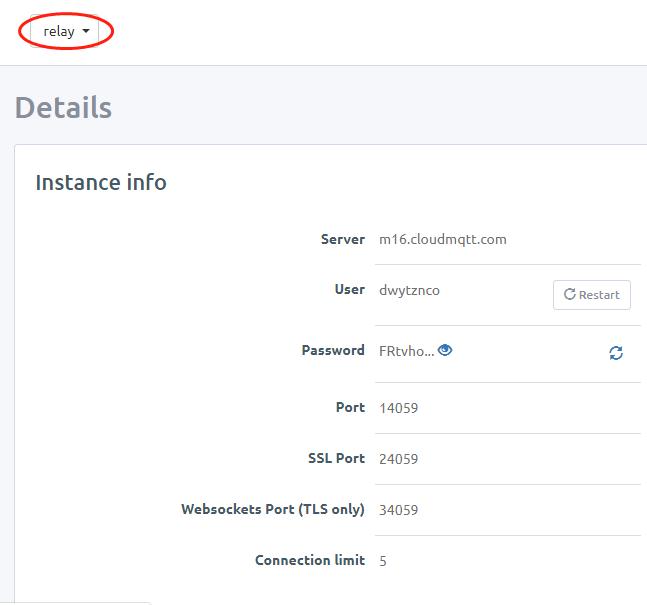
And then here you can get the instance info:
Click the Instance Name:
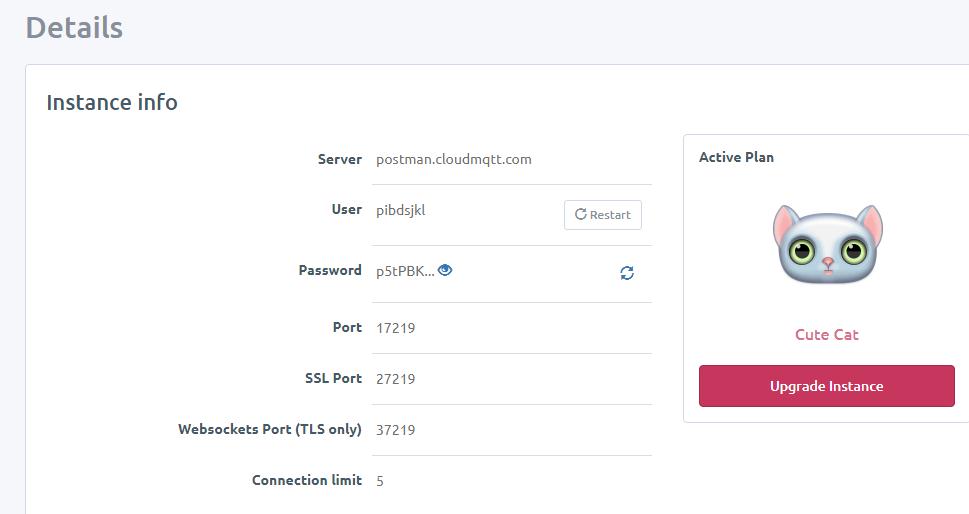
Instance Info:
6.Weather forcastin
We use the thingpulse(https://docs.thingpulse.com/how-tos/openweathermap-key/) to get the weather forecasting data, the final data from OpenWeatherMap (https://openweathermap.org/price).
Let’s use the free data :
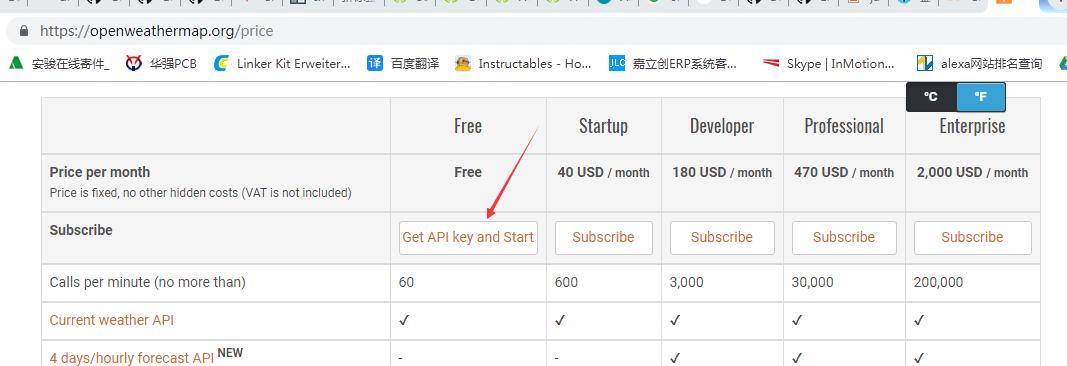
After registering, you will get your API key :
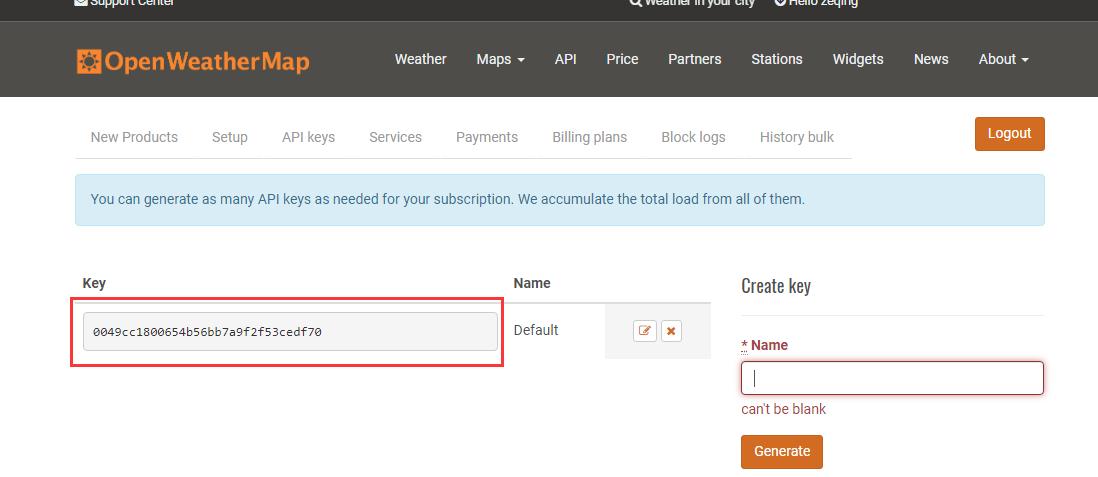
And you can also check your city ID at:

7.Hardware connection
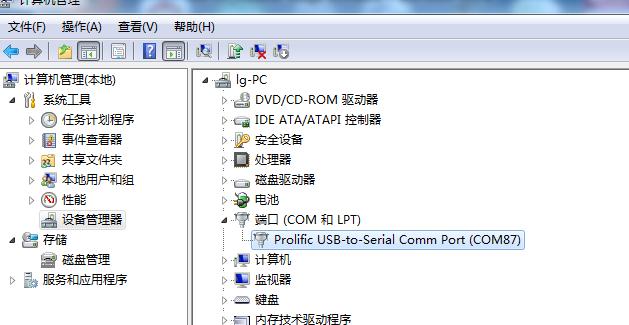
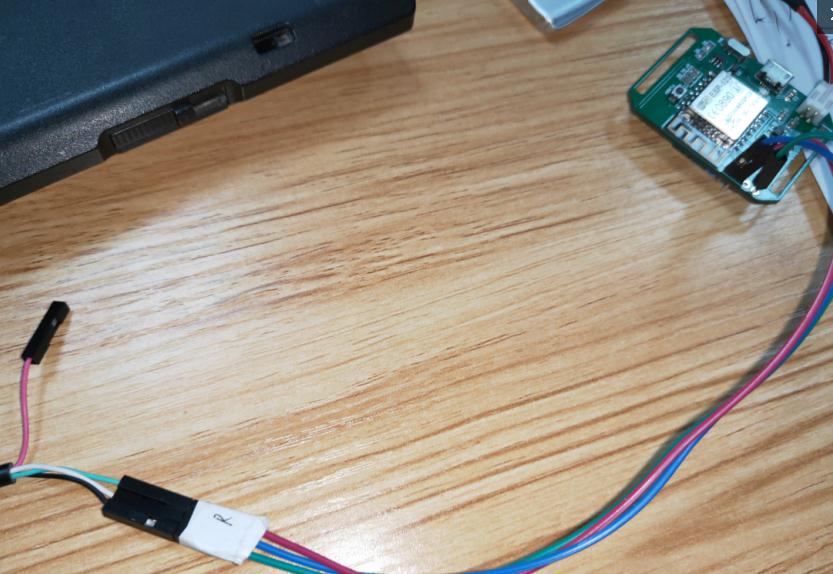
Connect the ESPwatch to PC with PL2303 UART wire, the drivers at: http://www.prolific.com.tw/US/ShowProduct.aspx?p_id=225&pcid=41 After driver installed , it will act as a COMM port:
Connect the PL2303 wire to ESPwatch programming port:
8.Programming
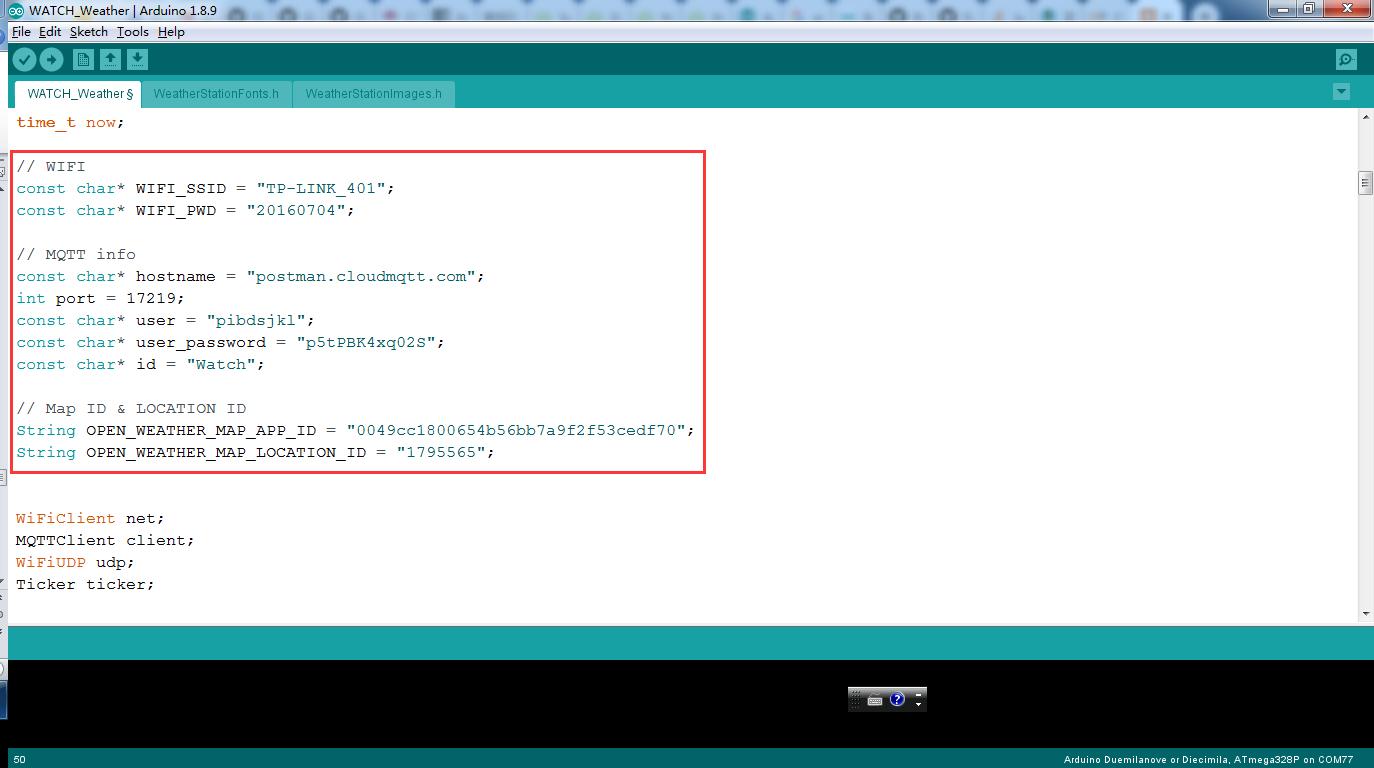
Open the watch.ino sketches:
- Change SSID and password of the Wi-Fi, 2. Modify hostname, port, user and user_password for MQTT, 3. and the weather_map_ID and Location_ID
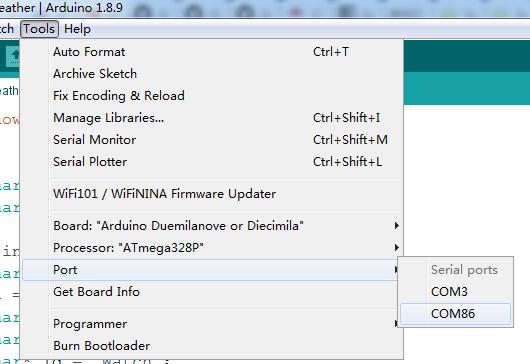
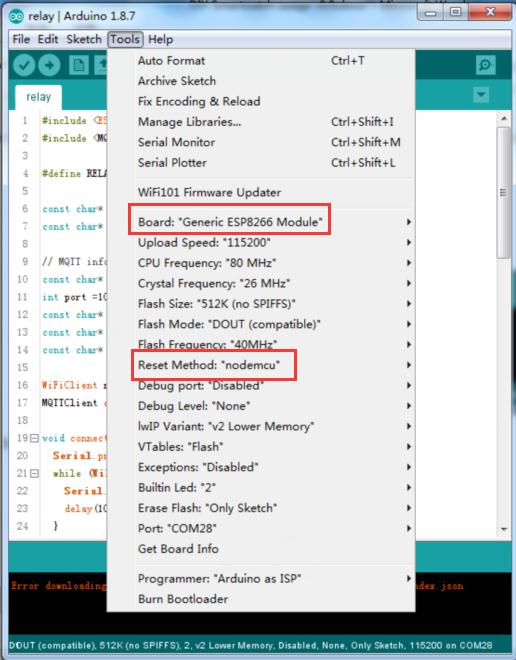
And we can now update the codes to ESPWatch now. Select the right COM port and board in Arduino IDE:
Hold the FLASH button; Power on the ESP8266 by the SW1, while the FLASH button holding on, to put ESP8226 into bootloader mode:

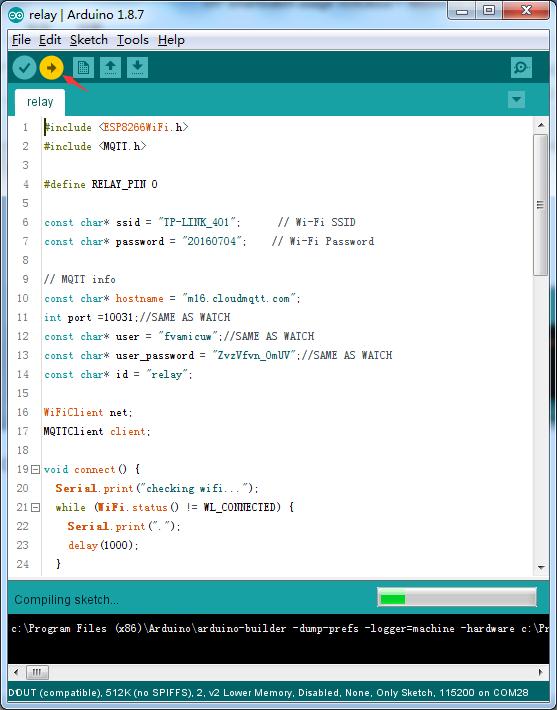
And click the upload to start the programming:
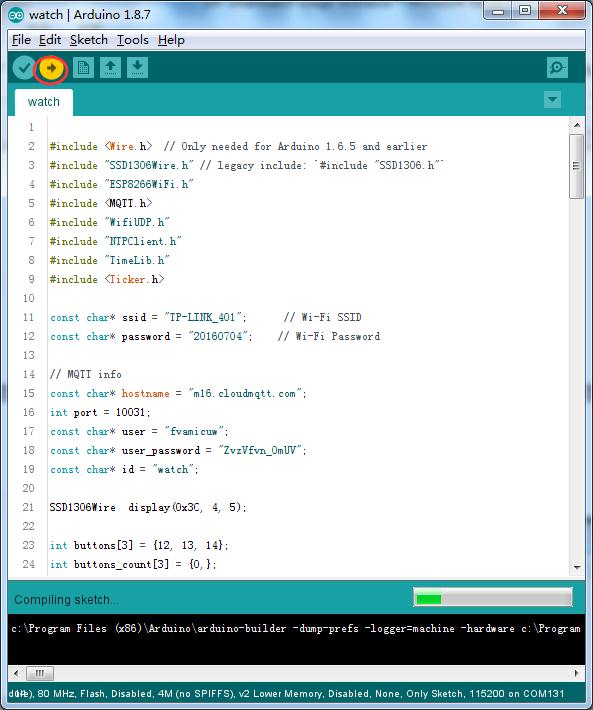
If no exceptions happen, the ESPwatch works!
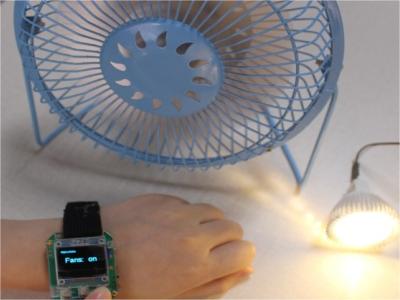
Premuim ESPWatch Remote Control
The ESPwatch can be also used to control other modules, such as the ESP relay: https://www.makerfabs.com/esp-01s-relay-module.html, and thus to create remote control application, such as AC lamp/Fans.
Note that the ESP12S module with relay does not include in the kit, users need to purchase them separately.
1.Create a new MQTT instance
Log in the cloudMQTT(if no, you need to register an Account), and create a new instance:
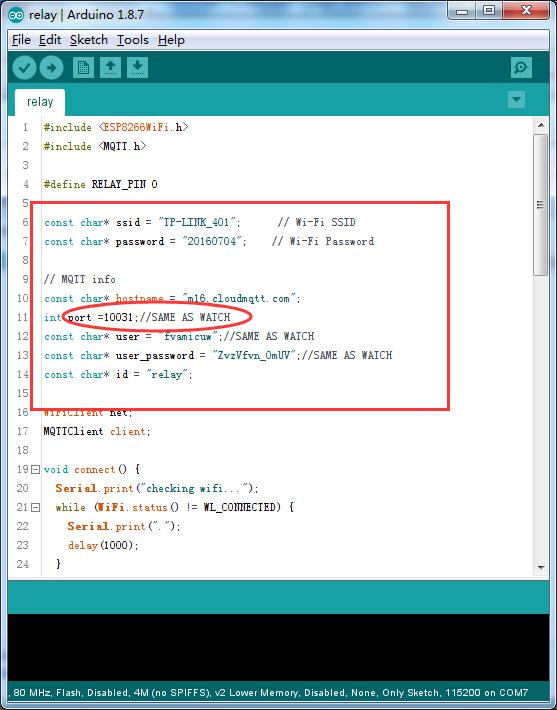
2.Sketch Modification
Open the sketches relay.ino, change SSID and password of the Wi-Fi, and modify hostname, port, user and user_password for MQTT.
Note: port must same as the watch.
3.Programming
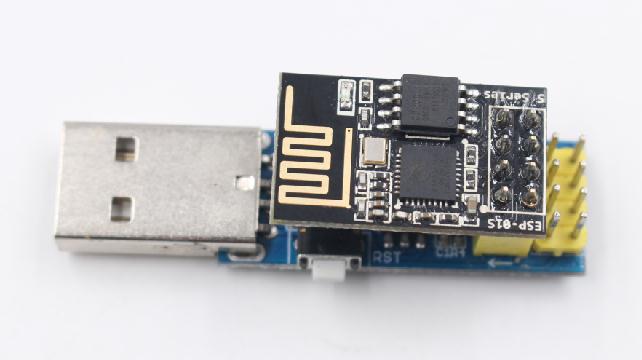
Plug the ESP-01 on the ESP8266 debugger, and program the ESP module, Select the right board to begin the programming
And now you can connect the Relay to your AC lamp/Fan, etc, to make it remote controlled by the ESPWatch.
FAQ
You can list your question here or contact techsupport@makerfabs.com for technology support. Detailed descriptions of your question will be helped to solve your question.