MaTouch ESP32 S3 Rotary IPS Display 1.28 GC9A01
Introduction
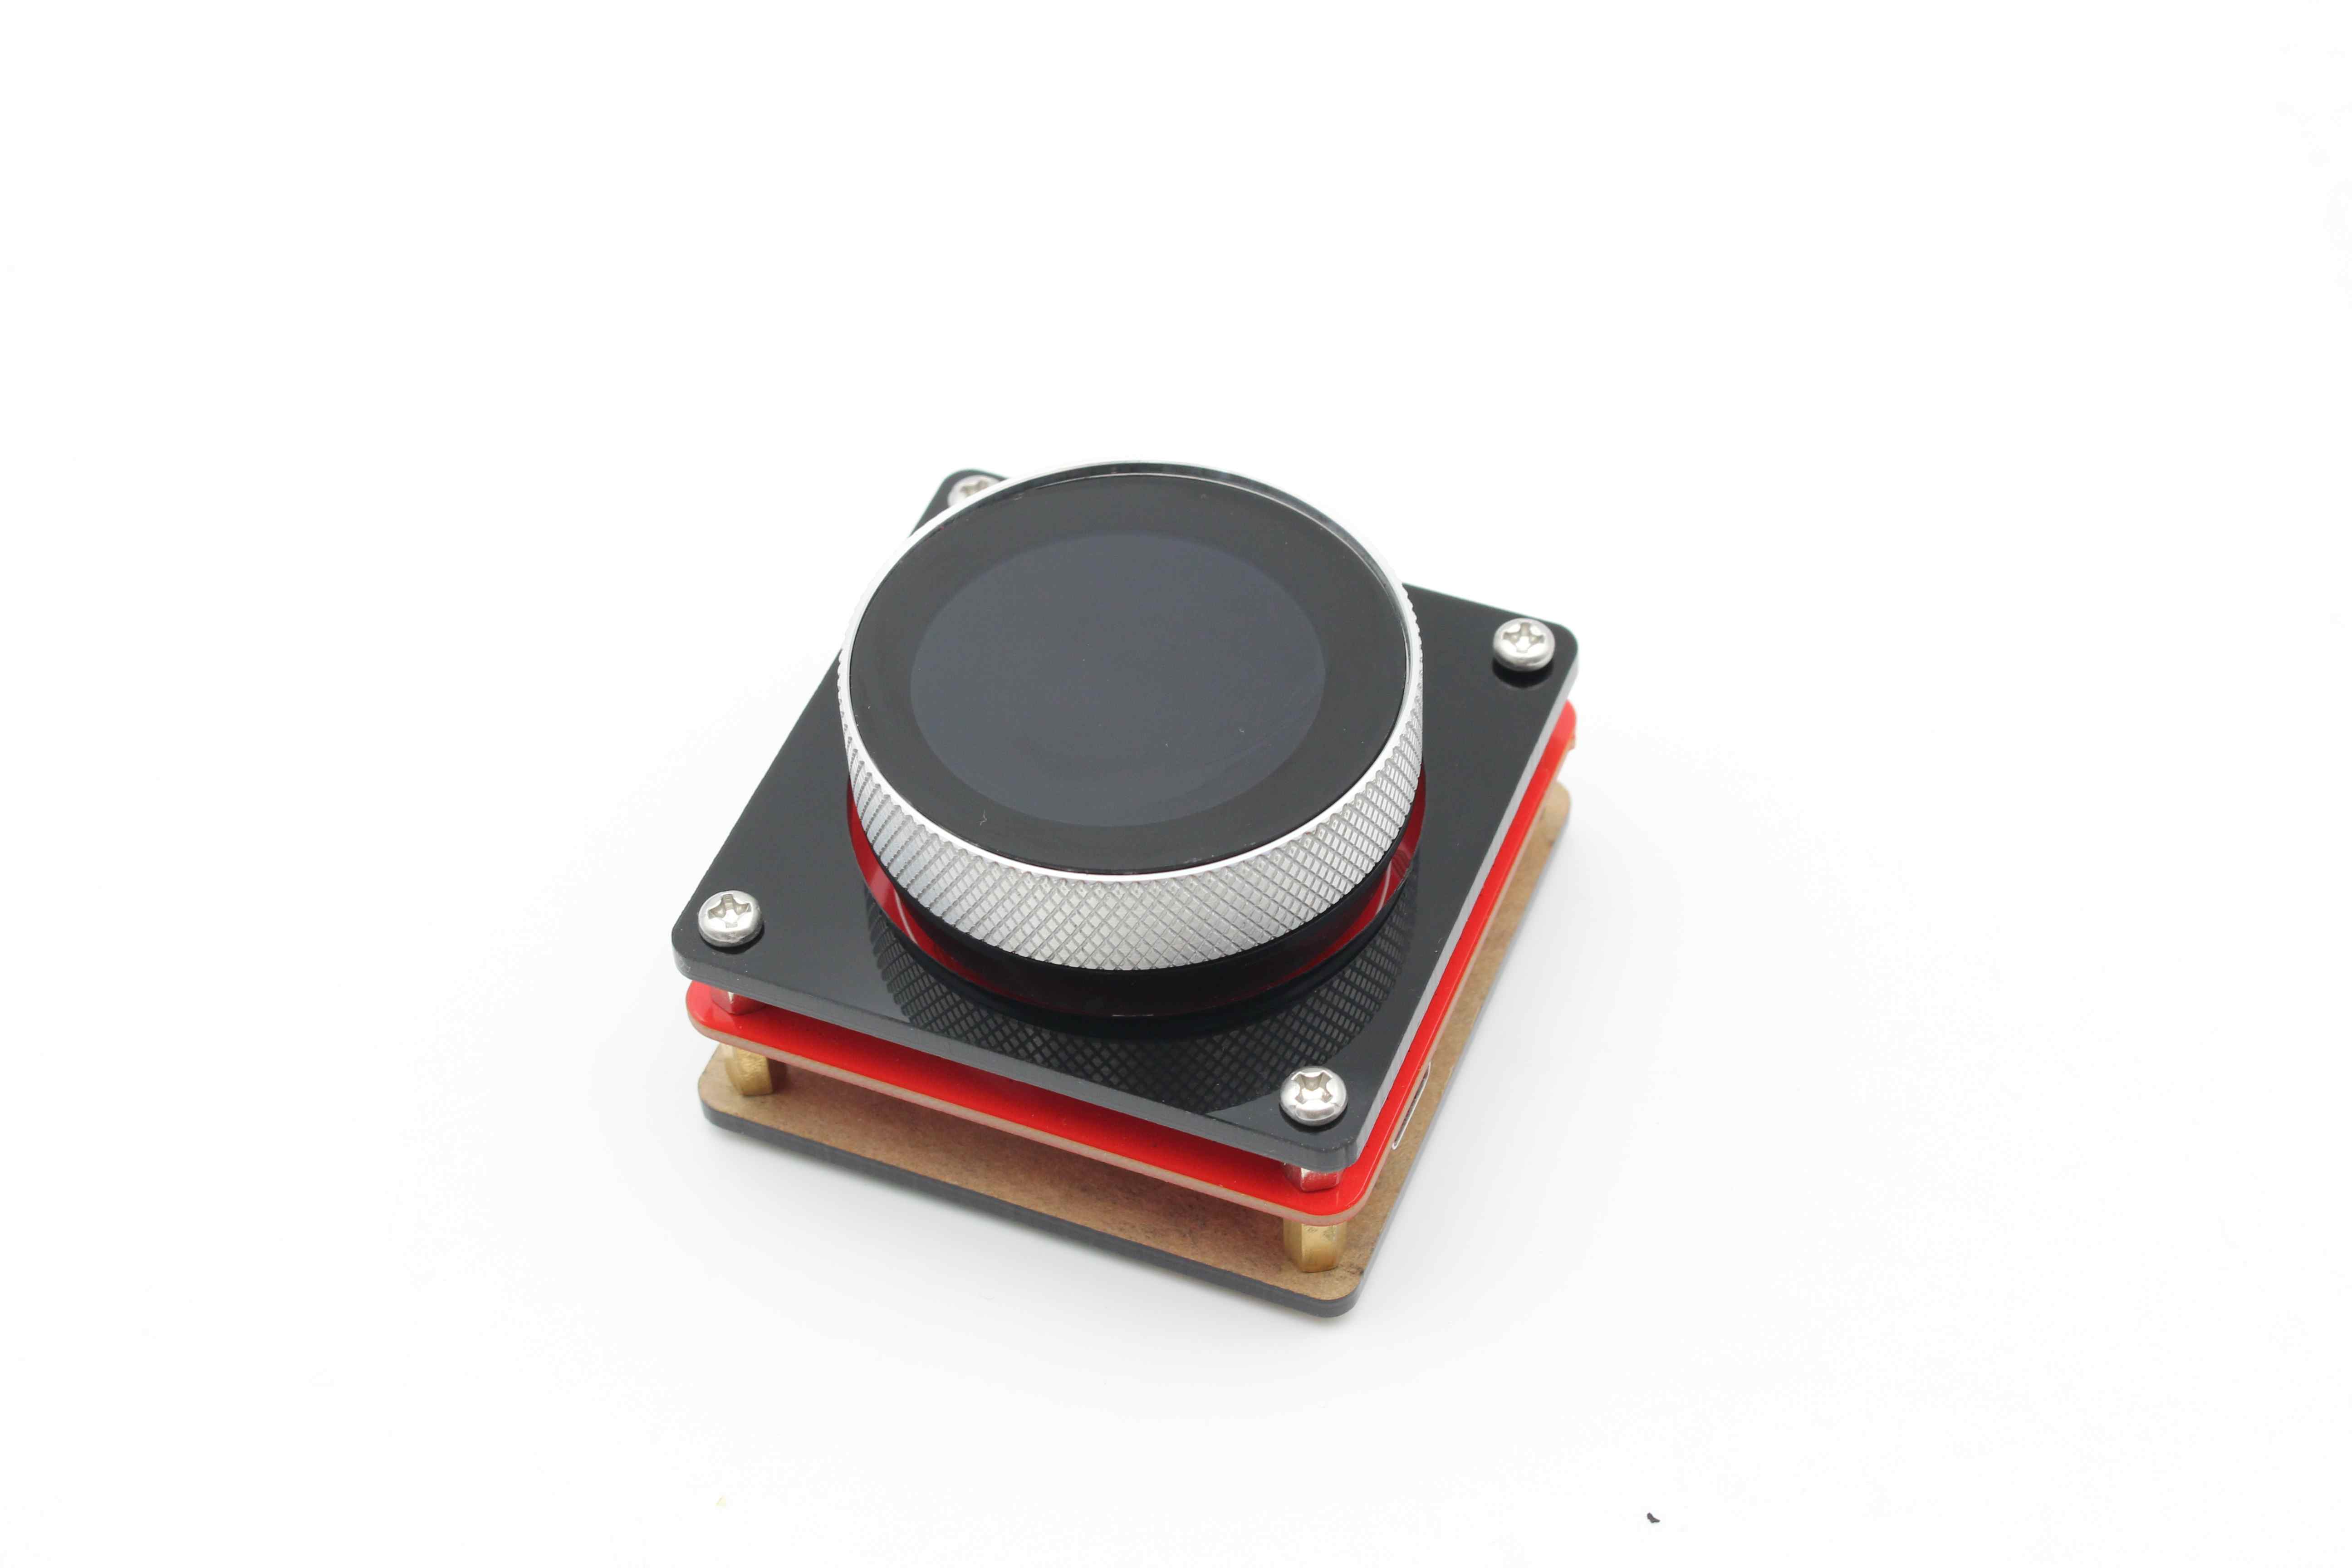
We've had products with 1.28-inch screens, which have been well received. However, some customers responded it was inconvenient in the installation, so we upgraded the 1.28-inch screen. The new version of 1.28-inch has a square base for easy installation, and there are three expansion ports, one for I2C, one for UART and one for GPIO. What's more, except for the touch screen, it has a rotary encoder and a screen press function, which enriches the input device.
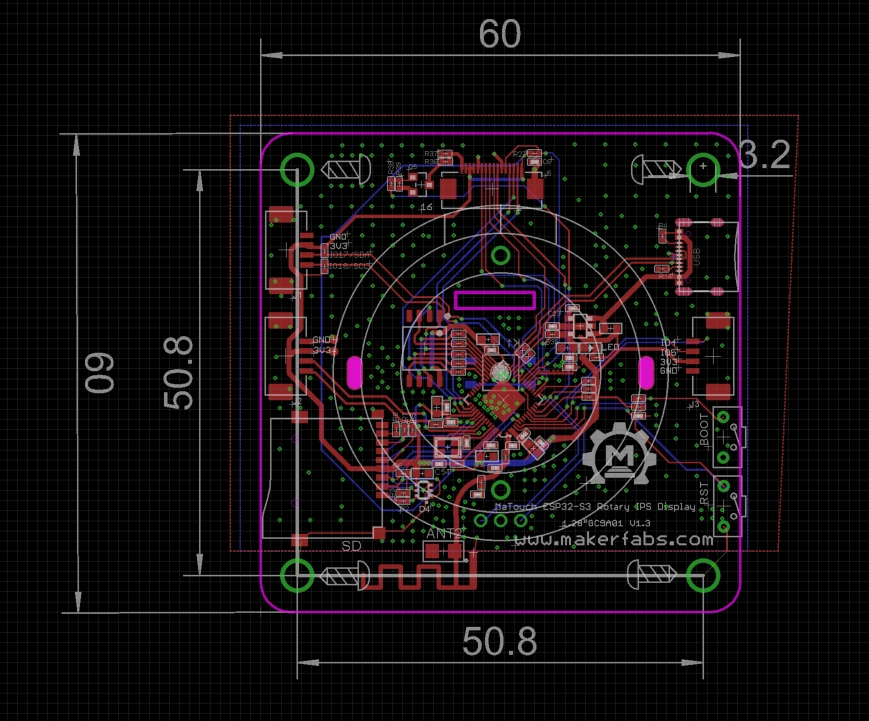
Model: MTRO128G
Feature
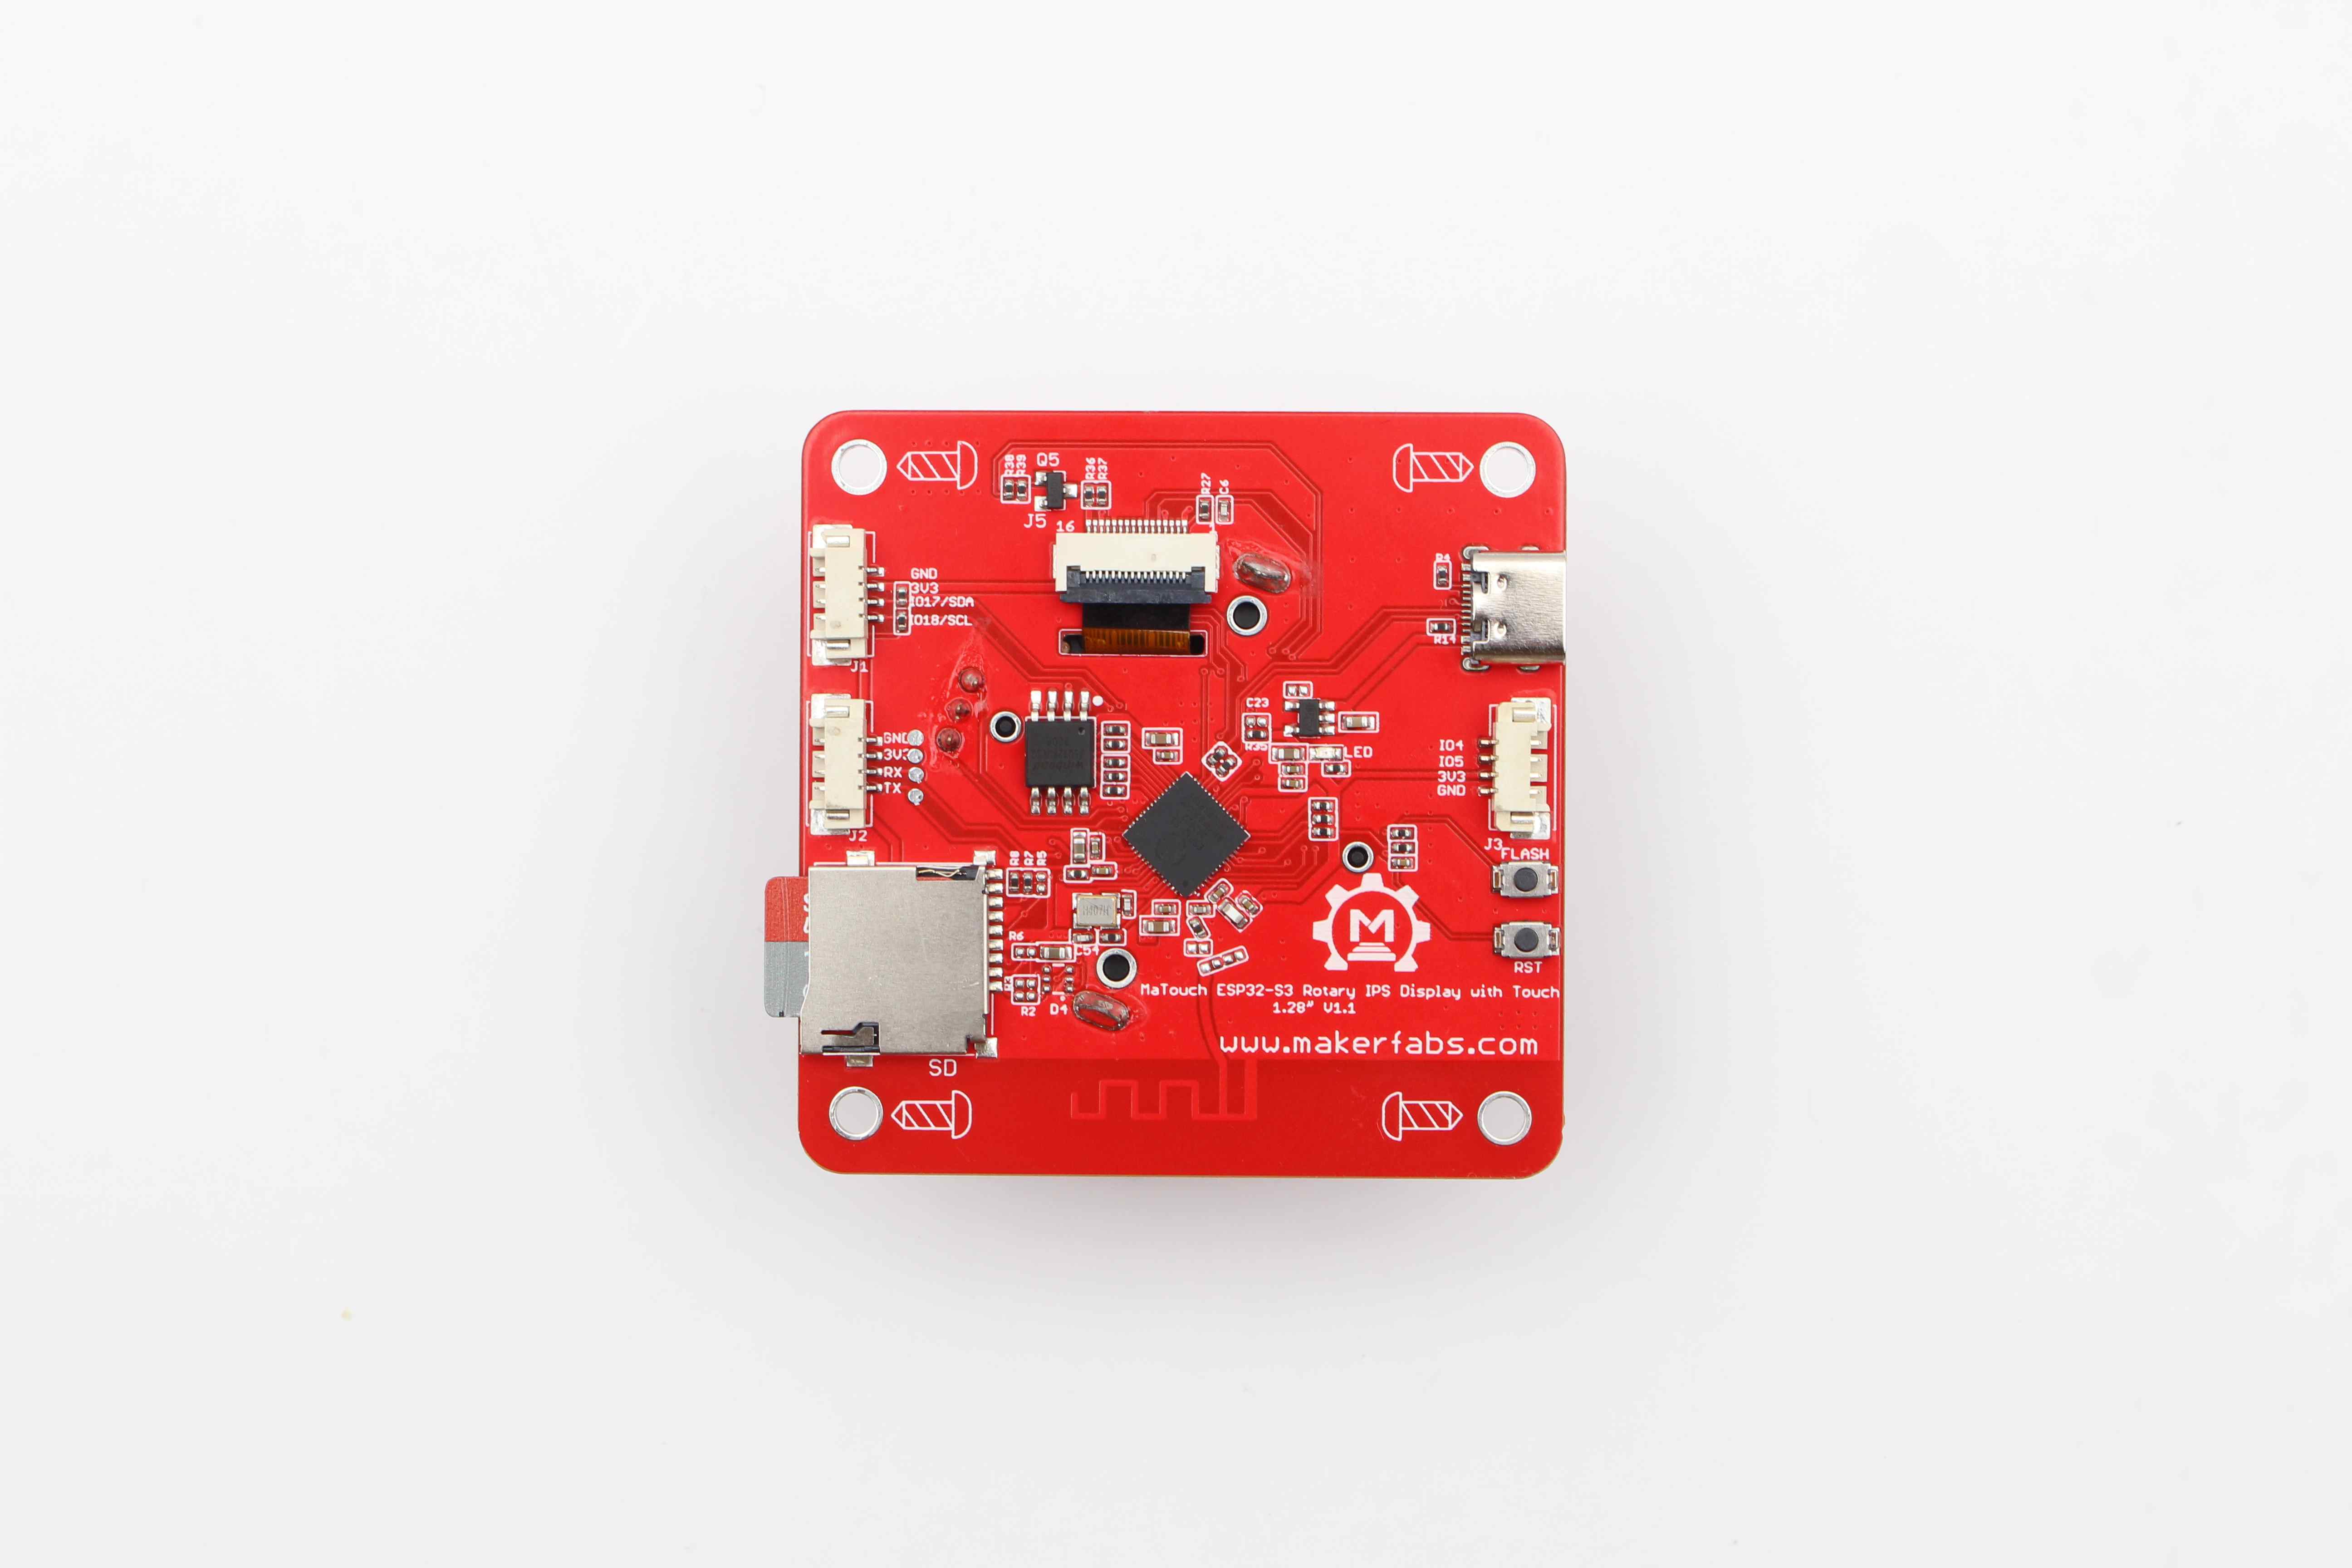
- Controller: ESP32-S3
- Wireless: WiFi& Bluetooth 5.0
- LCD: 1.28", 240x240 resolution, driver GC9A01
- LCD interface: SPI
- Flash:16MB Flash
- PSRAM:8MB
- Touch Panel: 5 Points Touch, Capacitive
- Touch Panel Driver: CST816D
- USB: USB Native, Type-C
- Power Supply: USB Type-C 5.0V(4.0V~5.25V)
- Button: Flash button and reset button
- Expansion interface: 1 * GPIO, 1 * I2C,1*UART
- MicroSD: Yes
- Arduino support: Yes
- MicroPython support: Yes
- Operation temperature: -40℃ to +85℃
Usage
The Arduino IDE supports ESP32 development board programming, before uploading the code, it is crucial to prepare the compilation environment for ESP32. If you haven't installed the ESP32 Board SDK yet, follow the steps to start quickly.
1.Install the Arduino IDE V1.8.10/V1.8.19.
2.Additional Board Manager URLs:
Select "File>Preferences>settings>Additional Boards Manager URLs" to fill in the link:
https://dl.espressif.com/dl/package_esp32_index.json
https://raw.githubusercontent.com/espressif/arduino-esp32/gh-pages/package_esp32_dev_index.json
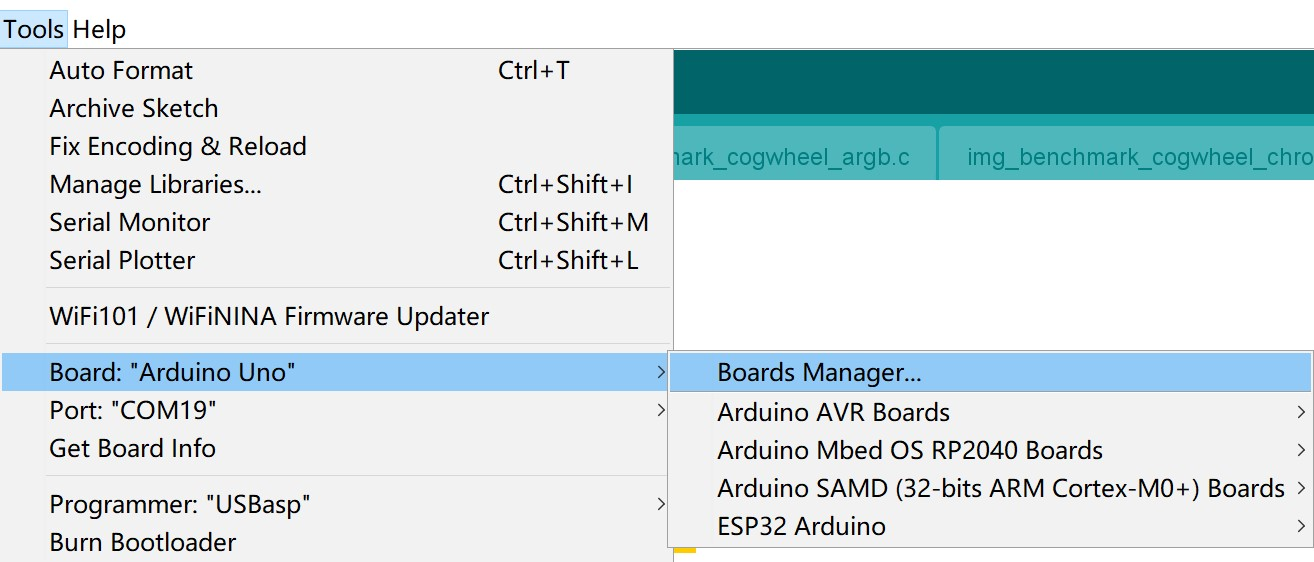
3.Boards Manager.
Open the Boards Manager. Go to Tools > Board > Boards Manager. Search for ESP32 and press install button for the “ESP32 by Espressif Systems“. For the ESP32-S3 Development board version, we recommend using versions that have been verified, such as 2.0.8 / 2.0.10, which is more stable, and less prone to errors.
4.Connect board
Use Type-C USB cable to connect the board and PC, note plug the cable to the USB-native interface.
5.Choose the ESP32 Arduino
Choose the “ESP32-S3 Dev module”, and choose the com.
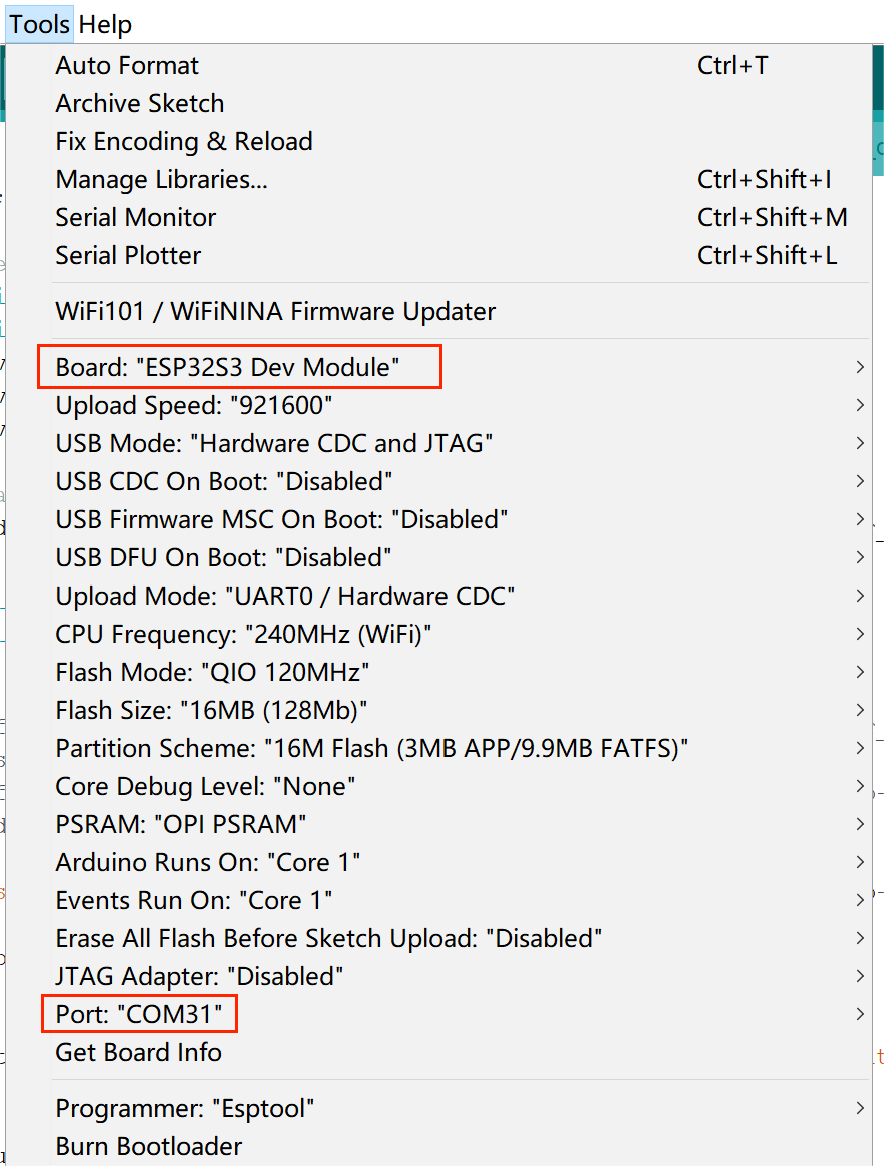
Note: Different computers may have different port numbers when connecting to a development board. Please select the correct port number based on the development board you are connecting to.
6.Install libraries needed.
Open the Arduino IDE, choose the >>tools>> Manage libraries, and install the libraries needed:
1.3.1 Version GFX_Library_for_Arduino
2.0.0 Version SPI
2.0.0 Version SD
2.0.0 Version FS
2.0.0 Version Wire
1.2.8 Version JPEGDEC
7.Upload code to board
-
Download MaTouch-ESP32-S3-RotaryIPS-Display1.28-GC9A01-main.zip and unzip it.
-
Copy logo_240240.jpg to sd card.
-
Open fw_test.ino.
-
Plug the SD card into the SD card slot.
-
Choose the “ESP32-S3 Dev module”, and choose the com.
-
Verify the code and upload.
Result
When the code is uploaded successfully, the screen displays the logo_240240.jpg, and it can draw red dots in the place where you touch, which is very sensitive. And when rotating the encoder or pressing the screen, it will display the corresponding results.
FAQ
You can list your questions here or contact techsupport@makerfabs.com for technology support. Detailed descriptions of your question will help to solve your question.