4G LTE Air Monitor
1. Introduction
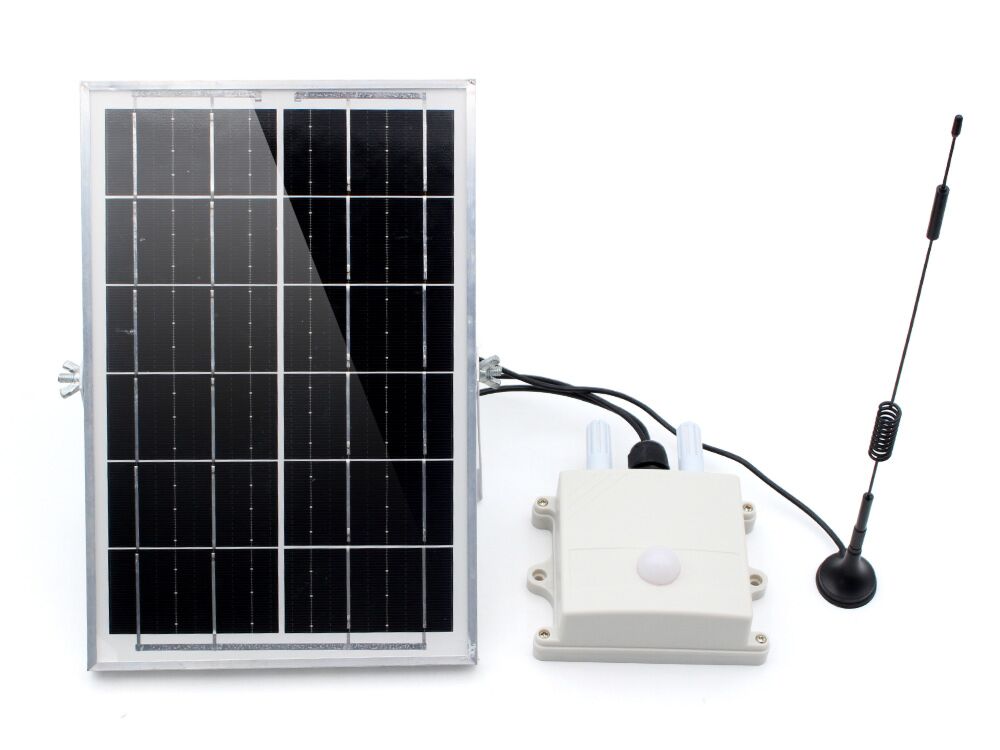
This air monitor, with the detection of air temperature and humidity, carbon dioxide, air quality TVOC, light intensity and other functions, mainly used in greenhouse environmental detection.
Its built-in 4G module, can transmit temperature, humidity, light intensity, carbon dioxide concentration and TVOC to the Internet to achieve remote wireless communication.
This air monitor is powered by internal 18650 lipo battery charged by solar panel, the power down current lower as 165uA. With the solar panel to charge the battery and low power consumption, the device can operate for extended periods. And then transmit the data via the 4G LTE network, so user can monitor the field status or have them recorded for long-term analyze.
Model:4GLAMESP32S3
2. Features
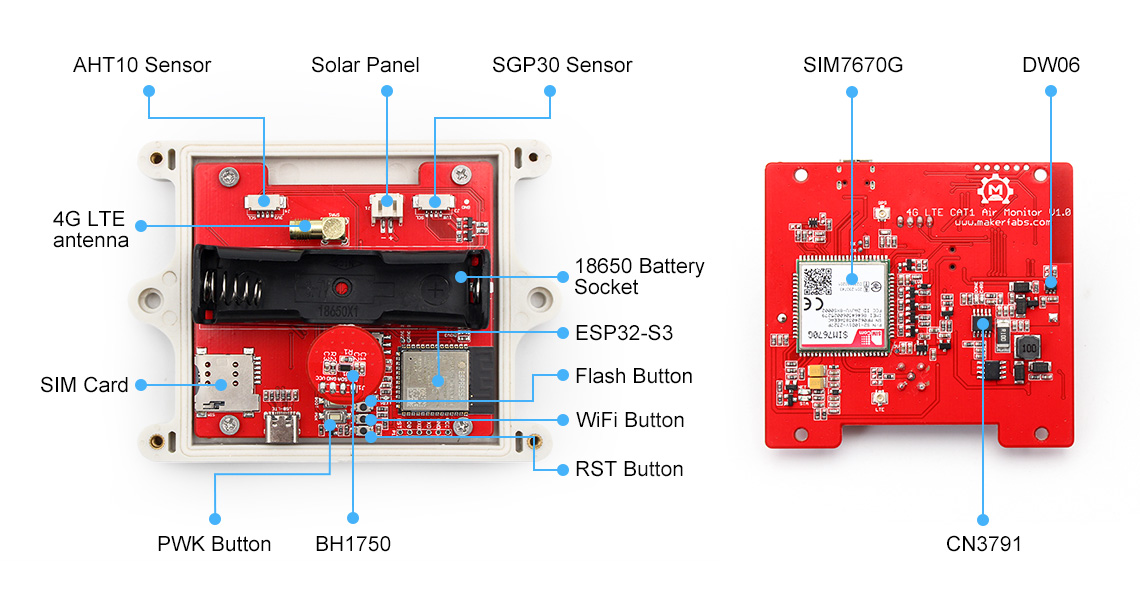
- Controller: ESP32-S3-WROOM-1, PCB Antenna, 16MB Flash, 8MB PSRAM, ESP32-S3-WROOM-1-N16R8
- Wireless: WiFi, Bluetooth 5.0 & 4G LTE CAT1
- Global used LTE Cat-1, SIM7670G with uplink rate 5 Mbps and downlink rate 10 Mbps
- GNSS Positioning
- MPPT: CN3791 solar maximum power tracking charging management
- BMS: DW06 over-charge, over-discharge protection
- Solar Power supply connector: 4.5~28V
- Humidity: 0~100% RH
- Temperature: -40~85℃
- CO2eq signal: 400~60000ppm
- TVOC signal: 0 to 60000ppb
- Light intensity: 1 - 65535 lx
- 18650 battery
- Arduino support
- Operation temperature: -40℃ to +85℃
3. Hardware
- Plug the SIM card into the board.
- Plug the 18650 battery into the 18650 Battery Socket.
- Plug the 4G-GSM antennas into the SMA1 interface.
4. Transmit the detection data to Thingspeak
This demo is to transfer the monitored data to Thingspeak via 4G.To transmit the data to your Thingspeak channel, it has to create a new channel and get the APIKEY information. Then replace the APIKEY in the code with yours.
4.1 Thingspeak
- sign in or sign up for ThingSpeak
If you already have an account, log in and enter the password, otherwise click Create one to register.

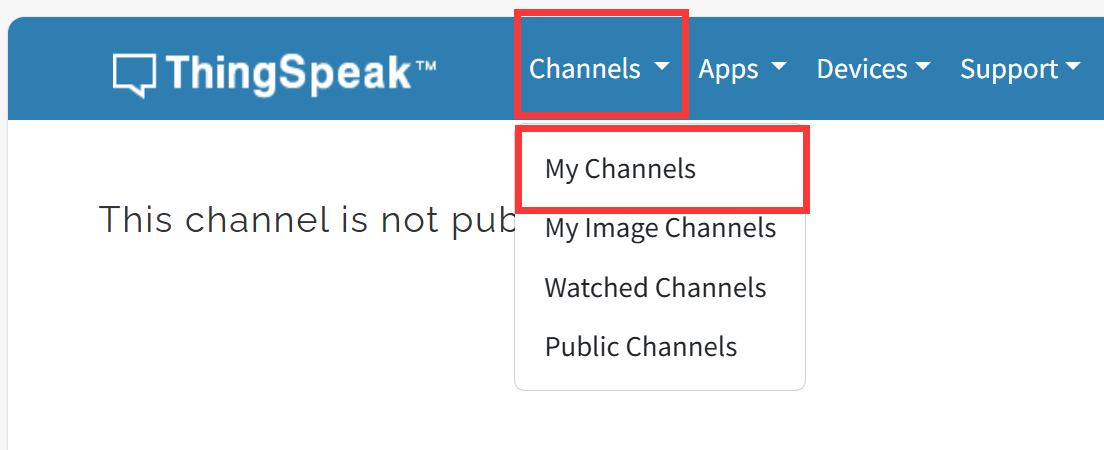
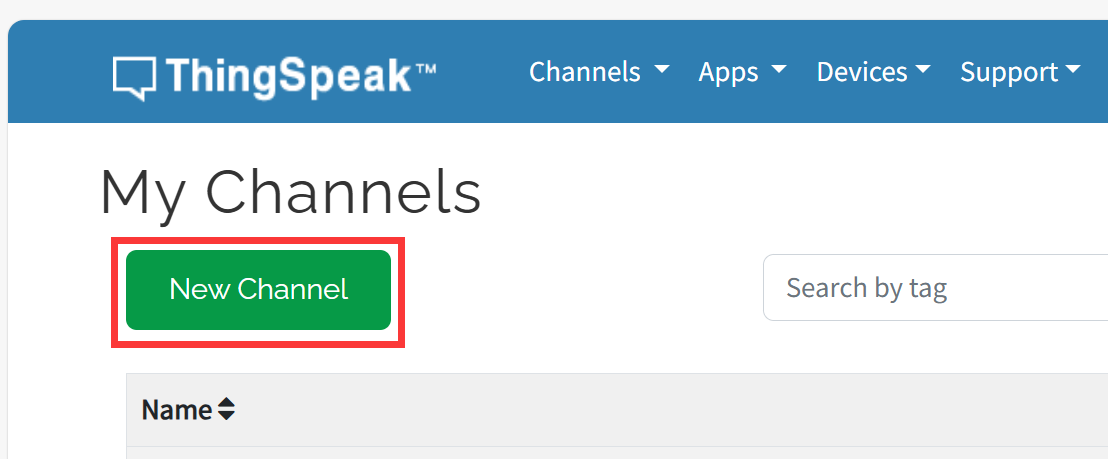
- Create new channel
Select "Channel --> My Channels".
click "New Channel".
Write the name and field information.
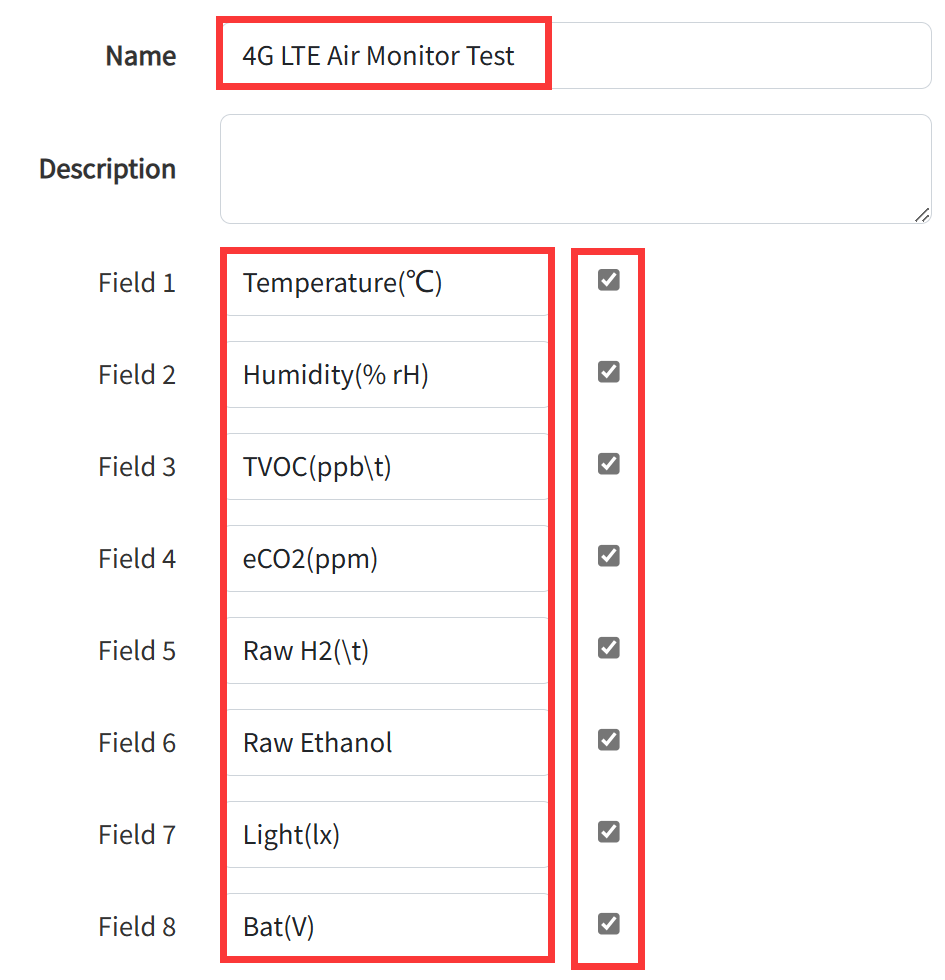
Click Save Channel to create successfully.
4.2 Arduino IDE
1.Open the Transmit_the_detection_data_to_Thingspeak by Arduino IDE.
2.Install the ESP32 board package.
All projects are based on the ESP32-S3 development board, guaranteeing higher compatibility and stability.If you haven't installed the ESP32 Board SDK yet, follow the steps in this guide to get started quickly.

3.Install Library.
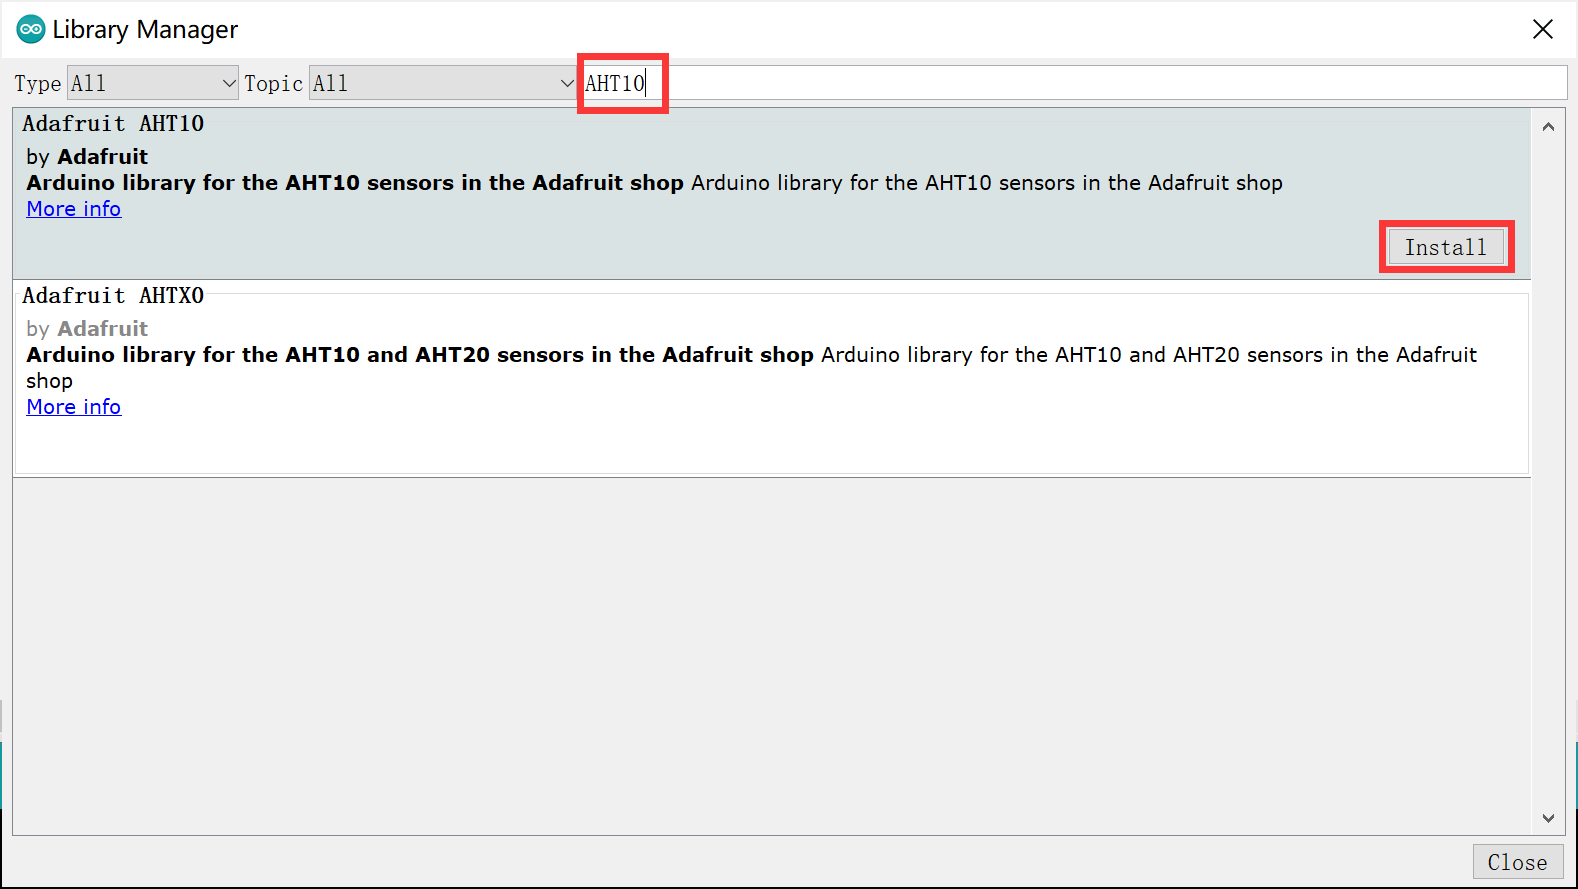
Select "Sketch > Include Library > Manage Libraries"
- search "AHT10" and click Install.
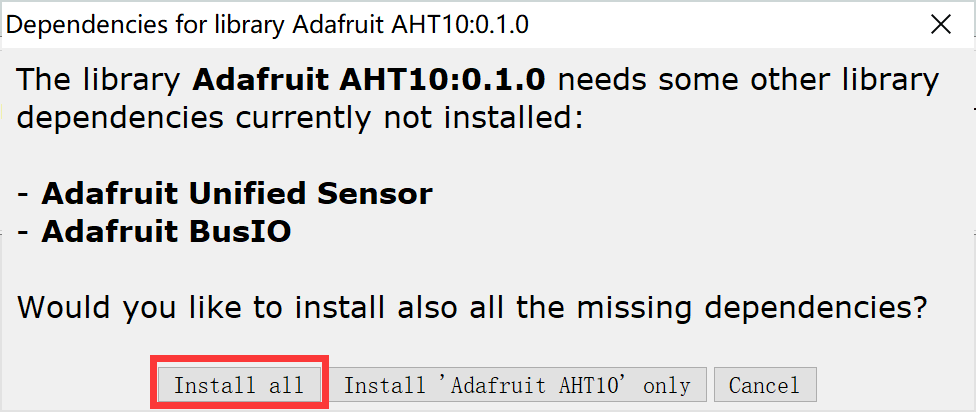
If the following page appears, click"Install all".
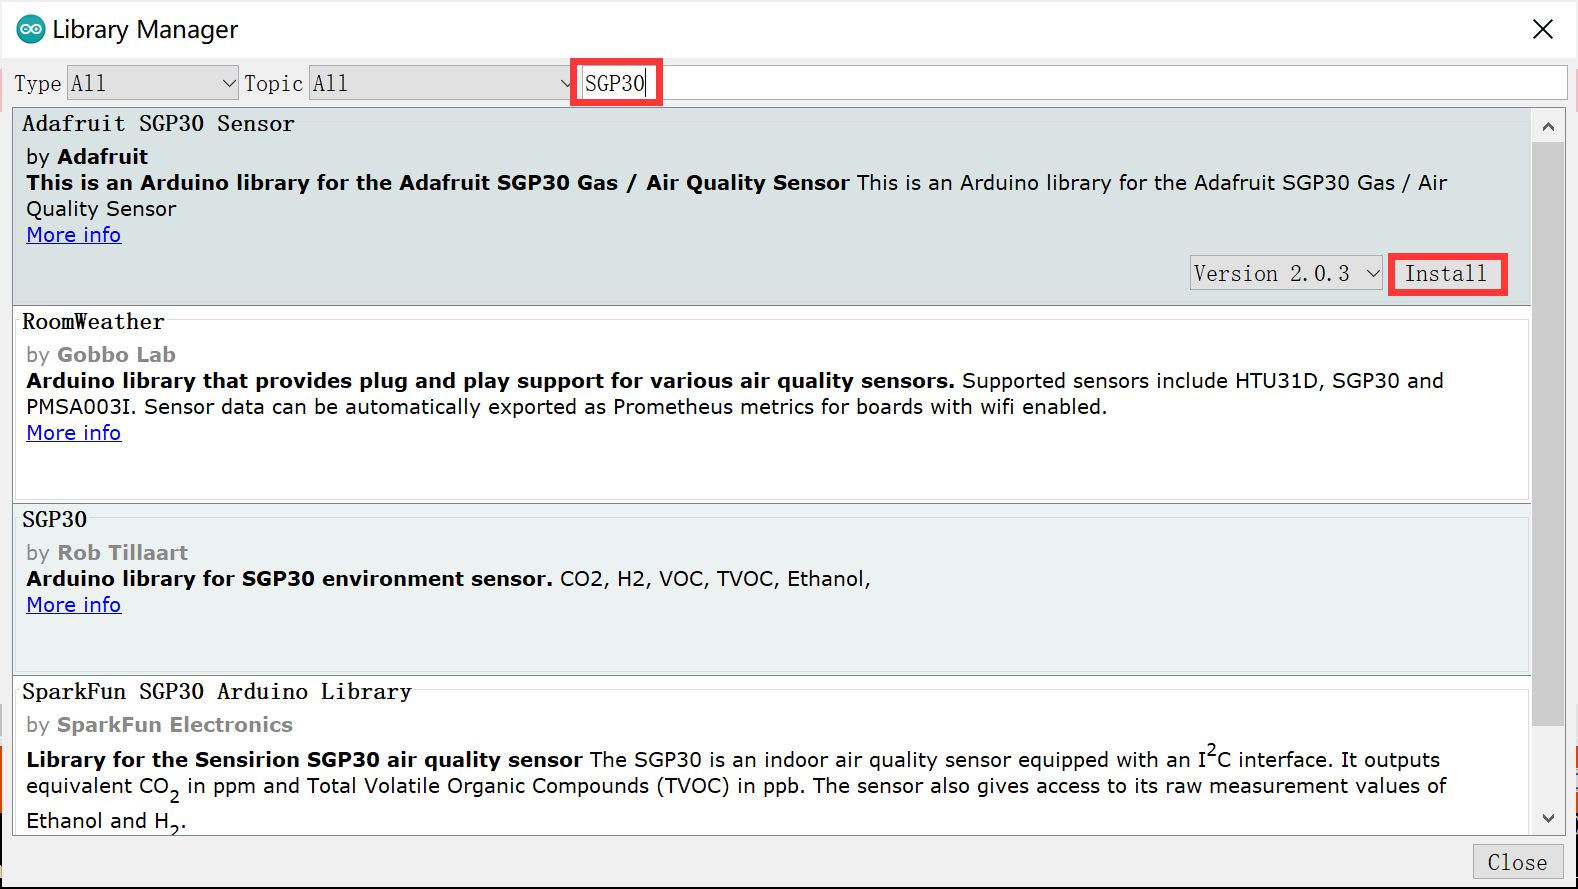
- search "SGP30" and click Install.
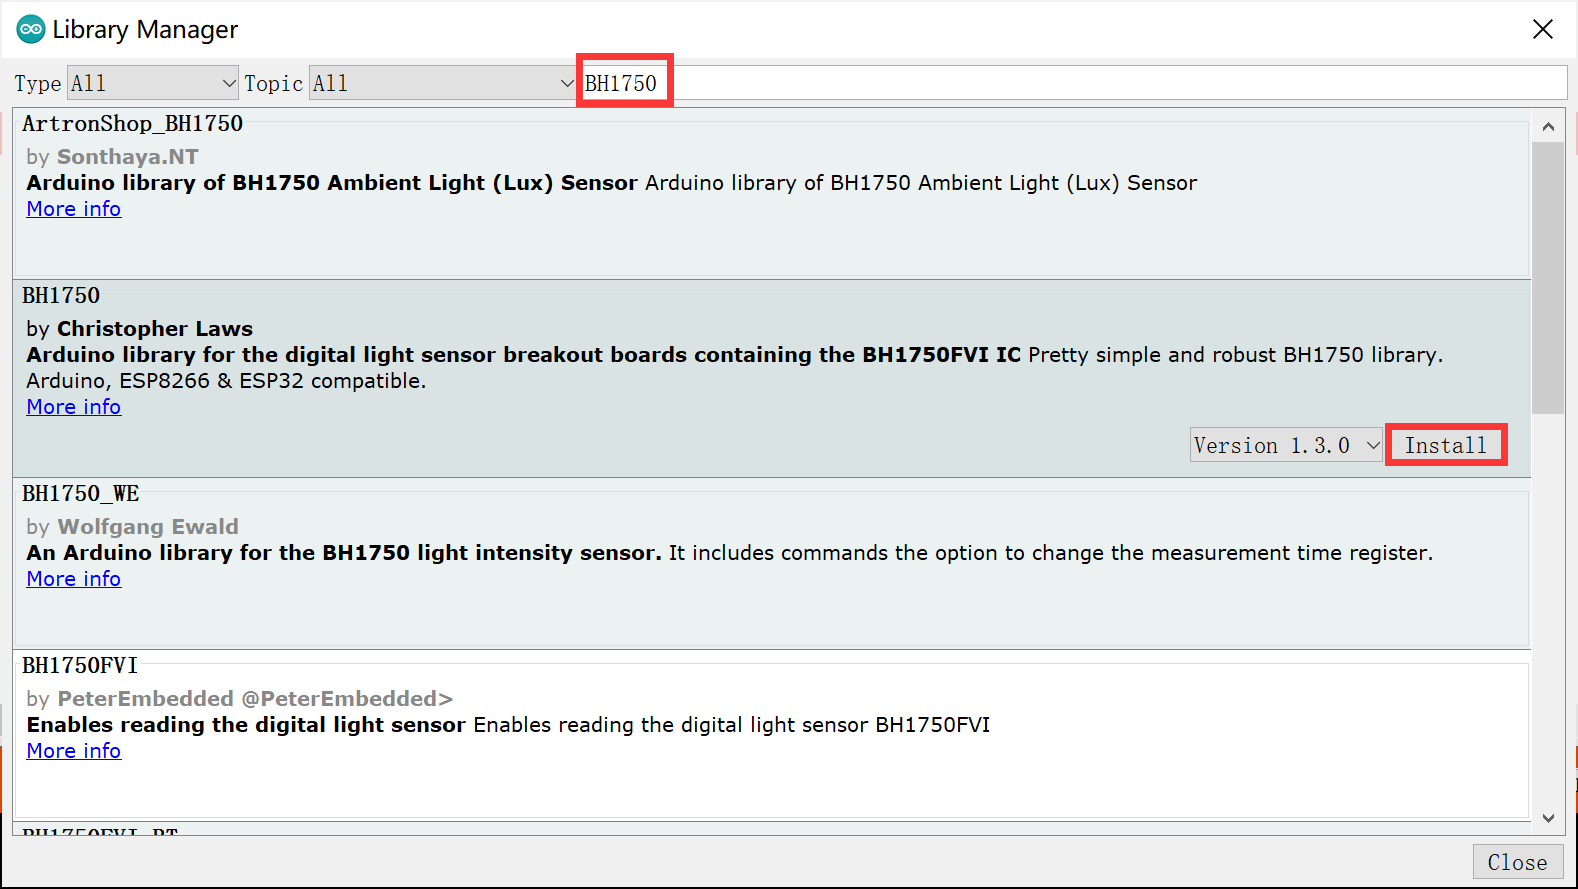
- search "BH1750" and click Install.
4.Change the APIKEY.
In order to view the data in your own channel, you need to modify the APIKEY in the code.
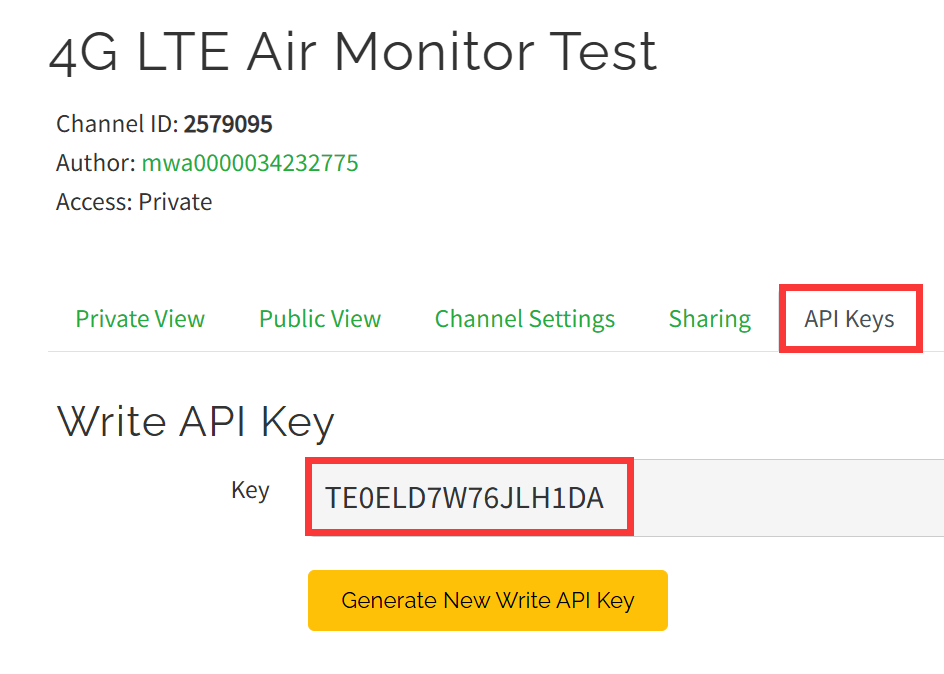
- Click the "API Keys" and copy you Key.
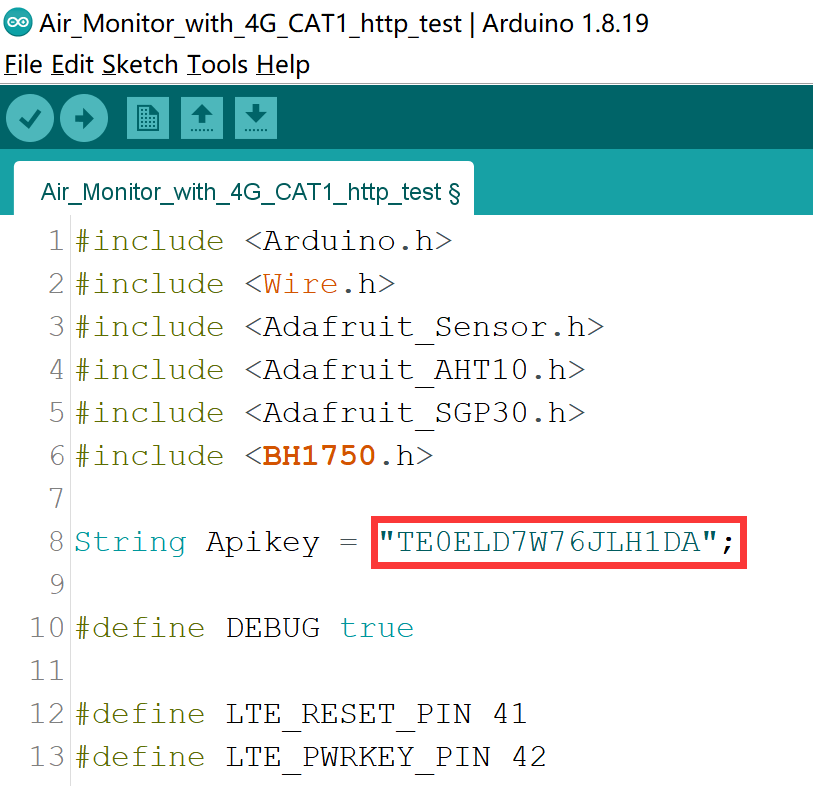
- Modify the APIKEY in the code.
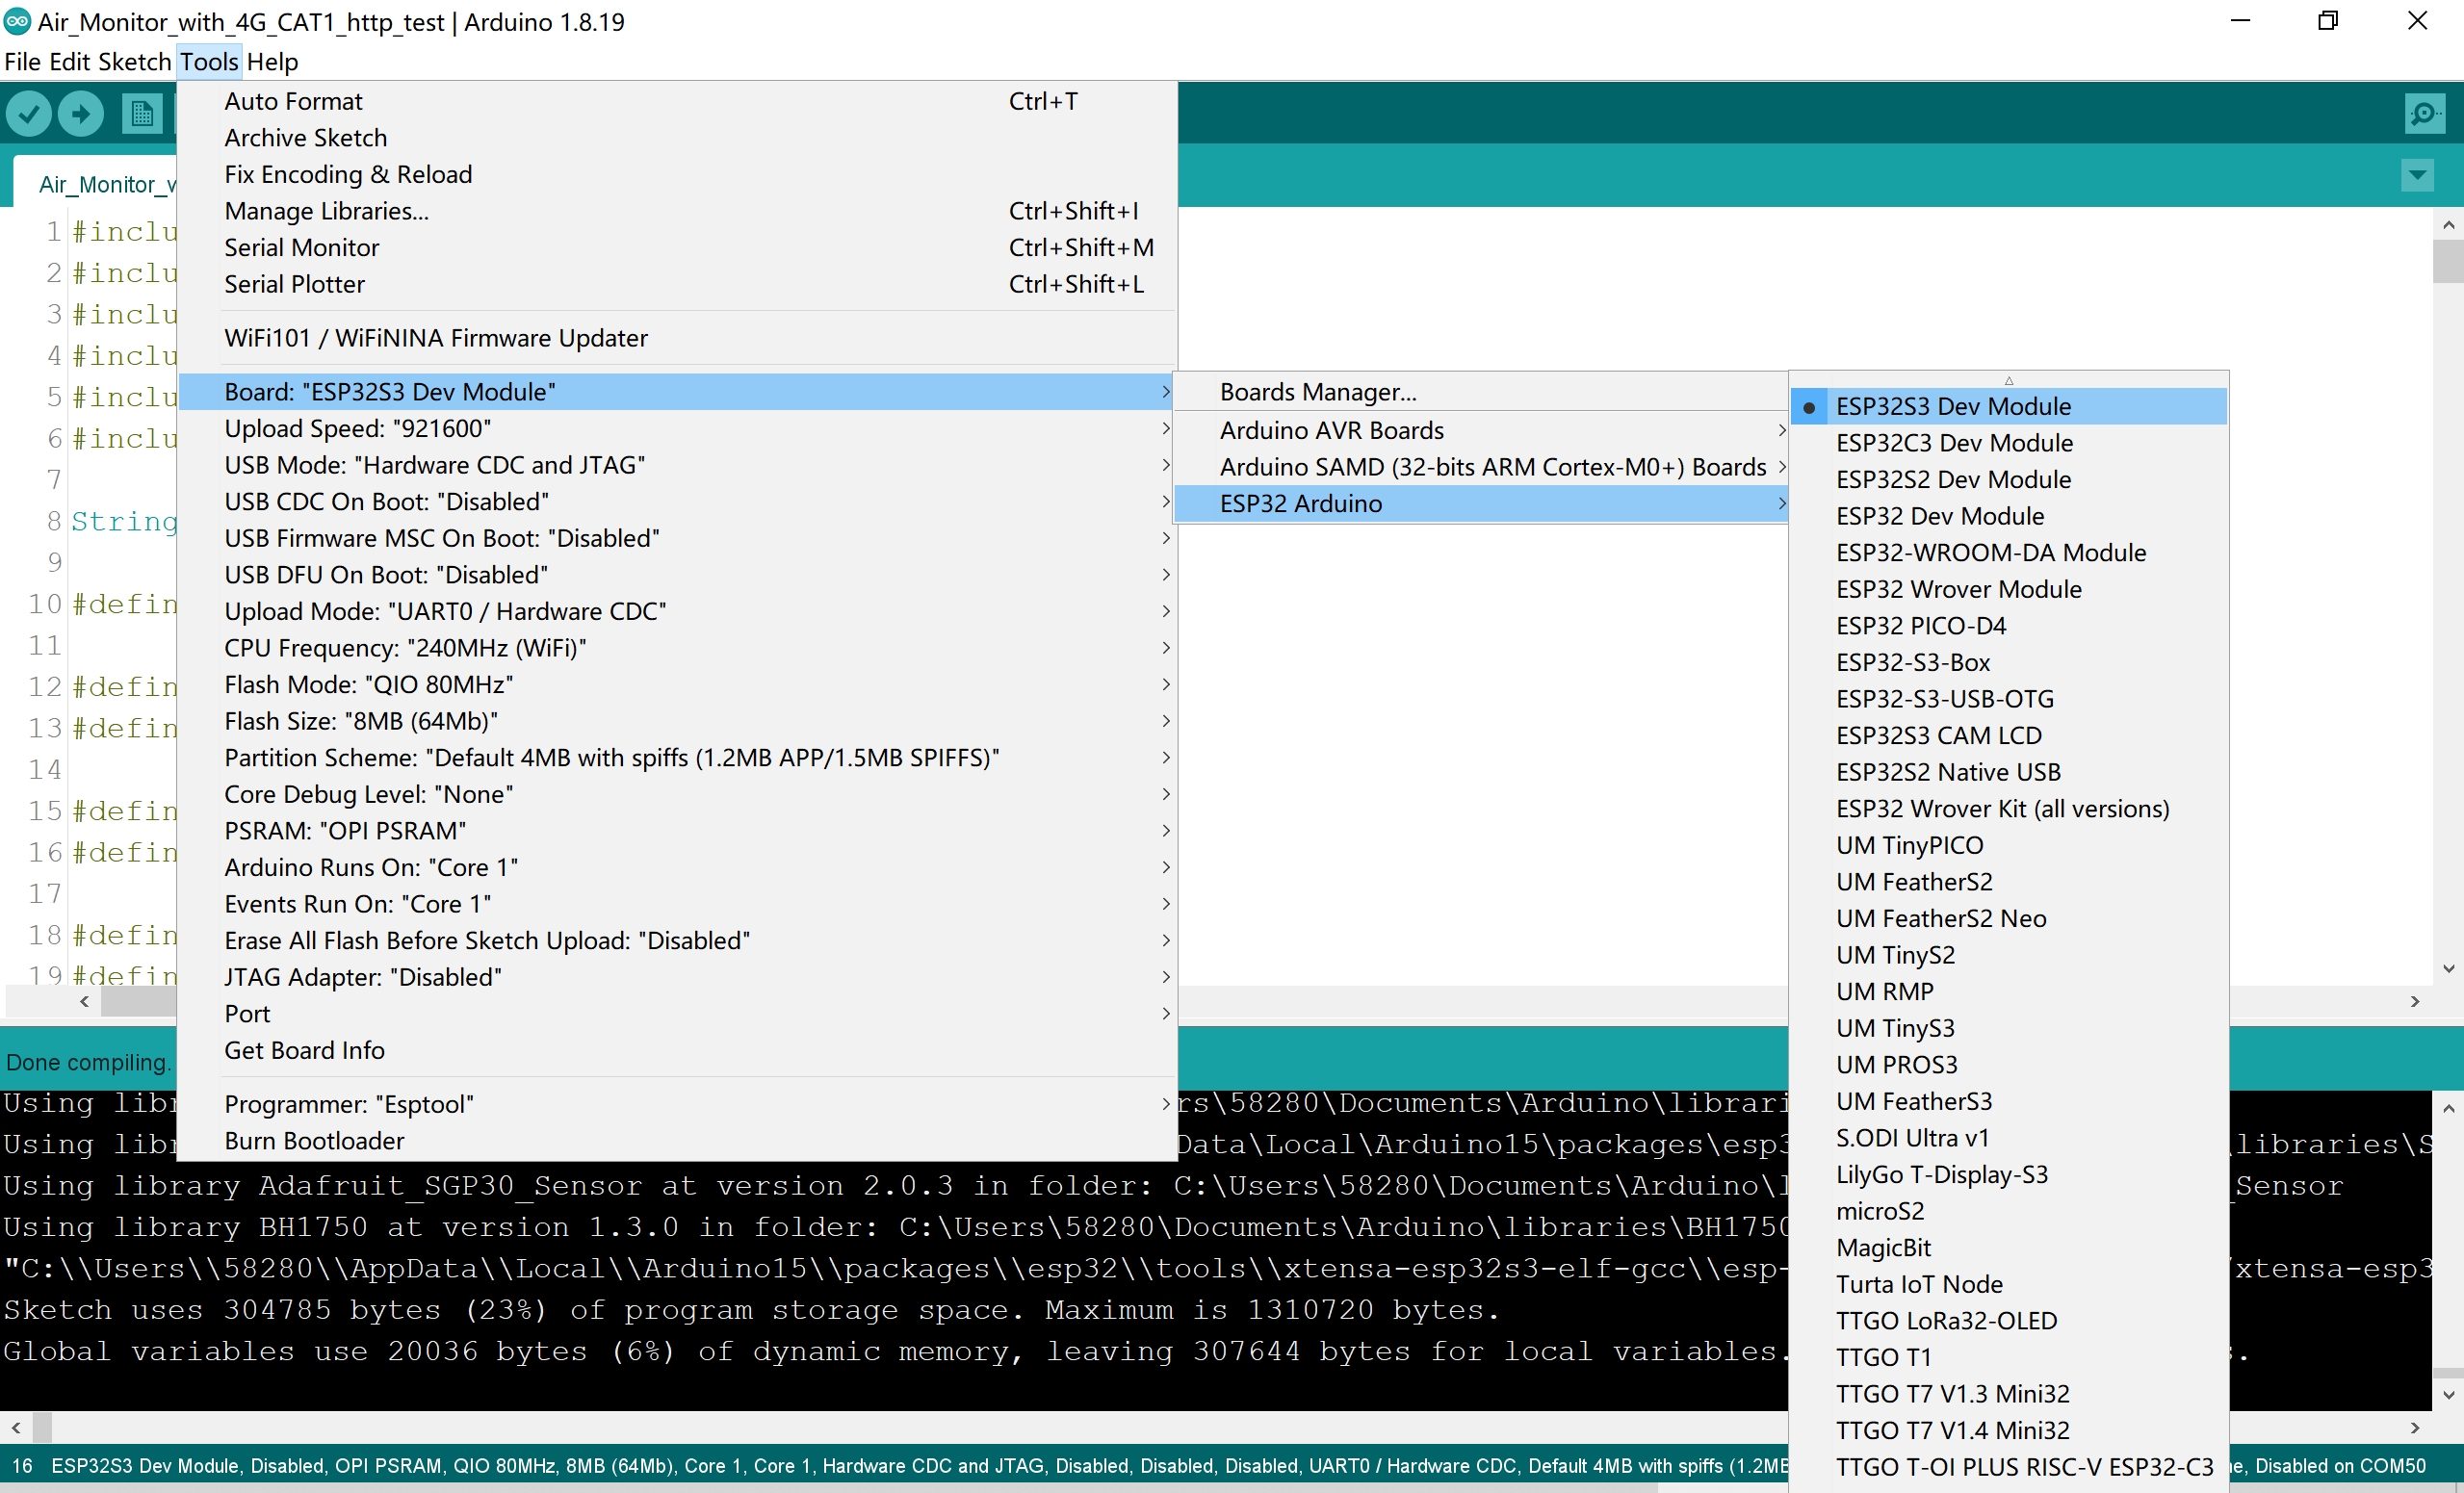
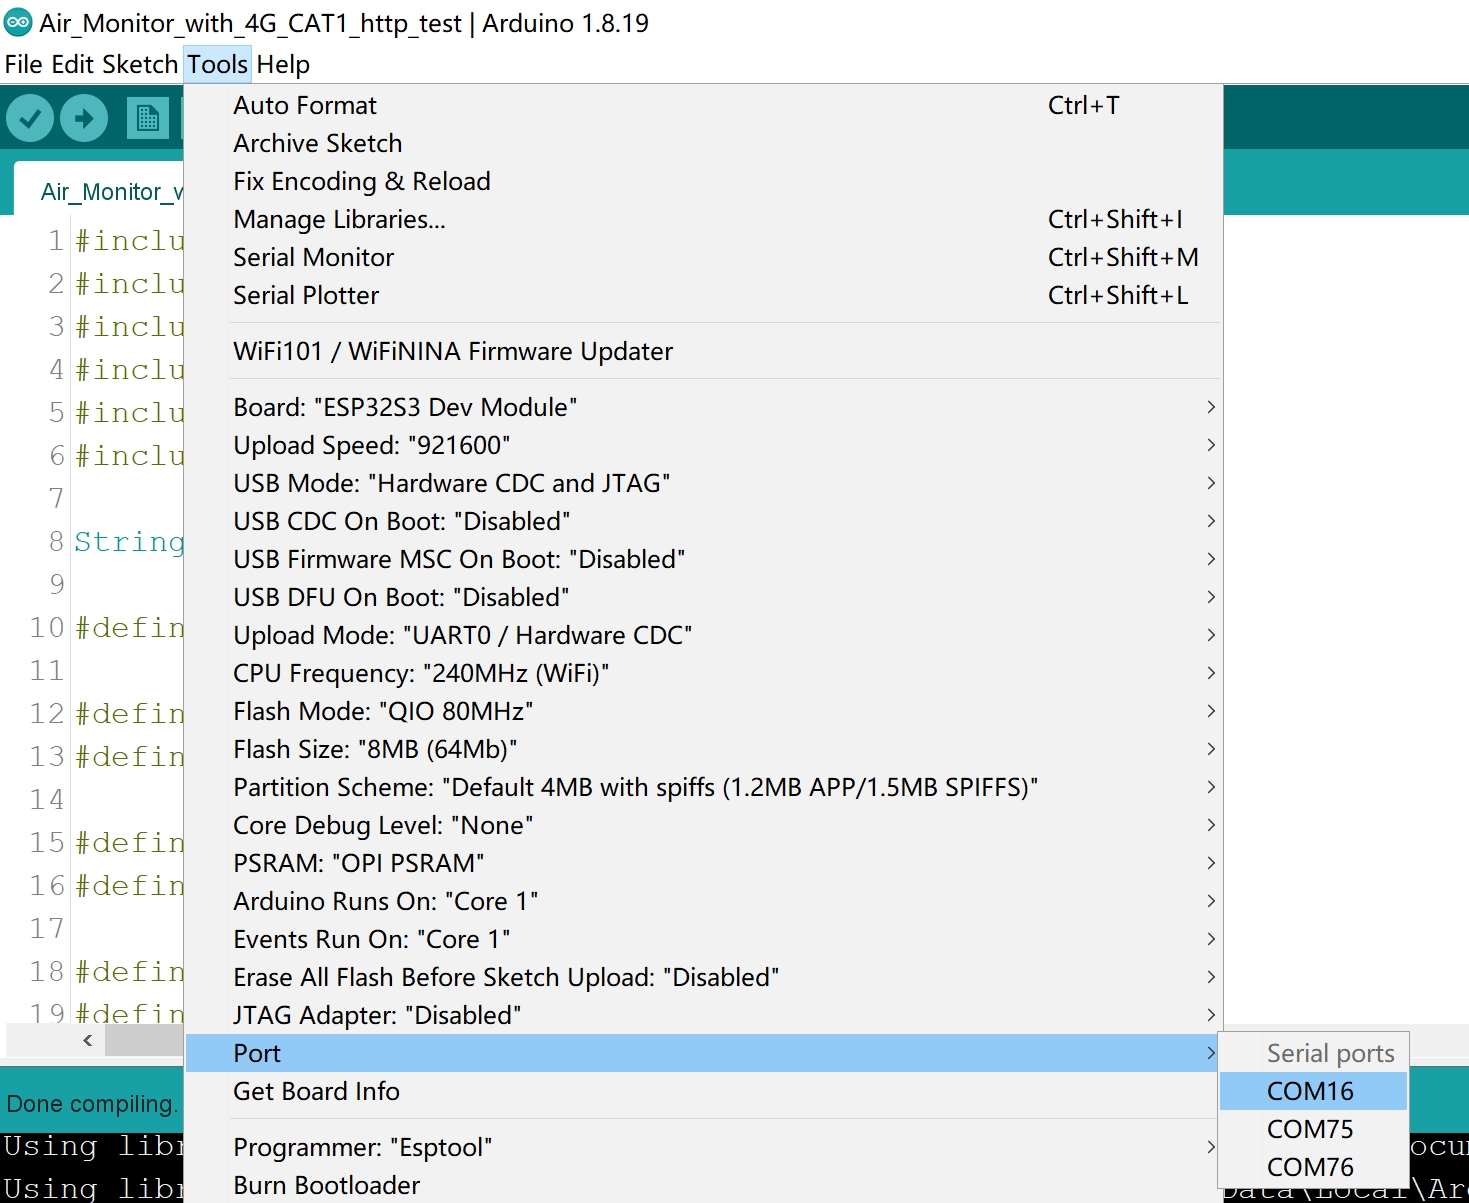
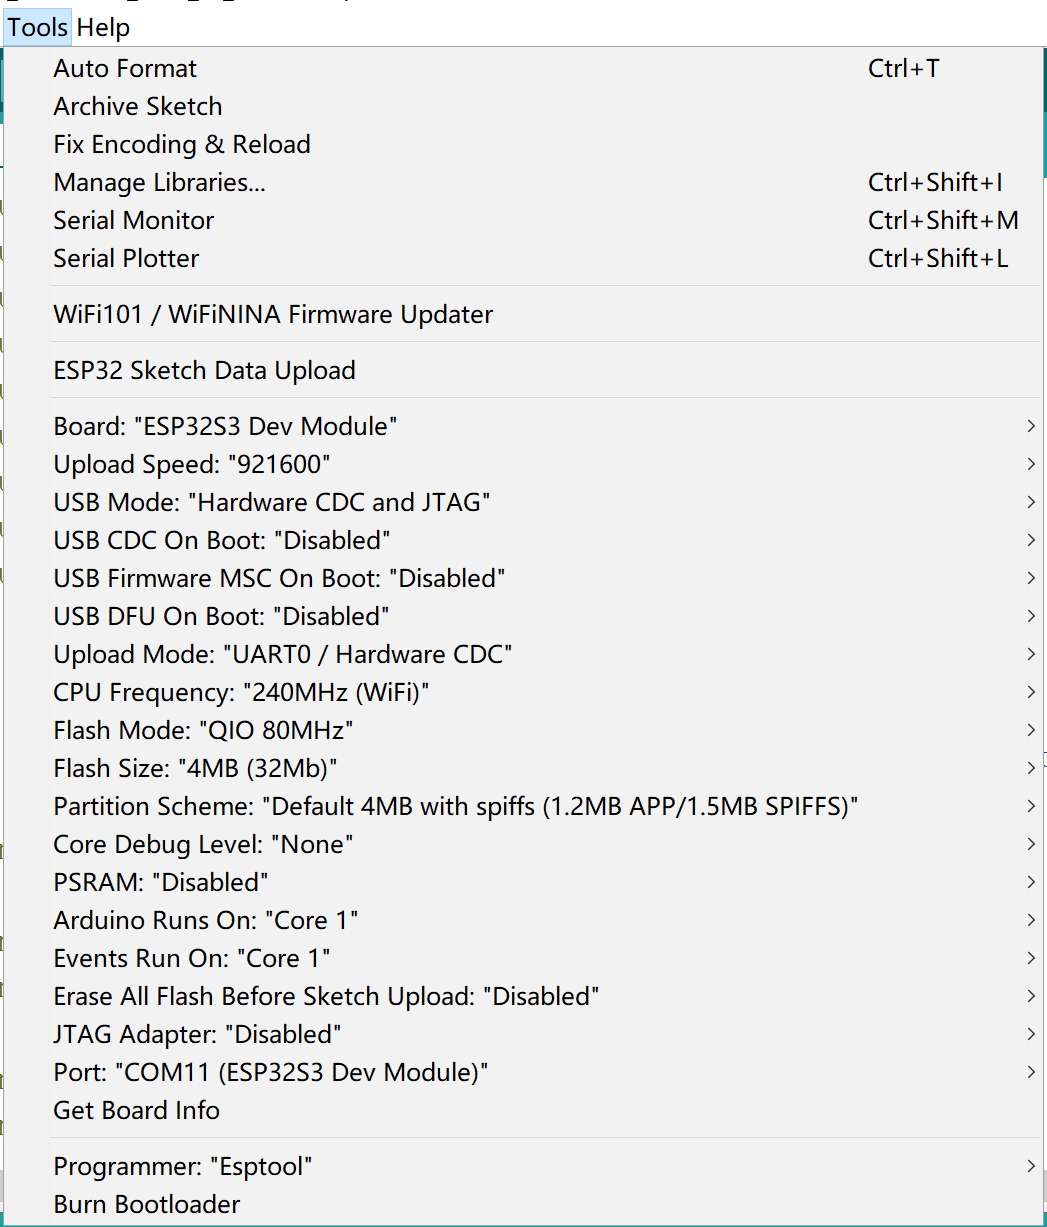
5.Use Type-C USB cable to connect the board and PC, note plug the cable to USB-NATIVE interface, and select the development board "ESP32S3 Dev Module" and the port.
- Select "Tools > board:"xxx" > ESP32 Arduino > ESP32S3 Dev Module".
- Select "Tools > Port",Select the port number of the board.
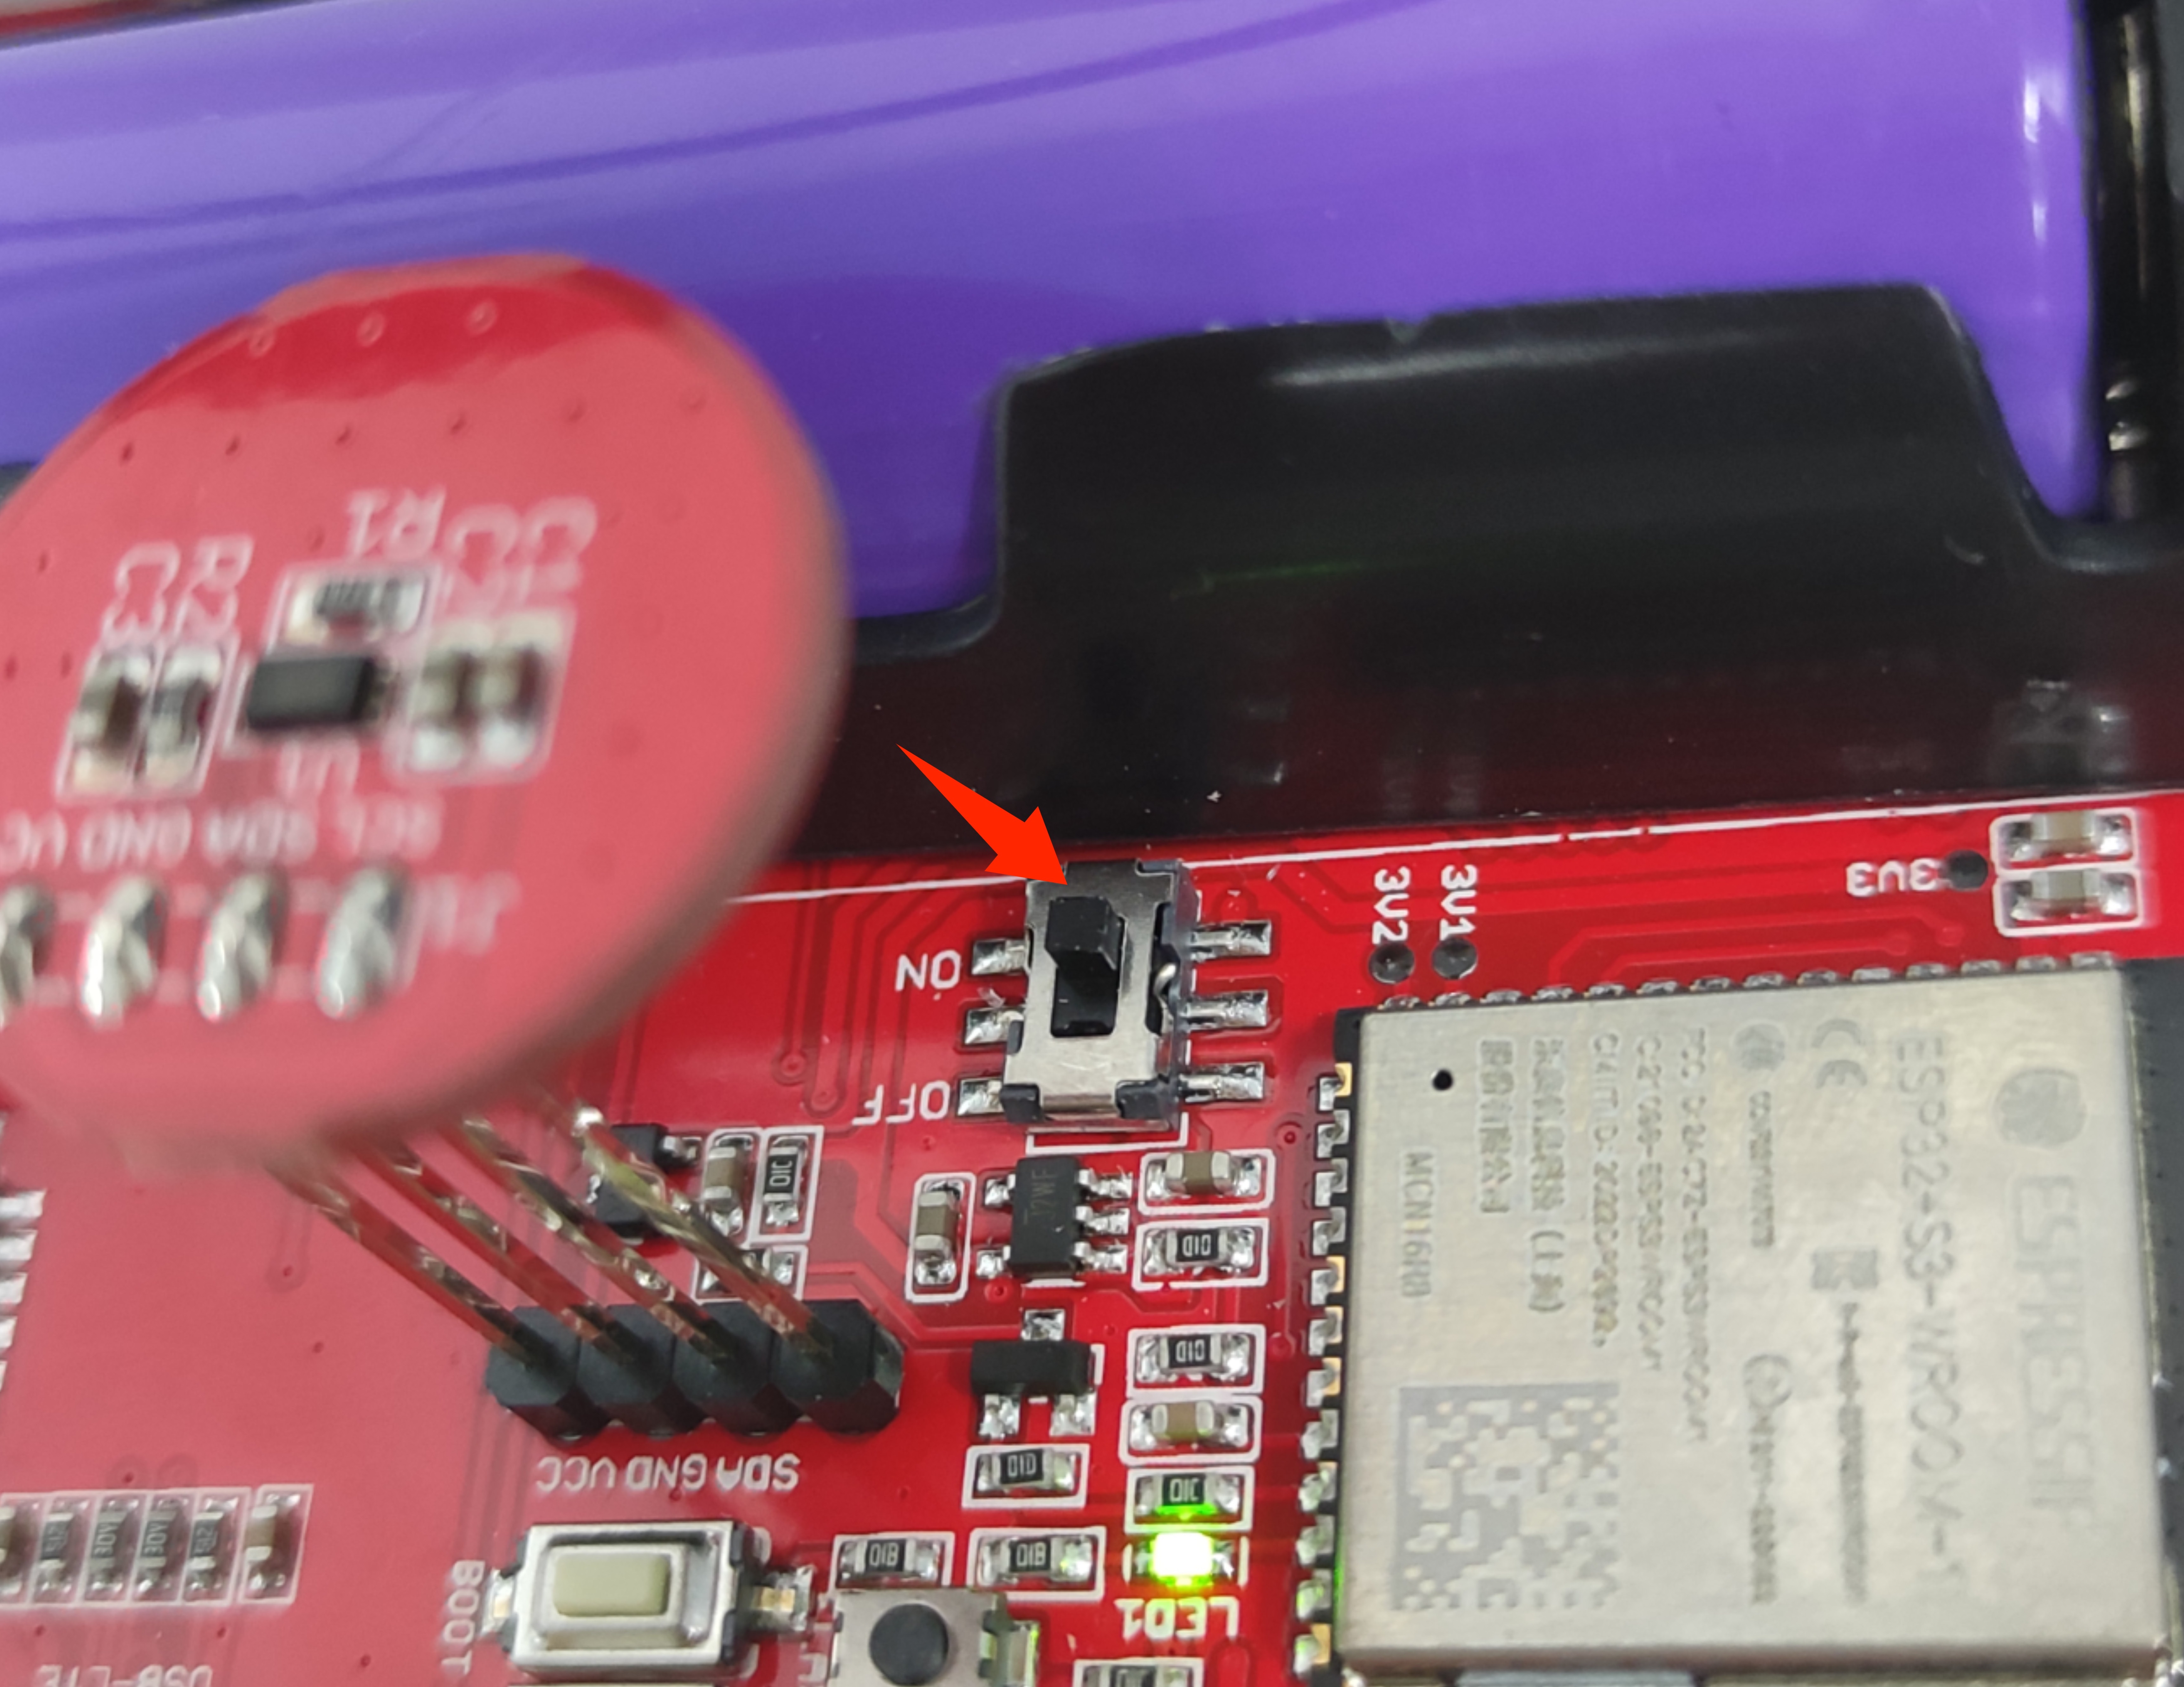
6.Turn on the toggle switch.
7.Verify the code and upload.
- Click this icon to upload to the board.

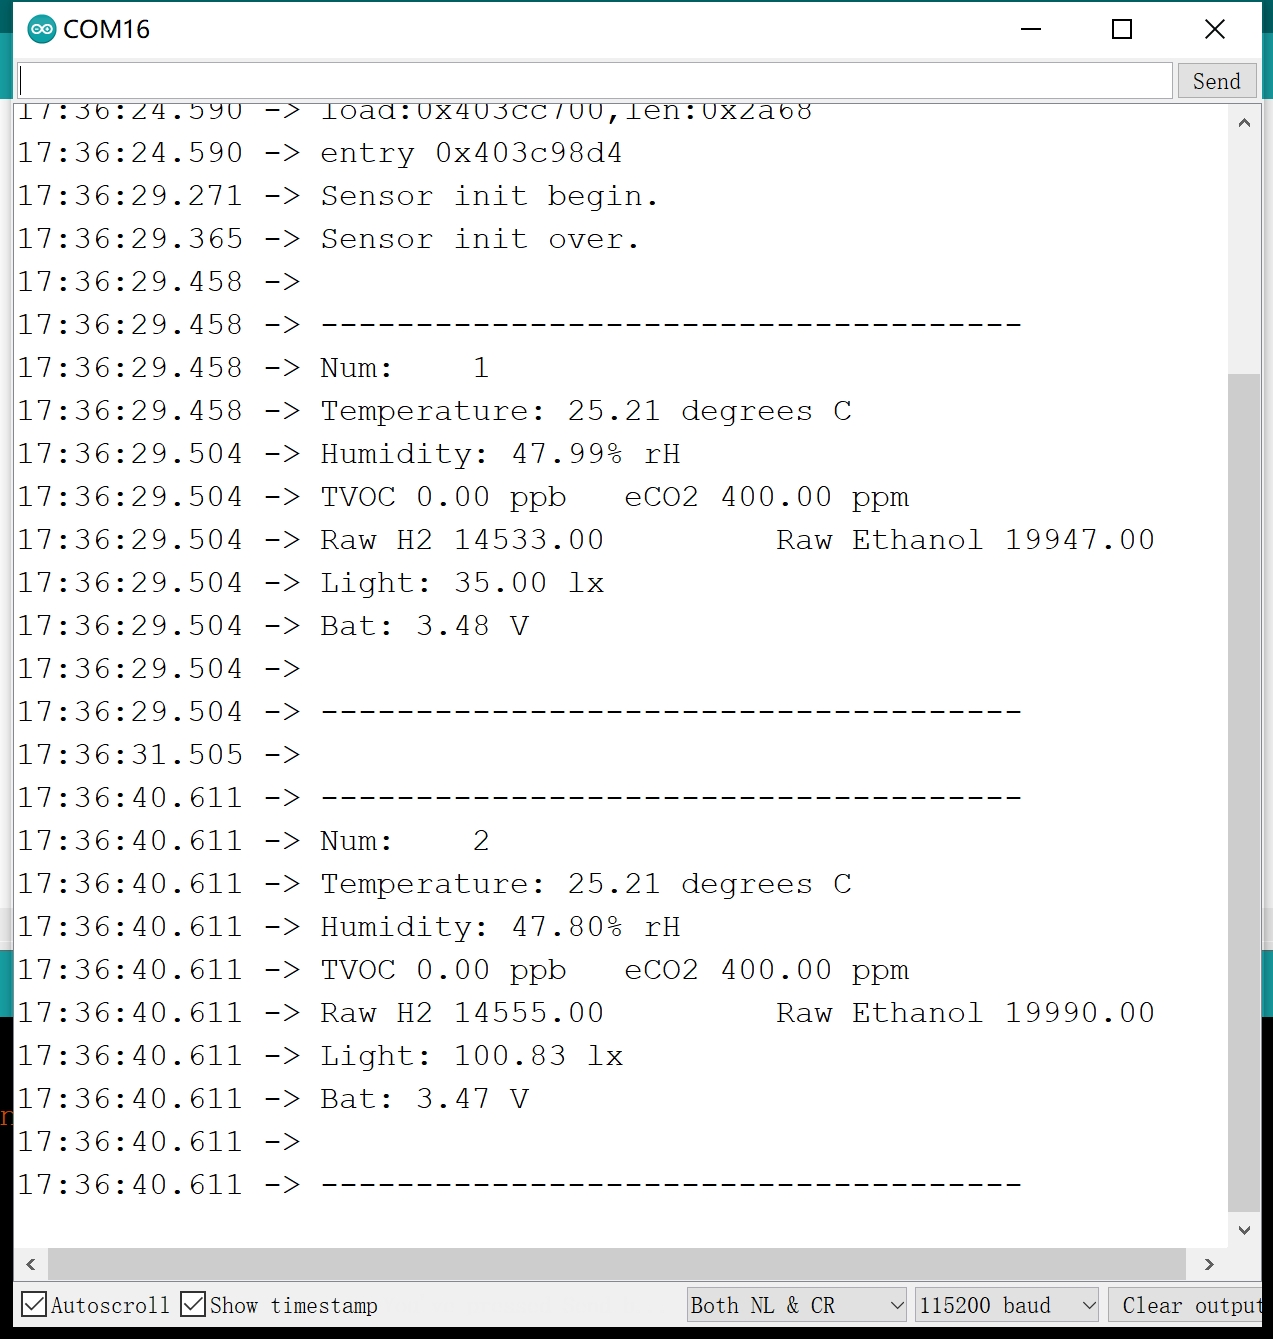
8.Open the serial monitor to view the monitoring data.
9.Press the WIFI button for about 2 seconds.

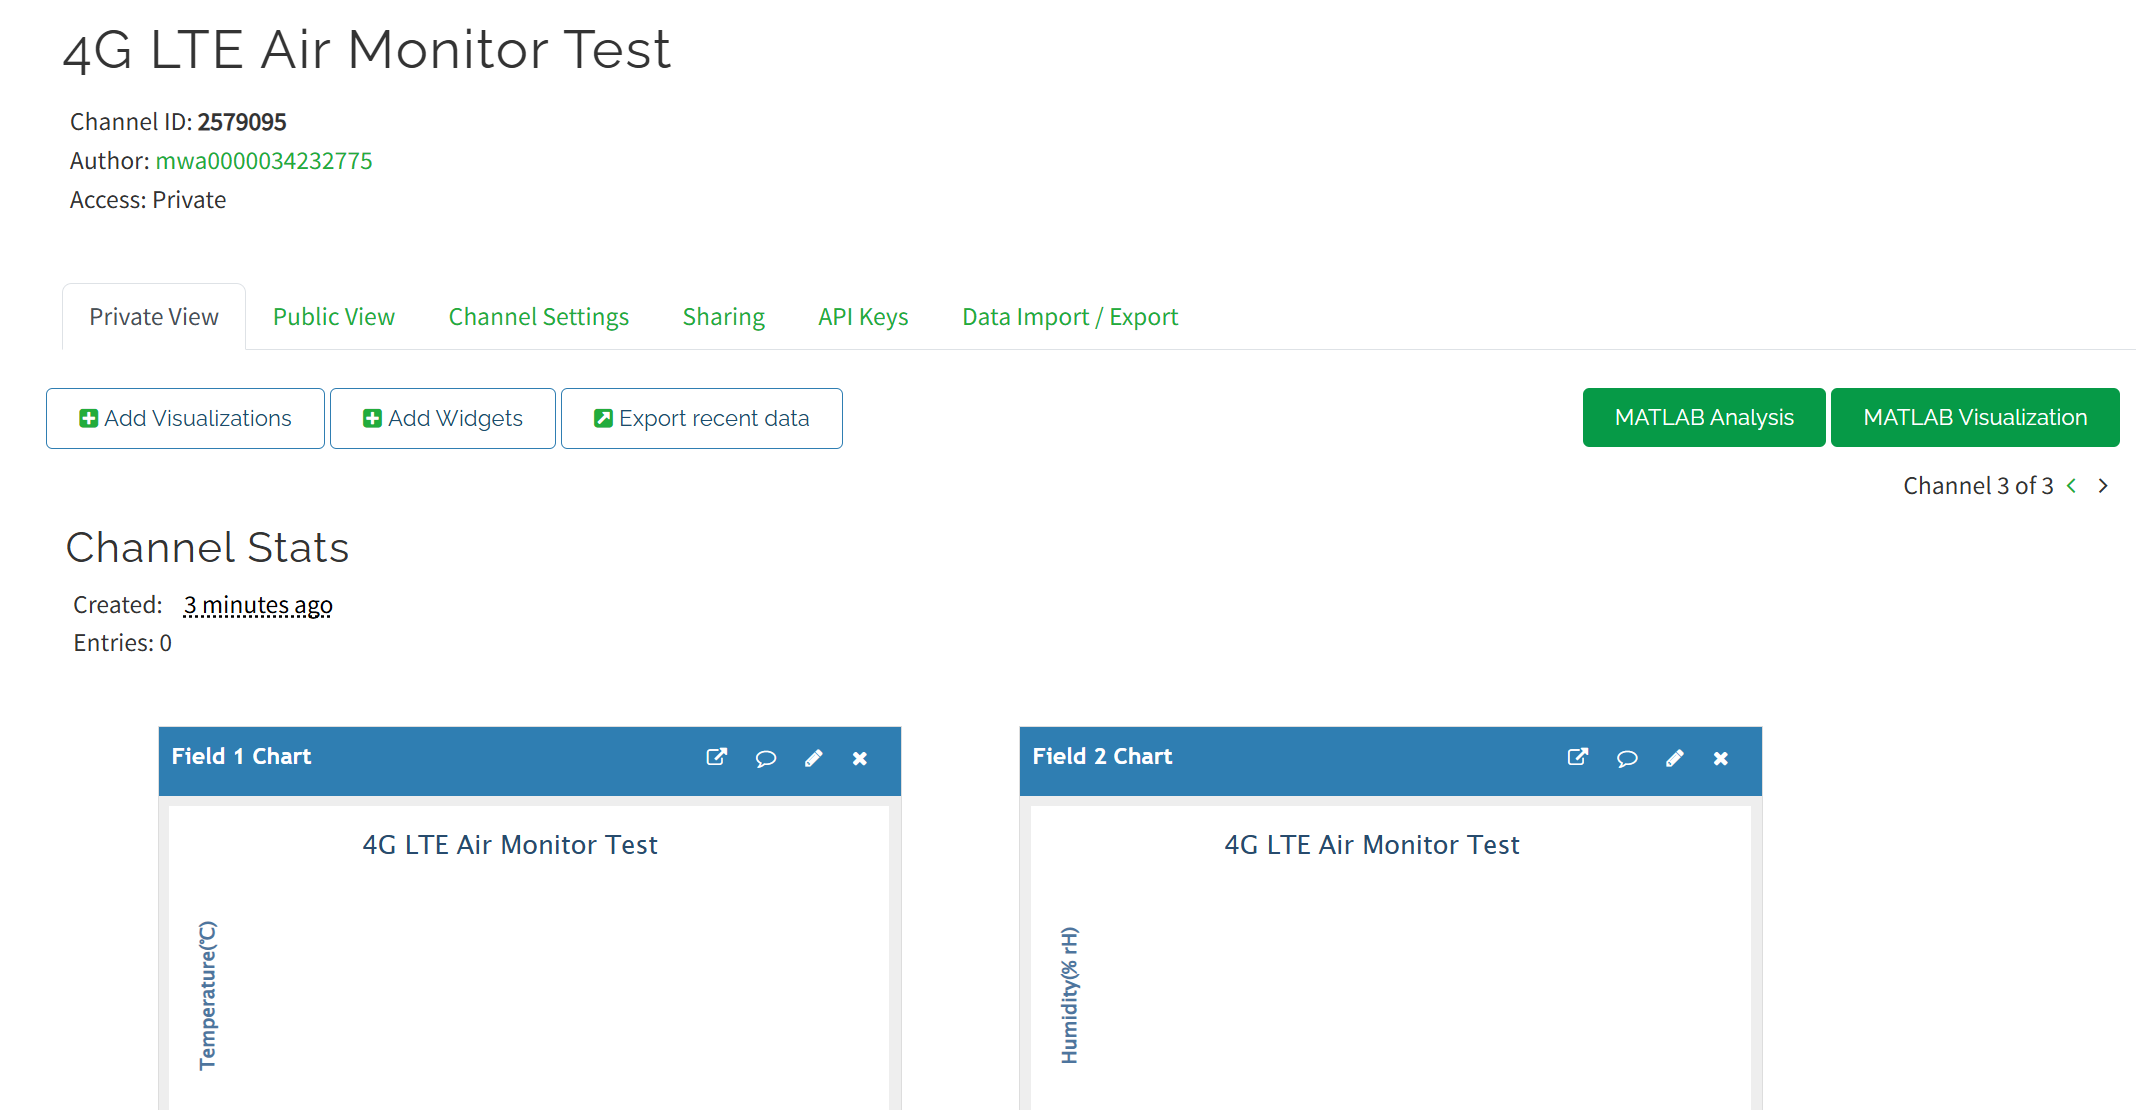
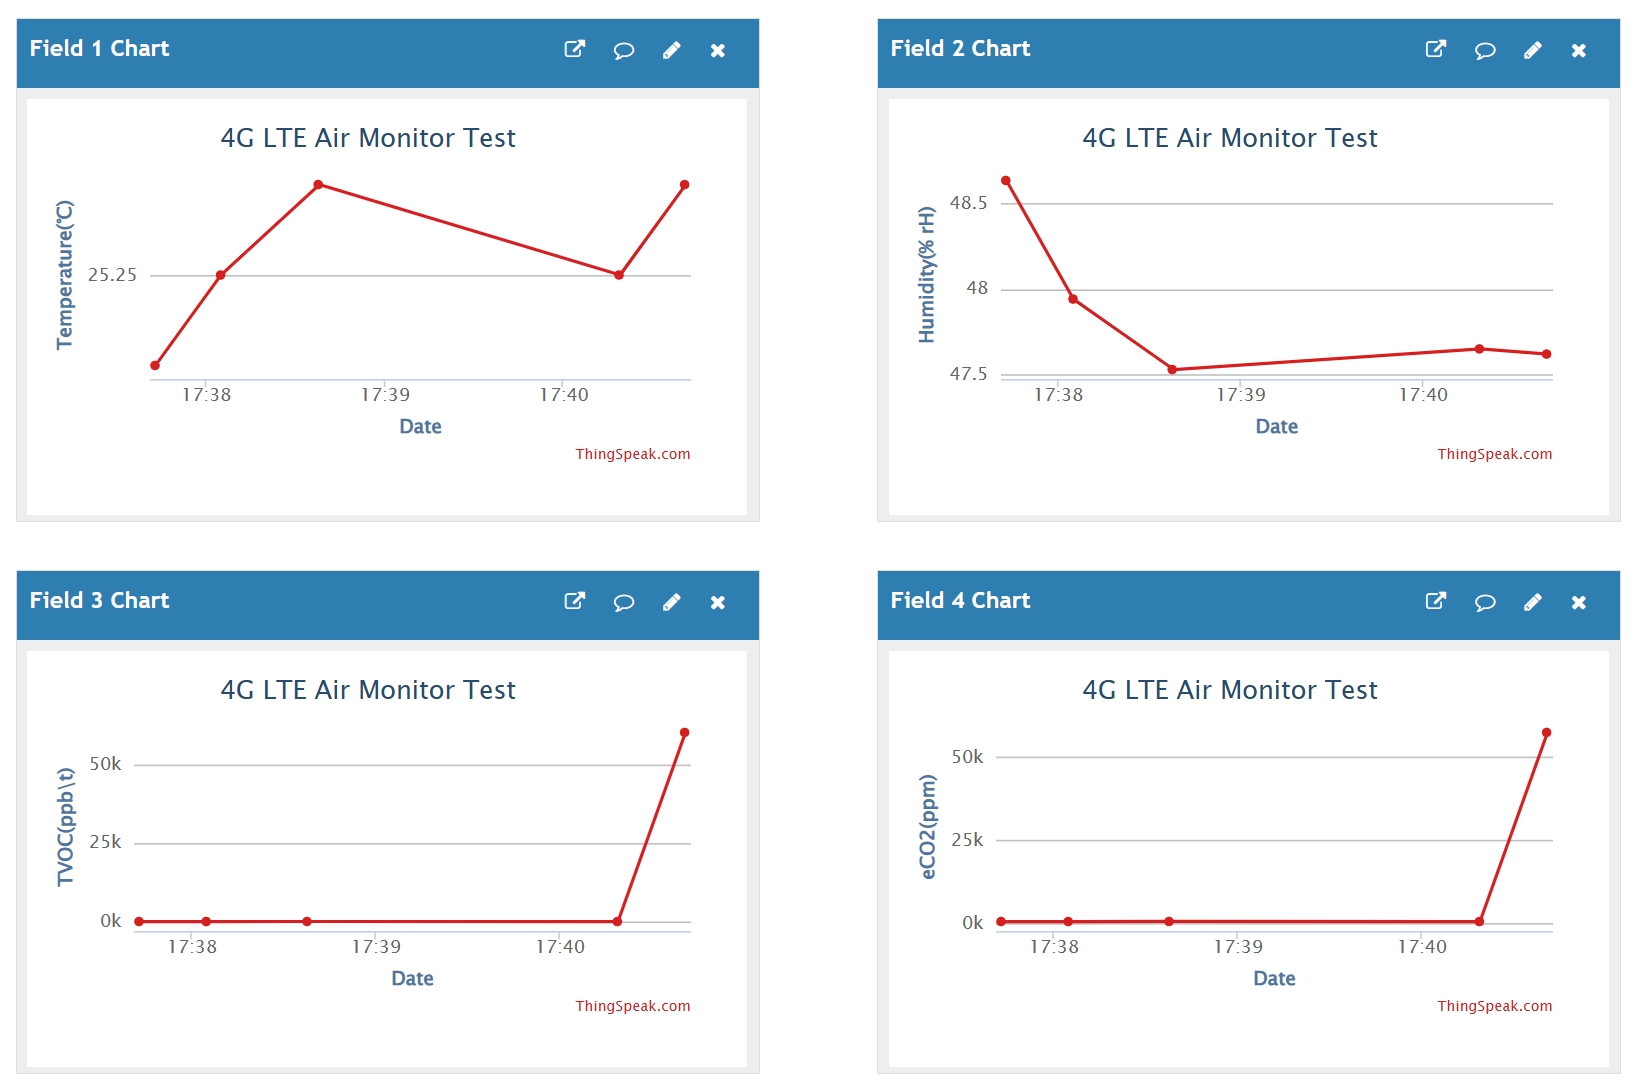
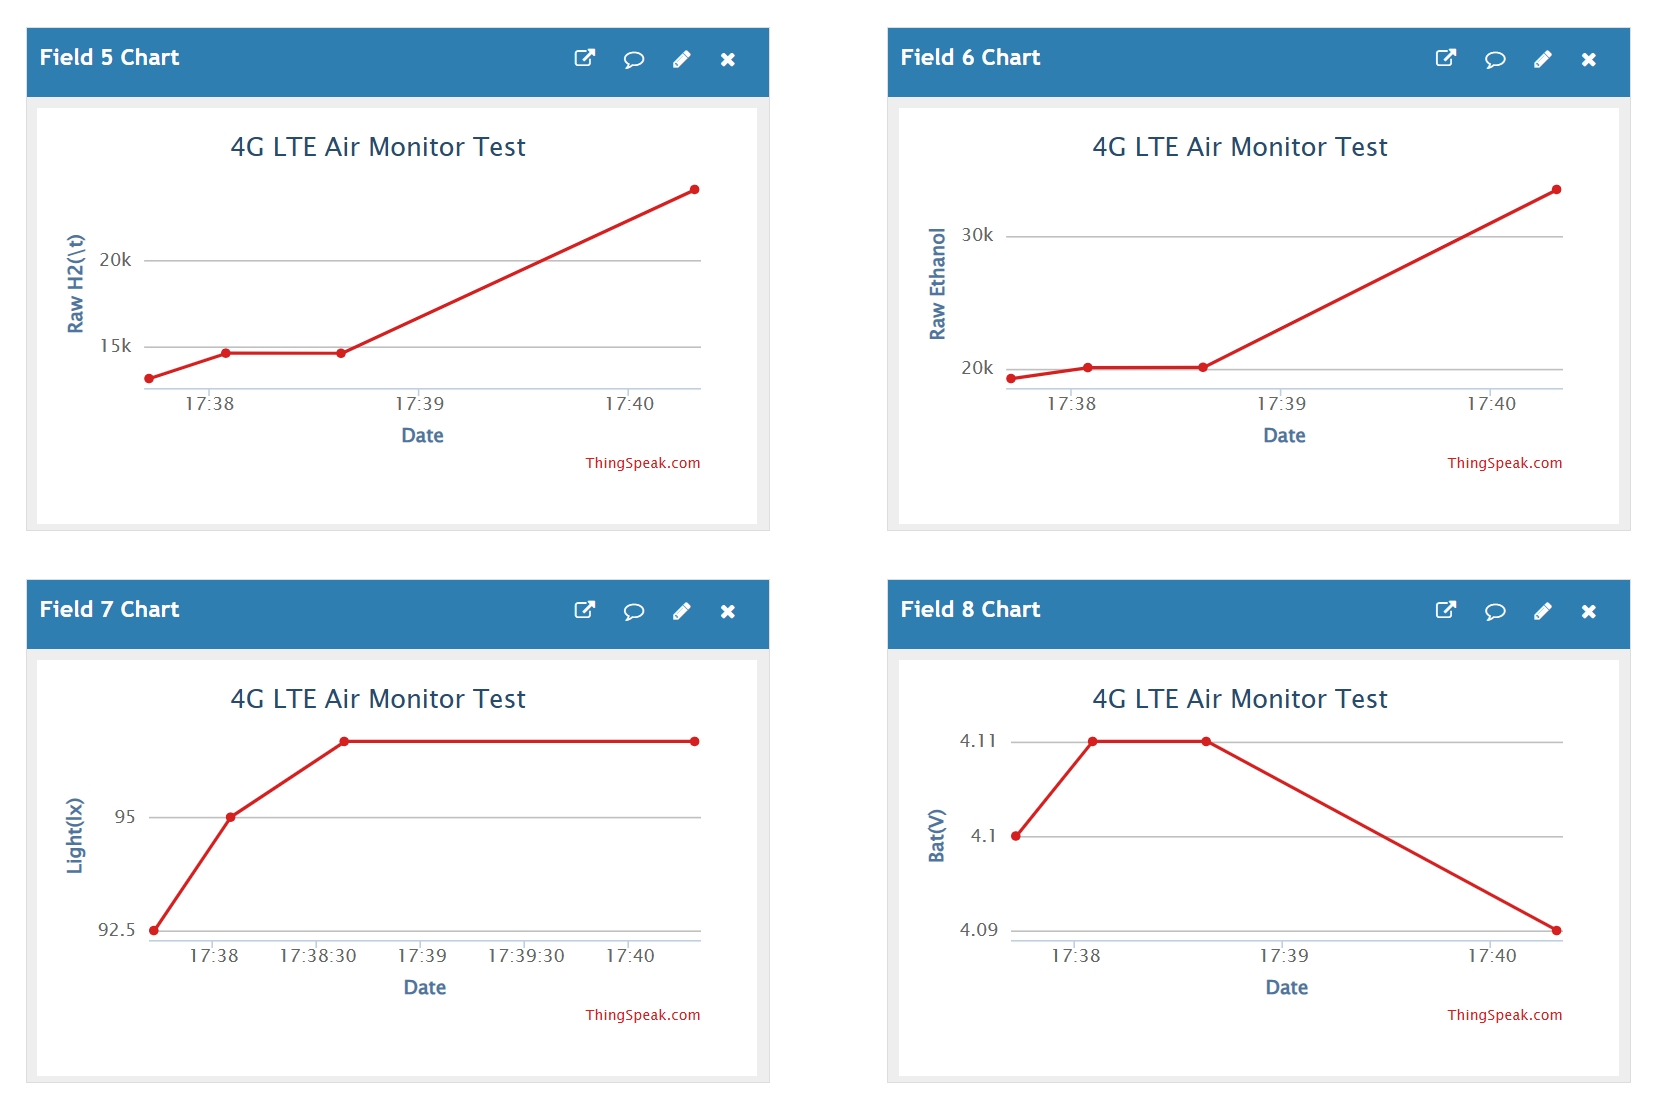
You'll see the transferred data in ThingSpeak.
5. Transmit the detection data to Datacake
This demo is to transfer the monitored data to Datacake via WIFI. First we have to add the device in Datacake, get the URL and serial number; Then open the code via Arduino IDE, change your WIFI information, URL and serial number on Datacake.
5.1 Datacake
- Login datacake or Create Account.
-
Click “Add Device”.

-
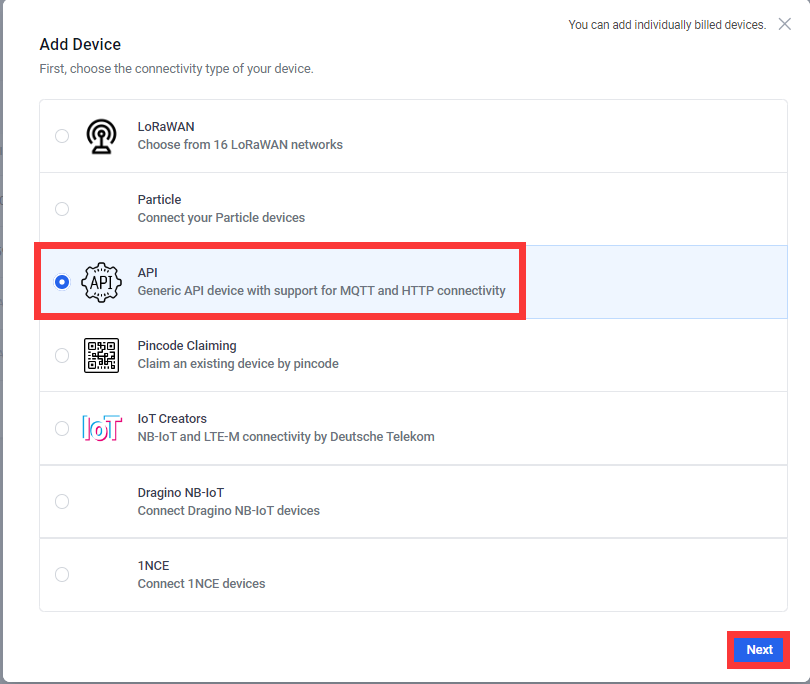
Select API and click “Next”.
-
Select a Product based on your needs, take "Create new empty product" as an example.

-
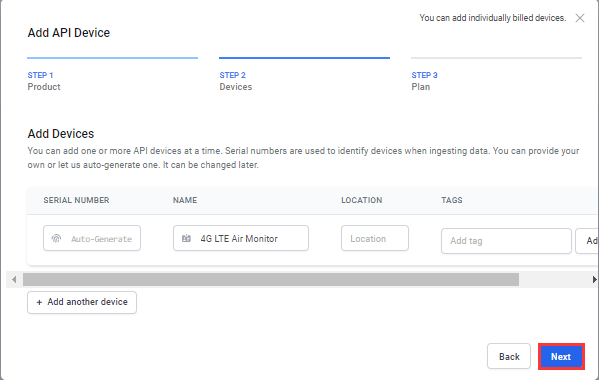
Leave the default in “Add API Device” and click “Next”.
-
Choose the type according to your needs, and click “Add 1 device”.

-
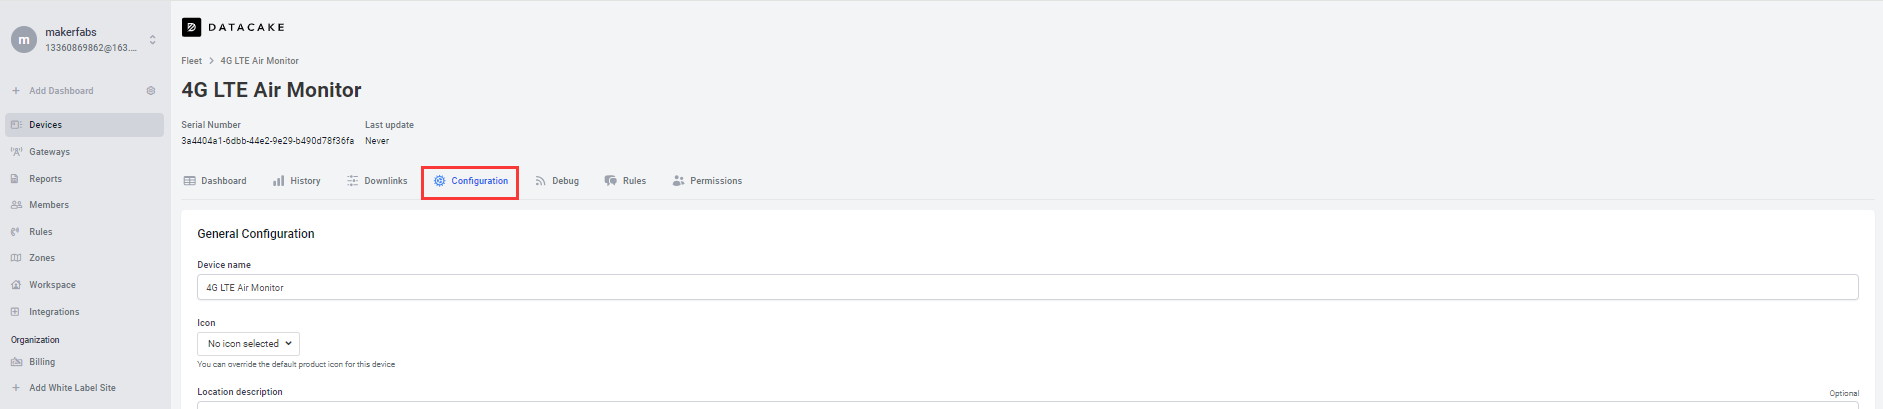
Click to go to the device you just added.

-
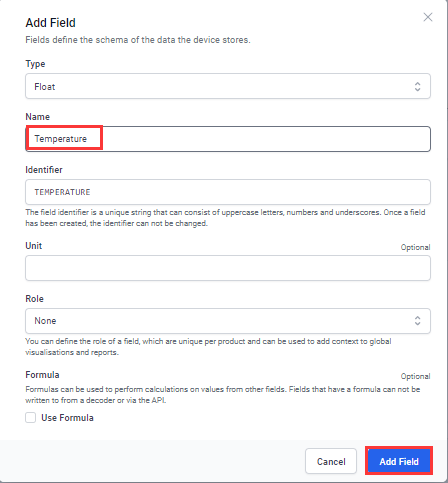
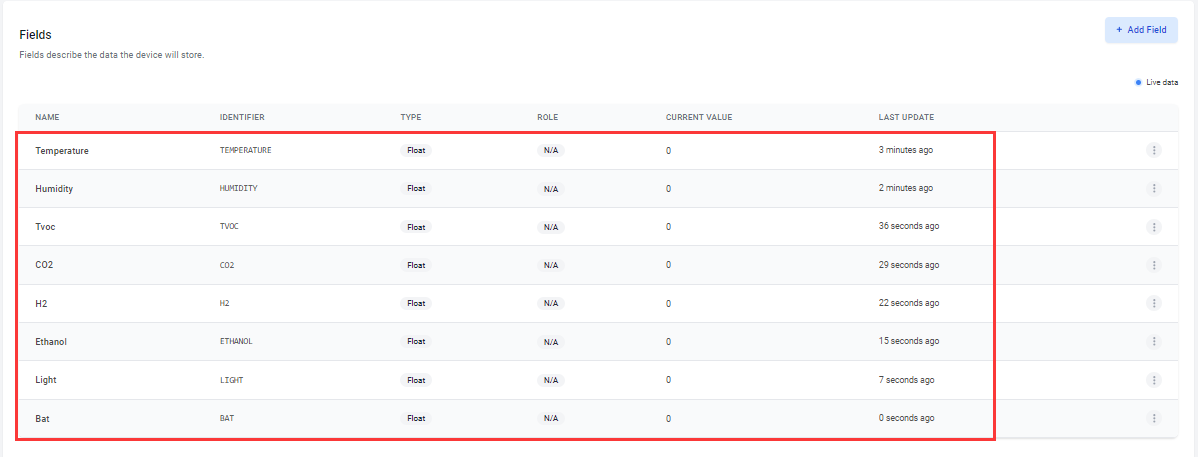
Click “Configuration”, follow the steps to add a field your need.

-
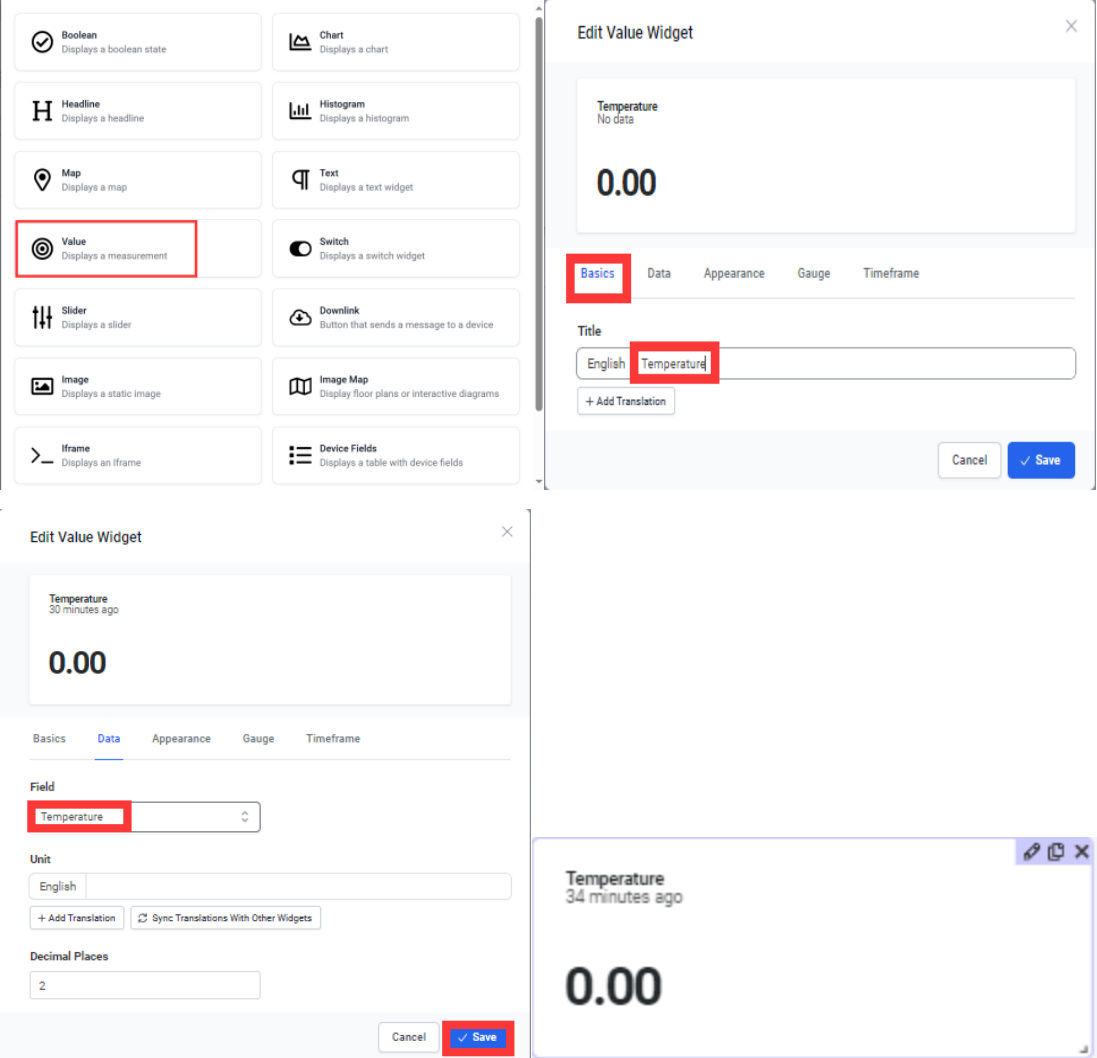
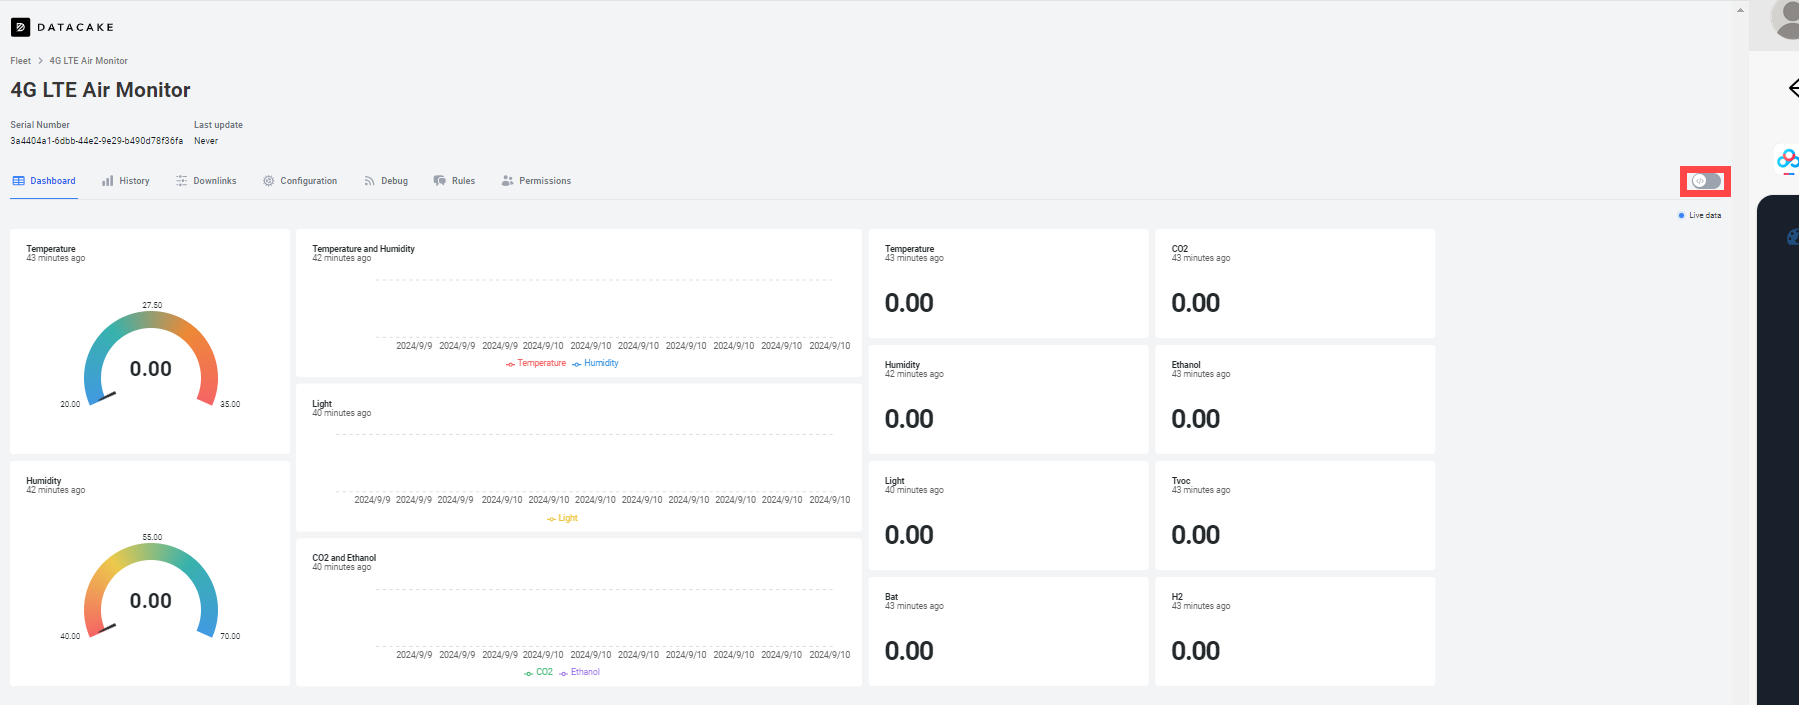
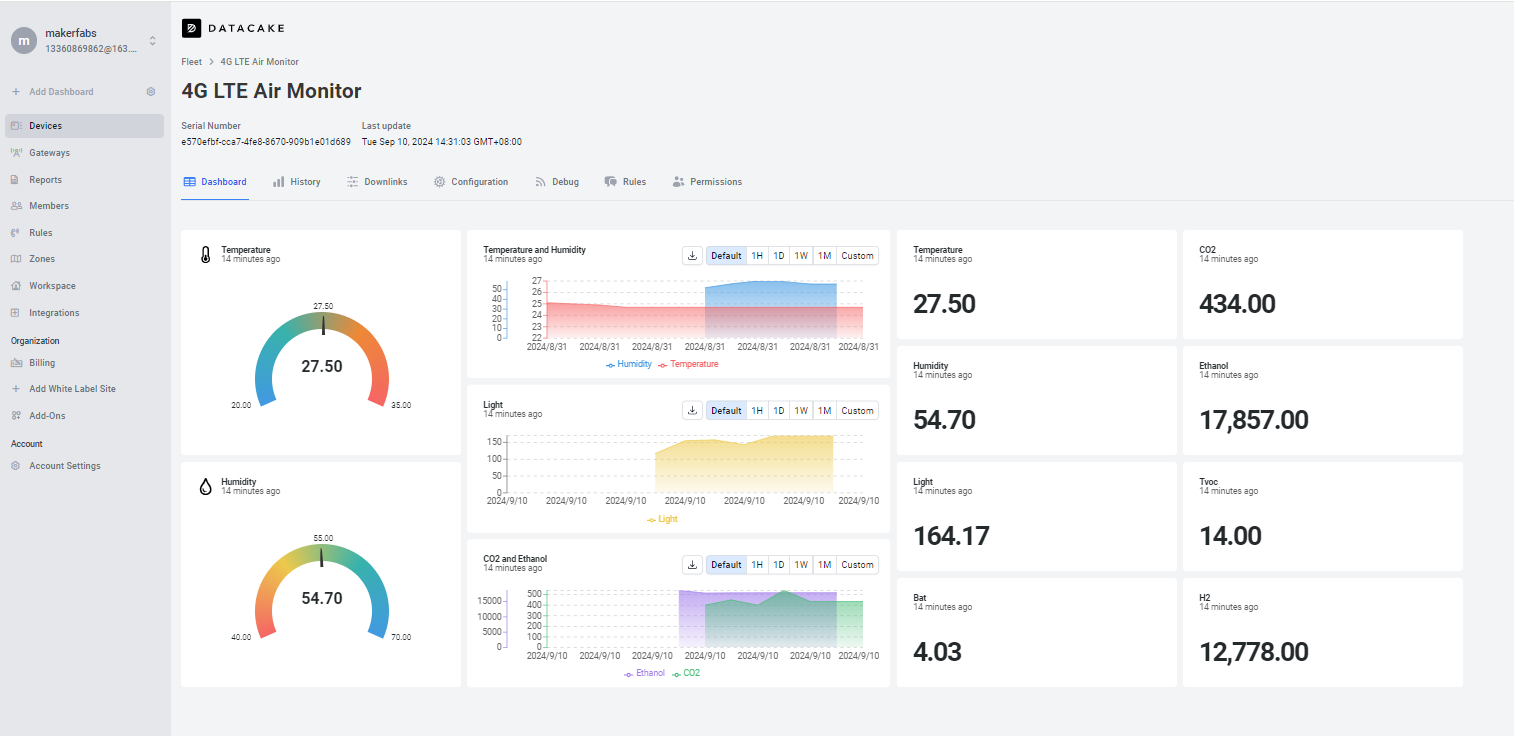
To get a better look at the data, we can add widget.Click “Dashboard-->switch-->+ Add Widget”.

-
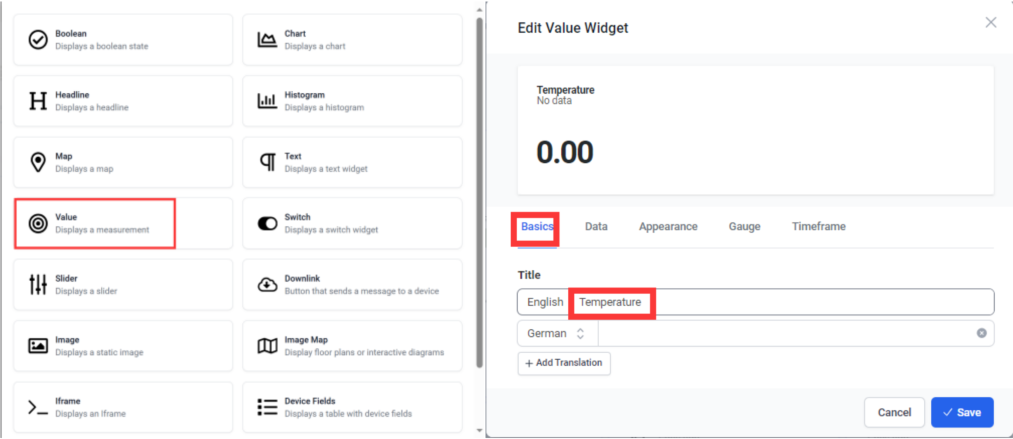
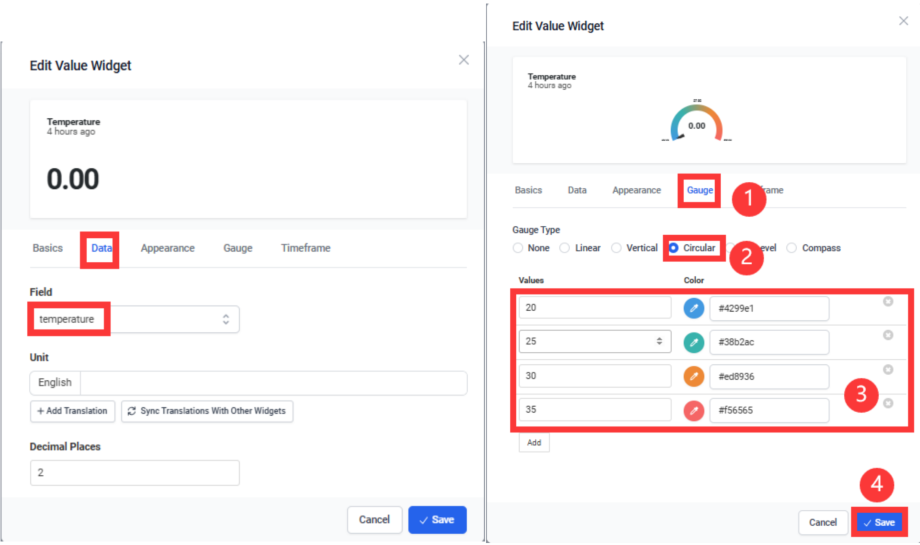
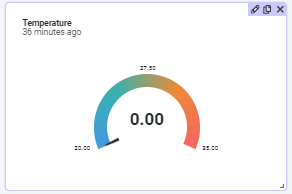
Select “Value” and set Title.
-
Select “Value” and set Title, Field and presentation form as well as the interval color.
-
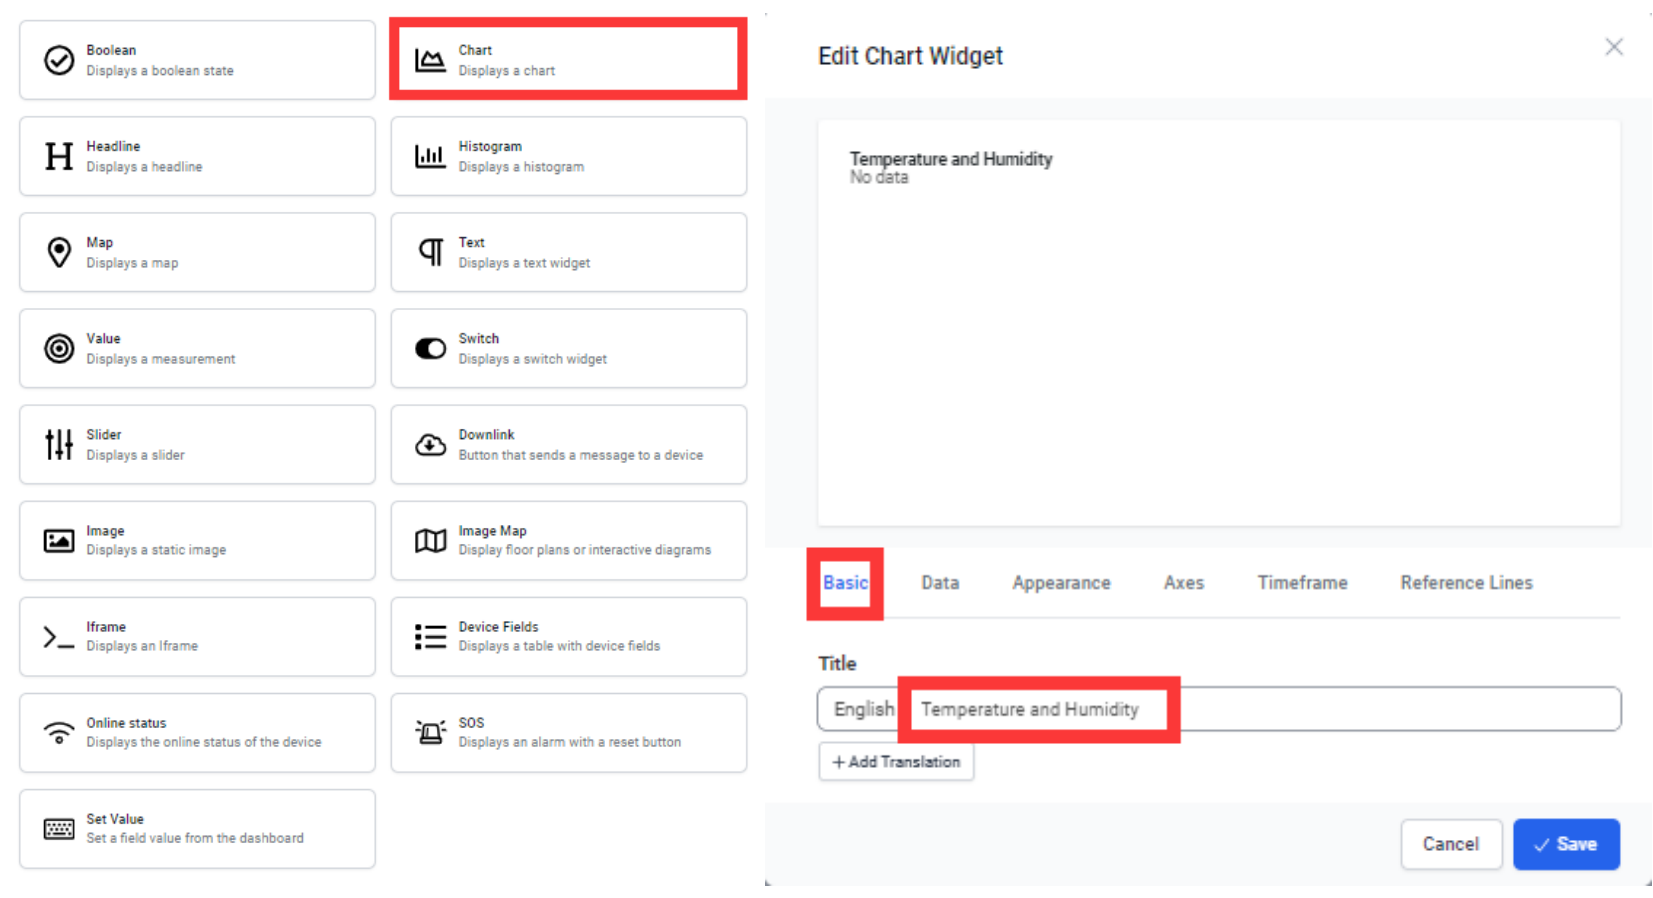
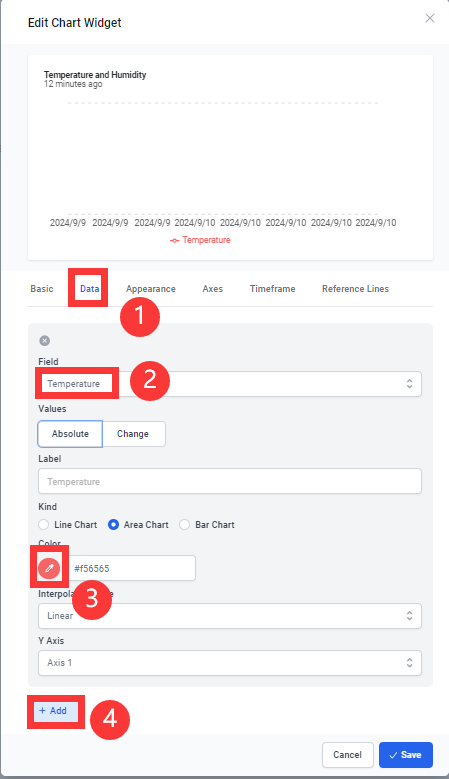
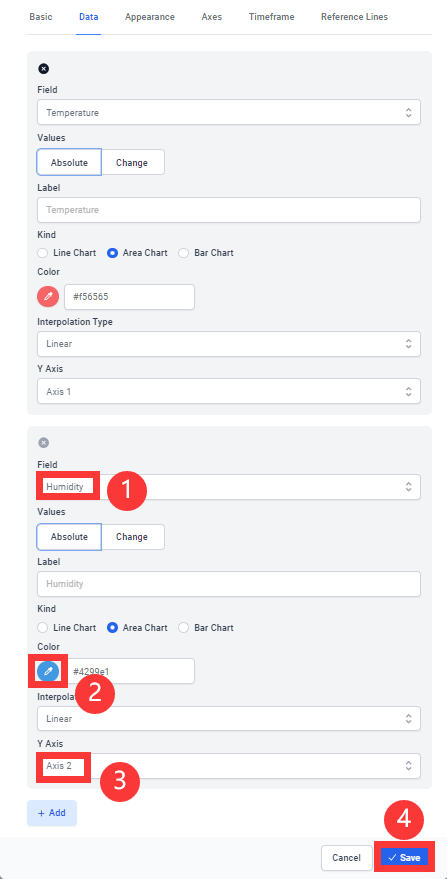
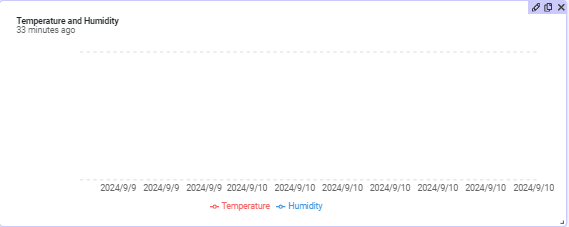
Select Chart and set Title, Field, Color, Axis and click “save”.
-
If you still need to observe other data, you can repeat the addition as above.
- Click the switch to save.
5.2 Arduino IDE
1.Open the Transmit_the_detection_data_to_Datacake by Arduino IDE.
2.Install the ESP32 board package.
3.Install Library.
Select "Sketch > Include Library > Manage Libraries"
-
search "AHT10" and click Install.
-
search "SGP30" and click Install.
-
search "BH1750" and click Install.
4.Change the WIFI ssid and password.
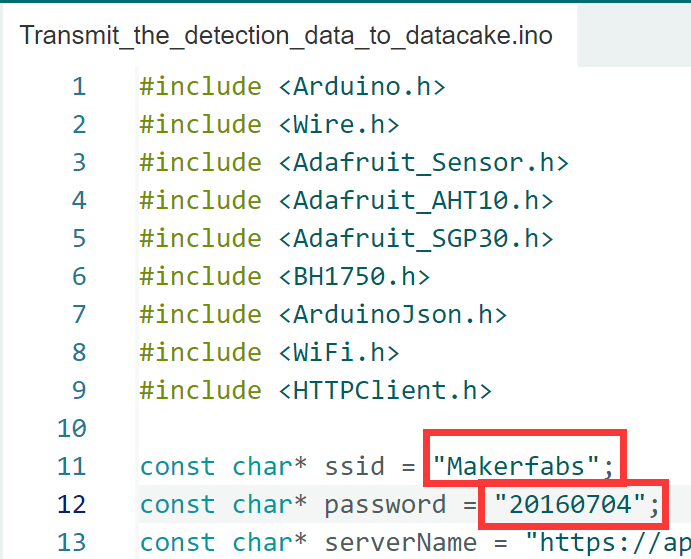
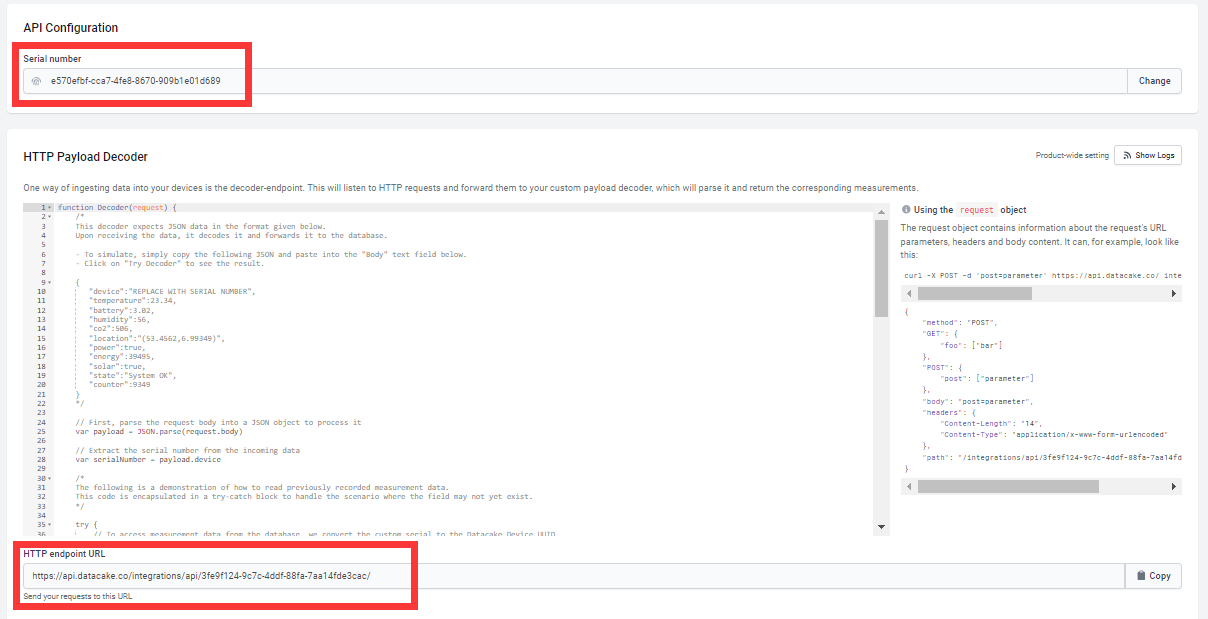
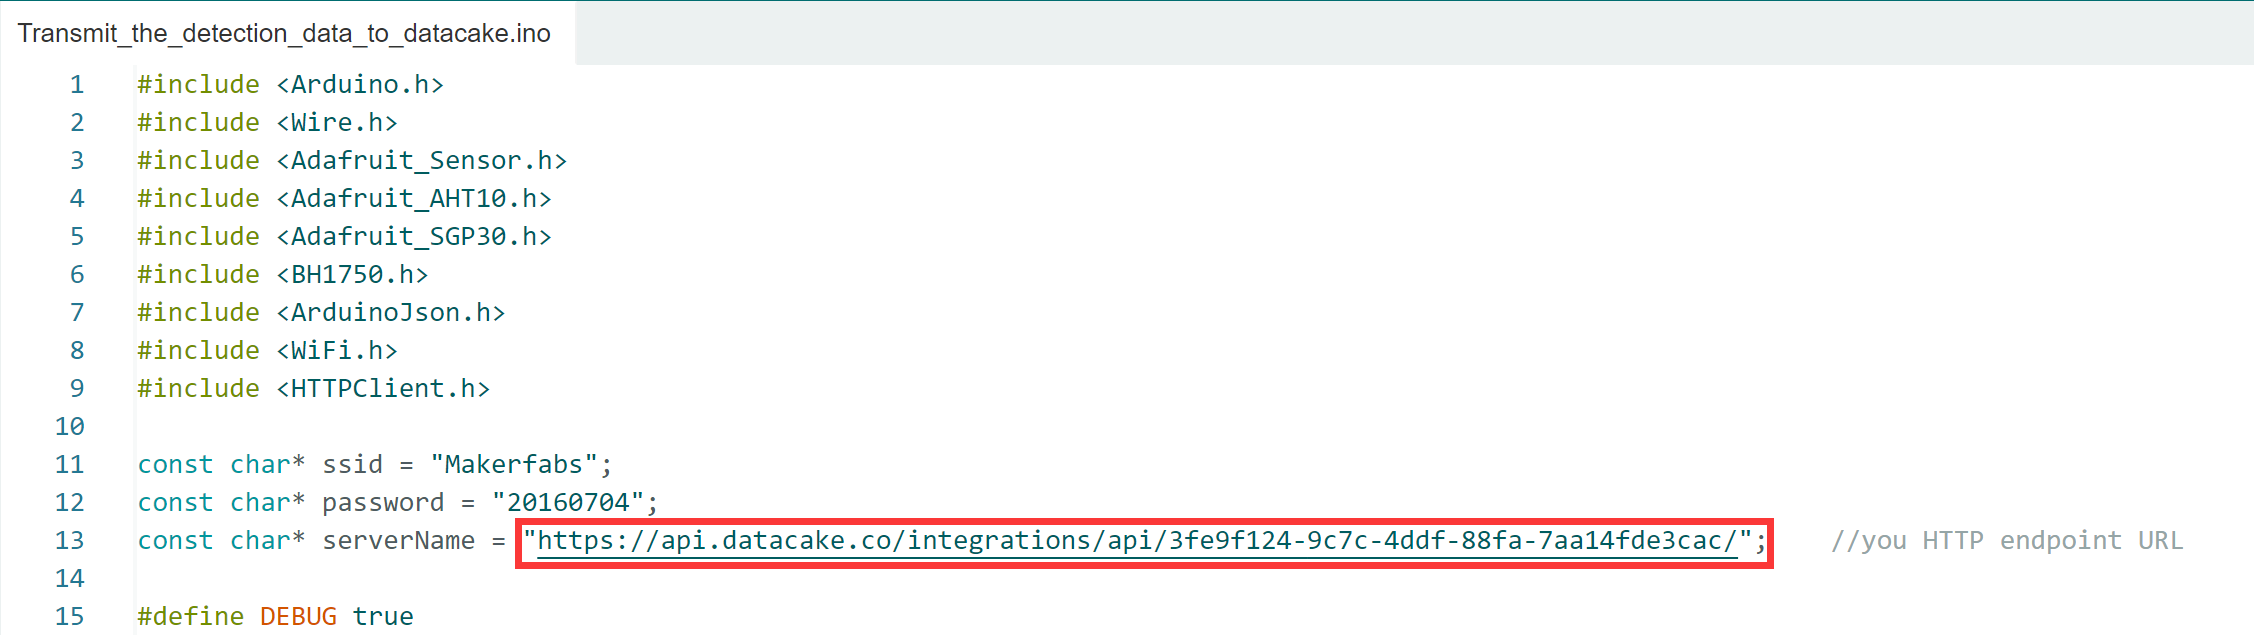
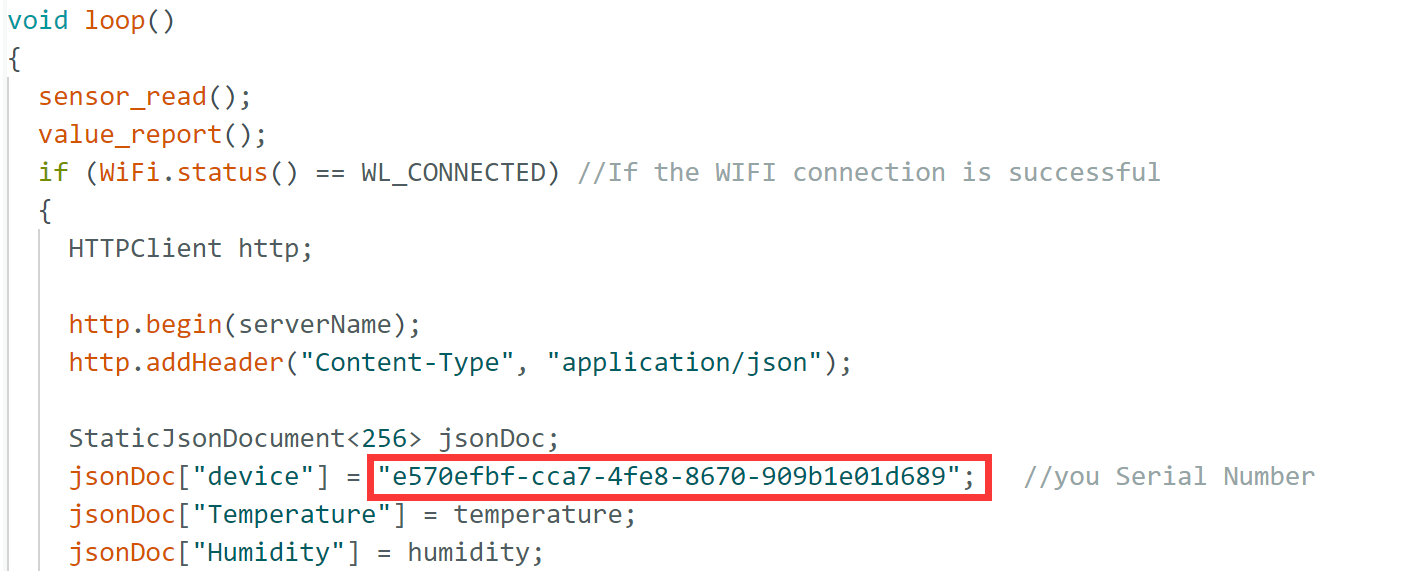
5.Go back to datacake, click “Configuration”, copy the “Serial number” and “HTTP endpoint URL” into the code respectively.
6.Use Type-C USB cable to connect the board and PC, and select the development board "ESP32S3 Dev Module" and the port.
7.Turn on the toggle switch.
8.Verify the code and upload.
9.Open the serial monitor to view the monitoring data.
You'll see the transferred data in Datacake.
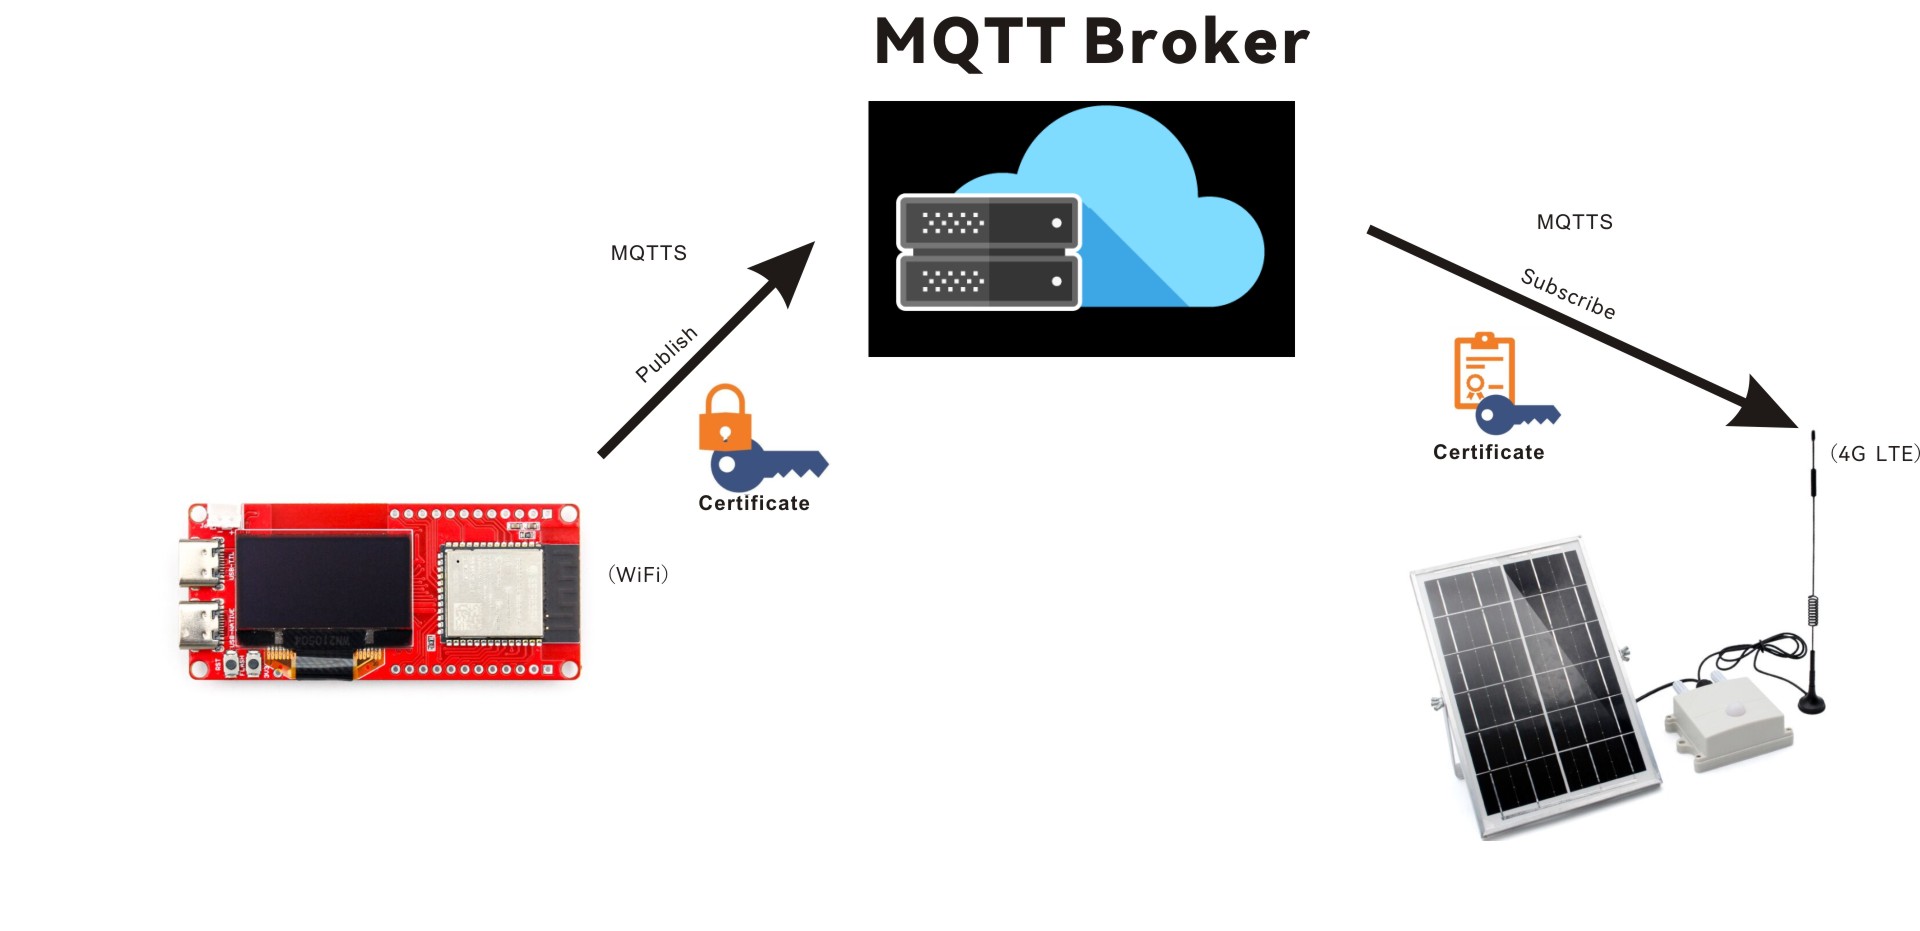
6. MQTTS Demo
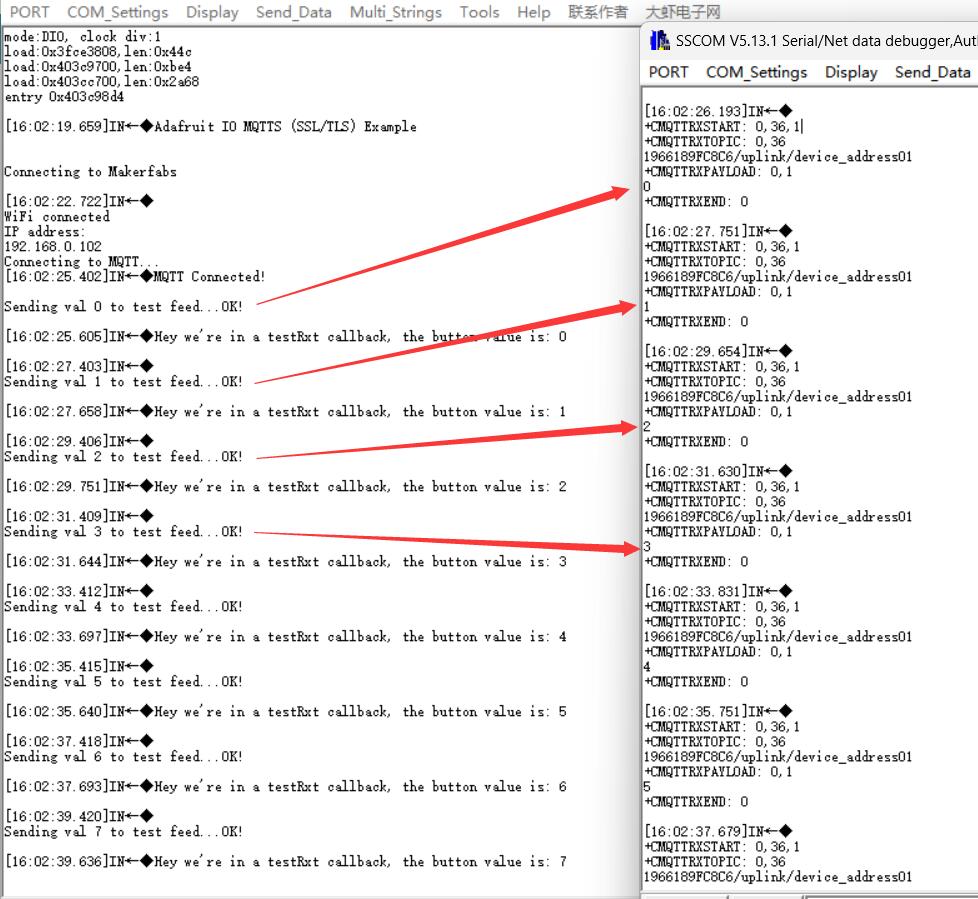
This demo shows how to use MQTTS. An ESP32-S3 board transfers data to MQTT broker via WiFi and received by 4G LTE Air Monitor via 4G.
 1. Install the Adafruit MQTT library from library manager. What we used is v2.5.9.
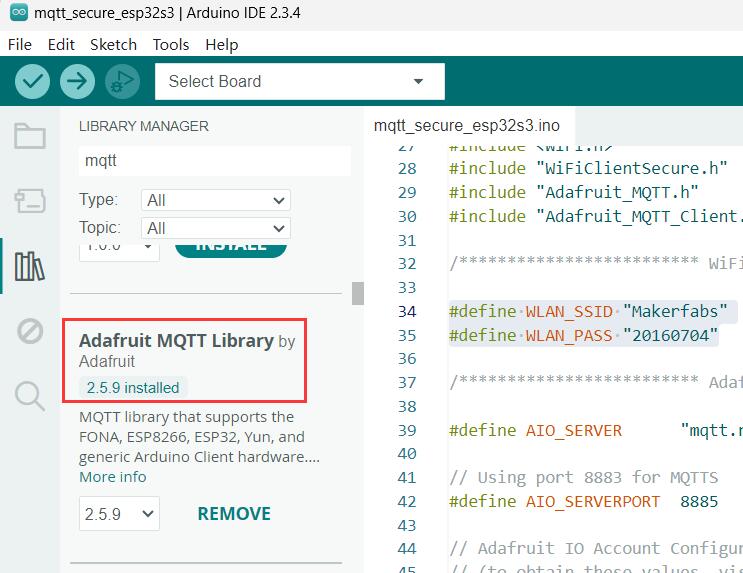 2. Open the mqtt_secure_esp32s3 demo by Arduino IDE, modify the WiFi to your local network.
#define WLAN_SSID "Makerfabs"
#define WLAN_PASS "20160704"
-
Compile and upload to a ESP32-S3 board. Now we can put it aside.
-
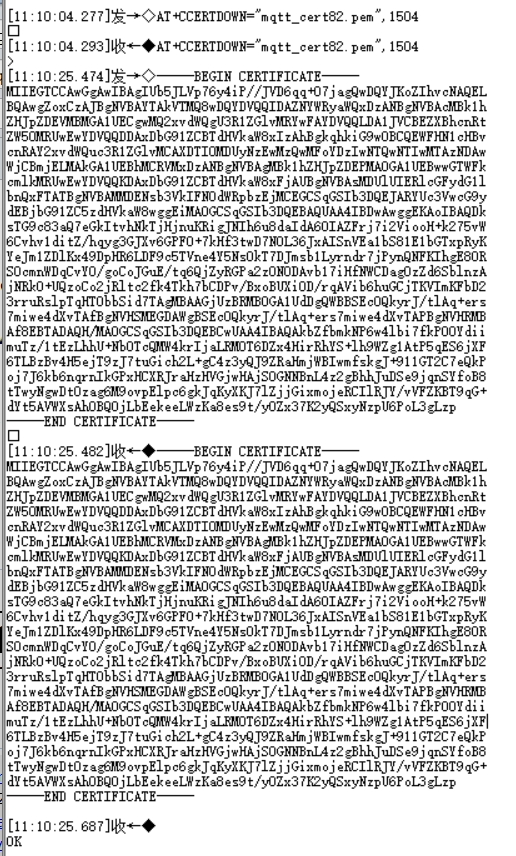
Download the CA certification to SIM7670G (Refer to SIM7672X & SIM7652X_Series_AT_Command_Manual_V1.00.pdf).
-
Open the 4G_LTE_MQTTS demo by Arduino IDE, compile and upload to 4G LTE Air Monitor.
-
Result show: We can see from the screenshot below,ESP32S3 send value to MQTT Server and received by 4G LTE monitor.
More usage of MQTT(S), you can refer to SIM7672X_SIM7652X_Series_MQTT(S)_Application_Note_V1.00.pdf
7. FAQ
You can list your questions here or contact techsupport@makerfabs.com for technology support. Describing your problem in detail will help solve your problem.