SenseCAP M2 Multi-Platform LoRaWAN Indoor Gateway
1. Gateway Network Configuration
Connect the antenna and power adaptor to the gateway. The power LED will show in red, and in about 15s, the indicator on the top will flash green, indicating that the gateway is booting.

2. Connect to the Internet
There are two ways to connect to the Internet. Choose the one that works for you.
2.1 Connect to Ethernet Cable
Connect the Ethernet cable to the Ethernet port, and the indicator on the top will show solid green if the gateway is successfully connected to the internet.
2.2 Connect to WIFI via Luci
There are two ways for users to login Luci configuration page.
- Access via router.
- Access via device AP hotspot.
2.2.1 Access via router
- Step 1: Connect your device to a Ethernet cable, and connect your PC to the same router.
Note: Your PC and device should be connected to the same router/network.
-
Step 2: Get IP Address of your device Check the IP Address of your device on your router admin page.
-
Step 3: Get your device Username and Password, You can find the Username and Password on your device label.
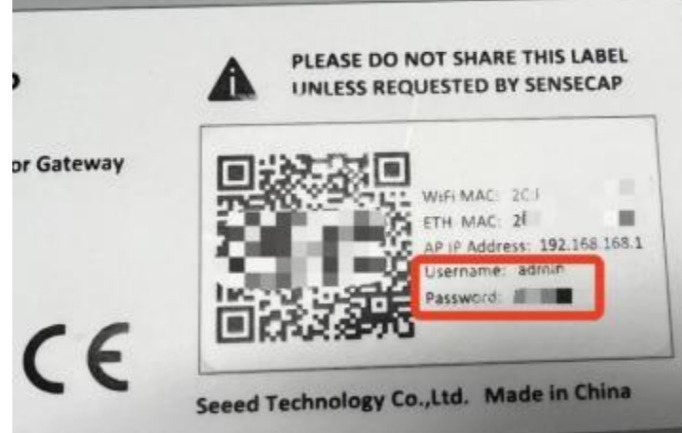
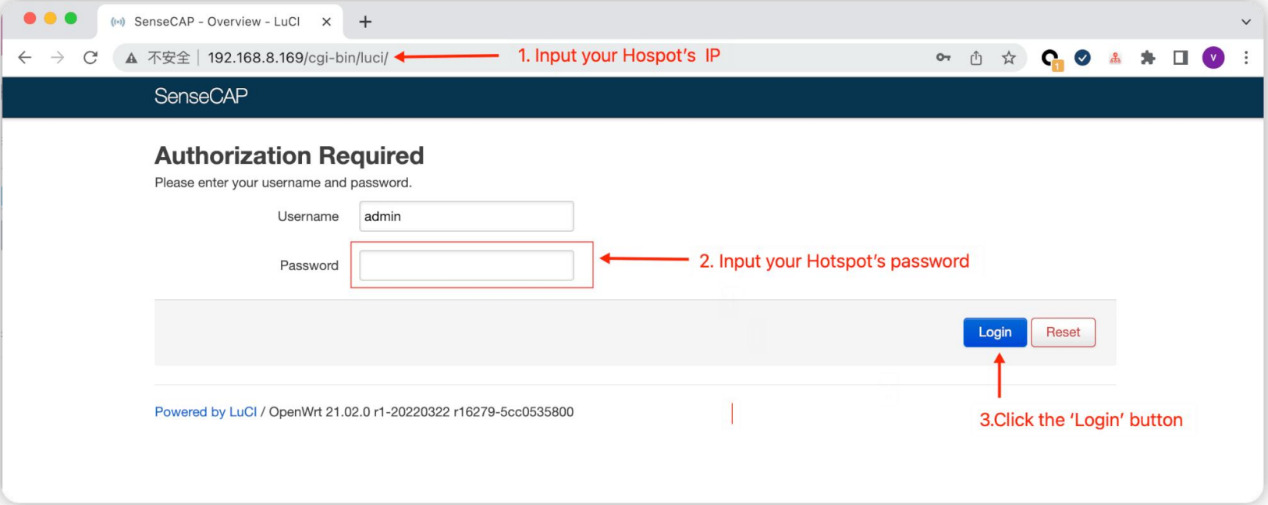
- Step 4: Login Luci Input the IP Address of your device in a browser to enter the Luci page.
Then input your device username and password to login.

2.2.2 Access via device AP hotspot
- Step 1: Turn on the device AP hotspot.
Press the button for 5s until the blue indicator flashes slowly to enter the configuration mode.
- Step 2: Connect to the AP hotspot.
AP hotspot name is SenseCAP_XXXXXX (6-figure MAC address),default password is 12345678; connect your computer to this AP hotspot.
- Step 3: Log in to the Local Console.
Input the IP Address (192.168.168.1) in your browser to enter the Local Console. Then input your device username and password, and click the Login button.
Note:You can find the Username and Password on your device label.
2.2.3 Connect to a WIFI
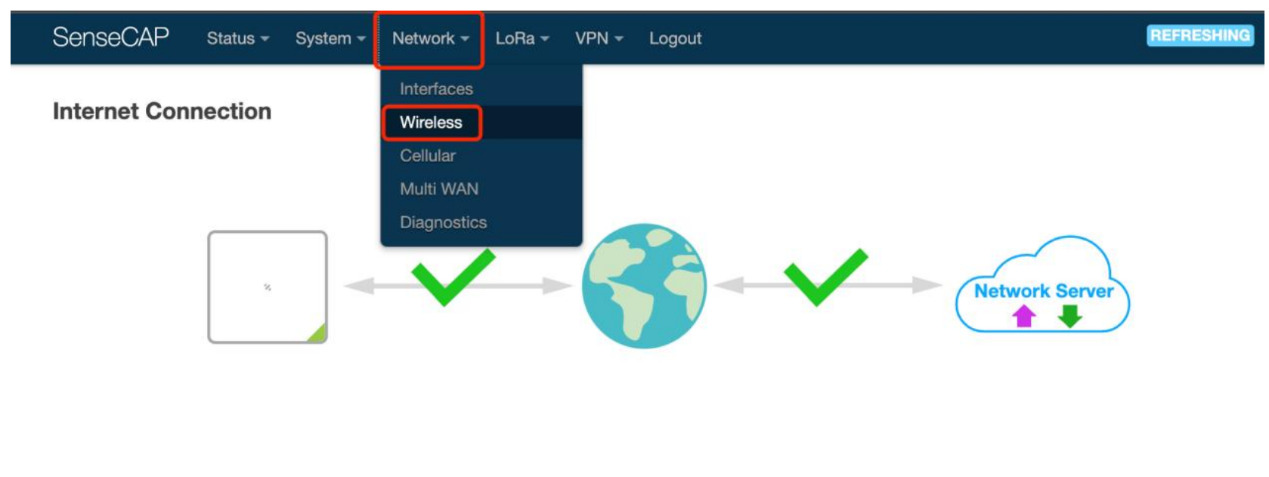
- Click on "Network --> Wireless".
- Click on the Scan button to scan the WIFI.
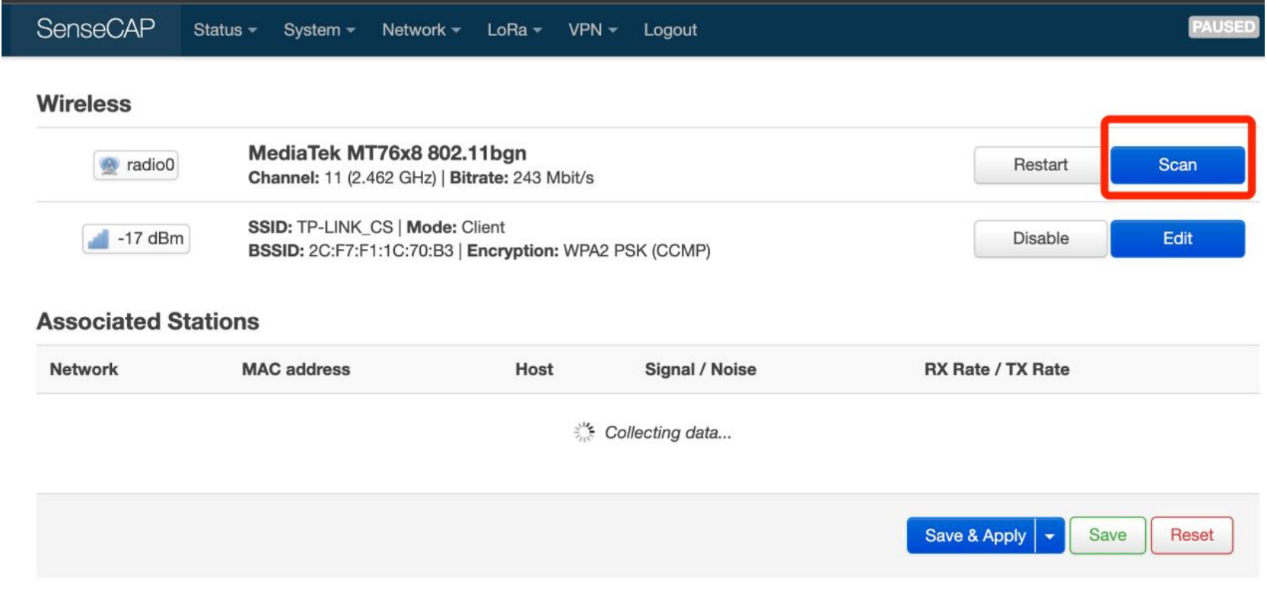
- Select your WI-FI to join the network.
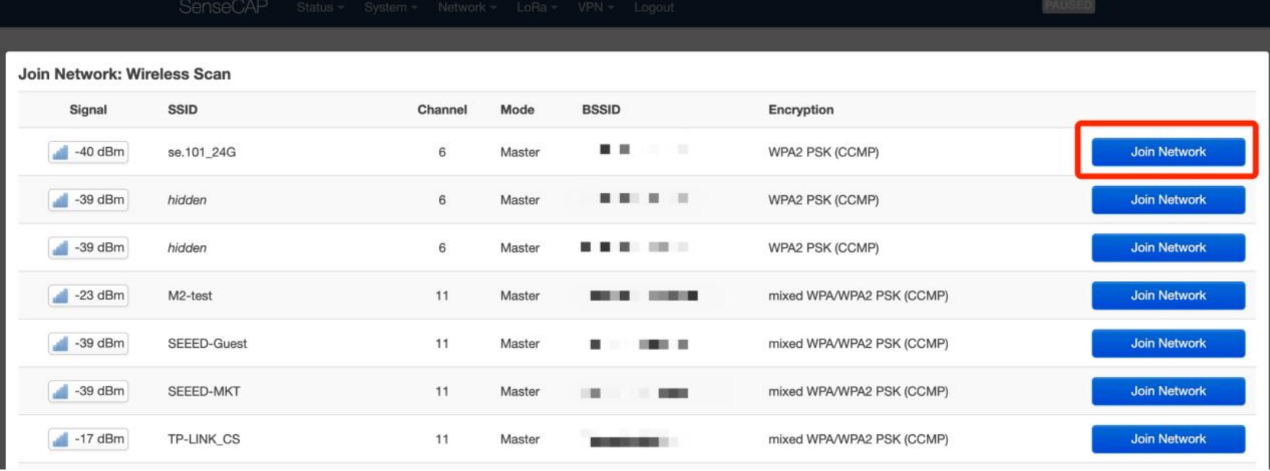
- Submit the Wi-Fi password, and then click Submit and Save.

Then click Save and Apply to apply your settings.
The indicator on the top will show solid green if the gateway is successfully connected to the WIFI.
3. Checking the Gateway Connection Status
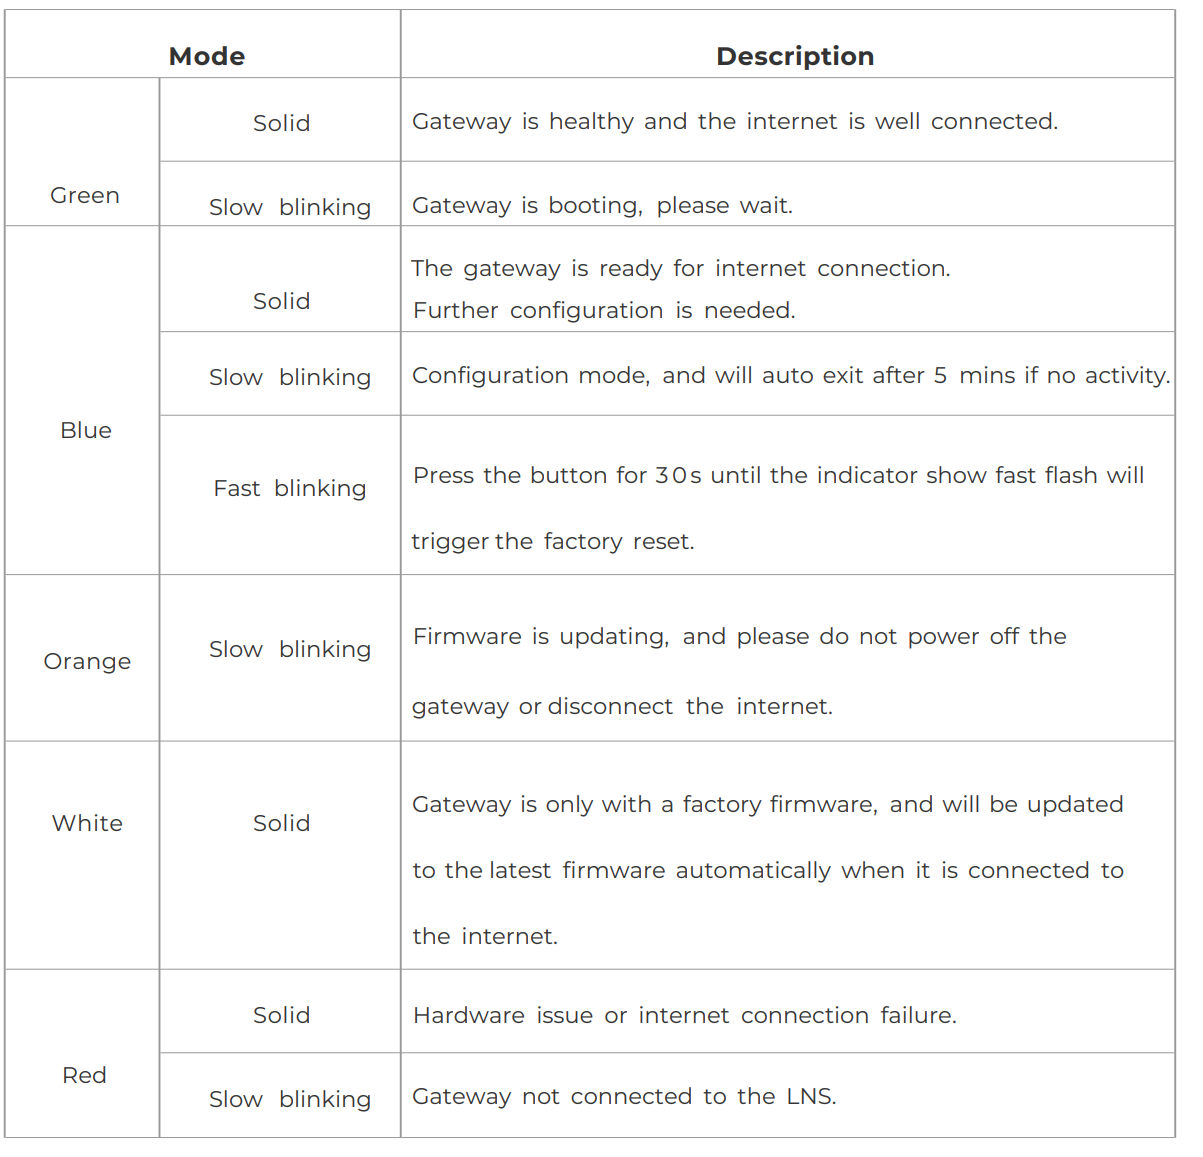
After powering on the gateway, there are two ways for you to check the gateway working status.
-
LED Indicator.
-
Connect Gateway to The Things Network.
3.1 LED Indicator
3.2 Connect Gateway to The Things Network
There are two ways to connect to the Things Network:
- Packet forward.
Semtech UDP Packet Forwarder is the original LoRaWAN® packet forwarder, connecting to servers through the Semtech UDP protocol.
- Basics Station.
LoRa Basics Station is the preferred way of connecting Gateways to The Things Stack.
Choose a way to connect your gateway.
3.2.1 Connecting via Packet Forwarder
TTN Configuration
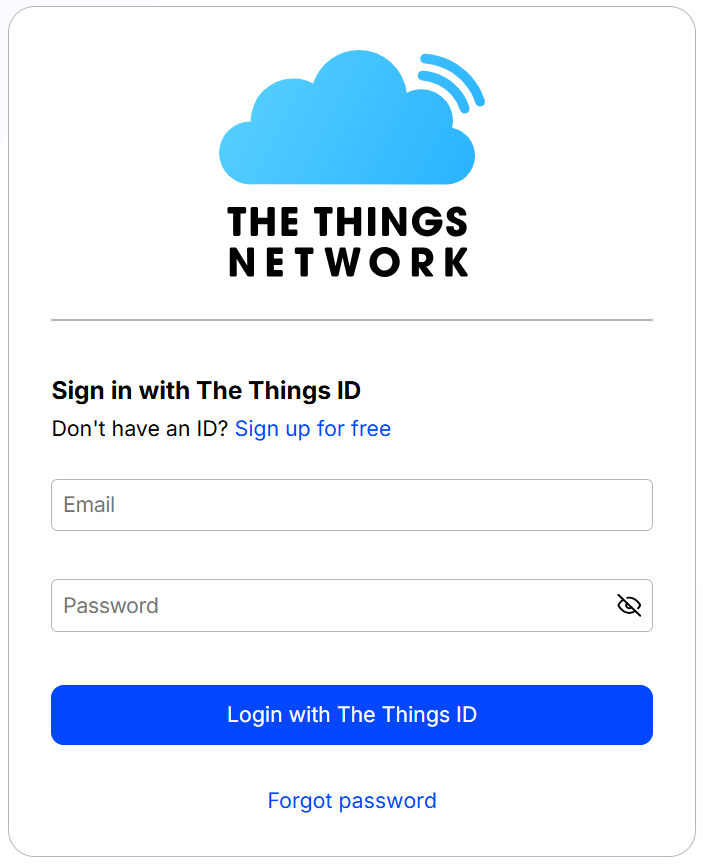
- Step 1:Log into The Things Stack.
If you don't have a TTN account, please register first.
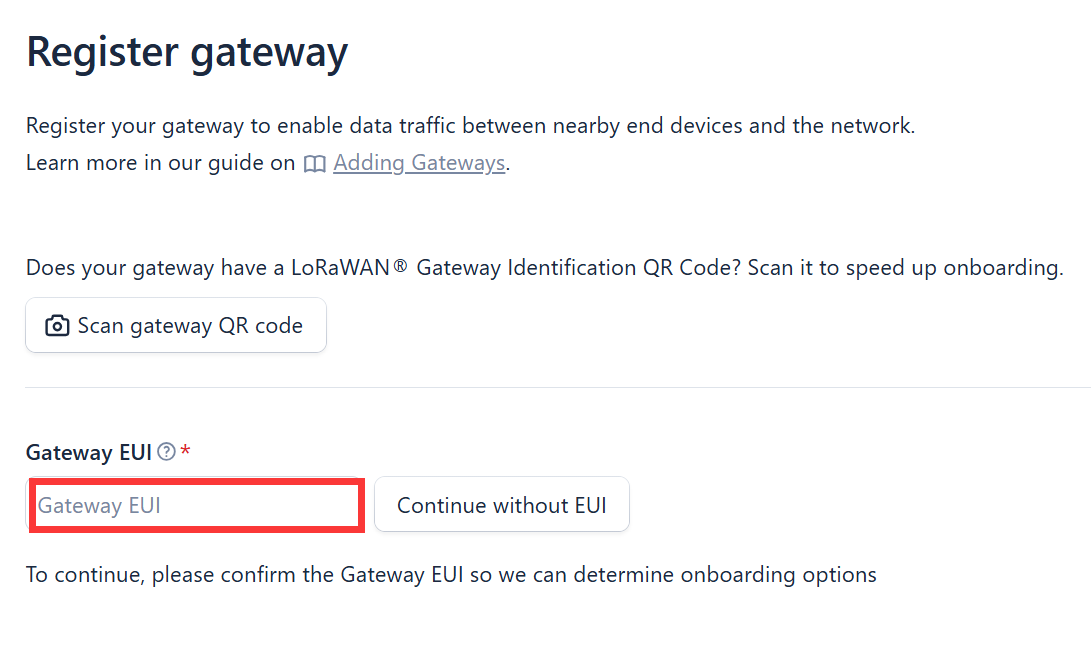
- Step 2: Register the gateway.

Enter your Gateway EUI and click "confirm".
Gateway EUI: Gateway EUI can be found on the device label or Local Console.
Enter your Gateway ID, Gateway ID, Frequency plan and click "Register gateway".
Gateway ID: A unique identifier for your gateway(the ID must contain only lowercase letters, numbers, and dashes).
Gateway name: A name of your gateway.
Frequency plan: Select the corresponding frequency according to your gateway version.
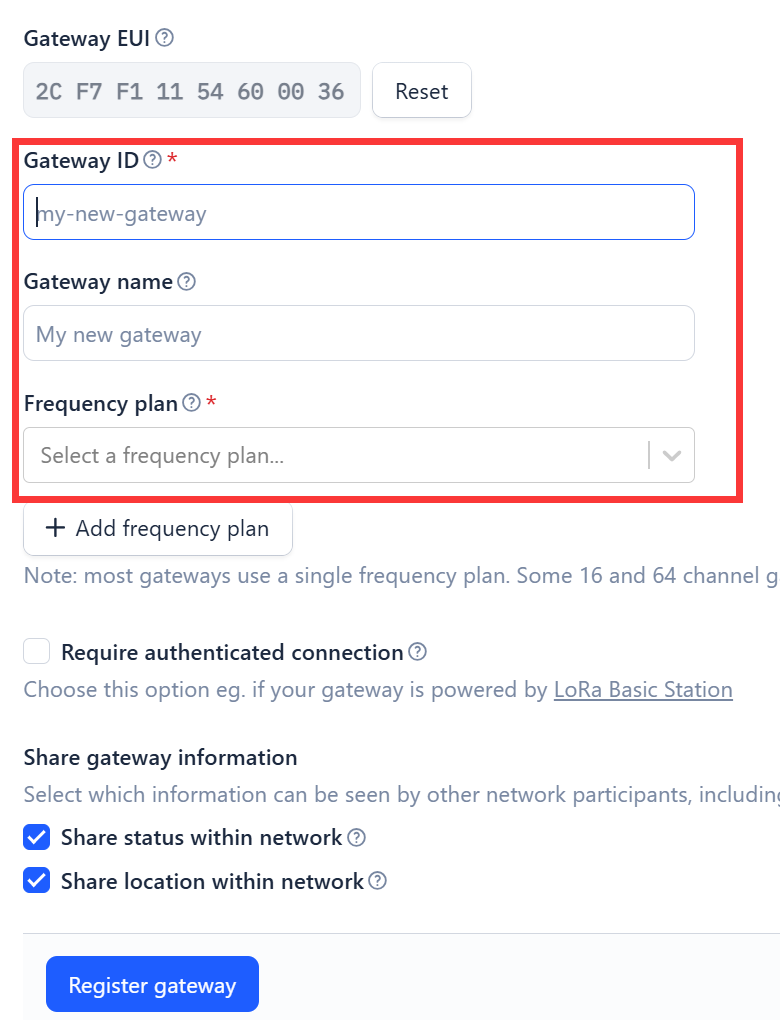
You can check the Gateway in the overview after successful registration.
Gateway Configuration
Configure the gateway via the Web UI, please to log into Luci page first.
- Step 1: LoRa Network Settings
Navigate to LoRa --> LoRa Network.
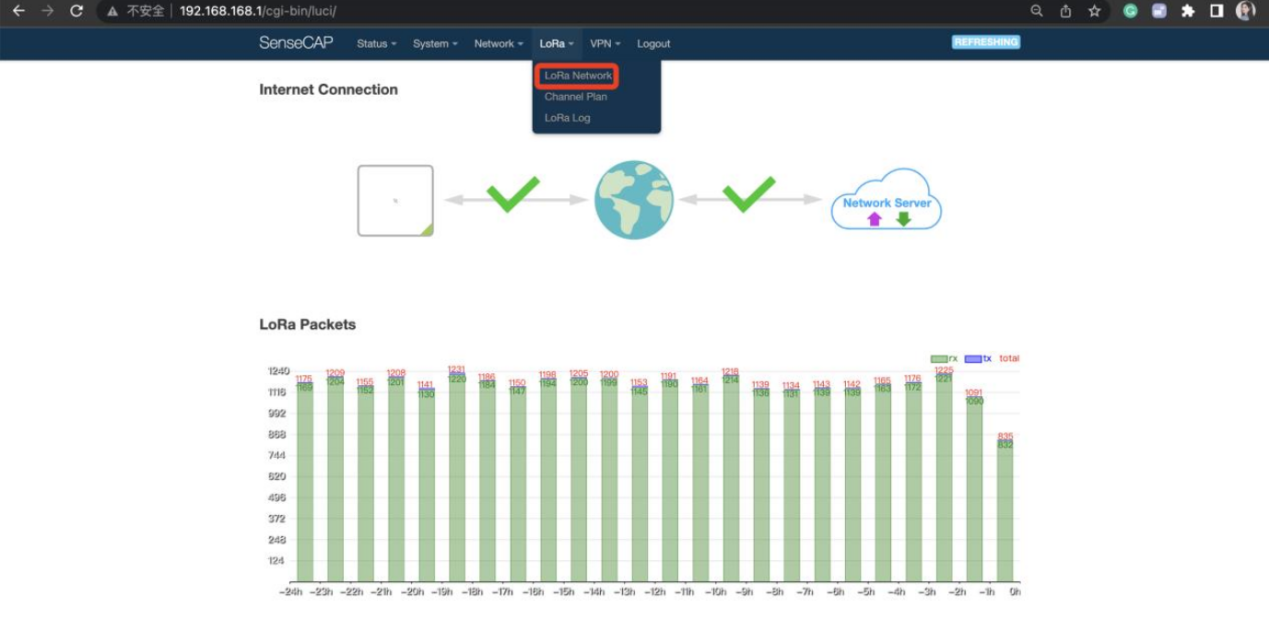
- Step 2: Set Mode to Packet Forward.
Gateway EUI: It will automatically get the EUI of the connected gateway.
Server Address: For Semtech UDP Packet Forwarder use
Server Port(Up/Down): The Up Port and Down Port are typically 1700. Other settings can be left as default, or can be changed to suit your requirements.
Click "Save&Apply" to apply your settings.
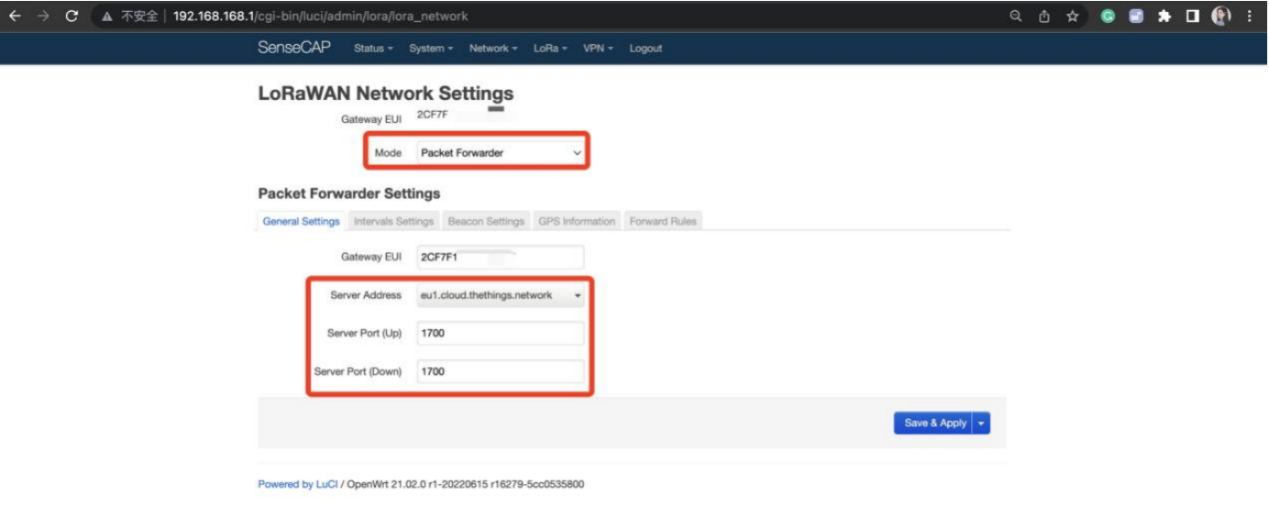
- Step 3: Channel Plan Settings
Navigate to LoRa --> Channel Plan.
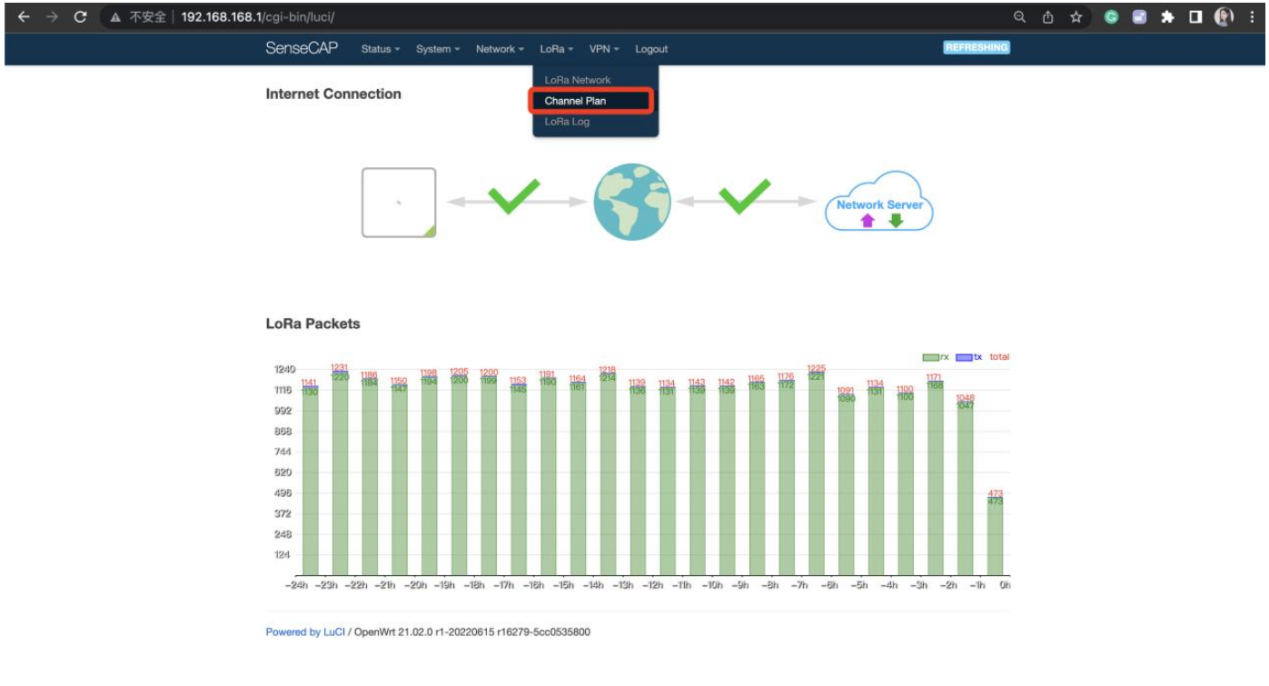
Select the Region and Frequency plan according to the actual choice.
After setting, click Save&Apply.

3.2.2 Connecting via Basic Station
TTN Configuration
- Step 1: Register gateway

Enter your Gateway EUI and click "confirm".
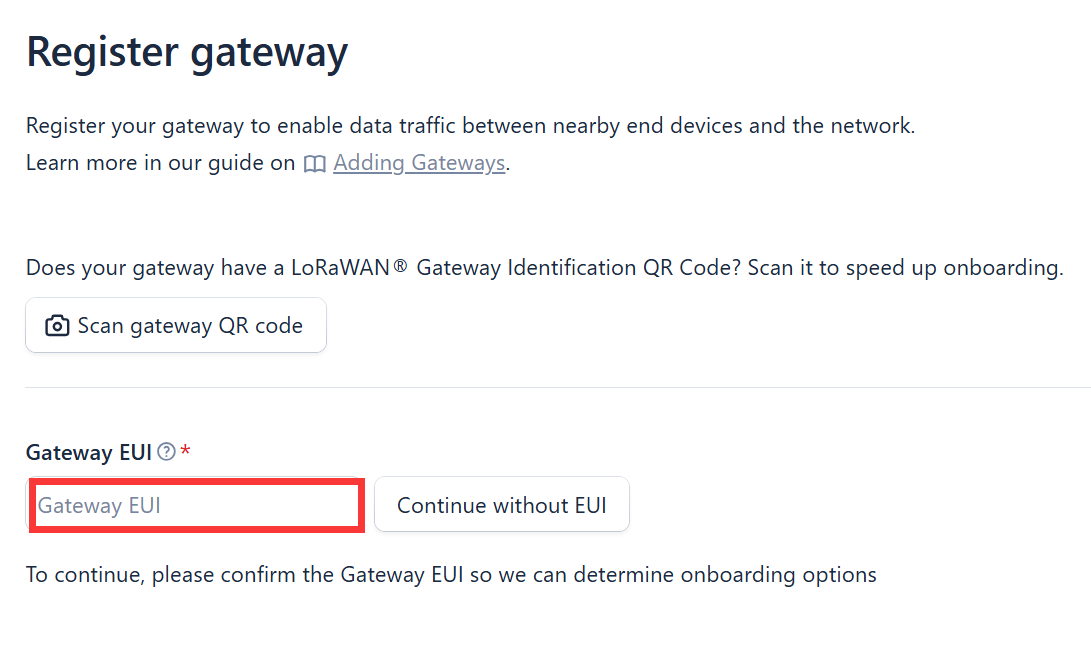
Enter your Gateway ID, Gateway ID, Frequency plan, enable Require authenticated connection and click "Register gateway".
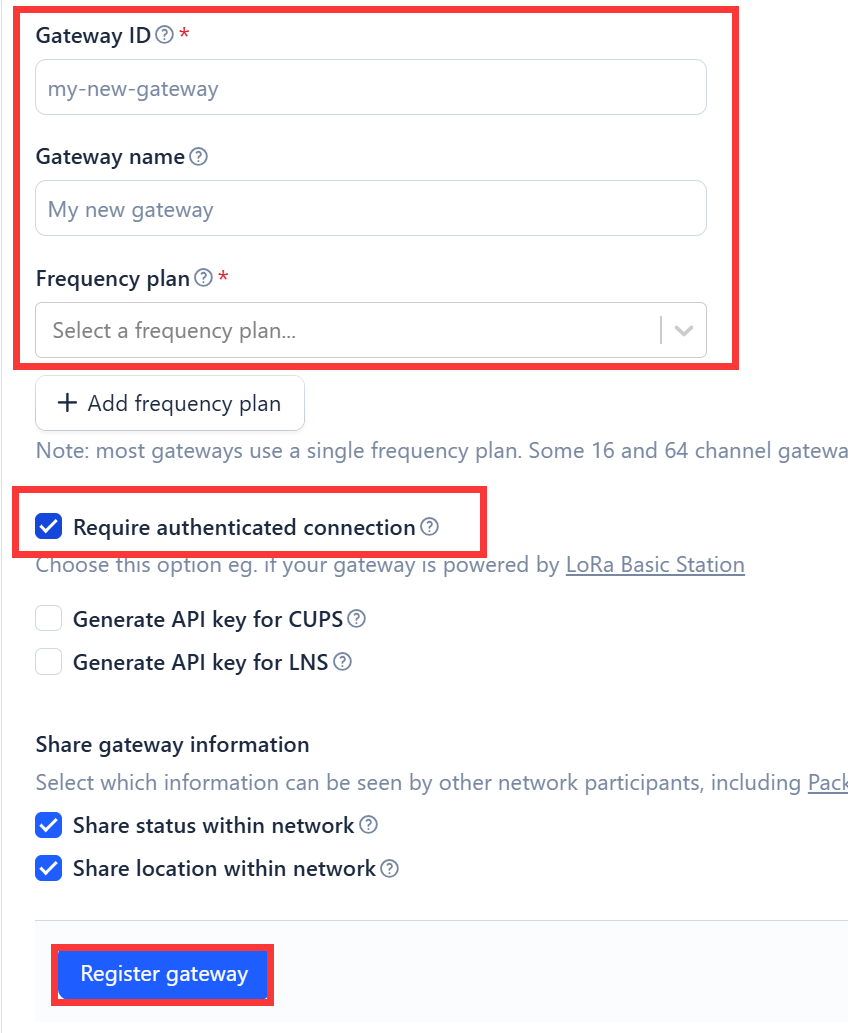
This will only allow a gateway to connect if it uses a TLS enabled Basic Station or MQTT connection.
- Step 2: Create an API key
Select a option to generate a API key for the CUPS or LNS service automatically, then you can authorize the gateway right away.
Choose a Server according to your need, then click “Register gateway”.
LoRaWAN Network Server (LNS)
LNS establishes a data connection between a LoRa Basics™ Station gateway and a Network Server (in this case, The Things Stack). LoRa® uplink and downlink frames are exchanged through this data connection. The LNS protocol is required for sending and receiving LoRaWAN data.
Configuration and Update Server (CUPS)
CUPS allows a Network Server to configure gateways remotely, and to update gateway firmware. CUPS is not required for sending and receiving LoRaWAN data, but it can greatly simplify the management of gateways. Configuring CUPS will also automatically retrieve LNS credentials and configure LNS on your gateway. More information about LoRa Basics™ Station is available at Semtech’s Developer Portal.
4. FAQ
You can list your question here or contact techsupport@makerfabs.com for technology support. Detailed descriptions of your question will be helped to solve your question.