ESP32 3.2" TFT LCD with Camera
Introduction
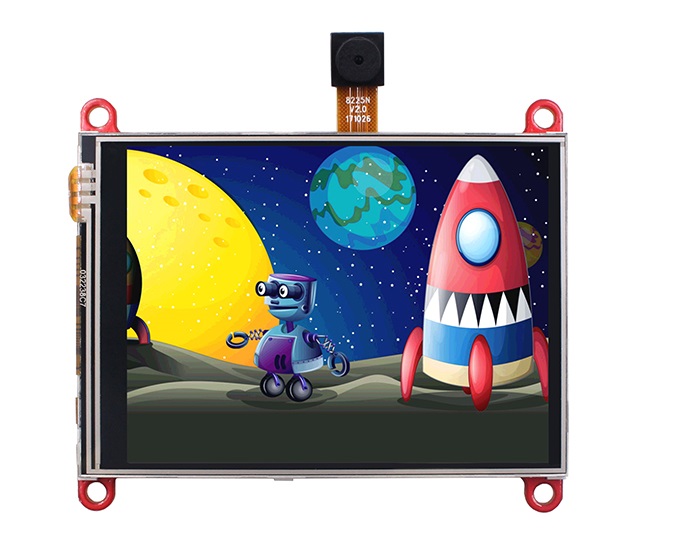
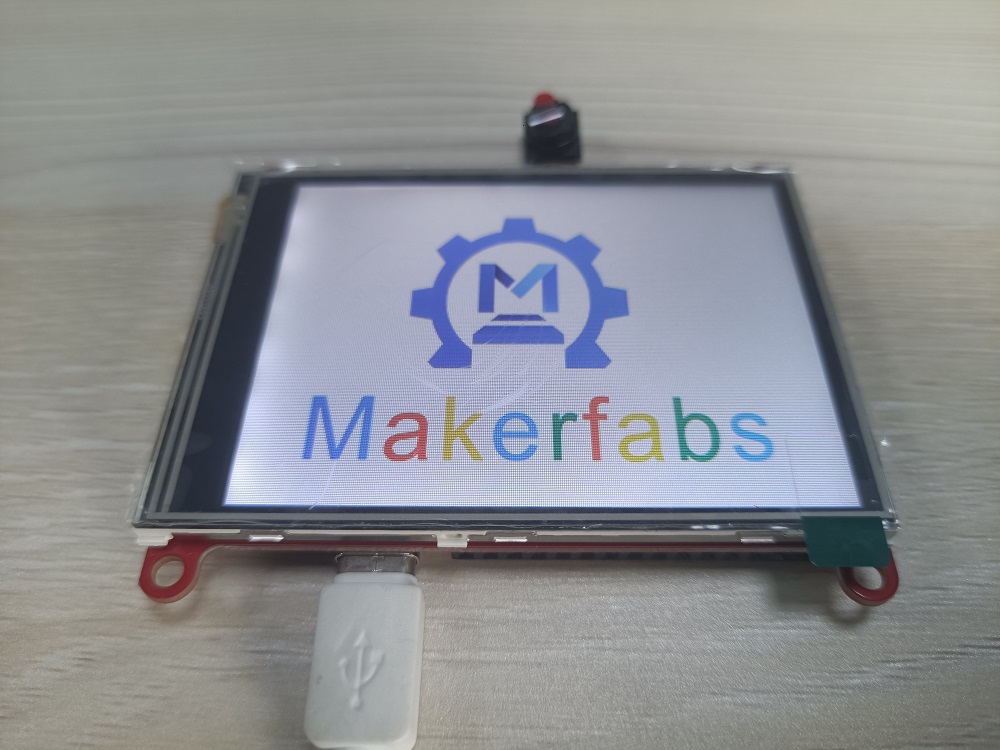
This module is the 3.2” version of the ESP32 touchscreen display, based on ESP32-WROVER, with a built-in 2M pixel OV2640 camera. The LCD is 320x240 TFT, with driver is ILI9341, it uses SPI for communication with ESP32, the SPI main clock could be up to 60M~80M, making the display smooth enough for videos; and the camera OV2640 with pixel 2M, with this camera, you can make applications such as remote photography, face recognition….
While the camera not used, you can freely use all these pins with the breakout connectors, to connect the ESP32 display with sensors/ actuators, suitable for IoT applications.
This 3.2-inch ESP32 display is fully compatible with the Adafruit Arduino ILI9341 libraries, which make it easy to use with Arduino.
Model:ESPTFT32CA
Features
- 3.2 inch display, 320x240, ili9341;
- Resistive Touch;
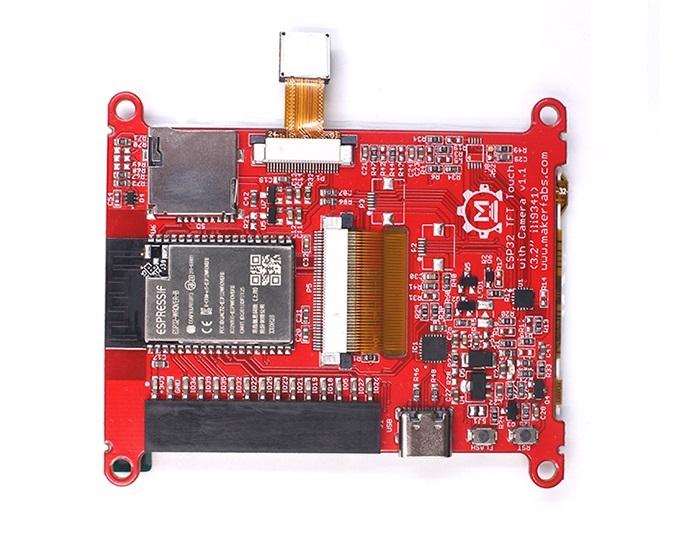
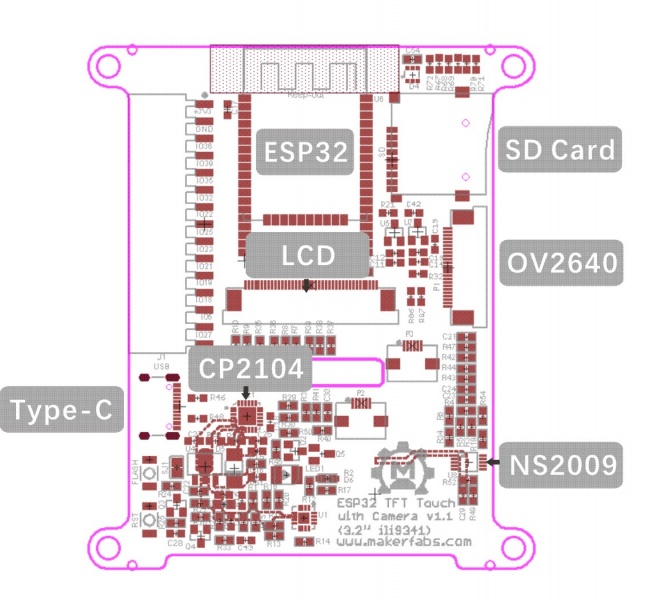
- ESP32-WROVER Controller;
- 2M pixel OV2640 Camera;
- WIFI/ BLE Connection.
- Onboard USB2UART converter for ESP32 programming;
- Onboard SD card socket;
- USB connector Type-C
Diagram
Usage
Software setup
- After Arduino IDE is installed, follow the Installation Instructions to add ESP32 support if you are not yet doing it: https://github.com/Makerfabs/Makerfabs_FAQ.. Please install version 1.0.6 or earlier, otherwise SD card initialization will fail。
- Install library: Adafruit_GFX library.
- Install library: Adafruit_ILI9341 library.
- Install library: Adafruit_STMPE610 library.
Draw on the LCD
- Connect the computer and the board through a Type-C USB cable.
- Open the file "\Project_Touch-Camera-ILI9341\example\TouchDraw\TouchDraw.ino".
//Pin definition according to hardware design

#define LCD_MOSI 13
#define LCD_MISO 12
#define LCD_SCK 14 //14
#define LCD_CS 15
#define LCD_RST -1
#define LCD_DC 33 //33
#define LCD_BL -1 //5

#define LCD_WIDTH 240
#define LCD_HEIGHT 320
#define LCD_SPI_HOST VSPI_HOST

#define SDA 26
#define SCL 27

#define STMPE_CS 2
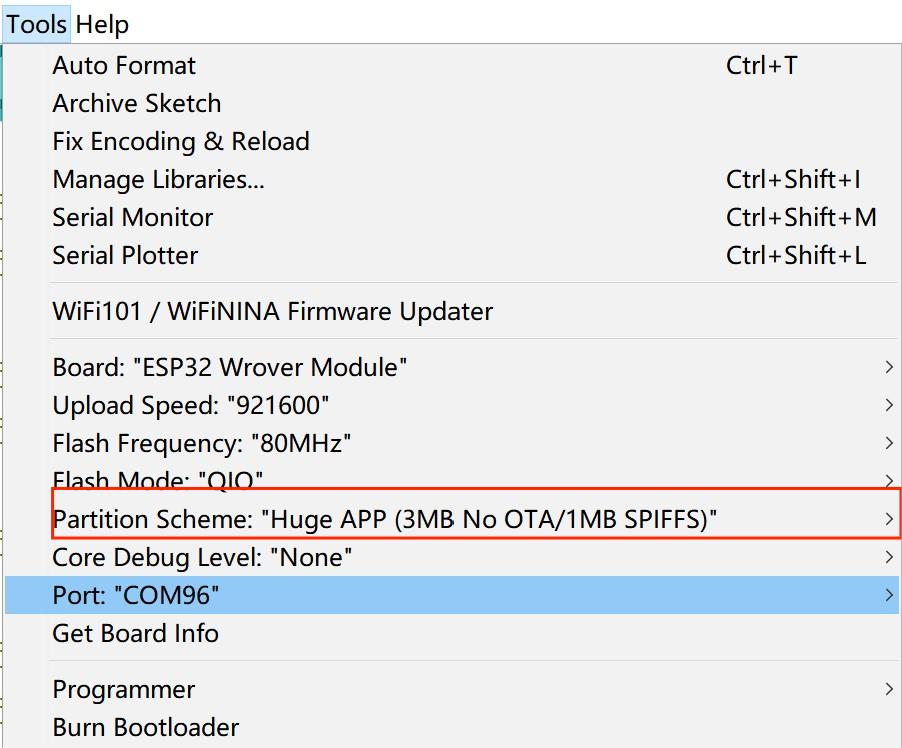
- Select Tools-> Board-> ESP32 Wrover Module, and Tools-> Port-> COM….
- Partition Scheme choose the "Huge APP(3MB No OTA/1MB SPIFFS)"
- Verify and upload the code.
- Reset ESP32. You can draw and write on the LCD.

Display the picture
- Open the file "\Project_Touch-Camera-ILI9341\example\SDtest\SDtest.ino".
- Verify and upload the code.
- Insert the SD card and reset the ESP32. The BMP file in the SD card will be displayed on the LCD.
Camera test
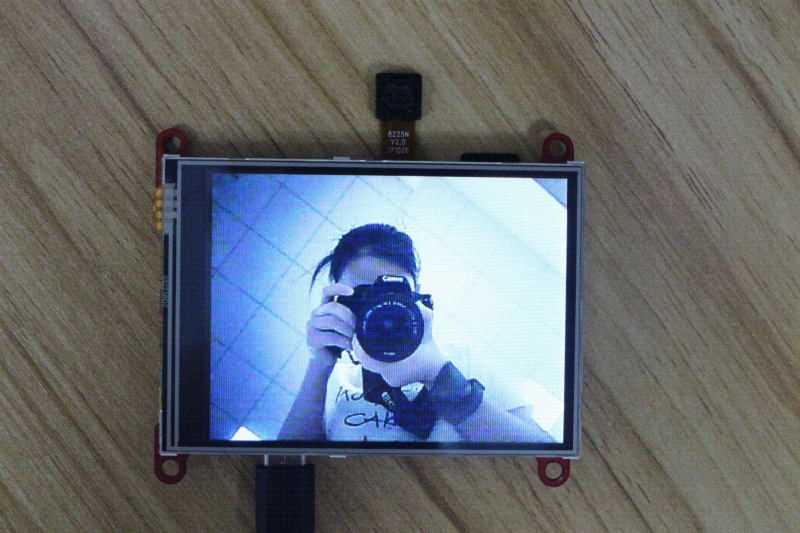
Open the file "\Project_Touch-Camera-ILI9341\camera\camera.ino". Verify and upload the code. Insert the SD card and reset the ESP32. The image obtained by the ov2640 sensor will be displayed on the LCD screen.
More Demos are displayed in follows the video.
F&Q
You can list your question here or contact techsupport@makerfabs.com for technology support. Detailed descriptions of your question will be helped to solve your question.