Basic usage of Squareline with MaTouch 1.28"
Introduction
SquareLine Studio is an exquisite visual tool that harnesses the capabilities of the LVGL graphics library for the development of captivating user interfaces. This remarkable software extends its support to various platforms, including MacOS, Windows, and Linux. Within this tool, we have the freedom to effortlessly add and manipulate widgets on the screen through intuitive drag-and-drop functionality. Working with images and fonts is a seamless experience, allowing us to create Arduino graphics projects that provide a clear understanding of Squraeline's graphic design.
For individual users, SquareLine Studio offers a complimentary license with certain limitations. Each project can accommodate up to five screens and 50 controls. Further details regarding pricing can be found on the SquareLine website.
To eliminate the hassle of applying for an account, we have opted for the 30-day free trial.
SquareLine Studio's official website is https://squareline.io/
SquareLine Studio official documentation:https://docs.squareline.io/docs/squareline/
Usage
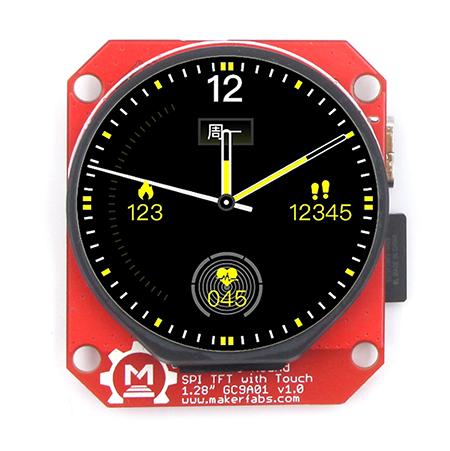
we choose a MaTouch_ESP32-S3 Round SPI TFT with Touch 1.28" as a monitor.
Note: In this project the Squareline version is 1.3.0, and the Arduino version is 1.8.19.
Introduction to Software Basics

Squareline introduction:
In the picture, we can see the Squareline interface. let's create a new project in it. We set the hardware parameters according to ESP32-S3 1.28" display with Touch. For example, Resolution is 240*240, the shape is Circle and color depth is 16-bit, and the project name and path need to be set for yourself. when all configurations are complete, click the "CREATE".
When Squareline creates a new project successfully, we can see the Squareline workspace interface.
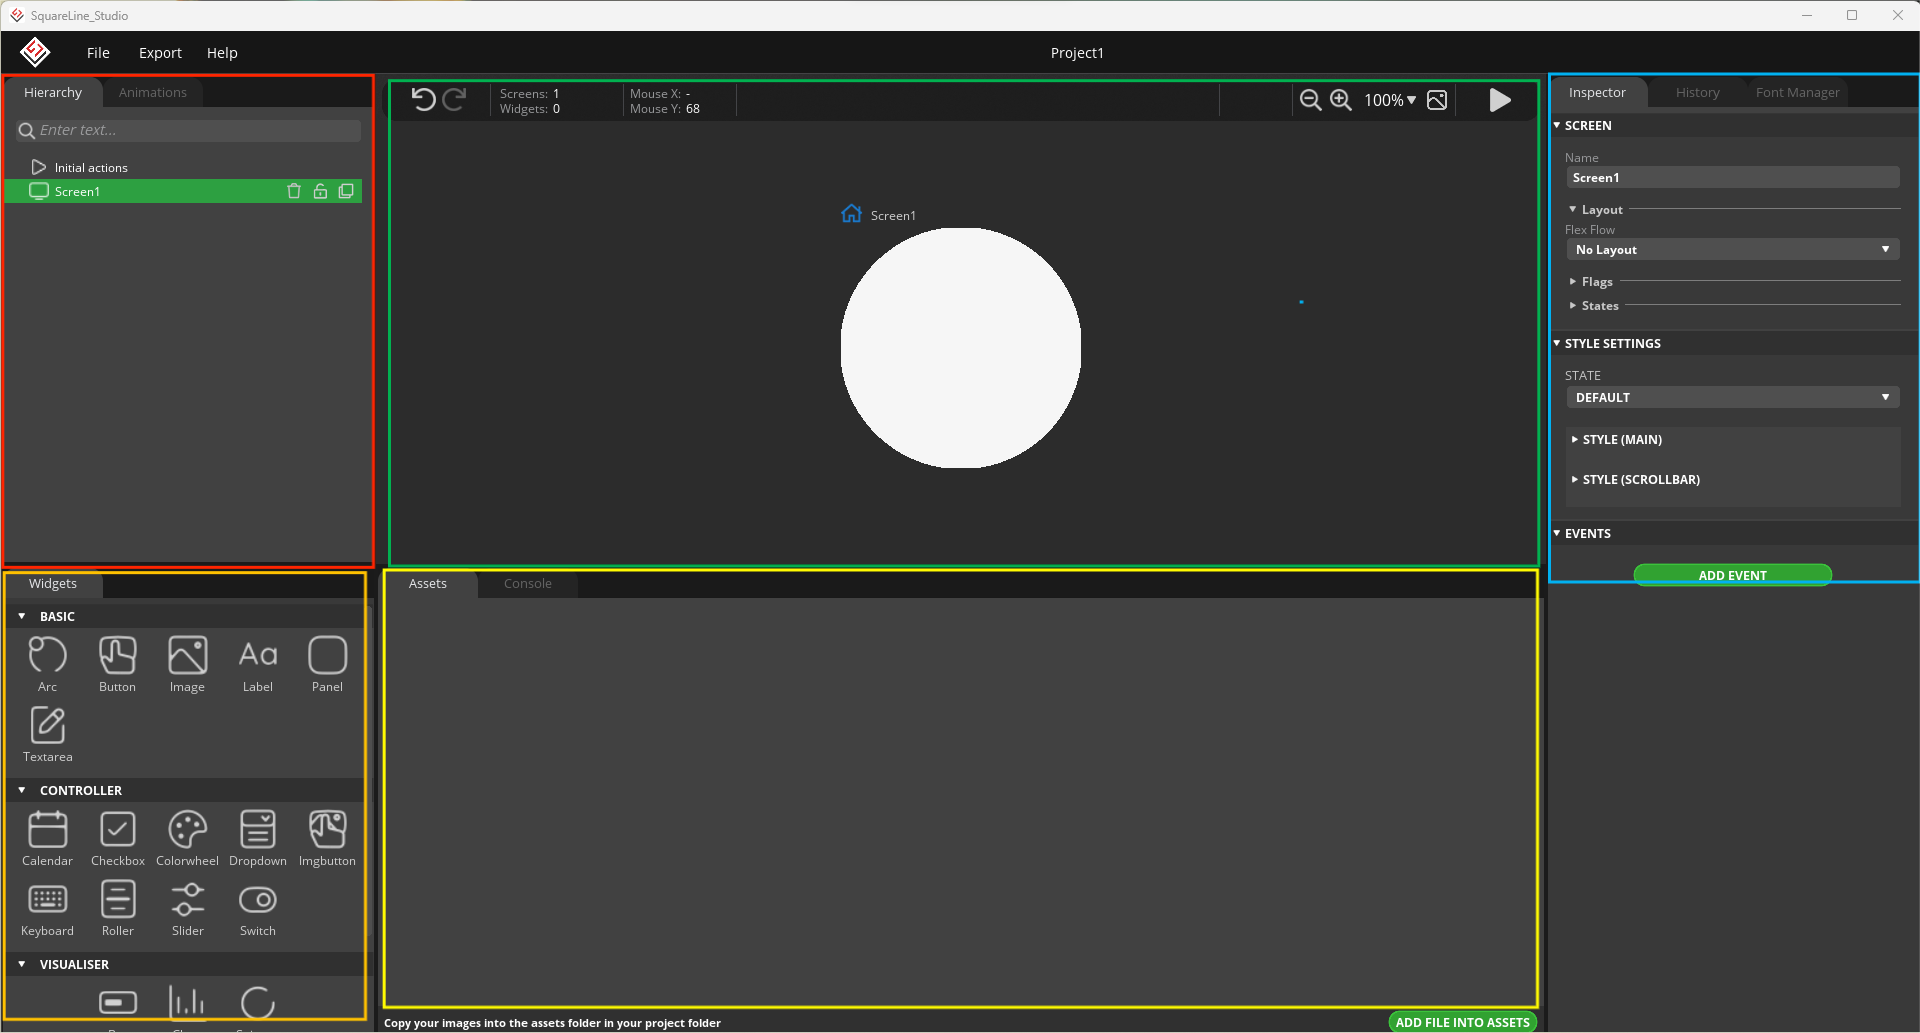
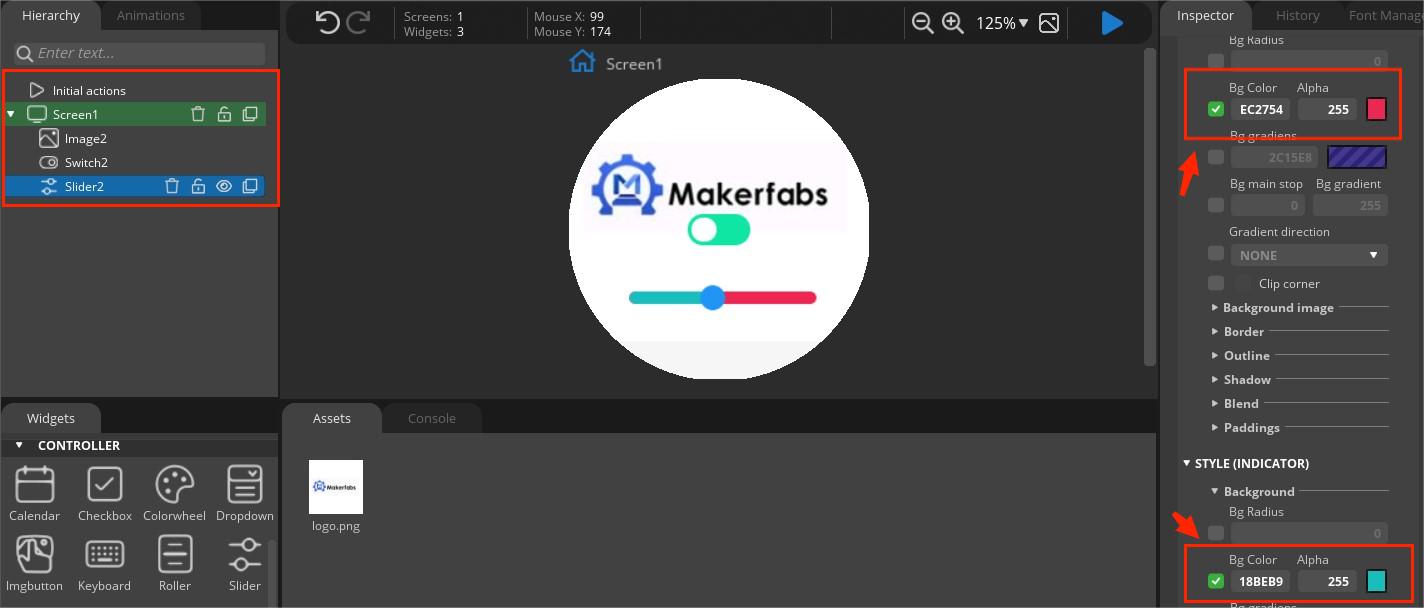
Hierarchy:
In the Hierarchy Panel, you can find the scenes and the list of the widgets appearing on the scenes in hierarchical order. You can modify widget order, of course.
Animations:
In the Hierarchy Panel, you can find the scenes and the list of the widgets appearing on the scenes in hierarchical order. You can modify widget order, of course.
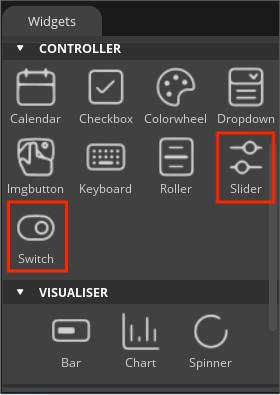
Widgets:
You can find widgets, which are the basic elements of UI, on the Widget Panel. Every widget has its own preference. You can add custom styles to widget components and you are allowed to configure them in different states.
Assets:
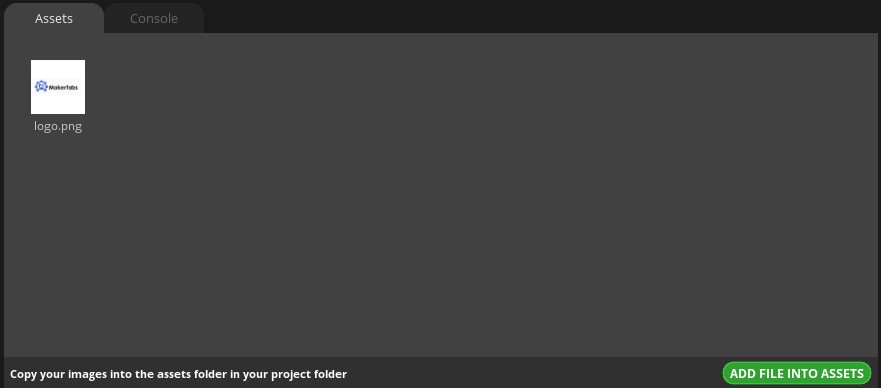
Images and fonts, added to the project, appear in the Asset Panel. Having created a project, an Asset folder has also been created. If you copy the images needed for your project there, the program will load them automatically listing them in the Asset Panel. Images are allowed in PNG formats. If you double-click on the image in the Asset Panel, it will be opened in the default image browser.
If you would like to add fonts to your project, you should copy them into the Asset/Fonts folder. Then the program will autoload them.
Console:
You can find program logos and error messages in the Console Panel.
Inspector:
In the Inspector Panel, there are the parameters of the selected widgets. You can add styles and events to them.
History:
In the Hierarchy Panel, you can find the scenes and the list of the widgets appearing on the scenes in hierarchical order. You can modify the widget order, of course.
Font Manager
Use your operation system fonts in your embedded GUI, as well. LVGL applies UTF-8 encoding to display Unicode characters in any language. Here, you can generate a new font for your GUI project. With the font converter tool, you can create Carray from any TTF or WOFF font. You can select ranges of Unicode characters and specify the bpp (bit-per-pixel).
Project presentations
- Simple UI design
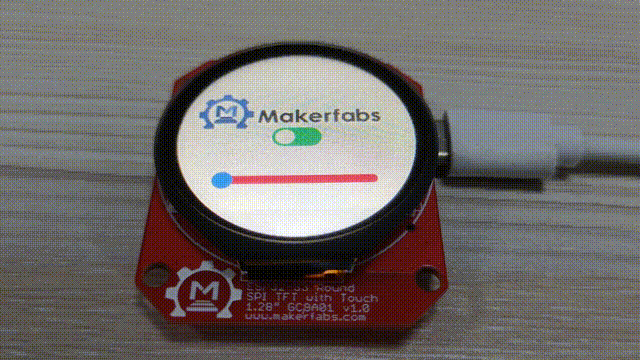
When we created a project, we choose the widgets depending on our own preferences. we use the simple demo to display how to design a UI interface for ESP32-S3 1.28" with touch by Squareline and Arduino.
Click the "ADD FILE INTO ASSETS" to add the picture as a background Within Assets, you can drag the image to Screen1.
We choose a Switch and a Slider to show the project. set the Switch and Slider color in STYLE SETTINGS.

Now we finish a simple project, and before the "create template project", users can click the >>file>>Project Settings to check whether the configuration is correct. Then click the >>export>>create template project.
- Library and program modifications
We find the program export path, can see 2 files named "ui" and "library", and copy the files in the library to the Arduino library file.

The library file and three libs,"ui, TFT_eSPI, and lvgl," and a lvgl_conf.txt.
Usually, the ui library we don't need to modify.

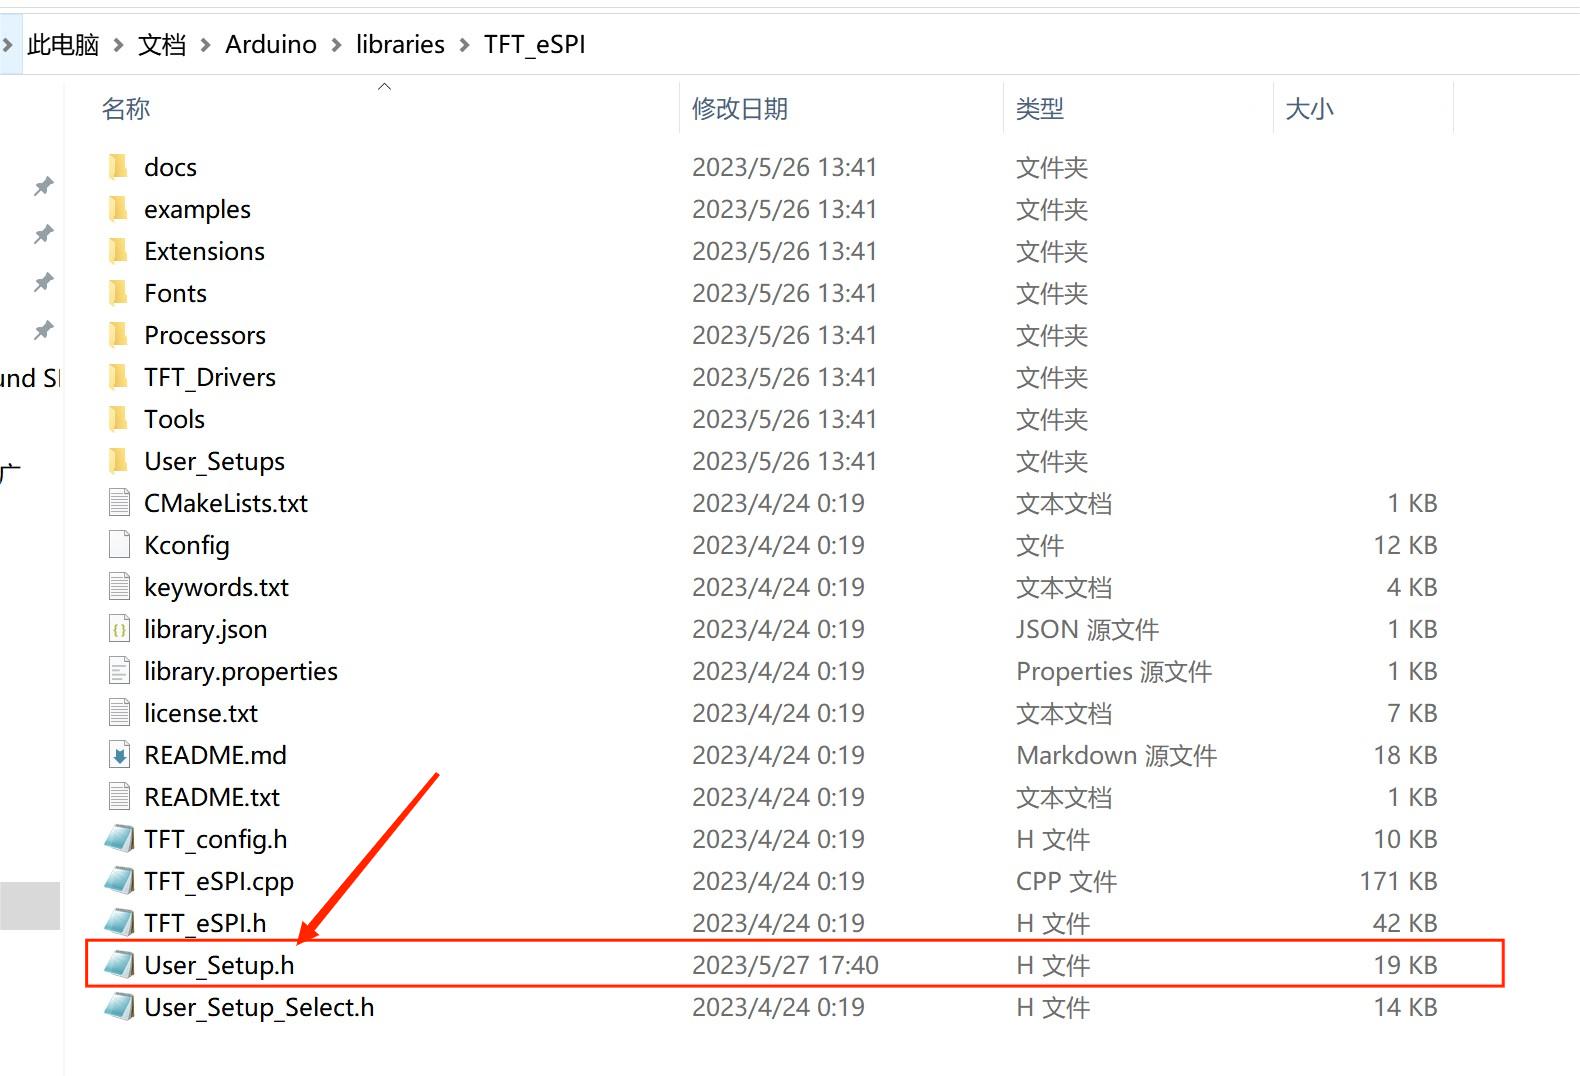
①.The "TFT_eSPI" library
We mainly modified the TFT_eSPI and lvgl libraries. With "TFT_eSPI", we need to modify the "Users_Setup.h" file, because every development board has different screen drivers IC, The ESP32-S3 1.28" use the GC9A01 as drivers IC, So define this driver.
Define GC9A01_DRIVER, and define the pixel width and height in portrait orientation for GC9A01.
#define GC9A01_DRIVER

#define TFT_WIDTH  240 // ST7789 240 x 240 and 240 x 320
#define TFT_HEIGHT 240 // GC9A01 240 x 240
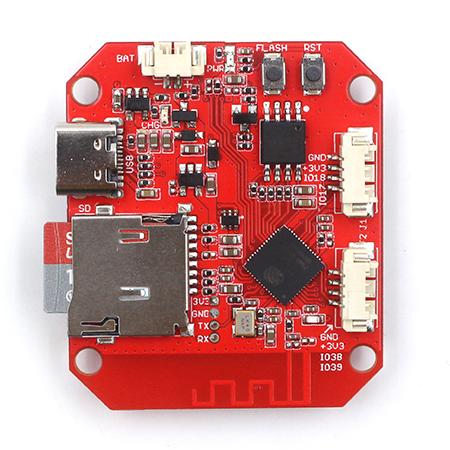
Then set the drive pin according to the schematic diagram
#define TFT_MOSI 13 // In some display driver board, it might be written as "SDA" and so on.
#define TFT_SCLK 14
#define TFT_CS   15  // Chip select control pin
#define TFT_DC   21  // Data Command control pin
#define TFT_RST  11  // Reset pin (could connect to Arduino RESET pin)
#define TFT_BL   45  // LED back-light
In Section 3. Define the fonts that are to be used here. We chose a variety of fonts to prevent them from being used without initializing them
#define LOAD_GLCD   // Font 1. Original Adafruit 8 pixel font needs ~1820 bytes in FLASH
#define LOAD_FONT2  // Font 2. Small 16 pixel high font, needs ~3534 bytes in FLASH, 96 characters
#define LOAD_FONT4  // Font 4. Medium 26 pixel high font, needs ~5848 bytes in FLASH, 96 characters
#define LOAD_FONT6  // Font 6. Large 48 pixel font, needs ~2666 bytes in FLASH, only characters 1234567890:-.apm
#define LOAD_FONT7  // Font 7. 7 segment 48 pixel font, needs ~2438 bytes in FLASH, only characters 1234567890:-.
#define LOAD_FONT8  // Font 8. Large 75 pixel font needs ~3256 bytes in FLASH, only characters 1234567890:-.
//#define LOAD_FONT8N // Font 8. Alternative to Font 8 above, slightly narrower, so 3 digits fit a 160 pixel TFT
#define LOAD_GFXFF  // FreeFonts. Include access to the 48 Adafruit_GFX free fonts FF1 to FF48 and custom fonts

// Comment out the #define below to stop the SPIFFS filing system and smooth font code being loaded
// this will save ~20kbytes of FLASH
#define SMOOTH_FONT
Now the "Users_Setup.h" file had modified successfully.
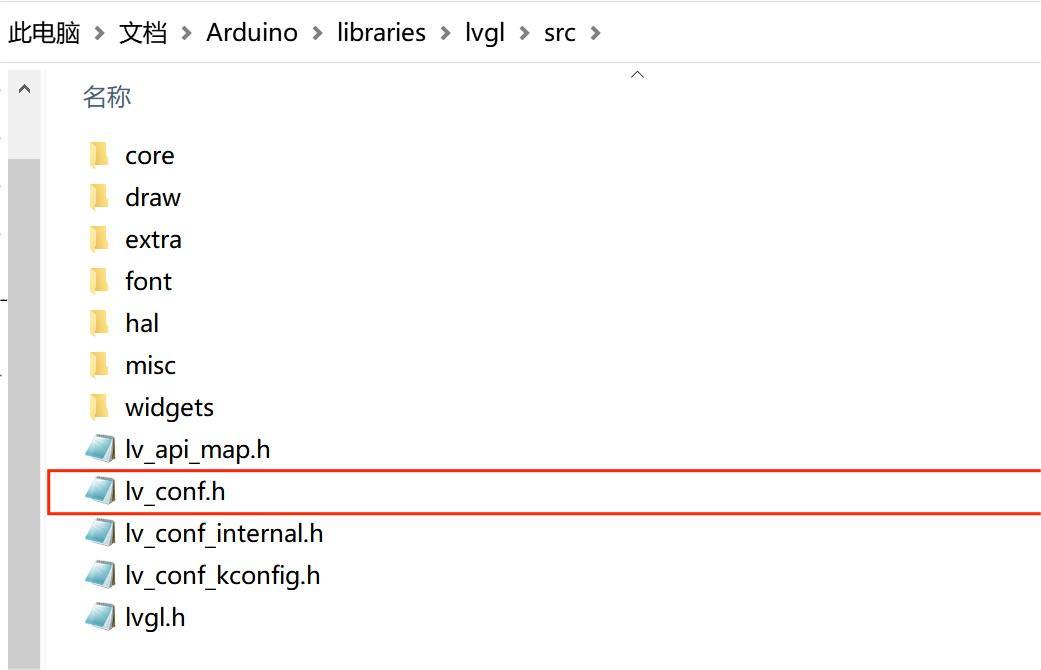
②. The "lvgl" library
With the lvgl library, The lvgl conf.txt file is included in the exported library, we need to copy it to the >>lvgl>>src, and the lvgl file is successfully modified.
③. The ui.ino settings
Because ESP32-S3 1.28" Display with touch uses the CST816S touch IC, so we need to add the CST816S library to the Arduino library file by Arduino. Open the ui.ino, click the >>tools>>manage libraries, Look for CST816S in the search box and install it. And the ESP32-S3 1.28" Display use USB serial port, so the serial port initialization needs to be written as USBSerial.
USBSerial.begin( 115200 );
Open the ui.ino, click the >>tools>>manage libraries Look for CST816S in the search box and install it.
Add
#include <CST816S.h>

#define TFT_BLK 45
#define TOUCH_INT 40
#define TOUCH_SDA 38
#define TOUCH_SCL 39
#define TOUCH_RST 16

CST816S touch(TOUCH_SDA, TOUCH_SCL, TOUCH_RST, TOUCH_INT); // sda, scl, rst, irq
In the touchpad function, you can copy the following program to call the library function. It calls the touch function of CST816S.
void my_touchpad_read(lv_indev_drv_t *indev_driver, lv_indev_data_t *data)

{

    uint16_t touchX = 0, touchY = 0;
    if (!touch.available())

    {
        data->state = LV_INDEV_STATE_REL;
    }
    else
    {
        data->state = LV_INDEV_STATE_PR;


        /*Set the coordinates*/
        data->point.x = touch.data.x;
        data->point.y = touch.data.y;


        USBSerial.print("Data x ");
        USBSerial.println(touchX);
        USBSerial.print("Data y ");
        USBSerial.println(touchY);
    }
}
In the void setup function, initial the TFT_BLK and touch pins.
void setup()
{
    pinMode(TFT_BLK, OUTPUT);
    digitalWrite(TFT_BLK, 1);


    touch.begin();
Modify the landscape orientation. The default value is 3. You need to change it to 0
 tft.begin();        /* TFT init */
 tft.setRotation(0); /* Landscape orientation, flipped */
When the ui.ino is modified successfully, choose the "ESP32-S3 Dev module", flash size is 16MB, PSRAM is OPI PSRAM, and choose the com. verify and upload the code.
Please pay attention to the UI path when saving, it was easy to cover the previous design, and the different projects' UI library was incompatible.
Key point: Screen backlight pin initialization.
Touch library usage and initialization, Replace the touch function to implement the touch function.
UI Export library path Settings.
Images can only be imported in ”png“ format.
TFT library display Angle Settings.
Result
Upon successfully uploading the application, users will be able to witness the Squareline UI showcased on the screen. Interacting with the UI can be accomplished by tapping or dragging the screen, thereby achieving the touch functionality. This serves as the Squareline Basic Learning guide.
FAQ
You can list your question here or contact techsupport@makerfabs.com for technology support. Detailed descriptions of your question will be helped to solve your question.